Take a Memo: Ten Tips for Successful Voice Dictation
Perfect speech recognition is one of the Holy Grails of computing — shouldn’t our computers be able to transcribe exactly what we say, complete with proper spelling and punctuation, as has been the case in science fiction for many years? In fact, speech recognition software is nothing new in computing. Windows users have long taken advantage of the excellent Dragon Naturally Speaking from Nuance. On the Mac, this software has gotten good enough only in the past couple of years, since MacSpeech licensed the Naturally Speaking engine and was subsequently acquired by Nuance, after which the MacSpeech app was renamed to Dragon Dictate.
But it’s important to understand what speech recognition software can and can’t do — we aren’t yet at the point where you can speak normally and have your words magically converted into text. I’ve been dictating into dictaphones and using speech recognition software for more than 15 years, and while dictating isn’t any faster than typing for me, I often find it more relaxing. For those who can’t type quickly, dictation might be faster, and it’s an essential technology for those with certain physical impairments or injuries.
With the release of the iPhone 4S and the third-generation iPad, Apple brought simple voice dictation to millions of iOS users, and with the launch of OS X 10.8 Mountain Lion, Mac users can now join the voice dictation party without buying Dragon Dictate. Whether you can be satisfied with Apple’s built-in voice dictation or whether you need the full capabilities of Dragon Dictate depends on how you plan to use the software.
(It’s worth noting that there’s a difference between voice dictation, where what you say is converted into text, just as though you’d typed it, and voice control, where you speak commands and the computer or iOS device reacts to them. On the iPhone 4S, that’s the difference between voice dictation and talking to Siri, and on the Mac under Mountain Lion, it’s the difference between the new voice dictation feature in the Dictation & Speech pane of System Preferences and the long-standing Speakable Items feature, which is now located in the Accessibility preference pane.)
The main thing to realize about speech recognition is that computers don’t understand what we say. They may be able to figure out what words leave our mouths, but they don’t understand any of the meaning or context. For this reason, dictation requires that you employ special techniques to convey what you mean.
Plus, speech recognition software works best in a quiet environment, since extraneous noise can render transcriptions that read like the work of Surrealistic poets. Luckily, technology, in the form of a noise-canceling microphone, can filter out background noise and provide a purer stream of audio to your Mac. This can enable you to dictate even in a lively office.
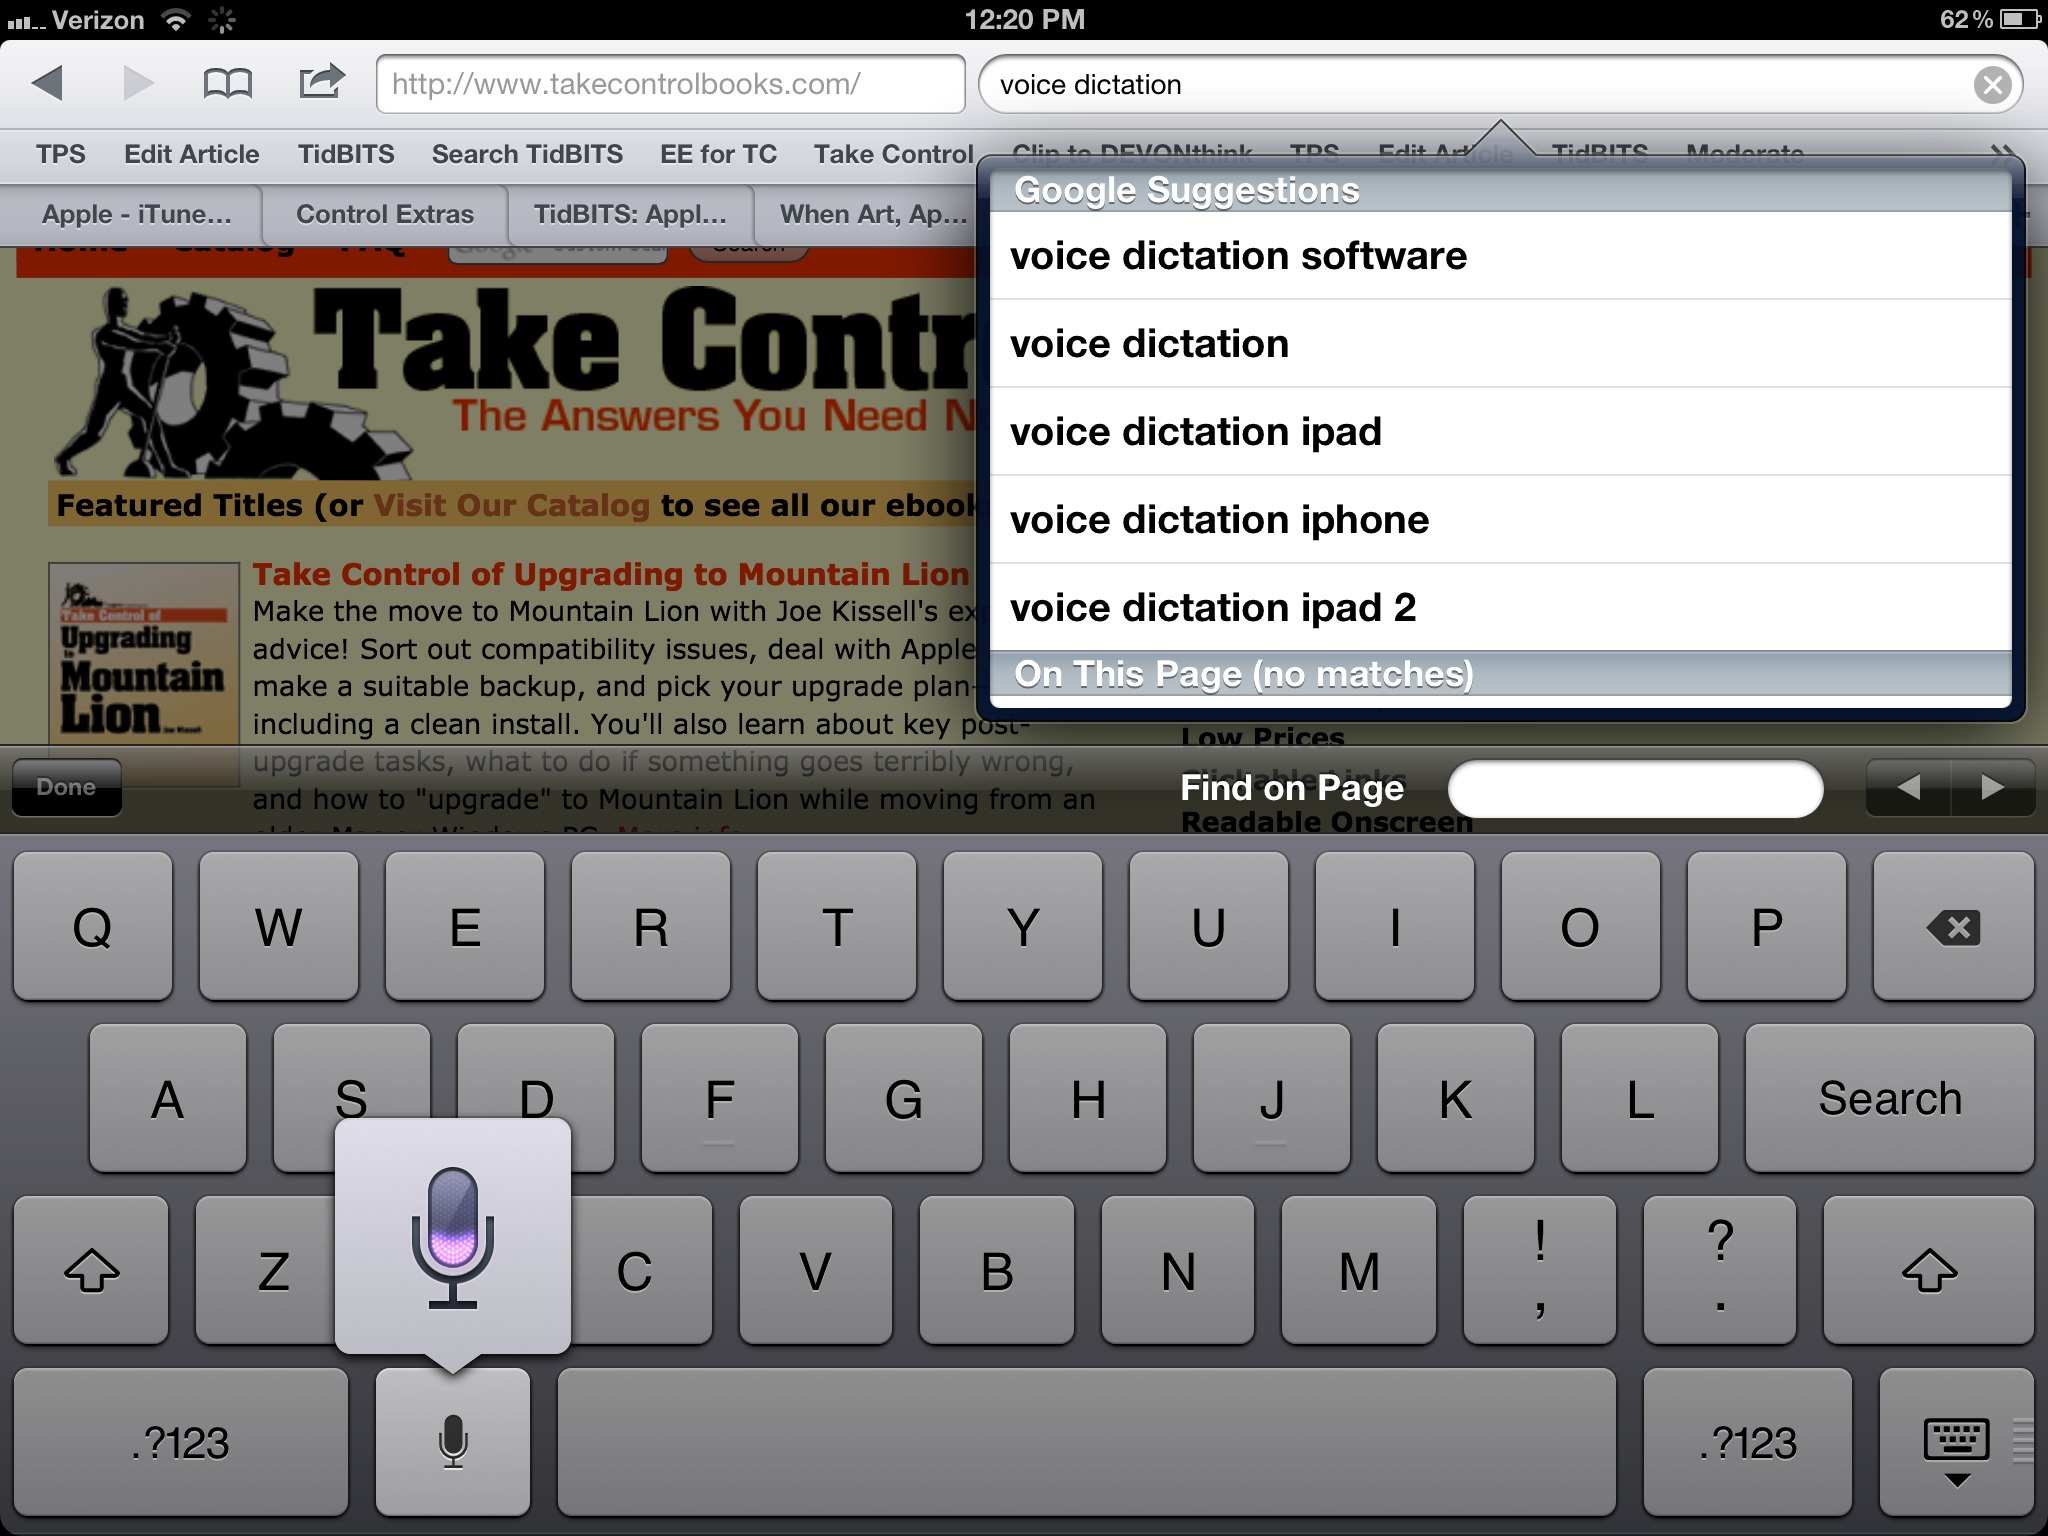
Starting to Speak — If you’ve never used dictation software before, you’ll find that the basics of how Apple has implemented it in iOS and Mountain Lion are extremely easy.
In iOS, to dictate text, bring up the onscreen keyboard by tapping anywhere you can type. Tap the microphone button to the left of the Space bar and speak, tapping it again when you’re done. You can also tap and hold on the microphone button, then lift your finger when you’re done speaking. The transcribed text appears at the insertion point.
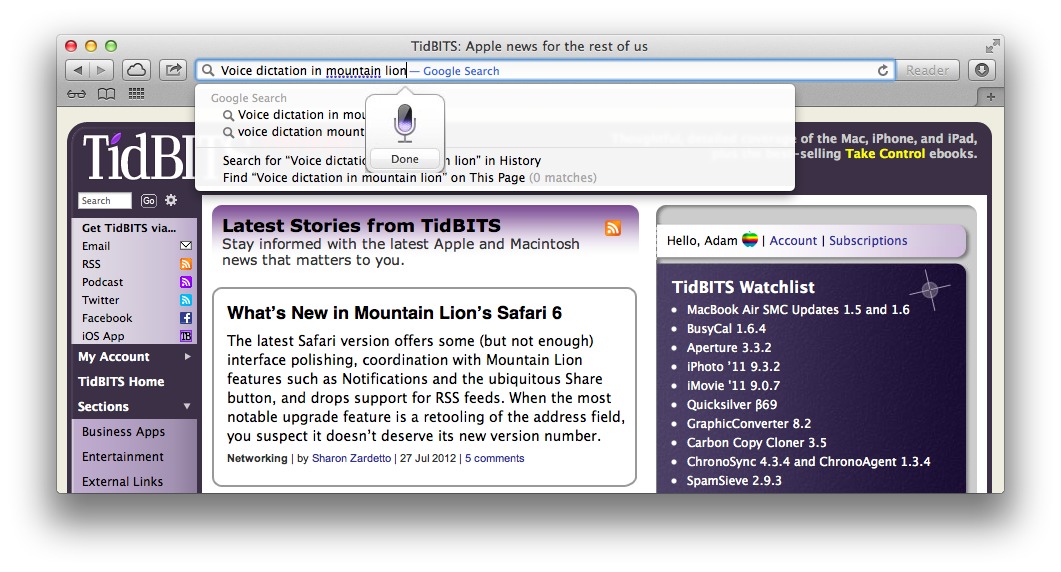
In Mountain Lion, position the insertion point where you want your transcribed text to appear, press the Fn (Function) key twice to start dictation, and then start speaking. (If you don’t have an insertion point, Mountain Lion just beeps at you when you press Fn twice.) As with iOS, press the Fn key again to alert Mountain Lion that you’re done speaking, or, if you keep the Fn key down on the second invocation press, you can just let up on it when you’re done. Or, you can click the Done button in the dictation balloon
that appears, but that seems like an awkward action if your hand was on the keyboard. Finally, you can just press Return to tell your Mac to process what you said. (You can change the key you press twice in the Dictation & Speech pane of System Preferences.)
Top Ten Techniques — A number of techniques can help you dictate more efficiently and more successfully. These are especially important with Apple’s dictation features in iOS and Mountain Lion, which don’t learn from what you dictate, unlike software like Dragon Dictate. For the best results, follow these rules:
- Speak slowly, evenly, and clearly. Pretend you’re a newscaster reading the news.
-
Think about what you are going to say before you say it. The more you hesitate while speaking, the harder it is for the software to figure out what you mean.
-
Dictate in short sentences or phrases, but try and dictate complete sentences and clauses. This is particularly necessary with Apple’s dictation features, which aren’t designed to process long sentences and can listen for only 30 to 40 seconds. That’s because, after you tap or click the Done button or run out of time, the audio you dictate is sent to a remote server, processed, and then returned to you as text. In contrast, Dragon Dictate does all its processing on your Mac, so if you pause briefly, it can process your text, type it, and wait for you to continue.
-
If you plan to dictate a lot, or if you’re in a noisy environment, use a standalone microphone. Built-in microphones are sufficient for basic use on both iOS devices and the Mac, but since they lack noise cancellation, they may not work well if there’s background noise. With the iPhone 4S and third-generation iPad, though, you can significantly improve recognition by holding the device so its internal mic is close to your mouth.
-
Speak all punctuation: say the words “comma,” “period,” “dollar sign,” “percent sign,” “degree sign,” and so on. Say “new line” to simulate pressing Return once and “new paragraph” to simulate pressing it twice, inserting a blank line.
-
Say the word “apostrophe” for a possessive. For example, “I am going to Ahab apostrophe s cabin period” transcribes as “I am going to Ahab’s cabin.”
-
To spell words or abbreviations, say the letters slowly and individually. Apple’s dictation features tend to assume you want all capitals, and it can be helpful to speak all the letters at the same cadence to avoid spurious spaces. If you’re using Dragon Dictate, the program has a spelling mode you can activate to tell the program to listen specifically for letters.
-
In iOS, you can capitalize words by saying “cap” before the words you want capitalized. For example, you would say “I’m going to buy some clothes at cap the cap gap” to get “The Gap” at the end of that sentence. Oddly, since it would seem likely that the remote servers are running similar, if not identical recognition code, this technique does not work in Mountain Lion. We hope Apple will tweak the back end to enable arbitrary capitalization in this fashion.
-
Unlike in Dragon Dictate, the iOS and Mountain Lion dictation features do not allow you to correct any mistakes via voice. Therefore, if a sentence is wrong, you must edit it from the keyboard, or just delete it and start over.
-
Drink regularly. A dry mouth and throat will make your voice sound different, and will make it harder for the software to transcribe what you say correctly.
-
As a bonus tip, if you’re dictating email and feel the need to convey some emotion, you can say “smiley” to get
:-), “winky” to get;-), and “frowny” to get:-(. You can also add “face” to any of them to get the same results. Interestingly, if you’re in, say, the address field in Safari 6 or the search field in a Finder window, these shortcuts don’t translate, and you’ll just get the words you say.
Is Dictation for You? — Don’t expect miracles from Apple’s dictation features in iOS and Mountain Lion. With practice, you will find that they can be useful for short texts, such as instant messages, short email messages, tweets, and so on. But if you want to dictate longer texts, you need to use dedicated speech recognition software such as Dragon Dictate, which learns from your speech patterns and enables you to edit the mistakes it makes. Nuance also offers software with specialized vocabularies built in — MacSpeech Dictate Legal and MacSpeech Dictate Medical — that makes it much easier for lawyers and doctors to dictate.
Speech recognition can seem miraculous. When it works well, you can go from typing 40 or 50 words a minute to dictating twice that or more in the same time. This takes a fair amount of effort, both for you to learn optimal dictation techniques and — if you’re using Dragon Dictate — for you to train the software to recognize your unique way of speaking. But if you’re interested in making the leap to a world where you dictate most of your text, give Apple’s dictation features in iOS and Mountain Lion a try, and if you find them saving you time, check out Dragon Dictate.
I've found that using the Dragon Dictate app on the iphone works quite well for me; much better than the mic that came with the program.
You mean the Dragon microphone app? That's interesting. Did you calibrate the headset correctly? I find that any headset is better than the iPhone.
I'm not a frequent DD user, so it is likely that I could have done better with the headset. I upgraded DD about the same time I discovered the iphone app, so improvements in DD may help to account for my improved results with the iphone app.
I've had trouble with quotation marks. Any tips?
Say "open quote" and "close quote". Do they not work? I just dictated this text on my iPad by the way.
For English-speakers, I thought I heard that the hardest accent for computers to digest was the Australian one. I like to tease my Aussie wife about this. Cannot anyone confirm this?
Nice article, Kirk. There's a thread on the Nuance DD for Mac support forum where the majority are reporting Dragon Dictate to be very erratic under ML, even with ML dictation turned off. What is your experience so far with various applications?
Erratic is a good word. Unstable is another.
Apple has now posted a support article with a lot of the special words that Dictation understands, along with other welcome details.
http://support.apple.com/kb/HT5449
Dictation in ML requires you to be in a text field. Google Docs does not follow apple standards for insertion points, it seems. The dictation balloon appears at top-left of page and pastes into a black hole.
Does anyone know of a simple tool or program that would pop up a standard text insertion field, let you dictate, then paste into a Google Doc?
PS: I used to use Quickeys, but too unstable in my config.
Thanks in advance, Gary
TextEdit might be just the ticket, perhaps automated with Keyboard Maestro?