How to Relocate a Dropbox Subfolder to Another Disk
Since replacing my MacBook Pro’s hard drive with a solid state drive (SSD), I’ve enjoyed a wonderful increase in performance that’s given the aging laptop new life (see “SSD Optical Drive Replacement Speeds a Sluggish MacBook Pro,” 20 July 2012). The tradeoff of getting a much faster drive, though, was dealing with a smaller footprint. I downsized from a 500 GB hard drive to a 256 GB SSD as my primary drive, but kept the original drive by replacing the computer’s optical drive (which I haven’t needed since).
Having both drives has made the transition manageable; for example, as I describe in the article above, I moved my iTunes library to the 500 GB disk. But recently I ran into a snag: I wanted to enable Dropbox’s Camera Upload feature, which automatically copies photos from an iPhone, iPad, or a connected camera or memory card to the Dropbox folder. The photos are then uploaded to Dropbox’s servers, giving me an offsite backup of my images I can access from anywhere.
The problem is that my Dropbox folder is located on the SSD in my Home directory. That’s where I keep all of my active projects, taking advantage of the SSD’s speed and, again, Dropbox’s capability to store backups of my files. This arrangement is no problem when dealing with a bunch of articles, but the capacity required for storing photos can be immense — certainly enough to devour the free space on the SSD. I wanted to keep the Dropbox folder in place, but move its Camera Uploads folder to the more capacious 500 GB drive.
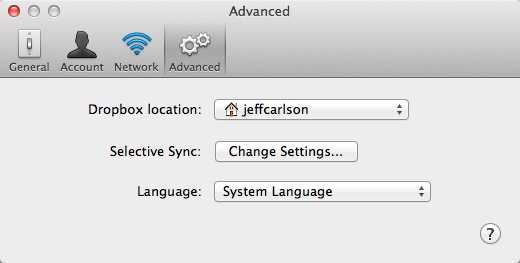
Dropbox isn’t cemented to the Home folder. I can specify that my Dropbox folder lives anywhere on my system by opening the Dropbox preferences, clicking the Advanced button, and choosing a new destination from the Dropbox Location pop-up menu. That applies only to the entire Dropbox folder, however. The software doesn’t allow relocating its subfolders.
The answer to making it work lies outside Dropbox’s options. Specifically, I needed Mac OS X to trick Dropbox into thinking it was still copying files to its Camera Uploads folder, even if the folder is located on another disk. That’s possible using symbolic links (“symlinks”), which act like aliases in the Finder, but work at a deeper level in the operating system. As far as Dropbox knows, the folder is still within its hierarchy, which is key to ensuring that the images are uploaded to the Dropbox
servers.
I don’t spend much time on the command line in Mac OS X, but creating a symlink is easy. I followed instructions written by Weldon Dodd at GigaOM, who pointed me to the technique after I inquired on Twitter. Here’s how to do it:
- In the Finder, move (don’t copy) the Camera Uploads folder from the Dropbox folder to the destination drive by holding down the Command key as you drag it to the destination (in my case, the 500 GB disk, which is named WinterXData).
- Open the Terminal application (located in
/Applications/Utilities/). -
Type
cd ~/Dropboxto change to the Dropbox directory. -
Type
ln -sand then a space, followed by the location of the destination folder. In my case, that looks like this:ln -s /Volumes/WinterXData/Dropbox_WinterXData/Camera\ Uploads. The fastest way to enter the path is to drag the destination folder from the Finder onto the Terminal window. Press Return, and Mac OS X creates what looks like an aliased Camera Uploads folder within the Dropbox folder, but is in fact a symlink.
With the symlink set up, I then connected my camera and let Dropbox copy the contents of its memory card to Camera Uploads. The image files themselves appear in the destination folder on my WinterXData volume, and copy successfully to Dropbox’s servers.
Should you ever wish to remove the symlink (such as when you get that 1 TB SSD!), just delete it as you would any other file in the Finder, after which you can move the Camera Uploads folder back into place.
Let me leave you with three thoughts. First, you can do this with any other folder in Dropbox as well, should you wish to offload Dropbox storage to a larger secondary disk.
Second, this technique doesn’t work if the destination hard drive is likely to be disconnected. In my case, both drives live in my MacBook Pro and are thus always available. But when I tested it using a different directory in my Dropbox folder and an external disk, Dropbox treated the broken symlink as if I had deleted the folder. After I ejected an external drive, the folder disappeared from my directory on the Dropbox Web site. When I re-mounted to disk, the symlink worked again but Dropbox didn’t recognize it; the folder was still gone at the Web site.
Third, this symlinking technique also works like a charm for moving any other large folder off a small SSD to a hard disk. It’s best done with folders that hold large amounts of data that’s not accessed constantly (like your Music folder), since you lose the performance benefits of storing that data on the SSD. If you’re moving one of Mac OS X’s default folders from your Home folder to another disk, you’ll need to authenticate the action with your username and password when you move the folder. And, as always, make sure you have backups before you do anything major!
(In addition to Weldon Dodd, thanks to Nik Friedman TeBockhorst and Rick Baumhauer for suggesting on Twitter that I try a symlink.)
What does Dropbox do when you don't have the external HD connected to the MacBook Pro and the symlink is broken, even if temporarily?
Just tested this. Dropbox treats the broken symlink as if you deleted the folder; after I ejected an external drive with this setup, the folder disappeared from my directory on the Dropbox Web site. When I re-mounted to disk, the symlink worked again but Dropbox didn't recognize it; the folder was still gone at the Web site.
Perhaps I can apply this technique of using a symlink to fix my re-boot problem resulting from using Dropbox to sync the Login Keychain across multiple Macs:
http://tidbits.com/pipermail/tidbits-talk/2012-August/009835.html
Worth a try, though Jeff's observation about the broken symlink might cause problems...
The problem isn't with Dropbox or symlinks per se. The problem seems to be that (at least with 10.6) a default keychain can't be outside of ~/Library/Keychains/
And, apparently, Keychain Access is smart enough to tell the difference between a real file and a symlink that points to a real file.
For details, see my writeup:
https://discussions.apple.com/message/22115021#22115021
What does Dropbox do if I sync three Macs via my Dropbox? Will it copy the symlink over to the Dropbox folder of Macs #2 and #3 and then keep the data in the sym-linked directories of those Macs in sync?
Or do I have to create all symlinks myself, and will Dropbox understand that those are not conflicted copies?
Did you test that, or do you have any idea of how to deal with that situation?
The Dropbox + Symlink tip has been around for a long time, but I never dared to use it in my situation, and would really appreciate to hear about it from an expert.
Thank you in advance!
Chris
I didn't test that. I would imagine the data you're linking to on the external drive would get uploaded to Dropbox, and then the other two Macs would have that data appear in their Dropbox folders. You could test it using a small data set and see what happens.
Thank you, Jeff. I am not enough of a tech guy to experiment when my real data and everyday setup is involved.
However, John Baere's hint to Macdropany may lead to something.
I use MacDropAny which works with Dropbox and a number of other services. Free.
http://www.zibity.com/macdropany
By the way, the Dropbox contextual menu does not work with symlinks, which I presume is what macdropany is creating.
Thank you, I had a look, and it seems to do exactly what I want.
Thanks for the link, John. Macworld's review of MacDropAny also has some useful advice on symlinking folders in Dropbox.
http://www.macworld.com/article/1157939/macdropany.html