Take Control of Slack Basics: Chapter 12, Start a Slack Team
This article is a pre-release chapter in the upcoming “Take Control of Slack Basics,” by Glenn Fleishman, scheduled for public release later in 2016. Apart from Chapter 1, Introducing Slack, Chapter 2, Get Started with Slack, and Chapter 12, Start a Slack Team, these chapters are available only to TidBITS members; see “Take Control of Slack Basics” Serialized in TidBITS for details.
Chapter 12: Start a Slack Team
Congratulations! You’ve finished reading Take Control of Slack Basics! You should now be able to use a wide variety of Slack features and interact successfully with Slack team members. As a special bonus, this series of chapters ends with the first chapter of the companion book I’m writing, Take Control of Slack Admin. If you’re interested in setting up and running your own Slack team, this book will get your team off to a smooth start and help you both technically and with establishing your new community online. It also includes training materials in the form of a
downloadable handout and slide deck. Remember, anyone can start a Slack team for free!
This chapter dives into the details you need to start a Slack team and walks you through the initial registration process. It also looks carefully at the differences between free and paid teams.
Register Your Team
Slack needs to know a few basic things about your team, which you enter as part of registering it. Although all these items and choices can be changed later, you may want to consider them before you dive into the registration form:
- Owner: Usually, this is you. Because you are registering the team, you will become the Primary Owner. Only the Primary Owner has permission to delete a team. (Teams can have additional owners who have nearly as much power as the primary, and I’ll explain how to add them to your team later.)
- Owner email address: You can use your normal email address, but consider whether you should be use a specific address that can stay with the Slack team even if you leave the group.
- Team name: The team name appears in various places, including in a user’s list of teams that they belong to and at the top of the main sidebar in the Slack app, when a user has that team active. As you can imagine, it’s hard to find something short and sweet for a team name if your company or group name doesn’t suffice—or is already taken.
-
Team subdomain name: This name, which I recommend you keep short, appears prefixed to
.slack.comto form the URL that team members visit in order to interact with the team in the Web app. Also, each message in Slack has a unique URL and users will at times see those URLs. Something short and recognizable is good.
The team name and team subdomain name do not have to match. - Your Slack username in the team: Because you’ll be setting an example for team members as they join, you may want to set up username guidelines—and follow them with your own username.
- Free or paid? All teams start free. You can convert a team to paid right away or at any time later. For details on the differences, skip ahead to Pick Free or Paid.
- Team icon: Slack will give you a default icon with a large letter on it, the letter being the first letter in your team name. This icon appears in a few places in Slack, including the left-hand Teams sidebar in the desktop and Web apps. You can upload your own icon, if you prefer.
Also, before you begin, you may wish to review Slack’s Terms of Service and Privacy Policy.
Now that you’ve assembled the information that you’ll be giving Slack as you set up your team, here’s how to create a team:
- Go to slack.com.
- In the field at the bottom of the page, enter the email address you want to use to log in as the team’s owner and click Create a New Team (Figure 1).

Figure 1: Start by providing your email address. - Next, pick a name. This name is shown everywhere a user sees a reference to the team (Figure 2, left). (You can change it later, so don’t worry too much about it.)
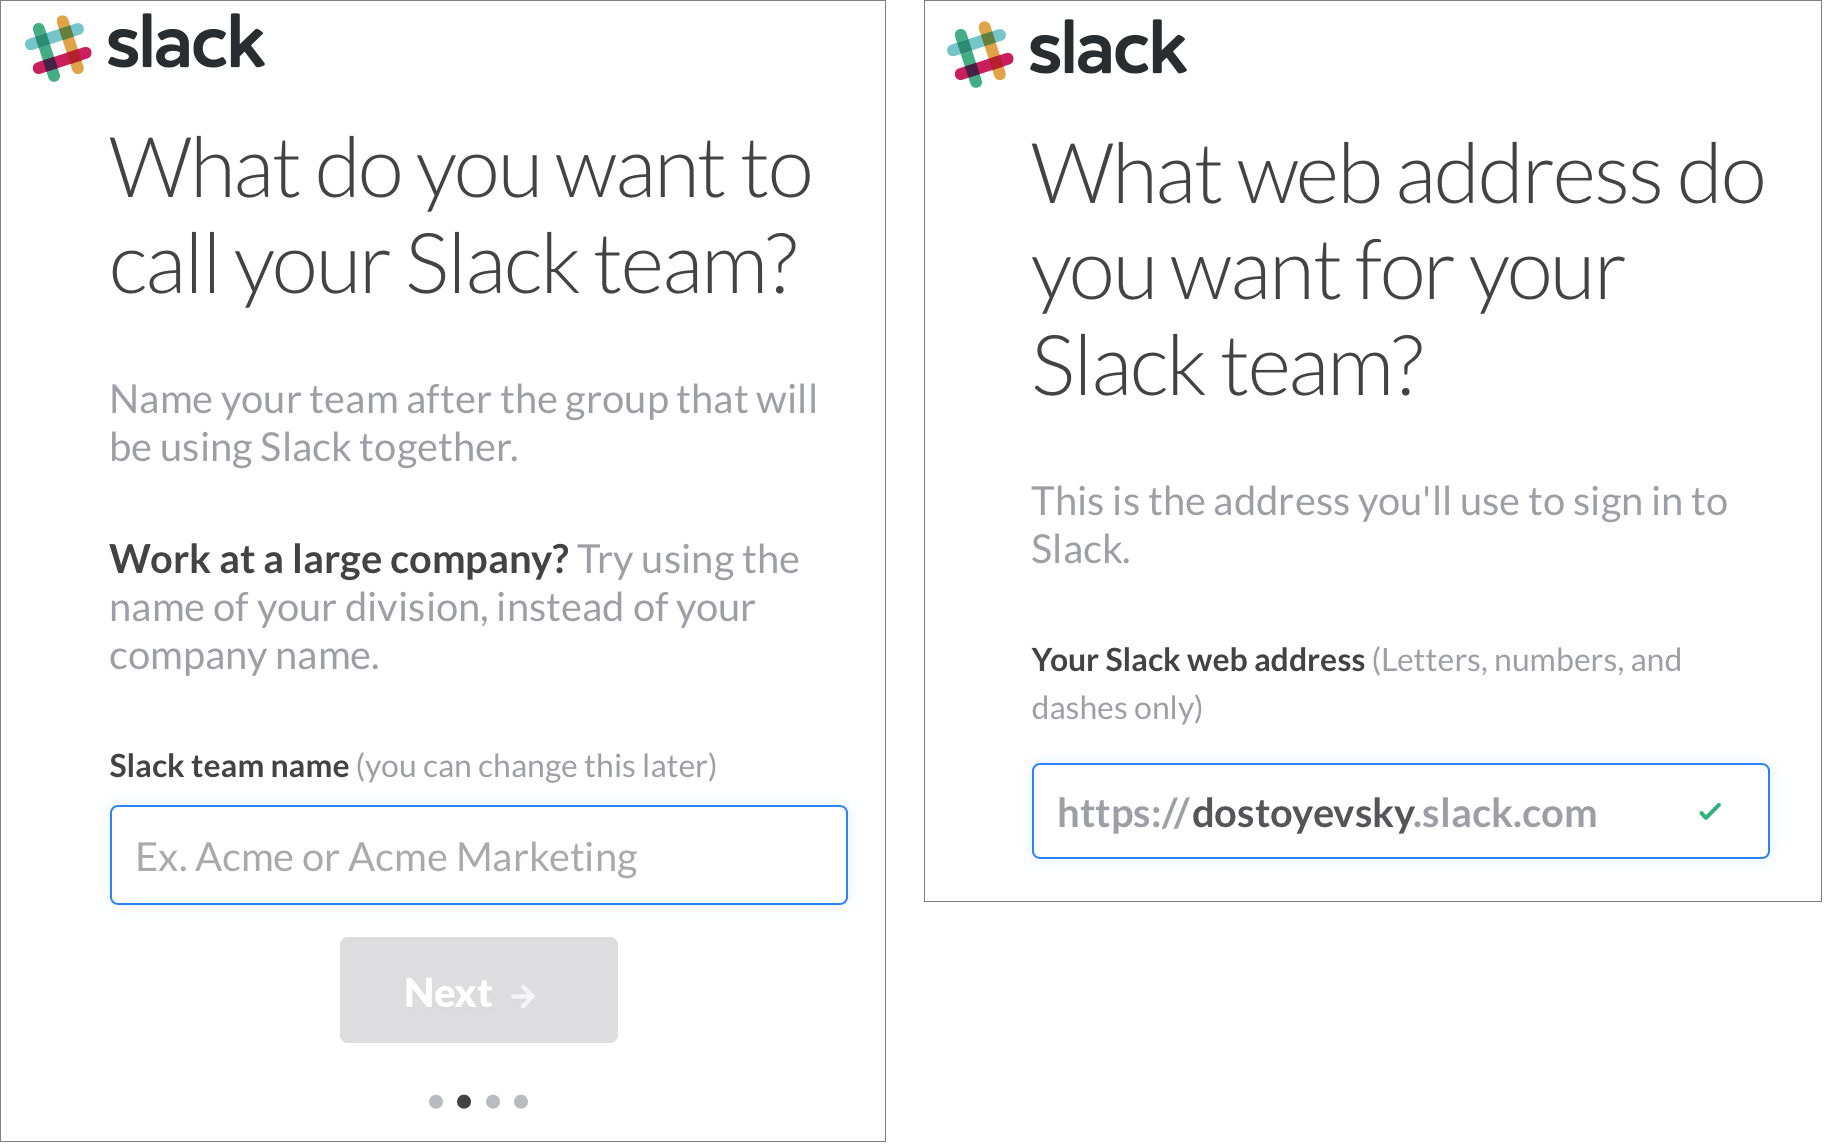
Figure 2: Name your Slack team (left); the Web site for a team has a unique subdomain (right). - Enter the subdomain name for what will effectively be your team’s own Web site (Figure 2, right). After you type a name, Slack will inform you if it’s in use; a green checkmark appears on an available choice. (You can change the URL later.)
- Enter your name and username, and click Next.
- Slack displays a confirmation page that lists all the details you’ve entered. If you need to change anything now, click its Edit button. If it all looks good, click the Create My New Slack Team button.
- Slack asks you about sending invitations. It’s fine to add users now, if you know what you are doing, but you might prefer to wait. I talk more about types of users and invitations later in Take Control of Slack Admin. Either add users or just click Skip for Now.
The Slack Web app now takes you to the same view that any new member of the team would see. In the sidebar, the two default Slack channels,#generaland#random, are available, and under Direct Messages, Slackbot is selected. (Slackbot is Slack’s built-in bot; every user has their own private direct messaging conversation with Slackbot.) - Check your email. You should have a message from Slack asking you to set up a password to go with your new Slack account. Follow the directions in the message to create your password.
Pick Free or Paid
Slack has a generous free tier, which may be sufficiently capable to meet the needs of social groups and many work-related groups.
Slack isn’t cheap for everyone else, however. Slack currently offers two paid tiers: If you pay annually, Standard costs $80 per year for each user, while Plus costs $150. In a modest team with 15 members that’s $1200 per year for Standard or $2250 for Plus.
Those costs might be reasonable for a small organization, but consider a business that needs 200 accounts, the cost for which adds up to $16,000 per year for Standard or $30,000 for Plus. Some organizations I know that have no central office or a large number of remote workers say that Slack is their single biggest expense.
Happily, while many business-oriented software systems require purchasing per-user subscriptions in certain quantities, like 100- or 1000-user increments, Slack charges only for active users, which it continuously measures against the yardstick of whether a member has accessed Slack in the previous 14 days. If they haven’t, that user is switched to inactive status for billing purposes, and that member’s cost is pro-rated—automatically. The reverse happens when someone starts using Slack again.
Free and paid teams differ in several ways:
- Free teams are limited to a chronological history of 10,000 messages. Older messages are neither displayed nor appear in searches, but they’re not deleted. Paid tiers have access to 100 percent of everything ever posted (if you upgrade from a free team to a paid team, all the old messages become accessible).
- Free teams can store a total of 5 GB of attached files for the entire team. Standard teams get a 5 GB allocation per user; with Plus, it’s 10 GB per user.
- Only paid teams can opt to have all messages (public and private) deleted a set period of time after they’re posted (from a day to several years), retain a log of all edits and deletions, and export all messages, including private ones.
- Free teams can add only ten integrations; paid teams have no limits.
- In paid teams, you can more easily compartmentalize user access by having guest users: these users can be single-channel or multi-channel. Paid teams get five single-channel guests per paying full member or multi-channel guest.
- Paid teams can add user groups, so a bunch of people can be addressed at once through a group @mention, like
@editorial. - On any team, free or paid, users can opt to sign in with two-factor authentication (2FA). On a paid team, 2FA can be required.
- With a paid team, you can set up single sign-on (SSO). SSO is used in small and large organizations alike to integrate a directory service (often based on LDAP), which centralizes a user’s account across everything they do as part of the organization. SSOs let that central directory also log them in to other services, including those not hosted in-house, like Slack.
Standard teams can let someone with a Google account use that to authenticate to the team, or can use Google’s paid Google Apps for Domains to connect the group’s users there with Slack. Plus teams gain enterprise-level SSO, with Slack supporting directory services that comply with the industry-standard SAML (Security Assertion Markup Language).
To start the process of paying for your team, go to https://team-name.slack.com/home. Click the Menu  button to open the sidebar and choose Billing.
Keep Going
We expect to publish the rest of Take Control of Slack Admin in late May, along with Take Control of Slack Basics. The ebooks will be available separately or in a bundle from the Take Control Web site.
Topics in Take Control of Slack Admin will include settings to tweak before you invite users, various methods of inviting users, thinking about channels and integrations from an admin’s point of view, and maintaining harmony in your team. The book will also come with a downloadable slide deck and handout that you can use when teaching your team about Slack.
We hope that publishing the entire draft of Take Control of Slack Basics plus this first chapter of Take Control of Slack Admin has helped you start using Slack more comfortably. Here at TidBITS, we’ve found it a useful and pleasant hub for centralizing communications.
Read More: About | Chapter 1 | Chapter 2 | Chapter 3 | Chapter 4 | Chapter 5 | Chapter 6 | Chapter 7 | Chapter 8 | Chapter 9 | Chapter 10 | Chapter 11 | Chapter 12