Making Better Use of the Touch Bar
I seem to have touched a nerve with “What’s Wrong with the Touch Bar” (4 August 2017), sparking a number of blog posts and commentaries, such as Chuq Von Rospach’s “The Life and Death of the Touch Bar” and “More Thoughts on the Future of the Touch Bar and Apple ID.” By and large, people agreed with my analysis, but a few folks pointed out neat uses of the Touch Bar that I had missed.
Overlooked Touch Bar Uses — Many users of Final Cut Pro X and Logic Pro X were quick to point out how useful the Touch Bar is for editing media, such as Chuck Joiner when we discussed the Touch Bar on MacVoices. Considering that Final Cut Pro X costs $300, Logic Pro X runs $200, and you paid a premium of about $300 for the Touch Bar, I should hope that you’re getting your money’s worth!
However, for the rest of us, I found or was alerted to a couple of built-in functions that are genuinely useful:
- In QuickTime, the Touch Bar offers a Record button, and it lets you quickly select a camera and audio source. Since selecting sources in QuickTime requires clicking a drop-down menu, the Touch Bar saves time here.
-
Preview offers some interesting and useful Touch Bar shortcuts, such as rotating images, underlining text, and quickly accessing markup tools. But the one that stands out to me is fast highlighting of text. Select some text in a PDF and tap a color on the Touch Bar to highlight the text with that color. Useful and time-saving!


I found one Touch Bar function that may legitimately be game-changing. When you press Command-Shift-4 to take a screenshot of a selected portion of the screen, the Touch Bar lets you choose which type of screenshot to take: Selected Portion, Window, or Entire Screen. Even better, you can choose where to save that screenshot! By default, macOS saves screenshots to the Desktop, but via the Touch Bar you can instead choose the Documents folder, you can send it to the clipboard, or you can open the
screenshot in Preview, Mail, or Messages.
What’s wild is that your chosen screenshot destination will become the default for all subsequent screenshots — it’s not just a one-time selection. Of course, you can change this at any time with the Touch Bar. As far as I know, this is the first time macOS has let you modify the screenshot destination (apart from copying to the clipboard by adding the Control key to Command-Shift-3 or Command-Shift-4) without using Terminal.
But the big thing I want to share is something that I didn’t think was possible before: invoking Keyboard Maestro macros with the Touch Bar.
Keyboard Maestro with the Touch Bar — In “What’s Wrong with the Touch Bar,” I said:
If background apps could present Touch Bar icons, automation utilities like Keyboard Maestro could allow users to trigger custom macros from the Touch Bar without requiring a potentially obscure key combination.
Well, it turns out that is true, although there’s no “official” way to do this. But I stumbled across a hack that makes it possible.
BetterTouchTool has long been one of my favorite Mac power-user apps, since it lets you configure all manner of keyboard, mouse, and trackpad shortcuts. It lets you create custom Touch Bar buttons and macros, but it’s not nearly as advanced as Keyboard Maestro. However, it can work as a bridge between Keyboard Maestro and the Touch Bar.
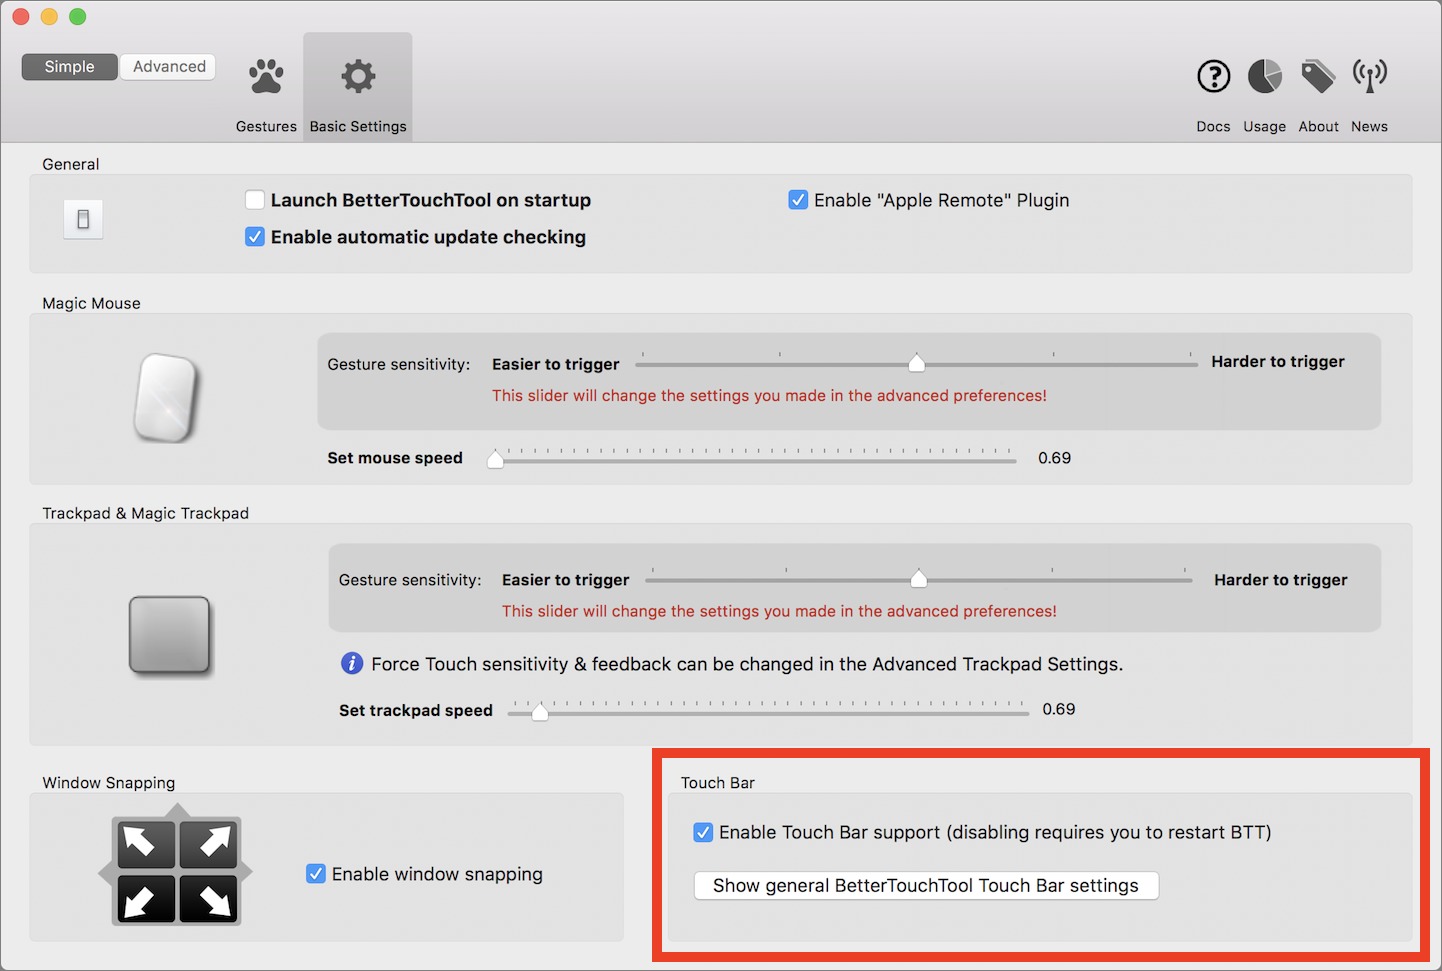
- Open BetterTouchTool Preferences and click Basic Settings. Make sure that Enable Touch Bar Support is enabled.
-
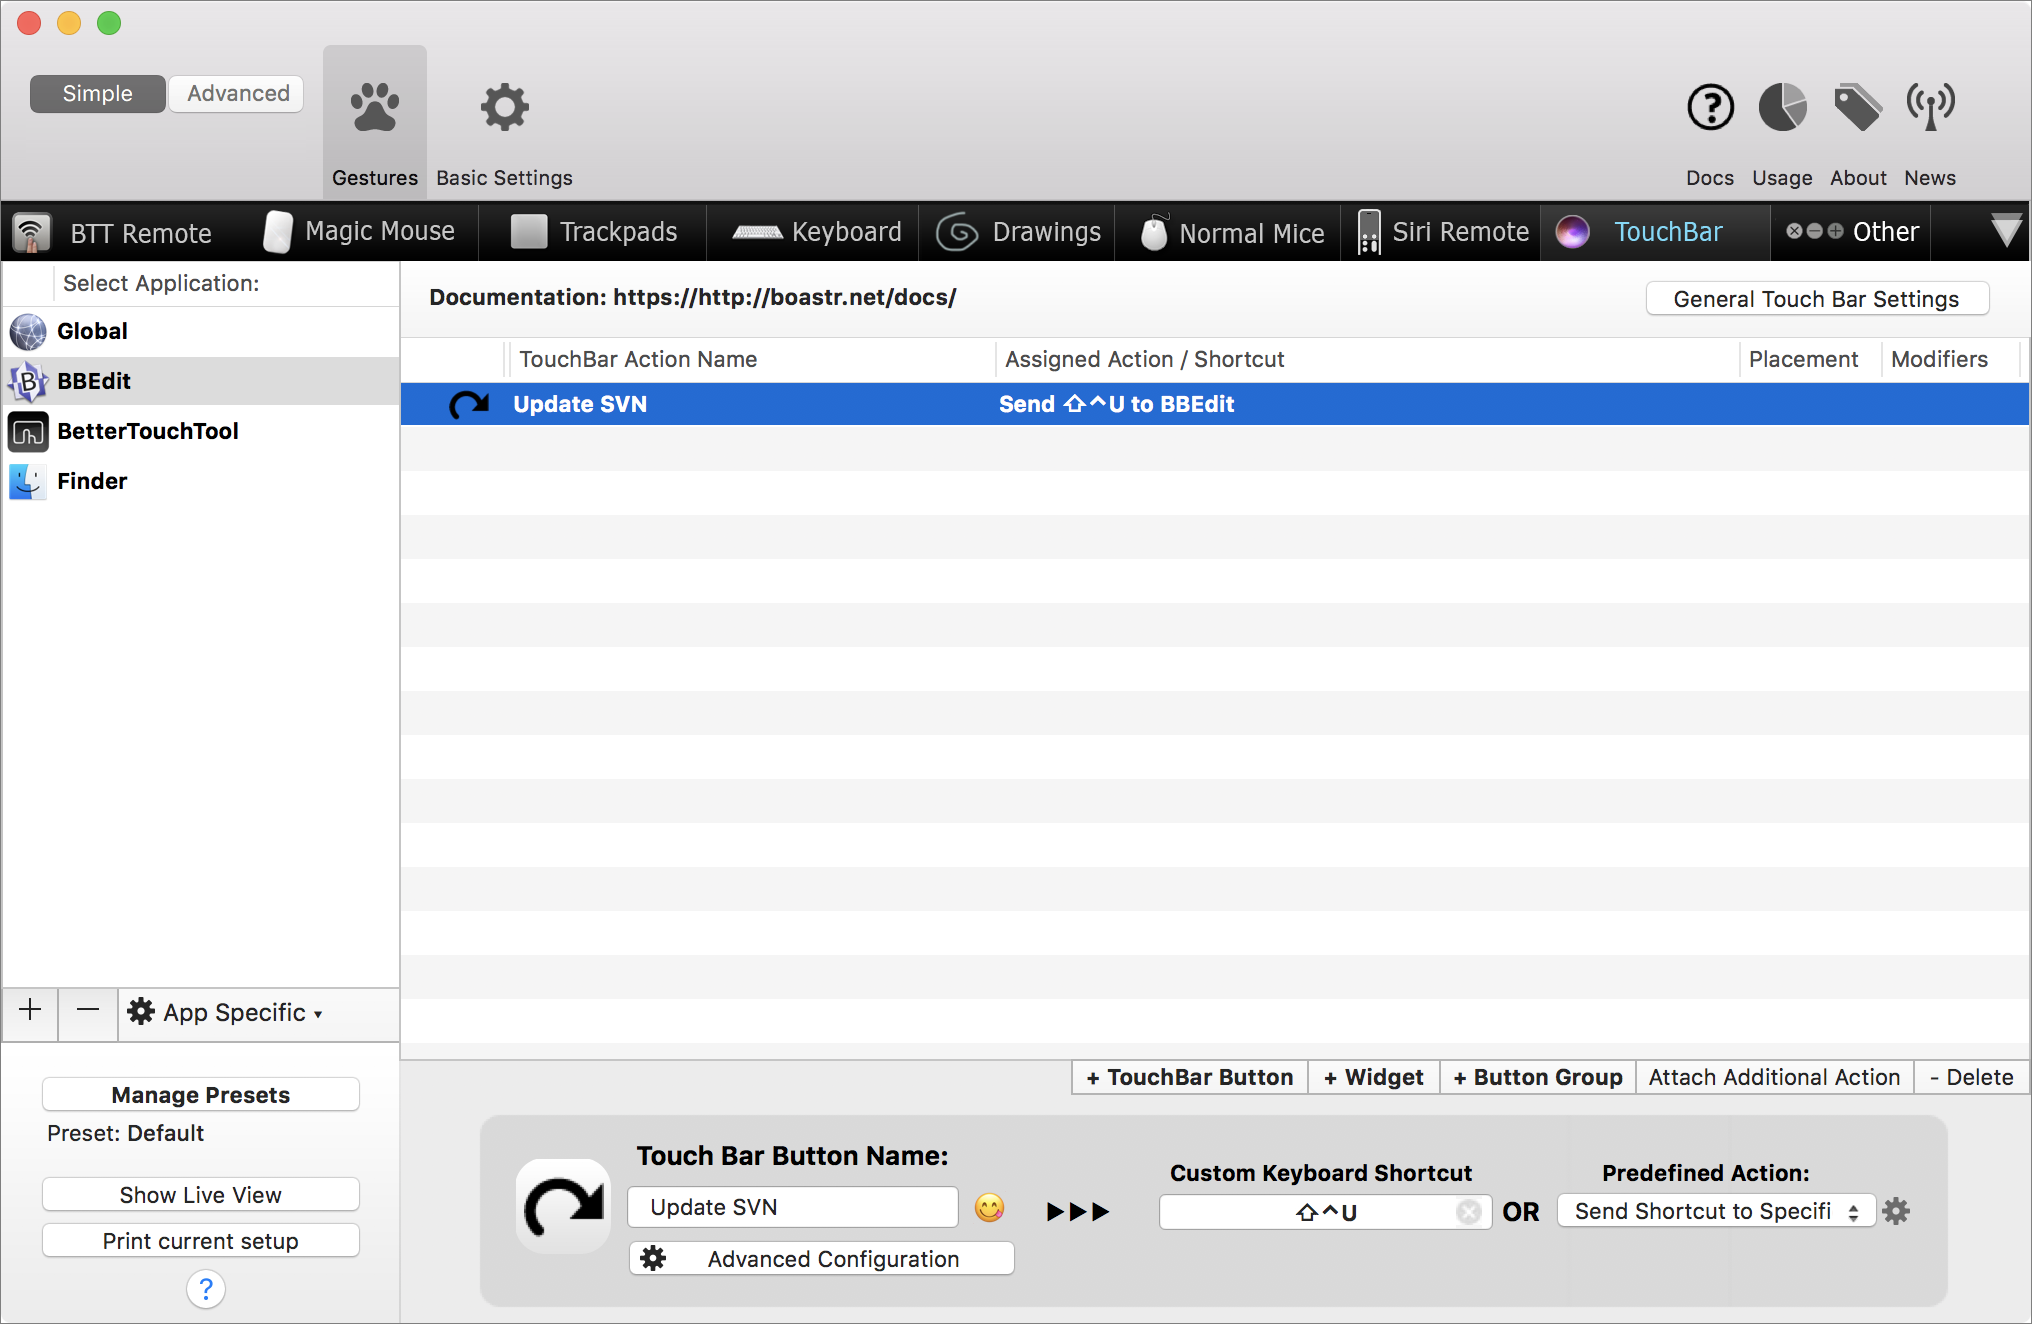
Back on the Gestures screen, choose the application you want the Touch Bar button to appear under in the Select Application column — click the + button to add an app if you don’t see it. Global will show the virtual key in all apps — that may be the most common choice.
-
Click + TouchBar Button to create a custom Touch Bar button. Enter a name, and, if you wish, choose an icon.
-
Here’s the trick: when you create a TouchBar Button, you can also enter a custom keyboard shortcut, so press the key combination for the macro you wish to trigger.
-
Try out your new custom button and make sure it does what you expect.
BetterTouchTool also offers predefined actions you can trigger. It’s not quite as powerful as Keyboard Maestro, so I’m just focusing on demonstrating how to trigger Keyboard Maestro macros here.
Once set up, you can hide or show your custom buttons with the BetterTouchTool button grafted onto the Touch Bar’s Control Strip. Activating a macro is as simple as tapping the button on the Touch Bar.

Even without diving into the details of BetterTouchTool macros, you can use this trick to trigger any action in macOS that can be invoked via a keyboard shortcut.
I hope these tips make the Touch Bar a bit more useful for you!
BetterTouchTool is indeed the "Touch Bar Preferences Panel that Apple forget to include". I've been making Touch Bar macro sets for numerous apps with custom colors and icons for commands. Josh wrote that with BTT "you can ... trigger any action in MacOS that can be invoked via a keyboard shortcut." But wait! There's more. With BTT you can create a Touch Bar action for any menu command on any menu in (almost) any app -- even menu commands on contextual menus. You cannot even do the contextual menu bit with Keyboard Maestro. The macOS / app control available with BTT is amazing.