Apple Implements Two-Factor Authentication for Apple IDs
Apple quietly added optional two-factor authentication for Apple ID accounts last week, joining the likes of Google, Dropbox, PayPal, Facebook, and an ever-growing number of other sites. This additional layer of authentication helps protect the increasingly important Apple ID accounts that millions of Mac and iOS users rely on for iTunes Store and App Store purchases, iCloud logins and data sharing, support from Apple, and more.
Although it’s optional, we recommend enabling two-factor authentication as soon as is practical for you. Since online criminals can use compromised Apple ID accounts both to siphon money from credit cards and to take over your digital identity, it’s no longer paranoid to worry about your password being stolen. Although it may seem like a hassle, and setup should be done with care, Apple’s two-factor authentication will not impact your life significantly. Apple says there are only three situations in which two-factor authentication will be invoked:
- When you sign in to the My Apple ID site to manage your account.
- When you make a purchase from the iTunes Store, App Store, or iBookstore from a new device.
-
When you get Apple ID-related support from Apple.
Factoring the Security Equation — The “factors” in two-factor authentication refer to two distinct private elements one must know or have to perform a successful login. The first factor is typically a password, as it still is with Apple IDs. The second is an “out-of-band” element: a code that can only be known or created using separately provided hardware or separately registered software. The out-of-band part is important to ensure that someone who already knows your password or has gained access to your computer cannot also obtain the second factor through the same medium.
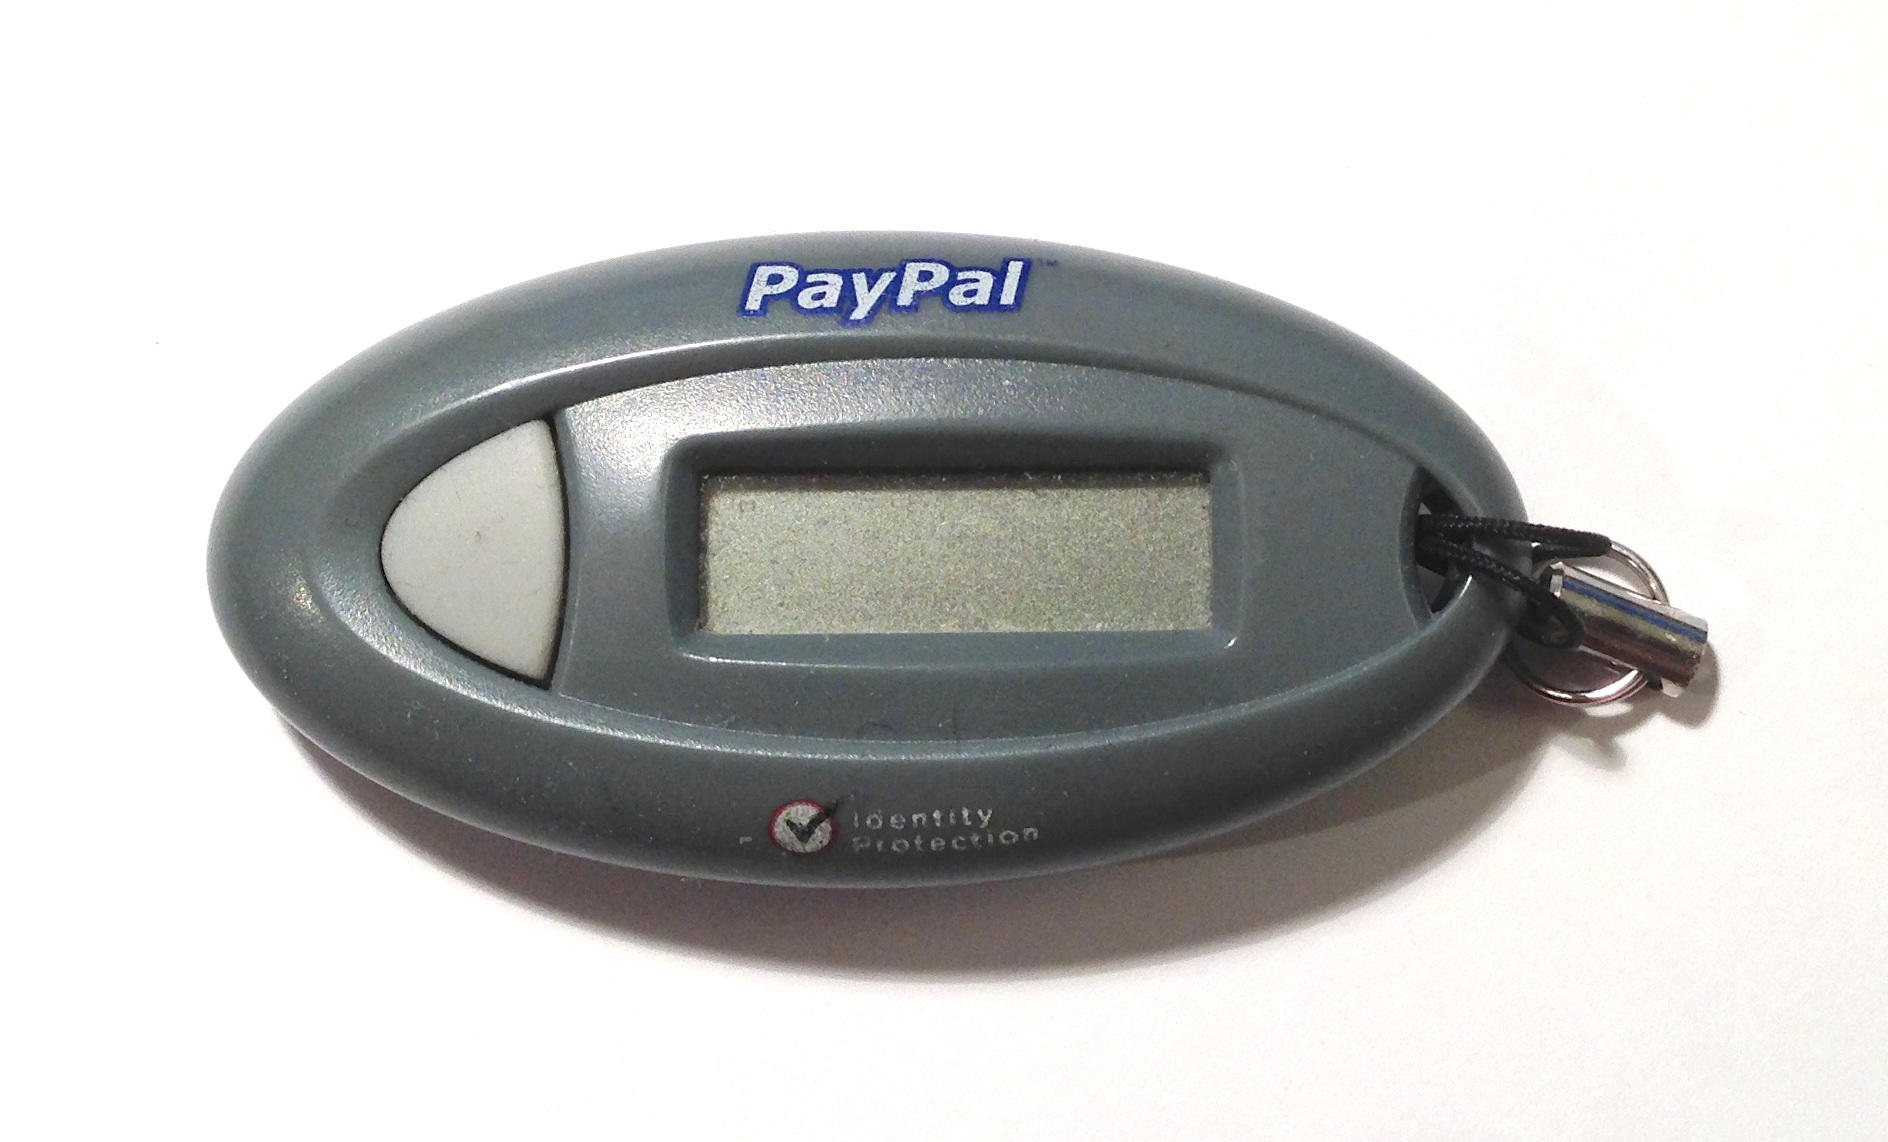
Two-factor authentication used to be wonky, but with the rise in online crime, we’re seeing increasingly widespread support. I have two separate keyfobs, one for PayPal/eBay and another for E*Trade, from which I have to enter a six-digit number whenever I log in to those services. That number changes every minute. Google offers Google Authenticator, a mobile app for iOS, Android, and BlackBerry that can provide the same sort of code more
conveniently, once you’ve associated it with your Google account. Dropbox can use Google Authenticator, too, which is handy, relying on a separately registered and generated entry in the app. Even Facebook offers two-factor authentication through both SMS text messages and the Facebook iOS app. Many other services without apps also rely on SMS text messages to send a code to a mobile device under your control in order to provide the out-of-band component.
This two-factor method replaces the “security questions” that Apple has long relied on, much like many other companies. These questions are typically drawn from a list of possibilities like, “Who was your best friend in school?” But the questions may be ambiguous and can often be hacked easily by identity thieves hoovering up your personal details by searching Google, Facebook, or other personal information services. (In “Take Control of Your Passwords,”
Joe Kissell recommends coming up with what is essentially a passphrase — not a truthful answer — for each security question.)
Worse, as Mat Honan amply documented when his own accounts were hijacked, crackers can sometimes take over an account using a combination of social engineering and logical failures in password-reset procedures. At one point, Amazon allowed you to add an email address by phone if you had the last four digits of a credit card on file. However, you could also add a credit card by phone. Crackers realized they could add the credit card in one call, hang up, and then call back to add an email address they owned using the stolen (but still active) or faked (but validly formulated) card number they’d just provided. They could then get a password-reset message sent
to their email address.
Honan documented that with an Amazon account, an attacker could then view the last four digits of other stored credit card numbers for that account, and use that information to reset passwords or add email addresses to an Apple ID or accounts at other sites.
These attacks fail when the miscreant must both reset the password and either have physical possession of an unlocked device owned by the target or intercept SMS messages bound for that person. For sophisticated attacks targeted at an individual — say someone involved in government or corporate espionage or even a particularly messy divorce — two-factor authentication may still not be enough, but it’s more than sufficient to prevent the commonplace drive-by assaults on one’s identity.
Factor Your Decision — Before you set up Apple’s two-factor authentication, consider what the future looks like after the switch, as there are pluses and minuses with the new method.
On the upside, consider:
- No thief with your password alone can change your password, have Apple make account changes by phone, or gain access to your account to make iTunes Store, App Store, or iBookstore purchases from a new device.
-
No more security questions to answer and remember!
-
You can reset your password securely (using a linked device and a special recovery key described below) if you forget it or believe it was compromised.
But there are a few downsides, too:
- You must be able to receive SMS messages, or be set up with notifications via Find My iPhone on a particular iOS device. (Apple’s assumption appears to be that both reception of SMS messages and Find My iPhone require physical possession of a specific piece of hardware, whereas messages sent via iMessage, for instance, could appear on multiple devices.)
-
You can permanently lose access to your account in a particularly complicated scenario that’s unlikely, but possible. As Apple describes in a support note, you can reset access to an account as long as you have two of the following: the account password, access to a “trusted” device associated with the account, and a special recovery key generated when you set up two-factor authentication that’s used as a last resort. But if you have only one or none of those, your account is dead forever. “You will need to create a new Apple ID,” Apple writes, and that is guaranteed to be annoying at best.
And there are two kinds of access that two-factor authentication doesn’t protect:
- It doesn’t prevent email from being accessed with just the knowledge of the password. Someone could still retrieve your email from a me.com, mac.com, or icloud.com address with just the account name and password. That would in turn still let an attacker invoke password resets for other services that you set up using an Apple-managed address.
-
You can log into the iCloud Web site with just the password, and use all the services there, including Mail, Contacts, Calendar, Notes, Reminders, Documents in the Cloud, and even Find My iPhone, from which your devices can be erased (you are backing them up, aren’t you?).
Finally, if you made any significant changes to your Apple ID account in the last few days, Apple won’t let you turn on two-factor authentication for three days. And if your Apple ID password is too weak for Apple’s tastes (see “FlippedBITS: Four Password Myths,” 20 March 2013), Apple forces you to change it, and then forces you to wait for three days.
Enable Apple’s Two-Factor Authentication — If you’re ready to go, follow the steps listed in Apple’s support note if you’re in a supported country, or read our version below. (Apple has rolled out two-factor authentication in the United States, the United Kingdom, Australia, Ireland, and New Zealand, and plans to add additional countries over time. Perhaps it’s a localization issue.)
- Navigate to the My Apple ID site, click Manage Your Apple ID, and log in using your current account information.
-
Click Password and Security on the left, answer the security questions shown, and click Continue.
-
Under the “Two-Step Verification” heading and text at the top, click the Get Started link.
-
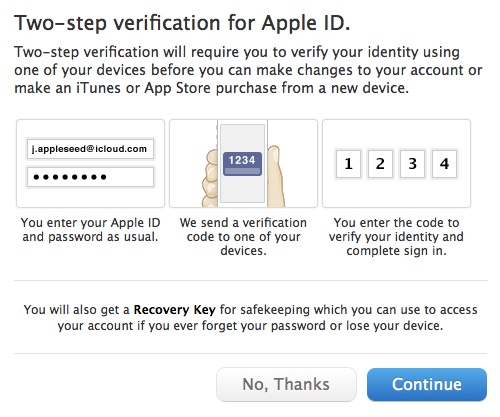
Apple then presents three screens of information, benefits, and warnings. Read each one and click Continue on the first two, then Get Started on the last one.
-
Apple displays a list of iOS devices associated with your account and lets you add SMS numbers for mobile phones. When you are finished verifying devices, click Continue.
- If you click Verify, Apple sends a code to the associated device via Find My iPhone. But, cleverly, if your device is locked with a PIN, unlike an SMS or iMessage, Apple prompts you to unlock iOS first to get the code. You may have problems if you have multiple Apple IDs because Find My iPhone can be associated with only one Apple ID. For instance, if you use
[email protected]for calendars and contacts on an iPad, that’s the account Find My iPhone will use, and you won’t be able to associate that iPad with another Apple ID registered under[email protected]. -
If you click “Add an SMS-capable phone number,” Apple sends the code in an SMS message. That works for connecting an iPhone that’s associated with a different Apple ID via Find My iPhone or a completely different mobile phone, even one owned by someone you trust. Happily, the SMS message is free.
- If you click Verify, Apple sends a code to the associated device via Find My iPhone. But, cleverly, if your device is locked with a PIN, unlike an SMS or iMessage, Apple prompts you to unlock iOS first to get the code. You may have problems if you have multiple Apple IDs because Find My iPhone can be associated with only one Apple ID. For instance, if you use
-
Apple now provides you with a 14-character recovery key that, if lost, cannot be recovered by anyone. Click Continue or Print Key to proceed. Apple recommends you write down your recovery key and don’t store it on your Mac. That’s reasonable advice, although if you have a tool that lets you store items with strong encryption (such as 1Password or Yojimbo) and secure that tool’s database with a strong password that’s not stored on the computer, you’re not tempting fate.
-
You have to re-enter the recovery key to prove that you really wrote it down! Type it in again, and click Confirm, which lights up only if you’ve entered the key correctly.
-
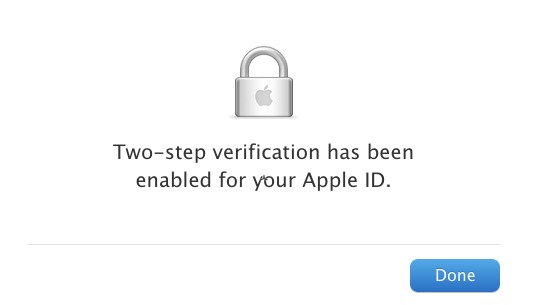
A final warning screen explains once again how completely messed up your life will be if you lose two or three of the elements required to reset your account. Select “I Understand the Conditions Above” and click “Enable Two-Step Verification.” The Manage Your Security Settings page now shows “Two-step verification is enabled.”

You will receive email notification of the change to all associated accounts immediately afterwards — and I do mean immediately, as mine arrived within a few seconds.
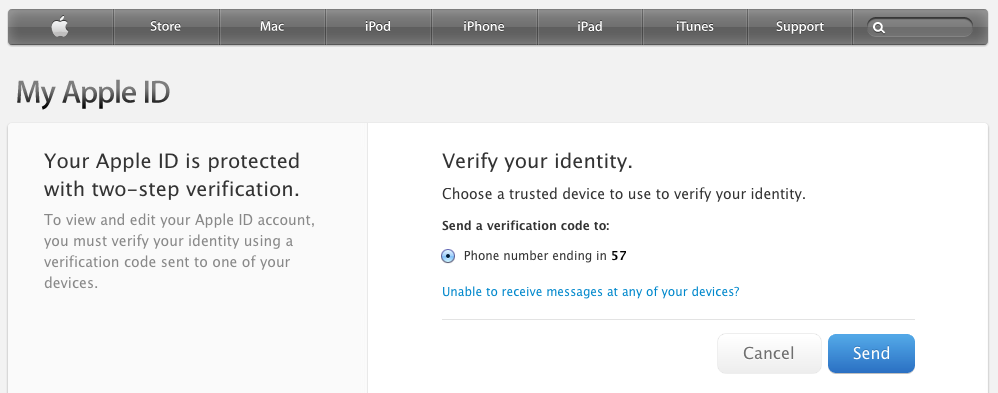
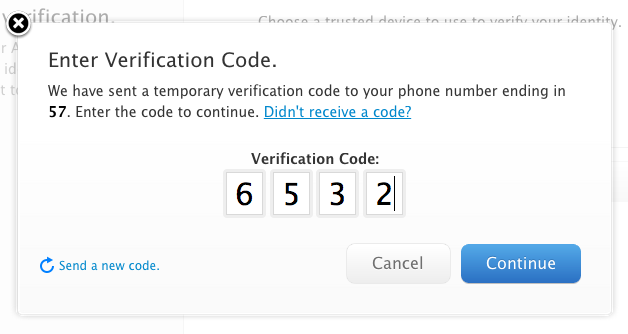
From then on, any time you access one of Apple’s protected services, such as the My Apple ID site’s Manage My Apple ID section, you’re asked which method you want to use to verify. Select it and proceed, and a code is sent. Enter that code, and you’re all set.
Not a Universal Solution — Two-factor authentication doesn’t solve all problems associated with validation and identity theft, but it solves some of the most important ones: password resets for account hijacking, purchases made through Apple-related services on new devices, and phone-based social engineering.
I’ve turned it on for the account I use for purchasing items, and recommend the same for all of you. Just make sure you have all your ducks and devices in a row (associated with the appropriate Apple ID and at hand) before you start!
After going through the three warning screens, I was told to come back after three days; I was not allowed to continue.
I believe this is a waiting period that Apple imposes if you've either fiddled with your Apple ID recently (as in, you might not control it) or if your password is too weak (again, if you might not control it).
As noted, this does nothing for those of us who spend part of the year in places where mobile service is spotty to non-existent. Also, living overseas part-time and using a local SIM card means getting the SMS fails as well.
And finally, add the risk of the disaster of having to create a new Apple ID and this really becomes nearly useless. I don't even trust iCloud; why would I go this route? Is there no alternative tech on the horizon for accomplishing this?
Yes, if SMS is unreliable for whatever reason, that makes it a bad choice for two-factor authentication. (Though, it is worth noting that SMS can usually get through even when voice and normal data is unavailable - SMS is very very low bandwidth and works on a store and forward system.)
There is absolutely no question that two-factor authentication is not ideal for everyone, and it very much sounds like that's true for you. But it is a generally good step forward to provide greater security across a broader swath of the population. Think of it a little like herd immunity - if enough people use two-factor authentication and thus can't be compromised, the bad guys will stop targeting those systems, and even users who don't use two-factor will benefit from that.
Under Apple's scheme, you don't necessarily need to be able to receive an SMS. But if you do not associate an SMS-enabled phone with your Apple ID, or if you are temporarily out of cell range, then you must have a trusted device with you, and that device must be able to connect to the Internet.
Personally, I prefer Google and Dropbox's scheme, which uses a time-based 6-digit code. After the initial setup, no data is transferred between Apple and me to get the second factor of authentication, which is one fewer way for someone to get access to my account. It also means that I don't need to worry about Google or Dropbox's code-generating servers being online.
And what about when you are out and about with your iPad or iPhone and, as often happens to me, Apple Mail asks, out of the blue, for your email password. Is inputting this password the equivalent of logging into your @me.com/iCloud mail account? If it is, this is a major PITA, as you probably have no second device handy on which to receive the code from Apple. No thanks, Apple.
Two-factor authentication isn't used in that scenario - only when you access the My Apple ID site, purchase from a new device, or get Apple ID-related support from Apple. I've updated the article with a clear list of those situations at the top.
That's correct. In the article proper, we note that email and iCloud.com Web access aren't protected with two-factor authentication. Google uses a clever-ish system to create app-specific passwords for programs that can't work with two-step checks, and I suspect Apple will ultimately add more options in newer software, too.
This won't improve security at all. A simple call to Apple and a pleading voice.... "I lost my phone, please let me reset my password and disable the PIN" and you are hacked.
Passwords aren't broken. Password recovery is broken.
I would suggest you try it after engaging this new mode and see where you get. Apple is claiming that it now requires two of the three elements (password, trusted and verified device, and recovery key) to even access Apple Support.
If you don't have a device to receive a code at or have the recovery key, Apple says you can't obtain a password reset. We'll see in practice, as I'm sure people will try.
And now this: http://www.theverge.com/2013/3/22/4136242/major-security-hole-allows-apple-id-passwords-reset-with-email-date-of-birth
And we've posted an article about this (with details about why a password reset is a risk) on TidBITS at http://tidbits.com/article/13656 just this second! Thanks, Matt!
So if I do this, suppose my 11 year old daughter wants to make a purchase (in app, music, etc.) from the iTunes Store using my iTunes account, as she frequently does. Will she still be able to do it using just my password, or will she have to do something else now?
She will need something else. Each time you want to purchase (and I suspect for a short duration afterwards), you will have to enter a code from a trusted device. If she is on the trusted device, I am not sure if there is an additional procedure or if the code appears and one must just enter it. I have yet to test that!
This sounds like a non-starter for me, then. I could make her iPhone a trusted device, I suppose, but explaining to her why she has to jump through another hoop wouldn't go well.
The biggest single thing Apple could do for security is not this two factor upgrade but to incorporate a good password manager into iOS. The reason my iTunes password is so weak now is because I have to type the damned thing on a 5 inch screen all the time...
"Wouldn't go well": Your money, though, not hers? As a fellow parent, I fail to see the problem.
More seriously, I recommend 1Password for iOS/Mac password management. I haven't used the same password twice for years, ever since adopting it.
I do use 1Password, although it got worse with the latest revision on iOS. Before you used a PIN and then needed a short password for each individual entry. Now you need to type your "master password", which in my case is long and difficult to enter without a real keyboard. But 1Password can't fill in the dialog boxes Apple's own software pops up asking for your password. It works OK with third party apps.
No, not for each purchase, just the first one from a new device. I confirmed this by giving Glenn a birthday gift certificate from iTunes last night - no extra authentication necessary, since I was using an already trusted device. :-)
Ah, what may not be clear is that a "trusted" device in this context is merely one from which you've made a purchase before.
I wonder if it times out and requires re-authentication? Google's two-factor approach (but not the per-app password one) sometimes asks me to enter a new code from Authenticator. Typically, this is when I log into my Google account from a machine I've already verified, but it's a good additional step.
I believe Google asks for authentication once per month per device, even if it was previously verified. But I see that Google's two-factor authentication had a major hole until recently...
https://blog.duosecurity.com/2013/02/bypassing-googles-two-factor-authentication/
I have to admit that I'm a bit freaked out by this. I like the idea, but it just seems too risky. What happens if you lose your iPhone? How long can it take to get things set up again?
This just seems too complicated for average users. I can imagine that there will be a lot of problems down the line with this.
This is why you can set up SMS, too. When I verified my iPhone, I used Find My iPhone and SMS. If I lost my iPhone, I just need AT&T to restore my phone number to a new phone, and I'm still ok.
Also, remember you need any two of the three elements to recover account access: a password plus either a trusted device or recovery key; or a trusted device and a recovery key.
You don't lose access to email, syncing, or iCloud.com (so long as you don't forget your password and have to reset it).
Well now...I remember following EVERYONE'S advice when .mac became iCloud...as I had two Apple ID's (one for purchases and one cos I'd kept my .mac address), I thought I'd be sorted, but now, as you can only have one Apple ID connected with iCloud/Find iPhone/iPad etc, then you can't have both your Apple IDs protected in this new more secure way. What to do? NOW unify the two IDs and just have one for everything in the future? Mmmmm..with the ramifications and problems in doing that, I'll be looking forward to tidbits' guide on this very subject, and if you guys think that's the best way for the future...
I'm in the same boat - when iTunes Store came out, I created an Apple ID. When Dot Mac came out, I now had another Apple ID; when Dot Mac became MobileMe, I was assigned a new @me.com address and ID; ditto when MobileMe became iCloud. Conceivably there are 4 Apple IDs that Apple lists for me, though I only use the first two. I want to merge those two AND keep ALL associated data for both: purchases, Apple Discussions records, Apple Hardware records, etc.
The problem is that Apple says they CAN'T unify Apple IDs - which is bogus. They are both in a database and database records can be merged, so Apple just needs to hire someone who knows how to merge data records - say any high school computer student.
As for SMS, I don't have that capability since I told my carrier to block incoming SMS due to being spammed (AND being CHARGED for the SPAM).
In theory, you should have only two Apple IDs, the one you created for the iTunes Store, and the one associated with your MobileMe/iCloud account. (The fact that you can use mac.com, me.com, and icloud.com addresses with your iCloud account doesn't mean you have three Apple IDs, luckily.) But yes, I think this is problematic, and I wish Apple would allow Apple ID merging too.
With SMS, I can certainly understand your irritation with the spam, but it might be worth having your carrier turn it back on (if only as a test), since it's possible (even likely) that the spam would have ceased once the SMS messages started failing.
Adam, I've heard that SMS spamming is increasing daily. Yes, that one spammer may have quit (but I doubt it since most are robo-spams), but there are thousands more out there. Maybe when the carriers eliminate charges for received SMS messages, I will consider turning it back on.
I did some research and while SMS spam has been increasing over time, it's not universal. Cloudmark has been doing some of the main research here, and they point to an FTC action in early March to shut down some of the main SMS spammers.
http://blog.cloudmark.com/2013/03/07/ftc-charges-29-defendants-for-sending-180-million-spam-text-messages/
Wikipedia claims (not supported) that SMS spam in the U.S. remains under 1% of the messages sent; it's much higher in other parts of the world.
http://en.wikipedia.org/wiki/Mobile_phone_spam
I wish I had better advice here, but I'm in exactly the same boat (actually worse, since I have a third Apple ID that Apple forced me to make to work with iTunes Connect for the iBookstore). One of my Apple IDs is used for purchases, and the other is associated with iCloud, and since the latter was what I'd been using for shared calendars and because it got more storage for iCloud Backup, that's what all my iOS devices are associated with (or were, until I fiddled things for testing during editing Glenn's article). But I don't see any solution to the problem - there is simply no way to have Find My iPhone work with a different account from all the rest of the iCloud stuff.
Most of my questions have been asked but no good answers to several: In a corner of AZ with little or no cellular, I have no cellular. I also have no Apple devices other than three Macs. Why cannot someone use land lines for the 2nd factor? An outfit named PhoneFactor does this, but neither Google, Dropbox nor Apple do it. What the #### is the big problem? Is it just to force people to buy useless cellphones? Yes, they are useless in my location. I am not alone in this location problem. No one cares?
Note: I should have said 'virtually useless", especially for something as critical as verifying identity. And why should I buy a lovely iPad or iPhone when they add little or no value to my daily life without the cellular connection. My wireless net and AppleTV are reliable and my MacBookPro supports video mirror just fine. Apple is laying a penalty on me for being a location-deprived luddite??
Get a Skype number and you can receive SMS over the Internet via Skype. http://www.skype.com/en/features/online-number/
It's not super cheap, but it does help solve that problem.
Google will use a landline instead of SMS at least some of the time. I just had to reset a password for a Google account (not one with 2-factor enabled) and it gave me the choice of receiving a text at a mobile number it knew about or receiving an automated phone call.
BTW, instead of paying for Skype, a Google Voice number can send and receive SMS messages for free.
Will Apple allow my Android Samsung smartphone to be a "trusted-device" for receiving SMS? Apple's "trusted-device" definition implies yes but I wonder if non-Apple devices are really allowed to play
I can't imagine there would be any problem at all. SMS is SMS, and there's no way for the sender to know what sort of device is on the receiving end.
Apple has to allow generic SMS messages because without it, it provides too few methods for recovery, and would lead to too many complaints.
The great advantage of having SMS on your account alongside iOS devices is that if everything you owned were stolen, including your recovery key, and you wanted to reset the password, you can get a phone company to put your phone number on another device at which you can receive SMS.
After a discussion with Apple Tech Support I found that I can initiate two factor authentication on both of my Apple IDs. Like many people I am stuck with an Apple ID for iTunes and one for iCloud. Apple said I can use the same SMS enabled device for both IDs, I will have to maintain two recovery keys.
Good to have that verified - I sort of assumed an SMS number could be used multiple times, but I hadn't tested that. It does help to get around the limitation of iOS devices being linked to only a single Apple ID.
I am in favour of second factor authentication. I have this on my other accounts. I have a credit sized dongle that gives a six digit code and for Google there is authenticator. I am just not keen on SMS which requires a message to be sent. Is there a to SMS? alternative.
Just to be clear, SMS is one mechanism, but Apple also uses a direct transmission that relies on Find My iPhone's signal path.
But I am surprised Apple didn't do the other alternative and offer an Apple Authenticator app like Google's. That would seem wise, too.
That is what is I feared. I would much prefer a Dongle or something like Google authenticator.