FunBITS: How Out-of-Focus Photos Can Be Works of Art
Meet bokeh.
“Bokeh” is a general term used to described the blurred, out-of-focus portions of a photograph. It’s typically used to describe the blur that occurs in the background of a photo, and aside from its aesthetic qualities, it can also help your eyes focus on the subject of the photo.
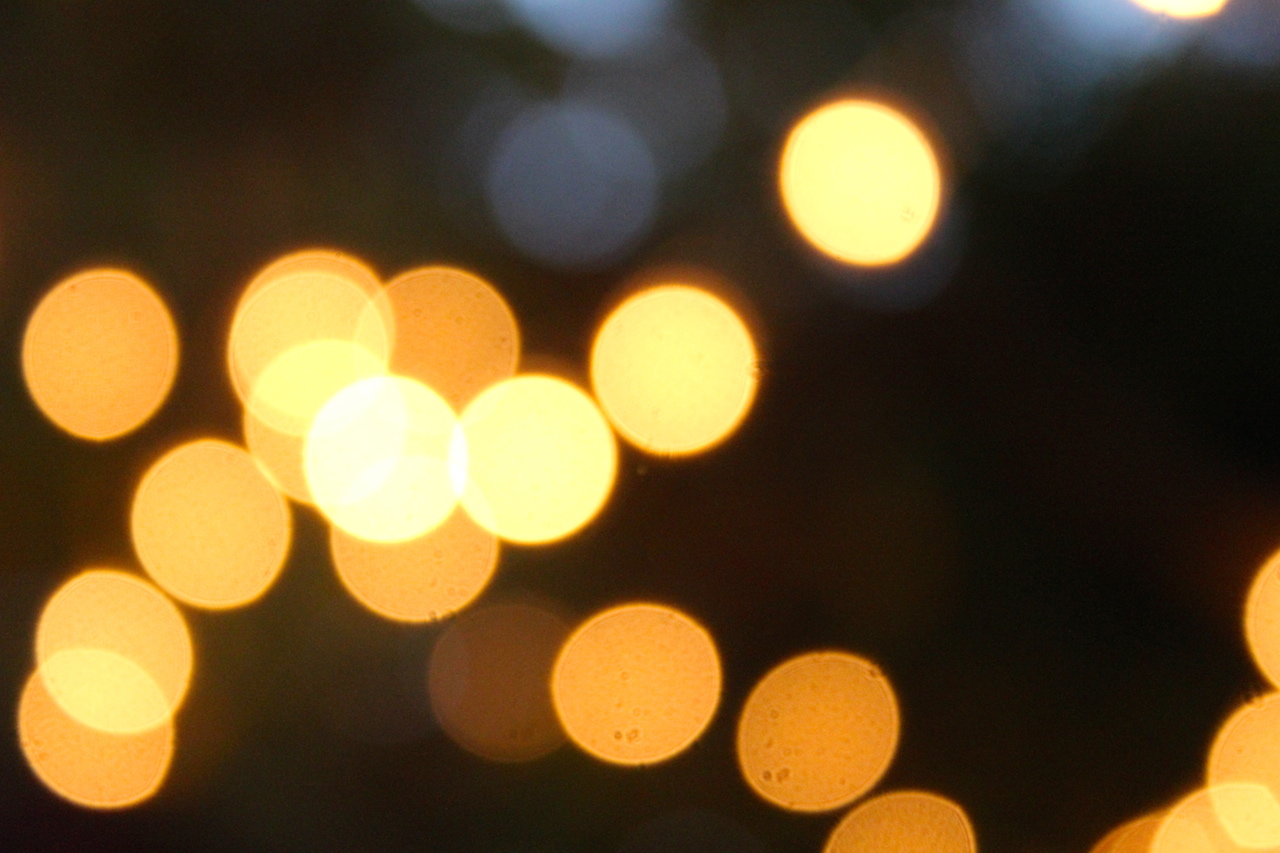
But there’s a second application of bokeh, where you use it as the main subject of your photo. For example, maybe you want to capture the colors of a scene, or a particular shape or contour, like a strand of lights draped over a tree. So what may have been a nighttime street scene becomes a colorful mosaic of spherical points of light that overlap and blend into each other.
To give you a better example of what I mean, here are a couple of example photos I’ve taken that use bokeh as a focal point. While this bokeh is typically round, it doesn’t need to be: depending on your lens or your camera settings, it may also appear as a hexagon or pentagon, among other shapes. Some photographers even make filters that let them produce bokeh in all sorts of shapes.

A quick search for “bokeh” on Flickr provides many more examples of how photographers put bokeh to good use in their photos.
Making Bokeh — Creating bokeh in your photos doesn’t necessarily require special equipment, but the sorts of effects you can achieve vary depending on the type of camera you have.
A DSLR — or other interchangeable-lens camera — will give you the best results and the most flexibility when working with bokeh (“advanced” point-and-shoot cameras that let you adjust the aperture or focus the lens manually should work as well). If you want background bokeh, switch to Aperture Priority mode (or Manual mode if you feel comfortable with it), and set the camera to a lower aperture setting, which will increase the amount of background blur in your photos. (If you don’t know how to change the aperture setting on your camera, refer to your camera’s manual — it’s different for every camera.)
If you need to get a feel for how aperture settings work, try taking photos of objects around your house or your neighborhood. Take multiple photos at different aperture settings and at different distances, and make note of the differences between the photos. (For a preview of how your shots would look without actually snapping a bunch of test photos, use your LCD viewfinder and hold down your shutter button halfway once you frame your shot.)
Now frame your shot, focus on your subject, and shoot away. Don’t be afraid to experiment with the aperture setting to get a feel for how different settings impact the photo.
For photos that use bokeh of lights as the main subject (which I call “foreground bokeh”), you need to shoot at night. For best results, use a tripod or monopod if you have one. To pull off this effect, switch your camera’s lens to manual focus (if it isn’t already), and scope out the scene you want to shoot. Street scenes make good subjects, as do buildings or light displays. The lights on carnival rides make for interesting subjects, too.
Next, make sure you adjust the focus so the subject is blurred out to your liking, and press the shutter button to take your photo. The aperture setting will affect the shape of your bokeh. For large, spherical blobs, use a lower aperture setting; for smaller, polygon-shaped bokeh, use a higher aperture setting. There’s no right or wrong way to use bokeh, so again, experiment with it to get a feel for how different settings change how your photos turn out.
If you have a point-and-shoot camera that lacks manual focus or aperture settings, you may not be able to achieve foreground bokeh in all your photos without resorting to some trickery, but it’s certainly possible.
With a point-and-shoot that lacks manual controls, you need fool your camera into putting the subject of your photo out of focus. While using your point-and-shoot’s Macro mode, point the camera at an object close up, lock the focus by holding the shutter button down halfway, pull away from the close-up object and frame your shot, and finally press the shutter button the rest of the way down to take your photo.
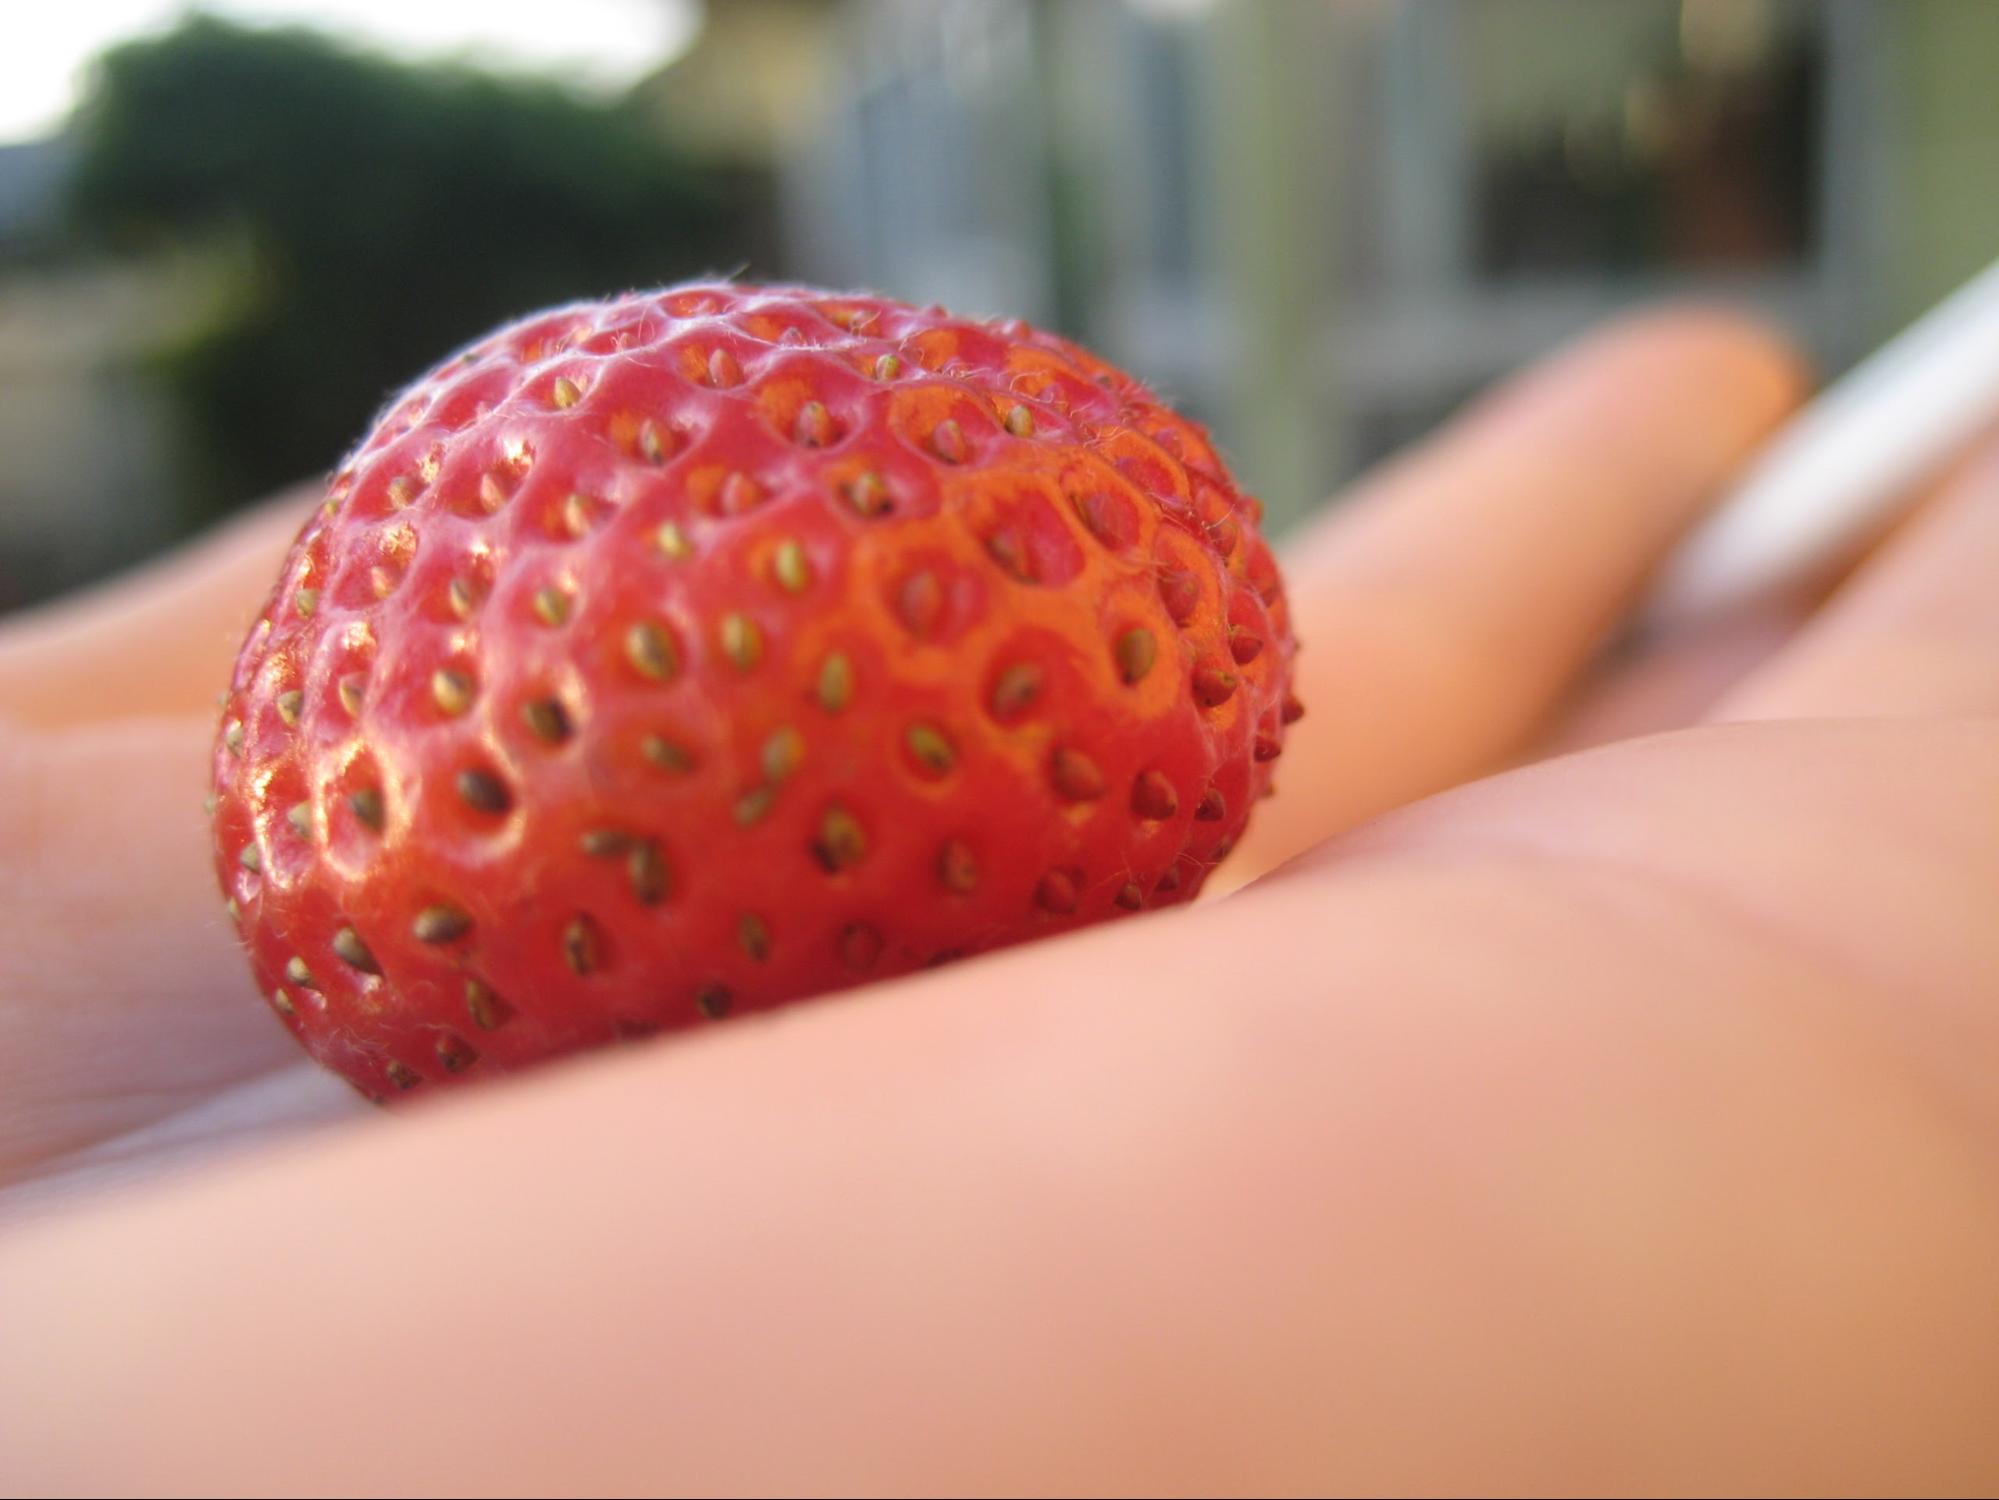
Getting background bokeh on a point-and-shoot is an easier proposition. When you shoot objects close up using your camera’s Macro mode, you might be able to get some good bokeh effects in the background. Consider, for example, this photo of a strawberry I took a few years ago. Note the blurring in the backdrop.
Take a similar style of photo at night with multicolored lights in the background, and you can get something like this shot from Flickr user Robert S. Donovan.

If you have an iPhone, you can toy around with the same sort of techniques you’d use on a point-and-shoot to achieve background bokeh on a close-up “macro” photo of an object. Like a point-and-shoot, though, you won’t be able to pull off foreground bokeh.
Another option is to simulate bokeh on your iPhone after the fact using an app. Bokeh Lens ($0.99) lets you apply bokeh effects to any photo in your iPhone’s Camera Roll reasonably quickly and easily. It can be a little tedious because you must manually set a “focus mask” — basically, the area of the photo that the app will not apply the bokeh effect to — and it takes a little work to get it just right. Once you get that down, though, the app is fairly straightforward to use, and the results aren’t bad, either.

Bokeh Lens is designed to simulate background bokeh, but you can make it apply the bokeh effect to almost the entire image by setting the focus mask to a small dot in a dark, non-obvious portion of the photo.
No matter what method you use, remember the basics of composing a photo: Think about the Rule of Thirds, experiment with different angles, and keep it simple — don’t try to cram too much into your shot. Good luck, have fun, and please, share links to your best shots in the comments!