Take Control of OS X Server, Chapter 10: Web Services
This article is a pre-release chapter in the upcoming “Take Control of OS X Server,” by Charles Edge, scheduled for public release later in 2014. Apart from Chapter 1: Introducing OS X Server, and Chapter 2: Choosing Server Hardware, these chapters are available only to TidBITS members; see “Take Control of OS X Server” Streaming in TidBITS for details.
Web Services
The World Wide Web has untold millions of Web sites providing information and interactive services to billions of users. There are many ways to create and host a Web site these days, whether for an individual, family, club, school, or business—or as a staging site for another site to be hosted elsewhere. With OS X Server and a few minutes of configuration, you can have your own Web server.
Although Server’s Web services rely on the industrial-strength Apache Web server software, setting up Server on your own Mac to serve a Web site has a few issues that you should consider before diving in:
- Uptime: Although 24/7 uptime isn’t quite as important for some Web servers as for a mail server (since users will just get a “site not available” error rather than having their email bounce inexplicably), 24/7 uptime is still the goal for most Web servers. If 24/7 uptime (or close to it) matters for your Web site, you might prefer to host it elsewhere and rely on OS X Server for just internal services (what’s commonly called an intranet).
- Performance: Although OS X Server can undoubtedly handle a low-volume Web site with no trouble, if you anticipate significant traffic (hundreds of simultaneous users), performance problems are likely. Areas that could cause slowdowns for users include:
- Your connection to the Internet might not have sufficient bandwidth. Remember that some connections have much more downstream bandwidth for incoming requests than upstream bandwidth for serving data back to those requests.
- Your server hardware might not be up to the task. Although Web services don’t generally require a vast amount of CPU power or RAM, or particularly fast storage, all three can impact performance in high-load situations. Dedicating a high-performance machine to the task can help.
- Interface: OS X Server doesn’t expose all that many of Apache’s settings, and for a production Web server accessed by a large number of users, you’ll likely want to tweak a number of hidden settings via Apache’s configuration text files. You can work in both Apache’s configuration files and Server’s graphical interface, but be aware that updates to Server often overwrite configuration changes you’ve made in Apache’s files.
All this is by way of saying that there’s no shame in relying on a Web hosting service or a virtual private server for a high-volume Web server while utilizing OS X Server’s Web services in a less public scenario.
In this chapter, I’ll walk you through setting up a Web server.
Prepare to Run a Web Server
It’s possible to run a Web server—and any associated Web apps—purely for internal network users. If that’s what you intend to do, you don’t need to worry about the list below. However, for your Web server to receive requests from the Internet—and respond to them—it must be open to the outside, just as a mail server must be open to the outside Internet in order to send and receive Internet email. If you’ve already opened OS X Server to the Internet for mail in Prepare to Run a Mail Server, in Chapter 8, you’re well on your way. Here’s what you need to set up:
- Static IP address: Any Internet server needs a static external IP address so that it’s always available. If you worked with your ISP to assign a static IP address to your server for mail services, nothing more needs to be done in this regard. If not, make sure your server has a static IP address.
- External DNS: As with the mail server, your fake internal domain (
mavserver.pretendco.lanin our example) won’t work for a public Web server since it’s restricted to your LAN. For the purposes of this discussion, we’ll assume you controlpretendco.comas well, and that you have a machine (A) record pointingosx.pretendco.comat your static IP address. You should also set up an alias (CNAME) record that mapswww.pretendco.comtoosx.pretendco.com. - Port forwarding: Fewer ports are necessary for Web services than for mail services, but you should still open port 80 for standard HTTP communication (used for normal
httpURLs) and port 443 for SSL-encrypted HTTP communications (used with URLs that start withhttps).
When it comes to enabling OS X Server’s Web server, there’s an important distinction to draw early on, between the default sites (one is accessible on port 80; the other, an SSL-encrypted site, is accessible on port 443) and custom sites, which offer a few more options.
The key fact about the default sites is that they answer requests aimed at any hostname or IP address. So if your server is called osx.pretendco.com and you point a DNS record at the server for www.pretendco.com, the same site will load for both hostnames. In contrast, custom sites answer requests aimed only at the hostnames for which they’re configured.
The easiest approach is to stick with the default sites, for sure, but if you need flexibility that isn’t available with the default sites, it’s easy to set up a custom site instead.
Configure the Websites Service
To turn on the default Web sites, click Websites in the Server app’s sidebar and then click the ON button.
If you want to be able to run Web applications written in either the PHP or Python scripting languages, select the appropriate checkbox: Enable PHP Web Applications or Enable Python Web Applications. These settings apply to both the default and any custom sites by default. Don’t select these checkboxes if you aren’t sure you need them—you can always do so later, and it’s good security practice to leave unused services disabled.
Once the Status light turns green, click the View Server Website link at the bottom of the pane, as seen in Figure 1.
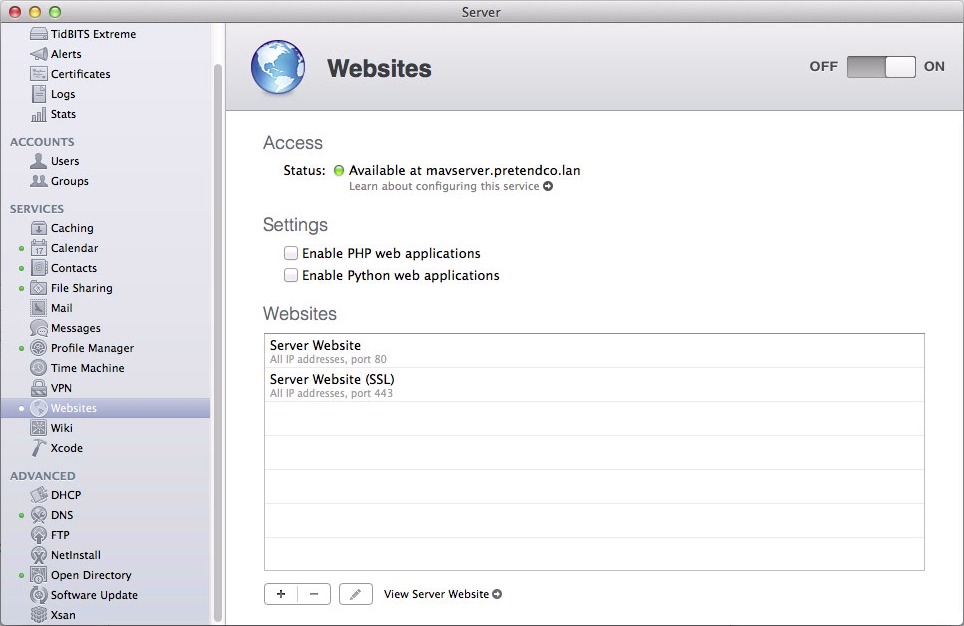
Figure 1: Enable OS X Server’s Web server by clicking the ON button in the Websites pane.
Assuming that the stock OS X Server page (Figure 2) loads in the machine’s default Web browser, you are ready to use OS X Server as a Web server.
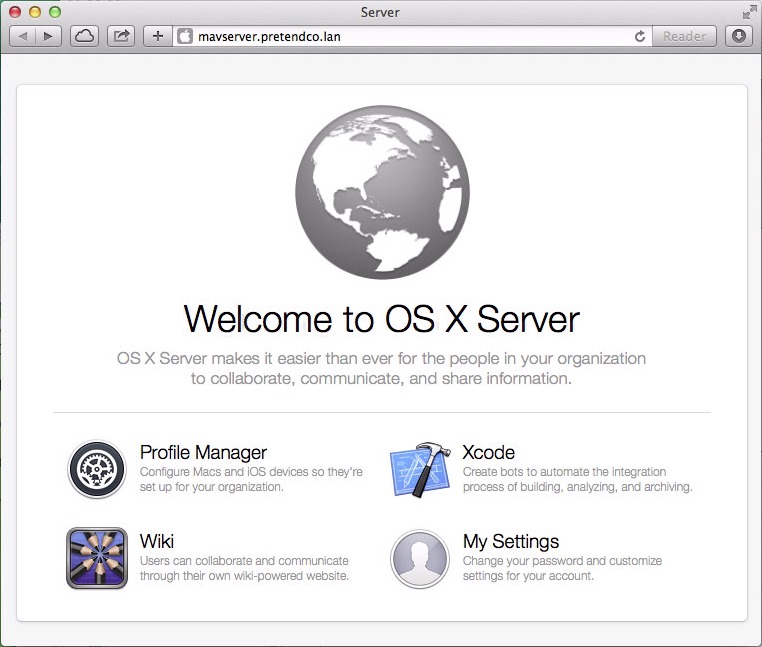
Figure 2: The default sites display this page by default, but you can always replace it later.
The default page is a file located deep within the guts of the Server app’s package file, and you probably won’t want to keep using it. To swap it out, navigate to /Library/Server/Web/Data/Sites/Default/, where you’ll find a bunch of default.html.xx files (where xx indicates the language used). These files are actually aliases to the files stored within the Server app. You can either leave them in place or throw them out, since you can put your own default page in place by copying an HTML file called default.html to the Default folder (Figure 3). (I talk more about Index Files later in this chapter.)

Figure 3: The files that make up your Web site go in the Default folder.
Configure Web Sites
Server provides several settings that you can adjust for the default sites, but since custom sites have the same settings and more, let’s look at them all together.
To get at the site configuration dialog, first open the Websites pane in Server and then do one of the following:
- Configure a default site or an existing custom site: From the Websites list, double-click the site. The site configuration dialog appears (Figure 4). When you finish making changes (described ahead), click the Done button.
- Create and configure a custom site: Click the plus
 button to bring up the site configuration dialog (Figure 4). Once you’ve set up the site in the dialog (explained ahead), click the Create button.
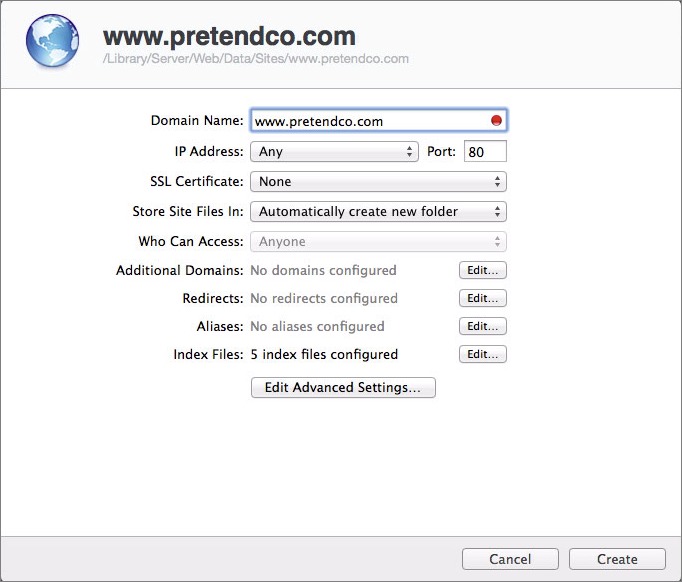
Figure 4: You set up a Web site in the site configuration dialog. Depending on the nature of the site, your options here may be slightly different.
Many settings shown in the figure above require explanation. We’ll go through them all in the text ahead.
Domain Name
The first and most important setting for a custom site is the domain name (really the hostname) that the site will be accessible from. If this site is meant to be accessible from the outside Internet, this hostname must be configured appropriately in your external DNS.
Default sites lack this option since they respond to all names that resolve to your server. Or, to be more precise, they respond to all names that are not otherwise assigned to a custom site.
In our example, the internal name of the server is mavserver.pretendco.lan and we’ve defined external names of osx.pretendco.com and www.pretendco.com. Initially, the default site will appear when you enter any of those hostnames into a Web browser. But if you create a custom site that answers to www.pretendco.com, the files in /Library/Server/Web/Data/Sites/www.pretendco.com/ will be used instead.
IP Address
The IP Address pop-up menu lets you choose which IP address the site listens on. In most cases, leave it set to Any, which means that the site will be accessible from every IP address that the server is configured to use.
The default sites lack this option, since they automatically listen to all IP addresses that the server has.
Port
As I noted previously, Web sites default to running on port 80 for http URLs and port 443 for SSL-encrypted https URLs. But you can run a Web server on any port you like—just enter the port here. 8080 is a common alternative port, but all that matters is that you map it from the outside to the inside on your router (Port Forwarding, in Chapter 8, has a quick look at doing this on an AirPort base station) and that it not conflict with any other service’s port.
The default sites lack this option since they’re hard-wired to work on port 80 and port 443 respectively.
SSL Certificate
If you want to protect your site’s communications with SSL encryption, you must choose an SSL certificate from this pop-up menu. There are many reasons for running a site with SSL-encrypted communications but a simple way to think about it is that if your site includes any forms, particularly those that ask for personal information from users, using SSL is a good idea.
Throughout this book, I’ve said that you can generally stick with the self-signed SSL certificate that was created when you enabled push notifications during the initial setup. This is the one place where that’s not true—if you choose your self-signed SSL certificate from the pop-up menu, all communications to and from your Web server will be encrypted, but whenever users connect to your site, they’ll be told that your certificate can’t be trusted (Figure 5). Needless to say, in this day and age of sites being exploited, that message will scare off most users.

Figure 5: If you rely on your self-signed certificate to protect an SSL-encrypted site, users will see this dialog every time they visit.
The solution is to purchase a trusted certificate from a certificate vendor—start the process by generating a certificate signing request (CSR) and submitting it to a certificate vendor. In the Server app, click Certificates in the sidebar and then click the plus ![]() button to get started with generating the CSR.
button to get started with generating the CSR.
The default site that listens on port 80 doesn’t have an SSL Certificate option, but the default site that listens on port 443 does.
Store Site Files In
By default, the files that make up your Web site are stored in /Library/Server/Web/Data/Sites/ but there’s no requirement that they stay there. There are two main reasons you might want to move them:
- The
Libraryfolder is located on your boot drive, but it’s often a good idea to separate service data from the operating system, by putting the service data on an external drive. That way, if the machine dies, you can easily move the external drive to a different machine running Server and point that copy of Server at the drive. - Anyone who will be building or maintaining the Web site needs access to the site’s folder, and the easiest way to enable that is to store it in a place that’s shared via file sharing. You can even share it as its own volume, so that anyone working on it can mount it in the Finder and work with files as though they were local.
To change the location, choose Other from the Store Site Files In pop-up menu and select the desired folder.
Who Can Access
The Who Can Access pop-up menu is set to Anyone by default, which means that anyone can access all the pages on your site without needing to authenticate. If you’re placing sensitive information on your site, you might wish to restrict access to particular groups of users (see Work with Groups, in Chapter 4).
You can restrict access to the entire site, or you can limit access on a folder-by-folder basis:
- Restrict the entire site: Choose a particular group from the Who Can Access pop-up menu. Now, when a user tries to access any page on the site from a browser, he sees an HTTP authentication dialog (Figure 6).
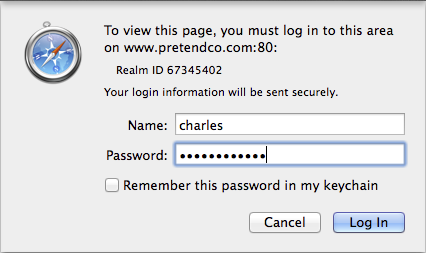
Figure 6: To load a page in a restricted Web site, enter the credentials of a user in the appropriate group.
- Limit access to part of the site: Choose Customize from the Who Can Access pop-up menu to bring up the Customize Access dialog showing all the folders at the top level of the site’s folder. For each folder, click the Group pop-up menu and choose the group that may view the content of that folder (Figure 7). Click OK.
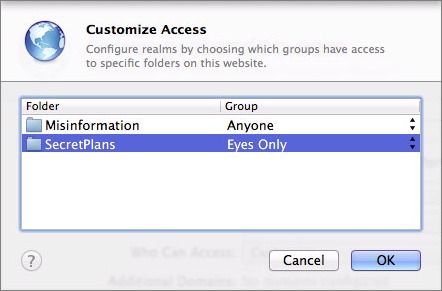
Figure 7: Specify which group should be able to view each folder in the Customize Access dialog.
Additional Domains
It’s common to configure a Web site to respond to both the domain name and the full hostname of the machine—pretendco.com and www.pretendco.com in our example. But by default, a custom site responds to only the name specified in the Domain Name field (and the default site responds to everything else).
To specify any additional hostnames that a custom site should respond to, click the Edit button next to Additional Domains, click the plus  button in the Additional Domain Names dialog, and enter the desired hostname (Figure 8). As needed, you can click the plus
  button repeatedly to enter more domain names. Click OK when you finish.
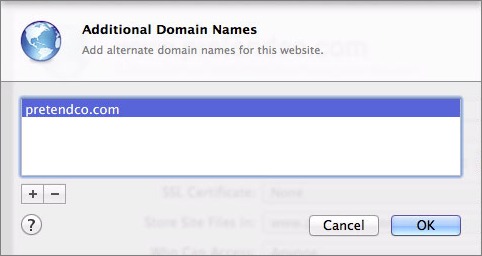
Figure 8: You site will respond to additional hostnames entered here.
Redirects
As you set up your Web site, I’m sure you’ll put lots of thought into naming and organizing it’s files and folders so that the site has sensible URLs (you will, right?). But over time, things change, and you may end up with multiple Web sites running on one or more Web servers. To keep the URLs from your original site working (which users may have bookmarked, or which may have been crawled by search engine robots), you can create redirects from one site to another. Or, if you want all traffic to and from your site to be encrypted, you might want to redirect your default site on port 80 to the SSL-encrypted site on port 443.
To set up redirects, click the Edit button next to Redirects and then click the plus  button to open the configuration dialog (Figure 9).
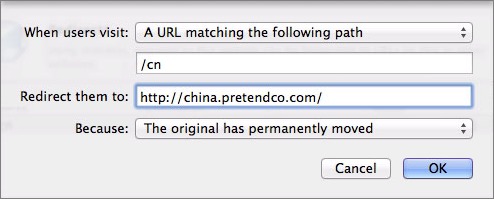
Figure 9: Configure your redirect with the pop-up menus and fields.
In the the configuration dialog, pick an option from the When Users Visit pop-up menu:
- A URL matching the following path: Choose this, for instance, to redirect everything in the path
/cnto the company’s Chinese-language version of the site athttp://china.pretendco.com/. In the field below the pop-up menu, enter a path at the current site. - A URL matching the following regular expression: A regular expression matches patterns of text rather than specific strings. You can get started with regular expressions in redirects in the Apache mod_rewrite module’s documentation. If you’ve chosen this option, in the field below the pop-up menu, enter a regular expression to match in a requested URL.
With the above two options, choose from the Because pop-up menu, whether the original has moved temporarily (HTTP status code 302) or permanently (HTTP status code 301). The difference matters mostly to search engine robots, which know to stop visiting a URL that is redirected permanently, replacing it with the new URL. With a temporary redirect, search engine robots continue visiting the original URL in the future. - This website: If you choose this option, enter the URL for the destination Web site in the field that appears. If you are configuring a redirect for Server’s default site running on port 80, in addition to redirecting to a URL that you enter by hand, you can choose the SSL-encrypted default site running on port 443, or any custom site defined in Server.
To save your changes, click OK in the configuration dialog and again in the Redirects dialogs.
Be sure to test your redirect right away to make sure it’s doing what you expect.
Aliases
Aliases are a little like redirects, but for folders on local volumes. Imagine that you want to make a collection of videos accessible via the Web, but you don’t want to bury the Video folder containing them in the hierarchy of your Web site. You might think you can put a normal Finder alias of the Video folder in your site’s folder, but that won’t work (Web browsers will download the Finder alias file, rather than seeing it as a directory).
To solve this problem, click the Edit button next to Aliases and then click the plus  button to add an alias.
As with the redirect configuration dialog (discussed just above), you can choose between “A URL matching the following path” and “A URL matching the following regular expression” in the When Users Visit pop-up menu. Then, enter the path or regular expression in the field below the pop-up menu, click the downward-pointing arrow ![]() to the right of “Show the contents of,” and select a folder (Figure 10).
to the right of “Show the contents of,” and select a folder (Figure 10).
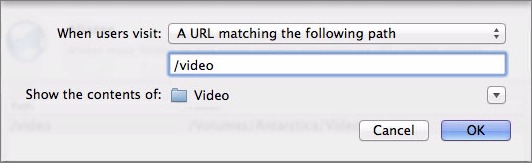
Figure 10: Enter the path that you want to resolve and the folder to which the alias should point.
To save your changes, click OK and then click OK again in the Aliases dialog.
Index Files
Whenever a browser requests a URL that ends in a slash, like http://www.pretendco.com/, the Web server actually sends what’s called an index file. This file may be a standard HTML file or it may be something like a PHP script for a dynamic site, and in fact, a site can have multiple files that are considered index files.
By default, all Web sites in Server understand five index files: index.html, index.php, /xcode/, /wiki/, and default.html. (The /xcode/ and /wiki/ entries are for Server’s internal use.)
Although adding or reprioritizing index files isn’t terribly common, it might be useful, for example, if you’re moving a bunch of files over from a site previously running on Windows that used index.htm or home.htm as the index file name.
Click the Edit button adjacent the Index Files label. In the Index Files dialog, you can add files by clicking the plus  button and rearrange them so Server uses the most likely ones first by dragging them.
Advanced Settings
This chapter has already discussed quite a few settings, but Server has more. Click the Edit Advanced Settings button at the bottom of the site configuration dialog to open the Advanced Settings dialog (Figure 11).
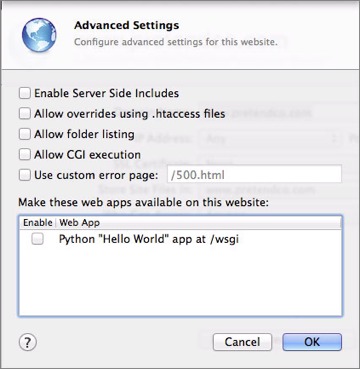
Figure 11: Access more settings in the Advanced Settings dialog.
You’re less likely to need these settings, so let’s look at them quickly:
- Enable Server Side Includes: A server side include is a directive that, when placed in an HTML file, is replaced on the fly with other content by the server. Server side includes are useful for inserting today’s date, the modified date of a file, the results of a CGI, or even the contents of another HTML file. For instance, a server side include could insert the contents of a
footer.htmlfile at the bottom of every page on your site. Select this checkbox to make it possible to use server side includes. For more information on creating them, see Apache’s Introduction to Server Side Includes. - Allow overrides using .htaccess files: In OS X Server in general and the Websites service in particular, authentication to restricted directories is handled via groups defined in Server (see Who Can Access, earlier). In a generic Apache environment, however, access is controlled via a
.htaccessfile. Select this checkbox to override OS X Server’s access controls with a.htaccessfile. Place the file at the top level of the site’s folder.
Be aware that you won’t be able to see the.htaccessfile in the Finder, since OS X doesn’t display files that start with a period, but you’ll still be able to see and work with it in Terminal.
- Allow folder listing: If a directory doesn’t have an index file (see Index Files, earlier), selecting this checkbox causes Server to return a simple listing of all the files and folders within the directory. Selecting this checkbox is a handy way of providing downloadable files via a Web site, but don’t select it unless you intend to use it and plan to be careful, since letting users see into directories that lack index files is a bit of a security hole.
- Allow CGI execution: CGIs, or Common Gateway Interface scripts, are a way of extending the capabilities of a Web server with custom applications. If you want CGIs to work on your server, select this checkbox. For a huge collection of CGIs you can download to add forums, run surveys and polls, build a shopping cart and more, check out The Resource Index.
- Use custom error page: If you want to get clever, like Scott Adams of Dilbert fame did, you can select this checkbox and specify a custom error page to appear whenever a user tries to access a URL that doesn’t exist on your server (Figure 12). Error pages are also known as 404 pages, after the HTTP status code that’s returned.
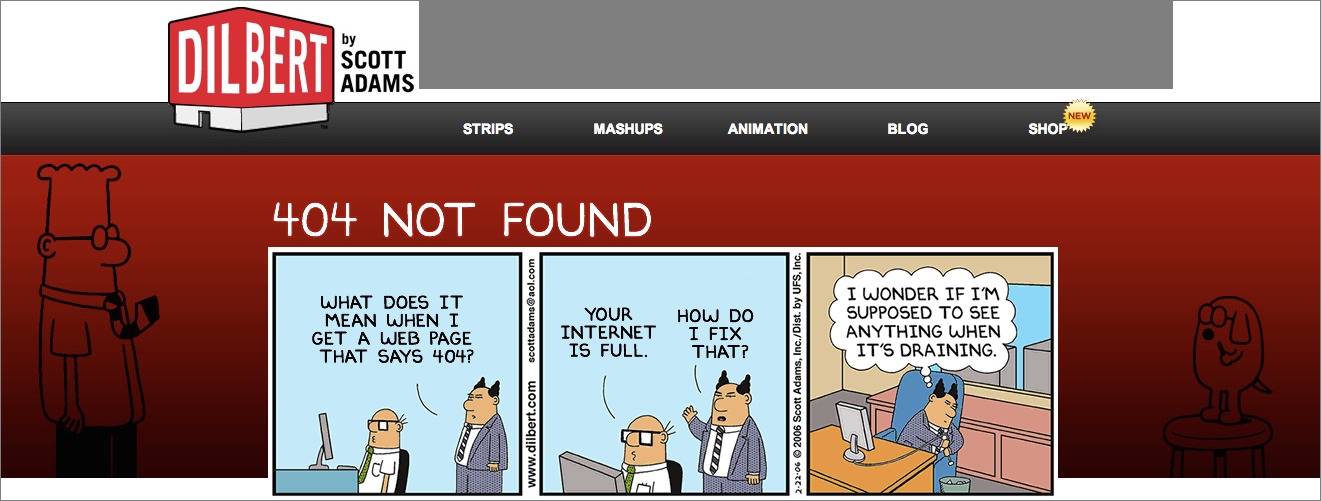
Figure 12: When in doubt, drain the Internet.
- Make these Web apps available on this Web site: If you want to install additional Web apps on your site, you need to select this checkbox. However, you must also do a significant amount of additional configuration that varies by the app, so refer to the OS X Server-specific installation directions for the app in question.
Read More: About | Chapter 1 | Chapter 2 | Chapter 3 | Chapter 4 | Chapter 5 | Chapter 6 | Chapter 7 | Chapter 8 | Chapter 9 | Chapter 10 | Chapter 11 | Chapter 12 | Chapter 13 | Chapter 14
Start the discussion in the TidBITS Discourse forum