TidBITS#1193/30-Sep-2013
Apple has quietly updated its iMac lineup with faster CPUs, faster SSDs, 802.11ac Wi-Fi, and beefier graphics processors. Less welcome are iOS 7’s animations, which, as Adam Engst explains, are making some users physically ill. If you’re sick of paying too much for printer ink, Josh Centers reviews the economical Brother HL-2270DW laser printer. Those who have switched to a paperless workflow may be more interested in Michael Cohen’s review of Smile’s PDFpen Scan+ scanning and OCR app for iOS devices. Looking for a place to set your iPhone? Join Josh as he plays the Game of Docks with Apple’s new iPhone 5s Dock and Twelve South’s HiRise. If you use two-factor authentication with your iPhone, be sure to read Glenn Fleishman’s guide on what to do if you lose that second factor. In our latest FunBITS installment — in plenty of time for Halloween — Josh looks at… er… listens to Vanished for the iPhone, an audio-only survival horror game. Finally, don’t miss the three bits of original content in ExtraBITS this week, where we use only 125 words total to review the iPhone 5s Case, cover iOS 7.0.2, and explain how to add weather to the iPad’s Notification Center in iOS 7. Notable software releases this week include Pixelmator 2.2.1, Typinator 5.7, TextExpander 4.1, and ReadKit 2.3.1.
Apple Updates iMac with Faster CPUs and 802.11ac Wi-Fi
Apple has quietly updated its iMac line with faster CPUs that use Intel’s new Haswell micro-architecture, faster SSDs, beefier graphics processors, and 802.11ac Wi-Fi (for more information, see “802.11ac Promises Better Coverage, but Won’t Hit Advertised Speeds,” 13 June 2013). The new iMacs retain the same industrial design and ports as the late-2012 models, along with the same prices.

The base iMac model starts at $1,299 and features a 21.5-inch IPS screen with a resolution of 1920-by-1080, a 2.7 GHz quad-core Intel Core i5 processor, 8 GB of RAM, a 1 TB 5400-rpm hard drive, and Intel Iris Pro graphics. You may wonder how Intel Iris Pro stacks up to the Intel HD 4000 graphics processor found in newer Apple laptops. AnandTech ran comparison benchmarks, and found that the Iris processors are nearly twice as fast as the Intel HD
4000. To put things into perspective, the Intel HD 4000 is powerful enough to support the graphically intensive game BioShock Infinite (for a review, check out “FunBITS: In Praise of BioShock Infinite for Mac,” 6 September 2013). Integrated graphics have came a long way over the years.
You can outfit the base iMac to 16 GB of RAM (add $200), plus upgrade the storage to a 1 TB Fusion Drive ($200) or either a 256 GB ($200) or 512 GB SSD ($500). The new iMacs now support PCIe-based flash storage, which Apple claims is up to 50 percent faster than last year’s iMac SSDs.
The high-end 21.5-inch model, starting at $1,499, swaps in a 2.9 GHz quad-core Intel Core i5 processor and a Nvidia GeForce GT 750M graphics processor with 1 GB of video RAM. It has the same customization options as the base model, except it can also be upgraded to an optional 3.1 GHz Intel Core i7 for $200 more. If you want more RAM in one of the 21.5-inch iMacs, have it added when you order, since the RAM is not user-accessible. Both 21.5-inch iMacs retain the same clock speeds as their predecessors.
That’s not true of the 27-inch models, which ramp up their CPU clock speeds from the late-2012 iMacs. The base 27-inch model starts at $1,799 and kicks the processor up to a 3.2 GHz quad-core Intel Core i5 and the graphics processor up to a Nvidia GeForce GT 755M with 1 GB of video RAM. Like all the iMac models, it features 8 GB of RAM standard, but unlike the 21.5-inch model, you can add more yourself. It comes with a 1 TB hard drive standard, but it spins at 7200 RPM. The base 27-inch iMac can be ordered with up to 32 GB of RAM (add $600). Storage options include a 3 TB hard drive ($150); a 1 TB ($200) or 3 TB ($350) Fusion Drive; and a 256 GB ($200), 512 GB ($500), or 1 TB ($1000) SSD.
The top-of-the-line 27-inch iMac starts at $1,999 and upgrades the processor to a 3.4 GHz Intel Core i5 and the graphics processor to a Nvidia GeForce GTX 775M with 2 GB of video RAM. It can be ordered with the same options as the base 27-inch, but also with a 3.5 GHz quad-core Intel Core i7 ($200) and/or a Nvidia GeForce GTX 780M with a whopping 4 GB of video RAM ($150).
All models of the iMac feature an SDXC card slot, four USB 3.0 ports, two Thunderbolt ports, Mini DisplayPort output (though you’ll need to buy DVI, VGA, and dual-link DVI adapters separately), Gigabit Ethernet, FaceTime HD camera, the capability to drive an external display at up to 2560-by-1600, stereo speakers, dual microphones, a headphone port, and Bluetooth 4.0.
Overall, while these new iMacs are not a drastic change from last year’s models, the addition of faster CPU clock speeds, 802.11ac Wi-Fi, and more powerful graphics processors make the 2013 iMac lineup a welcome enhancement. Now if only you could replace a failed hard drive without a set of suction cups…
iOS 7 Animations Cause Nausea for Some
Apple made a big fuss at the introduction of iOS 7 about how most of the skeuomorphism had been removed, ranging from the green felt of Game Center to the stitched leather of Calendar (see “Apple Unveils Completely Redesigned iOS 7,” 10 June 2013). At the same time, the Apple executives showing off the new look were almost reverent when talking up iOS 7’s new visual effects, including the parallax effect on the Home screen that gives the impression of depth, icon animations after unlocking, and cinematic representations of current conditions in the Weather app.
Now that users have spent some time with iOS 7, the reaction to these new motion-based effects is not universally positive. Even Apple seems to acknowledge that by making it possible to turn off the parallax effect in Settings > General > Accessibility > Reduce Motion (see “Peering at iOS 7 for the Vision Impaired,” 19 September 2013). That control says it will also “reduce the motion of the user interface,” but doesn’t provide any additional details or appear to do anything else.
In particular, that setting doesn’t get rid of the animation that causes icons to fly in to the Home screen when you unlock your iOS device or the zooming on the background wallpaper when opening and closing folders. I find these animations annoying and time-wasting, and I’d shut them off if I could, but they don’t significantly affect my use of the iPhone.
That’s not the case for designer Jenni Leder, who explains in a blog post how various animations in iOS 7 trigger her motion sickness and make her physically ill. She’s far from alone in experiencing nausea in response to iOS 7 animations, to judge from coverage on Stuff and a lengthy thread in the Apple Support Communities.
In general, it seems that people with certain vestibular disorders have trouble with such animations, as well as some video games, 3D movies, and more. The problems can even be related to the particular display technology.
Of course, animation in iOS isn’t new — there has long been a zoom effect after unlocking and when returning to the Home screen from an app. But there does seem to be something qualitatively different about iOS 7’s animations, such that they generate the same kind of nausea-inducing effect as a first-person shooter game or 3D film. Perhaps it’s a bit like the “uncanny valley” that causes revulsion when human features are almost, but not exactly, natural. If the animation is too realistic, particularly with regard to the simulation of three dimensions on a 2D screen, it may set off the viewer’s motion sickness.
Regardless, it’s clear that Apple needs to acknowledge that iOS 7’s eye candy has non-trivial side effects, and the company should beef up the Reduce Motion option to turn off unnecessary swooping and zooming. Jenni Leder encourages those who are affected to file a bug report with Apple, mentioning bug number 15074144 so the duplicate reports can be tallied. You can also send email to [email protected], though Apple reportedly takes such informal feedback less seriously than bug reports.
This shouldn’t be a controversial move, since some of iOS 7’s visual effects serve the same purpose as the Find My Friends app’s stitched leather. That is to say, none whatsoever. Is there any usability difference in a Home screen whose icons don’t fly in after you unlock your iPhone? Does a slowly moving cloud in the background of the Weather app change your understanding of the weather conditions?
Note that I’m just suggesting an accessibility option here, and certainly not arguing for a complete elimination of motion in the interface. Much of iOS’s interface motion is tied to user actions — the icons on the Home screen sliding as you swipe from page to page, for instance — and that direct feedback is essential for the touch interface to work.
But it’s important to distinguish between visual effects that are core to the user experience of iOS and those that merely make it look cool. Eye candy should be optional, given its negative consequences on a portion of the population. And who knows, in a few years, it might seem as dated as simulated stitched leather and green felt.
Why the Brother HL-2270DW Laser Printer Sucks Less
“I’m thinking printers,” said Tim Cook as he first took the reins as Apple CEO. “Laser, ink-jet, double-sided, color, black-and-white — the future of technology is in printers. I am absolutely convinced of that,” he said.
OK, not really. The above quote was actually taken from an Onion parody article written shortly after the resignation of Steve Jobs.
But all jokes aside, and despite the popularity of Joe Kissell’s “Take Control of Your Paperless Office, Second Edition,” we still need printers. While every other technology seems to have improved by leaps and bounds, printers are still as terrible as they were a decade ago. In some ways they’re even worse, with cartridges specifically designed for early failure, ink being nearly twice as expensive as Chanel No. 5 perfume, and most printers not even including a cheap USB cable in the box.
(TidBITS publisher Adam Engst tells me that printers in the early days of the Mac were actually pretty good, with dot-matrix ImageWriters being built like tanks, and a variety of excellent, if pricey, laser printers from Apple, HP, and others.)
When I purchased my first iPad in 2011, I thought I was done with printers. “I can just save documents on my iPad to carry with me, no printing required,” I thought. That worked great, until I needed to print a shipping label. You can’t tape an iPad to a package.
I got by for a long time by using one of the many laser printers in my office, but I lost that option when I started working from home. We had an old HP Deskjet 3050A multi-function inkjet (print, scan, and copy, though no faxing), which even supported AirPrint, Apple’s zero-configuration protocol for printing from iOS devices. I thought I was happy with the HP Deskjet 3050A, until a fresh black cartridge expired after a month and about 30 prints. That’s the problem with nearly all inkjets — fail to print regularly, and you’ll end up with dried-out cartridges and clogged print heads at the worst possible time.
That was the last straw. After what seemed like years of consideration, I broke down and bought a black-and-white laser printer: the Brother HL-2270DW (such a euphonious moniker!), which has long been recommended by the Wirecutter. When I purchased the Brother, it was on sale for $75, but even at its usual price of about $110, it’s a good deal.
To be brutally honest, like most printers, the Brother HL-2270DW stinks. But it stinks less than most of the competition, and it’s cheap. For starters, it’s noisy. Fire up the printer, and it will emit an annoying hum for several minutes until it goes back to sleep. The printing itself is slightly louder, but I expect that. The minutes of humming afterward grinds my gears. But once it’s asleep, it’s absolutely quiet.
As with most of its kind these days, the Brother HL-2270DW does not include a USB cable, which isn’t all bad, since it’s Wi-Fi enabled (it also has a wired Ethernet port). But my advice is to spend an extra $5 for a USB cable if you don’t have one lying around, as the wireless setup on the Mac is excruciating. I spent a couple of hours trying to get it to work, to no avail. However, after hauling my MacBook Pro across the room to connect it to the printer, re-running the setup application, and choosing the USB option, I was up and running in minutes, Wi-Fi and all.
Speaking of Wi-Fi, I should note that this printer sadly does not support AirPrint. Initially, I thought I might be able to work around this by plugging it into my AirPort Express base station and sharing it from there, but no, Apple hasn’t seen fit to layer AirPrint support on top of the AirPort base station’s wireless printer sharing. So if you frequently use AirPrint, the Brother probably isn’t the printer for you.
If you print only occasionally from an iPhone or iPad, you could instead run handyPrint (free) or Printopia ($19.95) on your Mac, either of which provides a virtual AirPrint printer that can route print jobs to your wireless printer. The downside of these options is that your Mac must be powered on whenever you want to print.
Like almost every printer, the Brother ships with a “starter” toner cartridge that prints only up to 700 pages. I don’t intend to print much, so I can live with this, even though it’s clearly a way of increasing revenues from the printer while maintaining a low list price. Replacement toner cartridges run about $45 and yield 2,600 pages, which is less than $0.02 per page. The drum unit, which transfers the toner to the paper, has a lifespan of about 12,000 pages. Given that the drum unit costs about $110, about the same as the printer itself, I’ll probably just buy a new printer when
that day comes.
But what about printing itself? That’s where the Brother shines. Once the printer wakes up, it fires out sheets of paper at 27 pages per minute. Text is crisp, as you’d expect from a laser printer, thanks to its 2400-by-600 dpi resolution. It has a 250-sheet paper tray for letter or legal size paper, and a manual feed slot for thicker paper. Finally, the printer features a duplex mode that prints on both sides of a page automatically, but using it tends to result in slightly curled pages, so if you’re a heavy duplexer, this probably isn’t your printer.
What about color prints? I realized that I very rarely need to print in color. In fact, the main time I require color is for photos, something that inexpensive inkjets do poorly anyway. Sure, a high-quality Epson inkjet can print dazzling photos, but by the time you buy the printer, good paper, and Epson’s official ink (knockoff inkjet cartridges often work badly or not at all), the cost per page is excessive. My local Walgreens prints photos for pennies, and they’re ready to pick up in minutes.
For now, then I can recommend the Brother HL-2270DW monochrome laser printer for many people. Like every printer, it has its problems, but it’s wireless, fast, solidly built, and inexpensive to purchase and operate. Printers may not be sexy enough for Apple to revisit, but for millions of regular people, they’re a necessary evil.
PDFpen Scan+ Puts a Scanner in Your Pocket
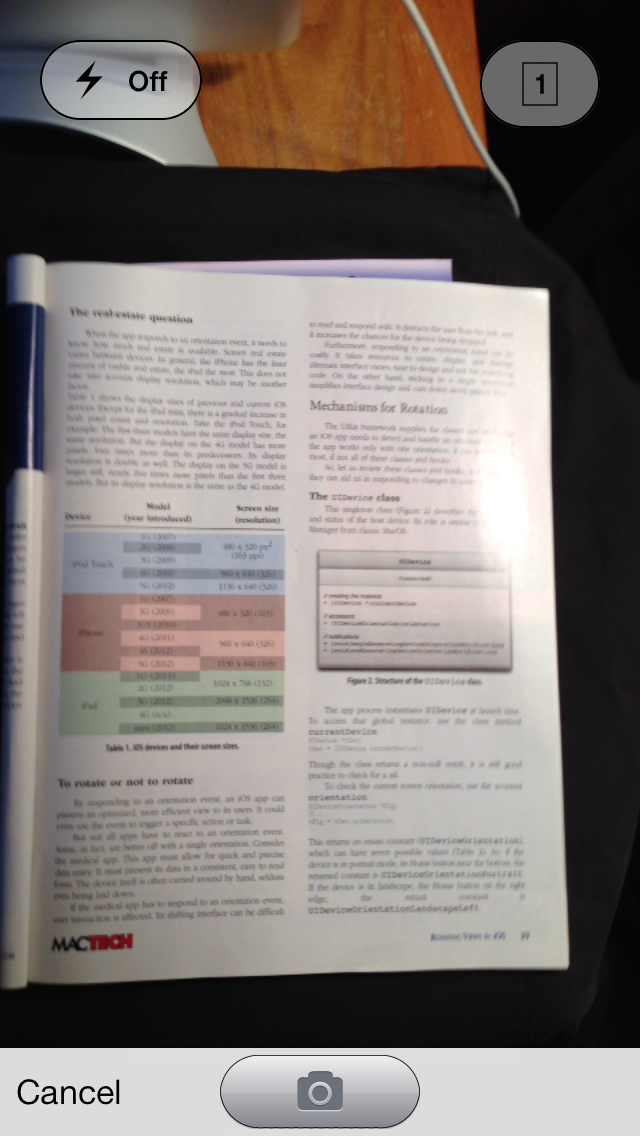
Hot on the heels of iOS 7 (see “iOS 7 Pre-flight Checklist,” 18 September 2013), Smile Software has released a new iOS app, the $4.99 PDFpen Scan+, that turns your iPad or iPhone into a document scanner. You can make use of the camera in your device to scan a document directly — the app offers its own camera interface for that — or you can use images from your device’s photo collection.
Yes, I said “images” — with PDFpen Scan+ you can combine multiple images into a single multi-page document. The result is a PDF that you can share easily with Smile’s PDFpen for iPad or iPhone, or with a number of cloud services, including iCloud, Dropbox, Evernote, Google Docs, Alfresco, and Box. The app also features page-edge detection and an OCR (optical character recognition) capability that supports sixteen languages.
That, of course, all sounds great — in theory. But how does PDFpen Scan+ work in practice? I tested it out, and discovered that it works well enough as a pure image scanner, but the OCR feature has lots of room for refinement and improvement.
Scanning with PDFpen Scan+ — When you first launch PDFpen Scan+ on an iPhone, for example, you see the Documents screen along with a set of simple buttons along the bottom: a camera button, for shooting a document and converting it to PDF; an images button, for creating a PDF from images stored in your Photos collections; and an add button, for importing copies of PDFs or images from other sources, such as Evernote or Dropbox.

Tap the camera button to take a picture of the document you want to make into a PDF. The interface is straightforward, although it uses the old iOS 6 style shutter control button that looks out of place in iOS 7. But that’s just a cosmetic issue: the real issue is that it is just darn hard to hold the camera still enough to get a clear, clean picture of a text document: Smile recommends you exhale and shoot when your body is at its most still. You can accept or reject each picture, and you can specify whether your document will
consist of a single image or multiple images by tapping the number button at the top left of the screen.
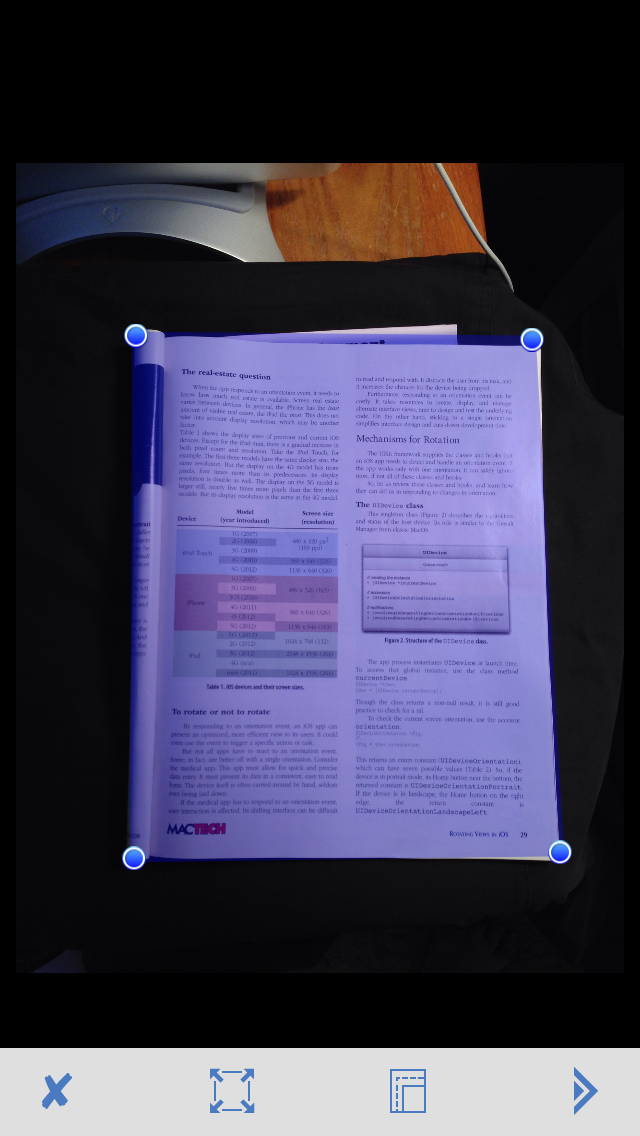
After you have taken your best shot(s), you then see the edge-setting screen. When you shoot a paper document against a dark background, the auto-edge detection works quite well; against lighter, less contrasty backgrounds, not so much. Fortunately, the draggable corner-control points make it easy to specify the image area you want to include if auto-edge detection messes up or if you want to capture only a portion of the image. You can also specify the entire image on this screen, set the paper size of the
final document (the default is US Letter), or discard the image and try again. Note that if the selected area created when you set the edges is more trapezoid than rectangle (a common problem when shooting a document at a slight angle), the cropped area is scaled appropriately to fit into a rectangle, eliminating the perspective effect.
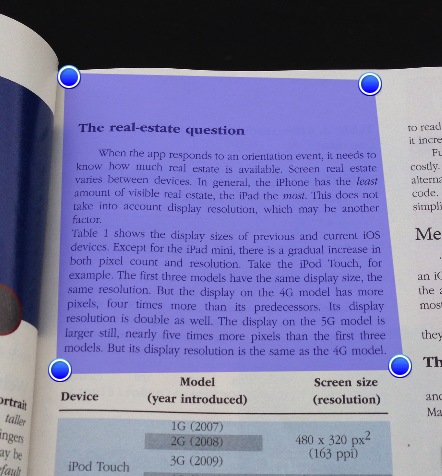
With the edges squared away, you next adjust the image quality itself, using the controls along the bottom of the screen to fix the orientation and to adjust the brightness and contrast of the image. You want to fiddle with these last controls to make the text as legible as you can against the page background,
eliminating shadows as much as possible.

Finally, with the image looking as good as you can make it, you arrive at a screen where you can choose to perform OCR or to add additional pages. Performing OCR is a simple matter of tapping the OCR button and then tapping OCR Document from the menu that appears. The actual OCR process is not fast: yellow bars march down the page image as PDFpen Scan+ identifies text to interpret, and once that stage is done, it then spends some time (as much as a minute or two) digesting and analyzing the results before it adds an
invisible text layer to the PDF.
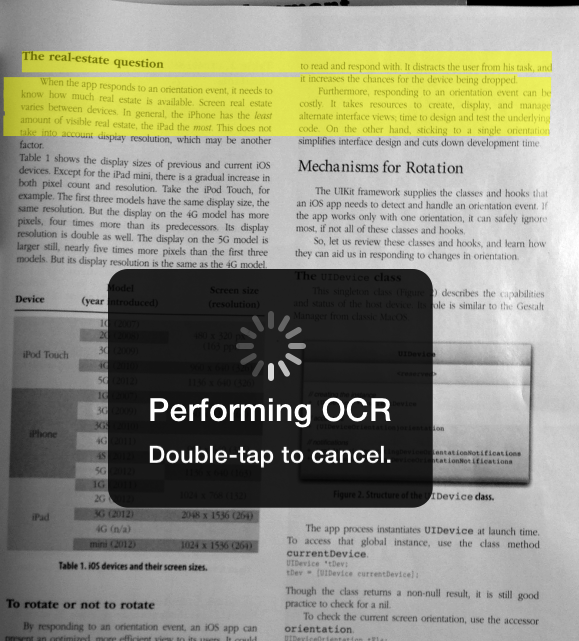
How Well Does PDFpen Scan+ Work? — Unfortunately, the OCR capability is not particularly smart or forgiving. For example, it understands nothing about a two-column page, so while it might include all the text on the page, when you choose Copy Document Text from the OCR menu, you end up with a mashup of text that can read more like a poem by Ezra Pound on a bender than normal prose. And it can easily be baffled by text that, to human eyes, looks quite readable. For example, here is the beginning of text derived from the two-column page I scanned for this article:
The real-estate to and respond with. lt distracts the user from his task, nml

it the chances for the device being dropped.

how much ml estate is esme

. devices. In the iPhOne has the least

the iPzd the moa ThlS not

account display which may be another

costly. it takes tesoumes to create. display. and

inletfau- views; time to design and test the

code. On the other hand. sticking to a single

simplifies design and cuts down

lllllt‘
Even if a text image is of exceedingly high quality, the OCR can do some peculiar things. For example, I took a screenshot on my third-generation iPad of a page from a novel in iBooks and used that for OCR testing. While PDFpen Scan+ managed to recognize almost every word correctly, it would sometimes, inexplicably, swap lines of text so that they appeared out of order when I copied them to the Notes app.
But it can also do an entirely creditable job deciphering other texty images. For example, I shot an exhibit sign at Santa Monica Airport’s Museum of Flying over the weekend, and gave a portion of it to PDFpen Scan+ to munch on.

The resulting interpretation was actually quite good, containing only a few blunders and dropping only an occasional word:
North Amencan

The North American F-86 Sabre (sometimes called the Sabrejet) was a

transonic jet fighter aircraft. The is best known as America's first

swept wing fighter which could counter the similarly-winged Soviet

MiG-15 in high speed dogfights. The was produced as both a fighter-

intereeptor and fighter-bomber. Although developed in the late 1940s and

outdated by the end of the 1950s, the Sabre proved versatile and adapt-

able, and continued as a front-line fighter in numerous air forces.

The F-86 Sabre was the first American aircraft to take advantage of flig ht re-

search data seized from the German aerodynamicists at the end of the war.

Use of a swept wing would solve their speed a slat on the

wing's leading edge which extended at low speeds would enhance low-

speed stability. Its success led to an extended production run of more than

7,800 aircraft between 1949 and i956, by far the most-produced Western

jet fighter.

About this Aircraft

This is an F-86H model that is currently undergoing restoration and will be

finished with a California Air National Guard livery andis onloan from the

National Museum of Naval Aviation.
Bottom Line — On the one hand, PDFpen Scan+ does decent job considering the conditions under which it must obtain images — shaky hands and available light as opposed to a stable flatbed scanner with a cover and its own light-source. In fact, I’m surprised that the images are as good as they are, considering that they are being produced by a device that can fit in my pocket! Frankly, if you need to make a quick PDF of some paper documents while on the go, I can’t think of an easier or cheaper way to do it. Plus, PDFpen Scan+’s tight integration with Smile’s PDFpen apps for iPhone and iPad makes it simple to annotate and mark up the PDFs you make.
At the same time, the OCR results are quite variable, and, all too often, disappointing (though sometimes unintentionally hilarious). Before I could recommend it to a serious road warrior who needs high quality OCR on the go, I’d want to see some significant improvement. However, for casual use I have no qualms: I fully intend to use it on my next trip to the museum!
A Game of Docks: Apple Versus Twelve South
With the advent of the iPhone 5 and the new Lightning connector, Apple did away with its long tradition of offering docks for its pocket devices. However, in the face of falling profits (see “Apple Q3 2013 Results Repeat Higher Revenues and Lower Profits,” 23 July 2013), Apple has reentered the accessory market in a big way, introducing both official docks and cases for the new iPhone 5s and iPhone 5c (for my oh-so-brief look at the iPhone 5s Case, see “39-Word Review of the $39 iPhone 5s Case ,” 24 September 2013). The iPhone 5s Dock is backward-compatible with my
iPhone 5, so I decided to test it out.
However, there’s a new horse in the race. OK, there are a variety of horses milling around in the paddock, but none matches up to Twelve South, which makes some of the finest Apple accessories money can buy. Twelve South’s accessories match Apple’s aluminum aesthetics, with gorgeous products like the BackPack for iMac (an innovative storage shelf that attaches to the iMac’s stand) and our own Michael Cohen’s favorite, the BookArc for iPad (an elevated stand for the iPad). Twelve South recently introduced the HiRise
adjustable stand for the iPhone 5, iPhone 5s, iPhone 5c, and iPad mini.
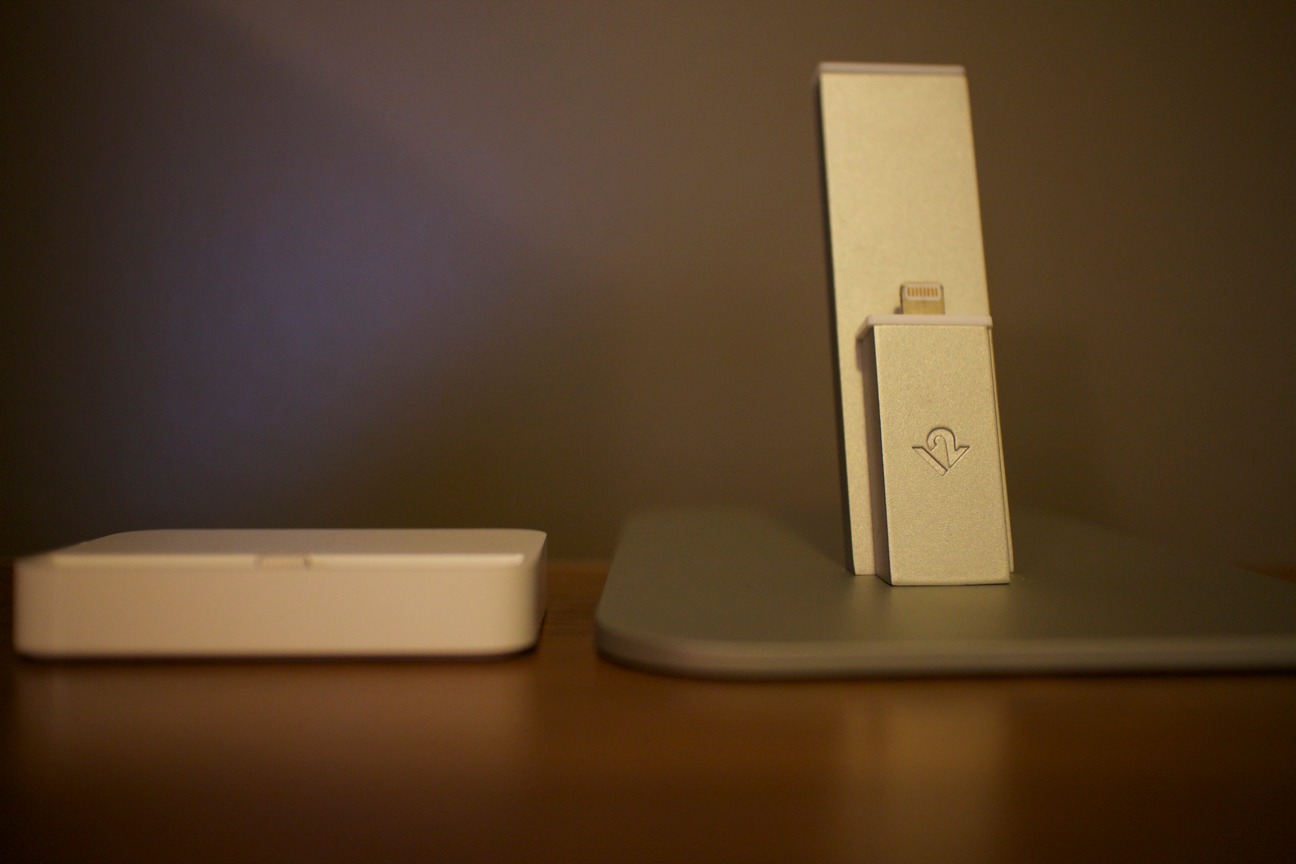
Apple’s iPhone 5s Dock is a tiny plastic rectangle. It measures less than 2.5 inches (6.35 cm) long and less than 1.75 inches (4.45 cm) wide. To use it, just plug a Lightning cable (not included) into the back. If you’re feeling fancy, you can connect a powered speaker to the dock’s line-out port. Just set your iPhone in the dock and you’re done.

Unless your iPhone is in a case, that is. The iPhone 5s Dock is perfectly fitted to the iPhone, so it’s not compatible with even Apple’s official case. This has always been a problem with Apple’s docks, but you’d think the company could have come up with something better after taking a year off.
Twelve South’s HiRise, on the other hand, will accept your encased iPhone, your iPad mini, and just about any gadget that’s small enough with a Lightning port on the bottom. However, with great flexibility comes great complexity. The HiRise is less of a dock and more of a hobby kit.
When you open the (quite nice) HiRise packaging, you don’t have a dock, but rather a dock construction kit, with all the parts you need. There’s a front support, a rear support, a base, a plastic base cap that holds a hex key, four hex screws, and three Lightning cable clips. As with Apple’s docks, a Lightning cable is not included (though that’s probably best, given reports that iOS 7 refuses to work with unofficial Lightning cables).

Assembly isn’t easy, and the instructions aren’t much help. The tricky part is screwing the front support to the base, as it attaches at an angle. So you’re trying to hold two small, angled, aluminum parts together with one hand, as you insert and tighten tiny hex screws with the other. The instructions say to thread the Lightning cable through the front support before assembly, but I found it much easier to assemble first and thread the cable through later.
Once the front support is attached to the base, and the cable is threaded through, you have to attach it to the top of the support with one of the included clips. One clip is for naked iPhones, another for thin cases, and the last for thick cases. The clips insert into the front support only one way, and it’s easy to put them in wrong. And Cupertino help you if you do, because if you insert the clip wrong, it gets jammed and is a pain to remove.
You then have to insert the rear support and screw it to the base via two long holes in the bottom of the base. It’s hard to keep the screws in place. However, the elongated holes make it possible to slide the rear support forward or back to accommodate different case thicknesses. Finally, you clip the Lightning cable into a channel on the bottom of the HiRise, and cover it with the base cap.
There’s no easy way to free your Lightning cable. While you can just unplug the cable from the back of Apple’s dock, with the HiRise you have to unclip it, then route it out of the bottom of the base.
It took me about thirty minutes to assemble the HiRise, and I used to work in machining and sheet metal fabrication! But once assembled, the HiRise is quite attractive, though at about 4 inches (10.16 cm) wide and 5 inches (12.7 cm) long at its widest, it takes up more desk space than the iPhone 5s Dock.
If I were to suggest an improvement for the HiRise, it would be to ship the unit preassembled. That would double the size of the packaging, but would present a much better user experience. I’d also replace the hex screws with thumb screws, removing the need for the included hex key and base cap.
So which dock is more stable? Although you might think the tall HiRise would be less stable than the iPhone 5s Dock, the HiRise’s larger, heavier, aluminum base provides much more stability than Apple’s tiny plastic dock.
How about the Lightning connection? On the HiRise, the iPhone sits on the front support, which is only about 0.63 inches (1.58 cm) wide. It’s easy to nudge the iPhone in such a way as to lose the connection. I thought with its wider support, the iPhone 5s Dock would provide a better connection, but I was wrong, as it’s just as easy to knock the iPhone connection loose in Apple’s dock. Turns out, Lightning, while it can be used in a dock, just isn’t meant for docking.
The irony is, while it’s all too easy to disrupt the Lightning connection, it’s actually quite difficult to remove the iPhone from either dock. Forget about just lifting it off the dock with one hand; you need to hold either dock down while you lift up on the iPhone. However, with a little practice, you can remove the iPhone from either dock with one hand. For the HiRise, the trick is to push down on the rear support with your middle finger as you pinch and lift the iPhone with your thumb and forefinger. On the iPhone 5s Dock, I press down on the dock with my pinky (like a gentleman) while pinching and lifting the phone with my index and middle fingers and thumb. I find it easier to remove my iPhone from the HiRise, as the rear
support offers a platform to push against.
Finally, what about audio and call quality? Apple and Twelve South take very different approaches. The Apple dock covers the bottom speaker and microphone, so Apple employs “special audio porting” to enhance the sound. Basically, the dock is sufficiently concave to apply a slight amplification — similar to inserting an iPhone in an empty glass. The HiRise instead puts the iPhone on a narrow-enough base so as to not cover the headphone jack, microphone, or speaker.
I tried a speakerphone FaceTime Audio call with TidBITS publisher Adam Engst, and he couldn’t discern any difference in sound quality between the two docks. On my end, the Apple dock was slightly louder, but it wasn’t a significant difference over the HiRise.
A clever aspect of the HiRise’s design is that it not only leaves the headphone port uncovered, but also offers enough clearance to insert and remove a headphone jack. The iPhone 5s Dock doesn’t technically support headphones through the line out jack, but I plugged in a pair of EarPods and they worked fine, with a notable caveat: the in-line remote controls were disabled, and I wasn’t even able to adjust the volume with the iPhone’s buttons.
In the end, the Game of Docks is a draw. Neither dock is especially useful, since the Lightning connector isn’t suited for docking. When you can’t quickly and easily remove the iPhone, much of the utility goes out the window. However, both docks make a nice throne for your iPhone, and keep the cable in place.
Which one is right for you? If your main reason for having a dock is to connect it to a wired speaker quickly, and you don’t use a case, then the iPhone 5s Dock is the way to go. Otherwise, the Twelve South HiRise is the better choice. Yes, it’s annoying to assemble and adjust, but that design almost guarantees that you’ll be able to use it for the entire life of the Lightning connector. At $34.99, it’s a bit more expensive than the $29 iPhone 5s Dock, but it’s constructed of nice aluminum instead of plastic and plays nice with headphones.
Dancing the Two-Step: Coping with the Loss of a Second Factor
The camera in my iPhone 5 finally became intolerable. It had shown some evidence of dust or a sensor failure inside its sealed optics for some time, but I had coped. The Standby button had also started to lose its resiliency and required a hard push to activate, but I was too busy to swap out the iPhone. Then a hair started appearing in all photos. That was the squiggle that broke the camel’s back.
I blithely went to a Genius Bar appointment, received a new iPhone 5 under warranty (not even invoking AppleCare+, which I have, as it was considered a factory defect), and restored from my iCloud backup. It was only 40 minutes later, when the restore was complete, that I realized I had blundered in not preparing for the loss of my so-called “second factor.”
Two-step or two-factor logins typically require that a login uses two different methods: a password and a unique token sent via text message, created within a specialized app, or displayed on the tiny screen of a keychain generator or ID card. Second factors rely on physical possession of an object or an app on a device. They don’t provide perfect security, but someone cannot simply steal your password and have full access to an associated account.
Most of my second factors were stored in Google Authenticator, a free app (for iOS and Android) from the search giant. Despite coming from Google, the app works with many two-step authentication systems to generate the time-limited codes that supplement passwords. To get started with it on a particular site, you need to enter a special priming code — either by typing in a set of characters or by capturing a QR code.
From then on, Google Authenticator cryptographically derives a set of digits for your login code that resets every minute. The current time is a factor in the computation that creates the code. These codes may be used only once, and thus are useless if captured after use. Plus, they work only during a 60-second period, and are useless thereafter. Wisely, Google Authenticator doesn’t retain the priming codes, since a bad guy could otherwise restore a stolen iPhone’s iCloud backup and gain access to those codes! (See “Elcomsoft Details Gaps in Apple’s Two-Factor Authentication Approach,” 30 May 2013.)
But that caused a problem for me, even though I consider myself relatively adept at security and good at thinking ahead. I knew I’d need two different Apple ID passwords and my Dropbox password to do a restore away from my main Mac. But I didn’t anticipate the two-step login problem at that moment.
Luckily, I had done the necessary work previously, when I set up the various two-step systems. Most systems provide methods of restoring access or resetting a two-factor system as long as you retain two of three pieces of information: email access to the address you used (or physical access to a specific set of trusted devices), your password, and a special recovery key or similar code. I had stashed recovery codes like mad, and simply forgotten about them until this point.
I use Yojimbo to stash my recovery keys. Yojimbo, just out in version 4 with a new syncing option, uses strong encryption for its secured elements (see “Yojimbo 4.0 Adds Syncing… But Not Via iCloud,” 14 August 2013). Set a strong password, and only that password will allow recovery of items stored in its database. 1Password, LastPass, and various other secure password managers and snippet keepers would also work for storing recovery keys.
Recovering from a Lost Second Factor — Let’s walk through how I got back into each of my two-factor services after restoring the new iPhone 5 from my backup:
- Apple ID. Recovering Apple’s two-factor authentication is the simplest case, because Apple requires a mobile number to which to send text messages as either the primary or backup method for a two-step login. In this case, I lost nothing because my phone number was transferred and activated on the new SIM. In fact, despite having two-factor authentication turned on, I wasn’t even prompted for anything but my password when I restored from iCloud, turned on my iTunes account, or logged into iCloud email. That’s not ideal, but Apple’s two-factor authentication doesn’t actually protect that much! (For details, see “Apple Implements Two-Factor Authentication for Apple
IDs,” 21 March 2013.)Apple’s system relies on a set of three trusted elements: your password, one or more trusted devices (set up for SMS or Find My iPhone messaging), and a recovery key created when you set up two-step logins. As long as you have any two of those three, you can recreate the missing third. You can reset a password with a recovery key and trusted device, for instance. If you have only one of the three, you’re sunk, and your Apple ID is dead forever.
- Google. With Google, you can pair your password with SMS, Authenticator, or one of a set of 10 backup codes that are generated when you set up two-step login. If you lose your password, it can be reset, but you still need one of these other factors.
Even though I had lost the Authenticator token, I could still have requested an SMS message or used one of the backup codes. However, since I had verified my desktop computer, I was able to log in there without needing any additional steps and regenerate my Authenticator code.
-
Dropbox. As with Google, resetting two-factor authentication with Dropbox requires use of a recovery key. I was able to go to a desktop computer which had been authorized, and login and use a recovery key generated during signup. I then removed Authenticator as the primary way of getting a code, and set Dropbox to use SMS temporarily. I later went back and reset Dropbox to use Authenticator and regenerated the recovery key, since keeping the one I’d used previously around seemed like a bad idea.
Be particularly careful with Dropbox, since it tends to be used for syncing utilities that you might use for storing recovery keys, such as 1Password and Yojimbo. But if you can’t get into Dropbox without a recovery key, and the recovery key is itself in Dropbox, you’re faced with a Catch-22.
-
Stripe and Linode. While these are more specialized services — a credit-card payment processor and a virtual private server host — both offer two-step logins and both work with verification apps like Authenticator.
In the case of Stripe, I had stored a recovery code, and used that to log in and disable two-factor authentication, after which I re-enabled two-factor authentication with a new priming code and recovery key.
For Linode, I had stored the code that was used to prime Authenticator, and once I re-entered that code, access was restored without me needing to regenerate anything.
Looking Forward — Clearly, I had no comprehensive plan for how I’d recover from the loss of my second factor in two-factor authentication systems. And the fact that no two of these services are precisely alike made it a little worrisome as I tried to figure out whether or not I’d lose access permanently or need to jump through more hoops to get back in. (Had I not kept my priming code for Linode, I would have had to send a scan of both sides of the credit card used for billing, omitting some numbers for security, along with some other data to convince them to restore access.)
My general advice for anyone using two-factor authentication system is:
- If you know you’re going to lose your second factor because you’re sending an iPhone in for repair or getting a new one, it’s easiest to turn off two-factor authentication first, and then turn it back on later.
-
Store your recovery keys in a place you can remember, that’s secured but available, and that’s also backed up offsite, whether via offline USB in a safe deposit box or an Internet sync/backup service. (My Yojimbo database is backed up through Dropbox and CrashPlan so in the worst case, I could access it on a friend’s Mac.)
-
Likewise, keep your passwords stored safely and backed up, with an offline secure copy. (I use 1Password, which is backed up through Dropbox and CrashPlan as well.)
-
Although this isn’t typically recommended, you could capture and store the priming codes used for second-factor generation in Authenticator and other apps. Take a screen capture of a 2D tag or copy down the equivalent text and store that information somewhere extremely secure. The priming code is essentially just as useful for a break-in as your password, since it’s all that’s needed to generate a second factor.
-
Make sure you know the requirements for restoring access. Some systems may be permanently inaccessible if you don’t have a password plus a recovery key or some other combination, as is the case with Apple IDs.
Being able to make a secure backup of Google’s Authenticator-stored codes would also have been a shortcut around all of this, and wouldn’t have exposed me to any more risk than my current storage of passwords and recovery codes.
FunBITS: Even the Blind Can Play Vanished
This week, we’ve heard from a number of visually impaired users who are having difficulties with iOS 7 (see “Peering at iOS 7 for the Vision Impaired,” 19 September 2013, and “iOS 7 Animations Cause Nausea for Some,” 25 September 2013). We feel terrible about that, but I became excited when I discovered Vanished, a unique game for iOS that even the most visually impaired can enjoy (with a caveat). Better yet, it’s free until 1 October 2013.
In Vanished, your character wakes up in complete darkness, able to navigate only by directional audio clues. The object of the game is to wander around each level until you find the exit, which is marked by chiming. It’s a little like the 1982 Haunted House game for the Atari 2600 — perhaps the first example of the survival horror genre.
Vanished requires headphones — Apple’s EarPods work nicely here. To walk forward, you hold a finger down on the screen, and you rotate your body to change direction — a clever use of the iPhone’s compass and a nice alternative to most 3D games, where you press an analog stick in the direction you’d like to go.

To navigate, you rotate until you hear some kind of beacon sound in front of you, perhaps a police radio or creepy whispers, then press your finger on the screen to walk toward it. Along the way, you’ll pass by other creepy sounds. Sometimes you’ll hear heavy breathing, laughing, or grunting, indicating that a monster is close.
Monsters? Yes, and unfortunately, combat is where the game falls flat. Your phone vibrates when a monster is about to attack. You can either run in the other direction, or shake your phone to attack (hold tight!). I suggest you run, as the combat is unforgiving. One wrong stab in the dark, and you’re dead. Some additional guidance would be welcome here. But there’s no shame in running; after all, the goal is to escape anyway.
Vanished is an interesting take on gaming, and definitely worth checking out if you normally avoid games in part because of their reliance on visual effects. I think it could be a blast at Halloween parties. Put your friends in a dark room with the game and listen for the screams!
But there’s one big oversight in Vanished, as pointed out to me by reader Moof: the game’s menus don’t support VoiceOver, so it’s difficult for a blind user to start the game. Considering the audio-based gameplay, this is a weird omission, and one I hope is fixed soon.
From Vanished to Daredevil — Despite its flaws, Vanished is a fun concept piece that’s worth checking out while it’s free. I’ve long been fascinated by the idea of an audio-only game — “The Hitchhiker’s Guide to the Galaxy” author Douglas Adams was reportedly working on one before he passed away. This base idea could be developed into something great.
Take the Marvel Comics crime-fighter Daredevil, for instance. Also known as attorney Matt Murdock, Daredevil was blinded by radioactive chemicals, which robbed him of his sight, but gave him super-powered senses. Daredevil can hear and identify an individual heartbeat from a block away and even tell if that person is lying. He also uses a special “billy club” — a cane that breaks into two pieces, with a long length of cable that he uses to beat up thugs and swing between buildings. It’s kind of like a nunchaku on steroids.
Now, imagine a Daredevil iPhone game, if someone were to build on Vanished’s concepts. You raise your phone until you hear a “tink” indicating a grapple point for your billy club. You flick your iPhone at it, and swing up to a rooftop. You hear fighting in the distance. You press on the screen to run toward the sound. As you get close, you aim your phone in the direction of the fight and hear five heartbeats. All are beating fast, but one is clearly in a panic. Someone’s being attacked! You aim your iPhone at one of the attackers and flick to throw half of your billy club at him, catching him by surprise. One down.
You press down on the screen to close in on the thugs. You sense an attack coming — your iPhone vibrates — and you quickly shake it to knock the second hoodlum unconscious. You aim the phone and rotate around until you hear the heartbeat of a third attacker, who’s staying just outside of reach. You shake the phone to leap across the roof and deliver a flying kick to his head. You hear the final punk run off, and you go to check on the victim. He’s bruised, but he’ll be OK. However, something’s odd, you can sense that there’s something he’s not telling you…
I can also imagine a visual replay, where you can see (and hear) your fight again, so you can learn what new sounds mean and perfect your skills. And, let’s face it, as cool as an audio-only game is, some slick graphics would still be appreciated by those who can see them.
I’m not a developer, but if that sounds as awesome to you as it does to me, go bug Marvel until they make it. In the meantime, check out Vanished, which hints at the potential of the iPhone for visually impaired gamers.
TidBITS Watchlist: Notable Software Updates for 30 September 2013
Pixelmator 2.2.1 — Despite receiving a seemingly minor numerical tick to version 2.2.1 (from the previous 2.2), Pixelmator introduces a new file format to its popular and attractively priced image editing and manipulation app, claiming significant performance improvements. (If you’re unfamiliar with Pixelmator, be sure to read Michael Cohen’s review, “Can You Replace Photoshop with Pixelmator?,” 17 May 2013.) In addition to greatly speeding up the opening and saving of image files, the new Pixelmator file format saves edits in the background while you manipulate images, and it
now saves individual edits to iCloud (rather than saving the whole image file each time). The new file format also introduces a progress bar for a better idea of where you’re at while opening and saving, and it offers enhanced Quick Look support. Additionally, Pixelmator adds a checkbox option that enables you to choose to open and save images in the new file format or in their original format.
Beyond the new file format, Pixelmator improves the Effects Browser with the capability to open highlighted effects by pressing Return as well as adding more keywords for quickly finding the right effect. Third-party effects are better organized and gain a tooltip so you can view full titles. Other changes include the addition of a Command-Option keyboard shortcut to compare how an image looks with and without an effect, improved accuracy while previewing the Sharpen effect, a more precise eyedropper for the Replace Color and Select Color tools, and more flexibility in previewing images while applying an effect or using the Select Color and Refine Selection features. ($14.99 new from the Mac App Store, free update, 41.6 MB, release notes)
Read/post comments about Pixelmator 2.2.1.
Typinator 5.7 — Ergonis has released Typinator 5.7, enhancing the way the text-expansion utility pulls together variable parts of expansions with optional default values. If a default value is present, the input field contains the specified string rather than what was entered the last time the expansion was used. The update also fixes a problem where some input fields weren’t recognized if they immediately followed another marker; works around issues in IntelliJ, PhpStorm, WebStorm, and PyCharm that inserted the current clipboard when attempting multi-line expansions; fixes a bug that created different types of
line breaks in some applications; and provides a workaround to a problem with certain multi-line expansions in Microsoft Word. (€24.99 new with a 25 percent discount for TidBITS members, free update, 5.5 MB, release notes)
Read/post comments about Typinator 5.7.
TextExpander 4.1 — Preparing for the upcoming release of OS X 10.9 Mavericks, Smile has released TextExpander 4.1 with new Security & Privacy settings as well as a lengthy laundry list of improvements and fixes. The typing shortcut utility gains an Emoji snippet group, enables you to type Command-Return to complete a fill-in window, improves the performance of snippets containing multiple embedded images, adds capitalization correction in applications such as Mellel, sets the CPU to idle 30 seconds after an expansion or capitalization correction, and gives you the option to convert existing snippets when
changing the default snippet type. ($34.95 new with a 20 percent discount for TidBITS members, free update, 8.6 MB, release notes)
Read/post comments about TextExpander 4.1.
ReadKit 2.3.1 — Webin has released ReadKit 2.3.1, a maintenance release with a number of fixes that also improves sync speed and overall performance. The RSS client and read-later app adds image caching for RSS services, mark as read/shared options and tag completion for Pinboard and Delicious sharing, OPML export for RSS feeds, and a preference to preload original pages in the background. The update also fixes a bug with marking Feedly items as read; a problem with sharing an article’s title on Twitter, Facebook, Messages, and Mail; a crash when adding new subscriptions on Mac OS X 10.7 Lion; display notifications in
Notification Center; and several validation issues. Normally priced at $4.99, ReadKit is on sale for a limited time for $1.99 from the Mac App Store. ($4.99 new, free update, 3.9 MB, release notes)
Read/post comments about ReadKit 2.3.1.
ExtraBITS for 30 September 2013
This week in ExtraBITS, we have three quick original articles for you in addition to our usual links. In just 125 words, we show how to add weather to your iPad’s Notification Center in iOS 7, run through what’s new in iOS 7.0.2, and review Apple’s iPhone 5s Case. Tell us what you think of these brief bits in their comments! Then read on for the newly revealed history of the iPhone, news of how Martha Stewart might be the hero app developers have been waiting for, thoughts from Marco Arment on how to name an app, and why security researcher Marc Rogers isn’t bothered that he was able to hack the Touch ID fingerprint scanner.
41 Words that Add Weather to Your iPad’s Notification Center — The iPad still lacks Apple’s Weather app, but concise weather info appears in the iOS 7 Notification Center’s Today view, if you enable Weather in Settings > Privacy > Location Services. Lock and unlock the iPad if it doesn’t show at first. Wacky!
All You Need to Know about iOS 7.0.2, in 45 Words — iOS 7.0.2 beefs up Passcode Lock security, eliminating access to the Camera Roll and recent apps, preventing non-emergency calls from being made at an iPhone’s Lock screen, and restoring a Greek keyboard for passcode entry. It’s a 21 MB download via Settings > General > Software Update.
39-Word Review of the $39 iPhone 5s Case — Its exterior leather feels nice and the microfiber interior protects the iPhone’s finish, but the case fits so tightly that it’s hard to remove. Worse, it makes the buttons hard to press, and it bulks up my sleek iPhone.
The Secret History of the iPhone — Fast Company has spent months in research to bring you the never-before-heard history of the iPhone. This article, an extract from the new book, “Design Crazy,” describes how the iPhone evolved from a Mac tablet (not unlike Microsoft’s Surface) to the sleek design we eventually saw. Only a select few Apple employees were allowed to see the actual iPhone interface; the rest had to test against an intentionally hideous decoy, until Scott Forstall convinced Steve Jobs otherwise.
App Developers Gain an Unexpected Champion — Lodsys has become infamous for patent-trolling small iOS developers, but they might have bit off more than they can chew when they set their sights on Martha Stewart. Yes, that Martha Stewart. While most app developers don’t have the resources to fight Lodsys in court, the Verge reports that the powerful and popular ex-con is fighting back, asking a judge not only to declare that Martha Stewart Living Omnimedia’s apps don’t infringe on Lodsys patents, but also to invalidate all Lodsys patents cited in the
suit, which would put a swift end to Lodsys’s reign of terror. And that’s a good thing.
How to Name an App — Well-known developer and podcaster Marco Arment is working on a new podcast client, called Overcast. In a blog post, he discusses how he came up with the name, the alternatives he considered, the steps he had to go through to ensure that there were no trademark infringements, and how he secured an online presence, including a domain name and Twitter handle. It’s a fascinating look into something most of us never consider.
Marc Rogers Hacked Touch ID and Still Thinks It’s Awesome — Security researcher Marc Rogers has replicated the spoof performed by Chaos Computer Club members who tricked the iPhone 5s Touch ID fingerprint scanner with a fake fingerprint. Rogers says regular users have little to fear, as the technique requires expensive equipment and expertise. He also makes the case that Touch ID is still an improvement in iPhone security, since many users currently don’t use a passcode to secure their devices.