#1624: Important OS security updates, rescuing QuickTake 150 photos, AirTag alerts while traveling
Last week, Apple released iOS 15.6.1, iPadOS 15.6.1, and macOS 12.5.1 to address a pair of critical security issues—you should update soon. Apple’s QuickTake 100 from 1994 was the first consumer digital camera, but Photos crashes if you try to work with original QuickTake photos in your library. Adam Engst explains how he used the current version of GraphicConverter to make his QuickTake photos usable on a modern Mac. Finally, prompted by numerous stories of AirTags saving the day in this summer of lost luggage, Glenn Fleishman explains how to tune Find My to prevent annoying alerts while traveling. Notable Mac app releases this week include Safari 15.6.1 and Lightroom Classic 11.5.
iOS 15.6.1, iPadOS 15.6.1, and macOS 12.5.1 Monterey Address Serious Security Vulnerabilities
In response to a pair of concerning security vulnerabilities, Apple has released three updates: iOS 15.6.1, iPadOS 15.6.1, and macOS 12.5.1 Monterey. One of the vulnerabilities is at the kernel level, whereas the other is related to WebKit. No other changes were mentioned.
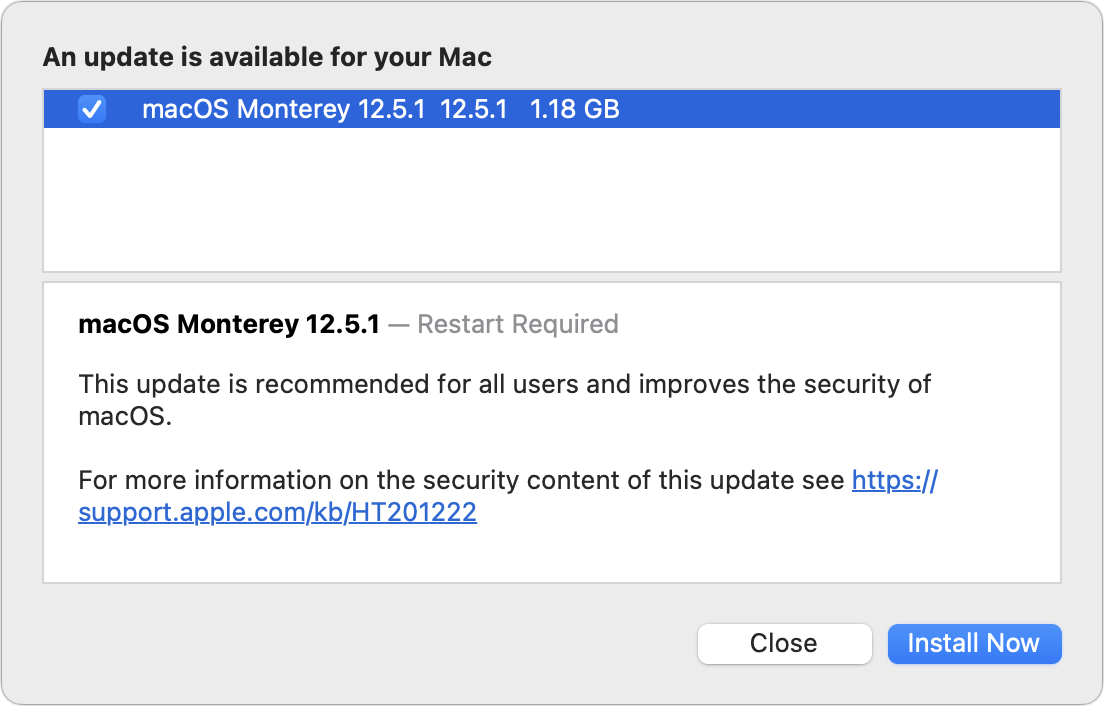
Given the severity of the vulnerabilities—both allow arbitrary code execution, one with kernel privileges—and the fact that both are being exploited in the wild, we recommend that you update as soon as possible. As always, install iOS and iPadOS updates by going to Settings > General > Software Update; install macOS updates from System Preferences > Software Update.
Apple also released watchOS 8.7.1 for the Apple Watch Series 3, not, as it later turned out, because of security problems, but to fix a bug that caused random restarts. You can download it from the Watch app in General > Software Update.
GraphicConverter 11 Rescues Ancient QuickTake 150 Photos
Apple is now known for the cameras in the iPhone, but the first Apple camera was the QuickTake 100, released in 1994. It wasn’t the first digital camera, but Time magazine called it “the first consumer digital camera.” A video about it and its successors, the QuickTake 150 and rather different QuickTake 200, recently made the rounds on a private mailing list I’m on.
I used a QuickTake 150 for a few years starting in mid-1995, and it was an eye-opener (see “Digital Photographs as a Way of Life,” 2 October 1995). The photos were small—640 by 480 pixels—and of rather poor quality, but the freedom afforded by not worrying about wasting film or waiting to develop it was life-changing. I wouldn’t have bought the QuickTake 150 on my own—it cost $700 new—but I had written a white paper for Apple about the company’s Internet strategy, so I asked my contacts to pay me in hardware at internal prices. It was a serious score, and I ended up with quite a collection of gear, including the camera.
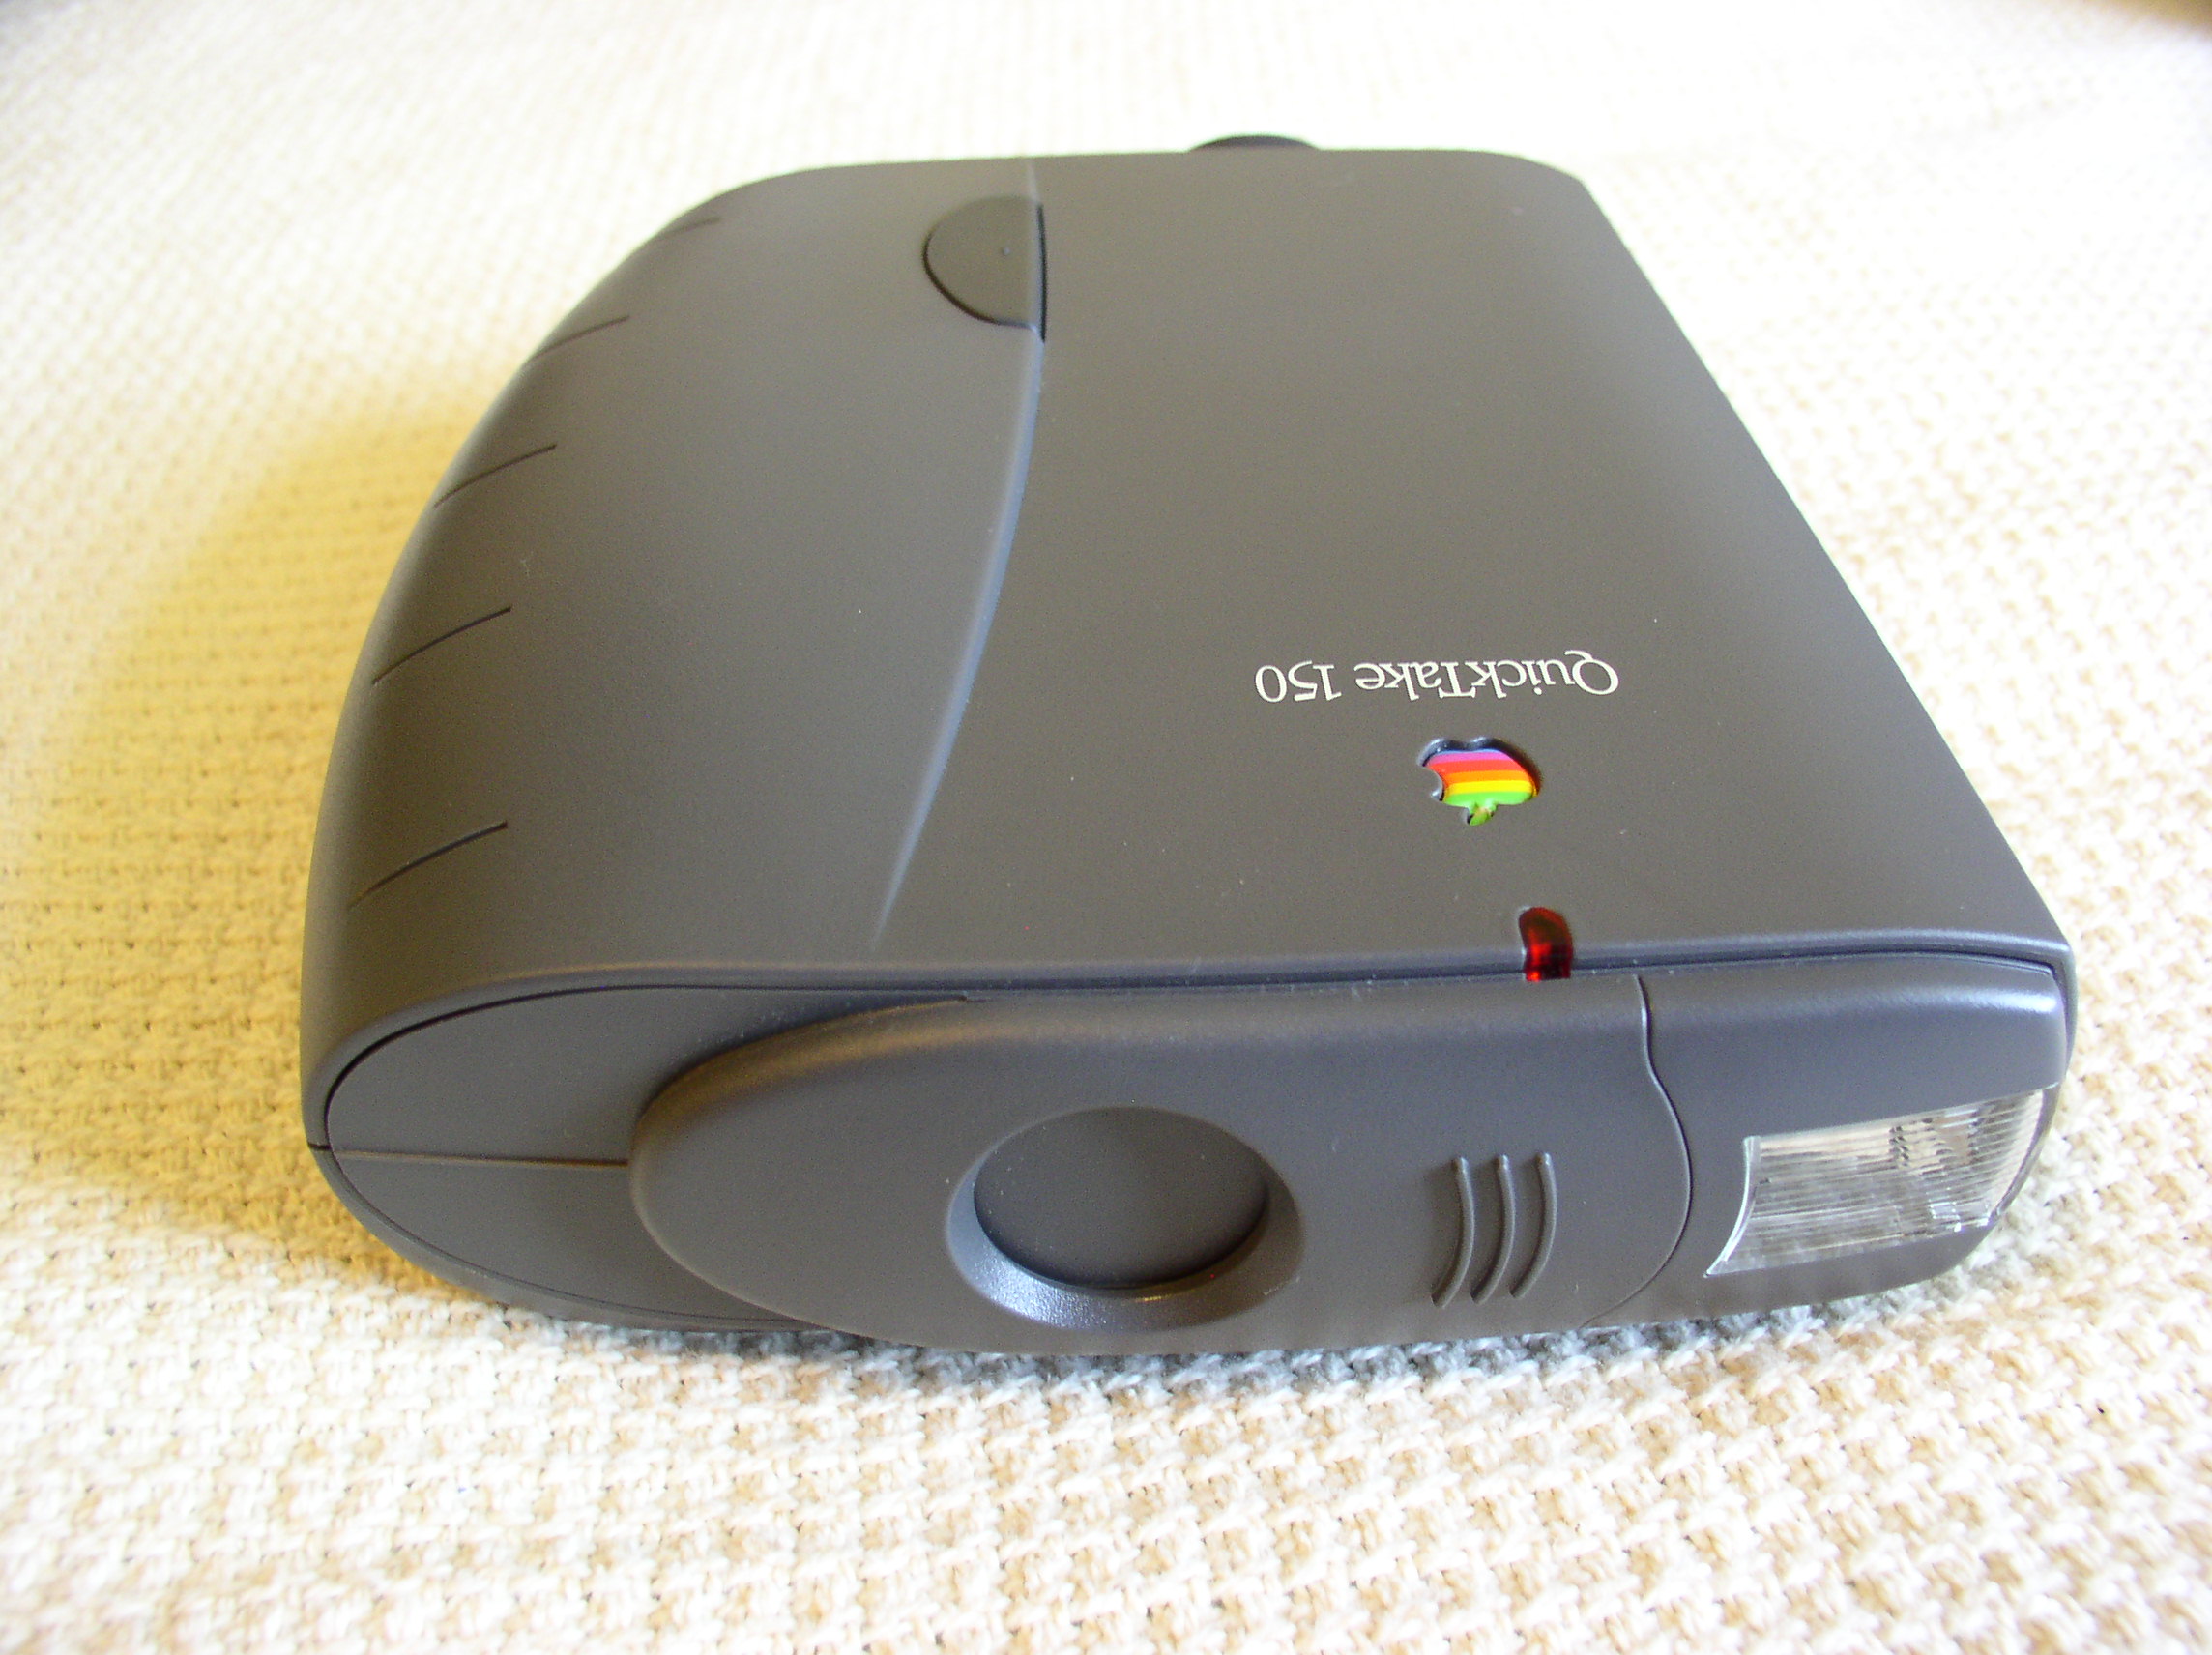
I’ve long maintained my QuickTake 150 photos in iPhoto and later Photos, but since they’re out of sight at the very top of my library, I hadn’t thought about them in years. Prompted by the QuickTake video, I became curious about what was in those photos, so I scrolled all the way up and was concerned to see that none of the images had previews. Worse, Photos crashed when I tried to double-click an image to view it full-size or Control-click it to see what other options might be available. I couldn’t even select the images and choose File > Export to see if I could get the originals out that way. Luckily, I could select them all and drag them to a folder in the Finder. I also verified that I could find them by searching for their .pict extension within the Photos Library package.
After export, all the photos still sported blank white thumbnails and were equally blank when opened in Preview. As the discussion progressed on the mailing list (complete with shared QuickTake photos from others), I was reminded that accessing such photos required a QuickTake Image Access extension in an old version of the classic Mac OS. Putting together such a system using SheepShaver wasn’t out of the question, but I was hoping there might be a better alternative.
My thoughts immediately went to GraphicConverter, the venerable Swiss Army knife of graphics programs, and I dropped the folder on GraphicConverter 10, the latest version I had handy. No luck, and although the app alerted me that I could update to GraphicConverter 11, I couldn’t imagine that support for such an ancient image format would be in version 11 but not version 10.
So I wrote to Thorsten Lemke, the image conversion guru behind GraphicConverter, who had worked with me on “How to Create Mojave’s True Dynamic Desktops with GraphicConverter” (10 October 2018). It turned out that I should have done my homework more completely. Thorsten asked for a couple of sample images to check and then gently pointed out that GraphicConverter 11 could indeed open and convert those QuickTake 150 images, and he even made me a quick video tutorial showing me how. Color me embarrassed, but talk about great customer service!
When I followed his steps using GraphicConverter 11, it had no problem converting my images to JPEG, and it was wonderful to see those images—and the much younger people in them—once again. Here you can see me and Tonya wearing fezzes in the Archie McPhee store in Seattle, plus one of my Mac-filled office in our first house in Renton, Washington, circa 1995.

So thanks to Thorsten and GraphicConverter, and if you still have any QuickTake 150 images lying around, I encourage you to convert them while you’re thinking about it.
Tune Find My for Travel Tracking to Avoid Annoying AirTag and Apple Device Alerts
Apple’s AirTag offers compact and inexpensive tracking of your items through low-power, short-range Bluetooth networking signals. It’s a perfect item to drop into your suitcase or other checked bag while traveling during this summer’s explosion of lost luggage.
That way, even if an airline says your bag is lost or they can’t (or refuse to) give you an update on its whereabouts, you can track it! Some travelers have reported that they were able to find their luggage in a mess of thousands of bags in overflowing claim areas, find out that someone had seemingly stolen a bag that was supposed to be delivered, track down a bag delivered to the wrong address, or help police find bags allegedly stolen by an airport worker. One person tracked their “lost” bag to their home address: an airline delivered the bag to their home in California while they were in Glasgow for a wedding, waiting for it to arrive with a custom kilt.
I’ll definitely be planting AirTags in my bags before my next air trip in a couple of months—my first in three years and the first since AirTags were released. But I’ll be aware of some of the ways in which AirTags can provoke annoyances and try to mitigate those. Adam and Tonya Engst recently visited their son in Vancouver, B.C., and experienced a few even though they didn’t check luggage. Some of their issues revolved not around AirTags but other Apple devices, which react similarly when separated from their owners.
The Find My network technology enabled through Apple devices, AirTags, and third-party Find My items like trackers from Chipolo and Pebblebee has three purposes that can result in “correct” but unwanted notifications:
- Tracking: Find your lost or stolen Apple hardware and other stuff by letting you track it via a network of other people’s Apple hardware that it’s near, even briefly.
- Loss avoidance: Avoid unintentionally leaving your Apple gear or other belongings behind by being reminded when you leave somewhere without it.
- Anti-stalking: Apple has built—and plans to build more—anti-stalking technology that provides alerts in different circumstances about an AirTag traveling with or near you for an extended period.
You can improve the behavior of these last two when you intend to leave something behind in a specific place or when you know that a Find My item is near or traveling with you for a good reason.
(For more detailed information about the whole Find My ecosystem, consult my book Take Control of Find My and AirTags.)
Add Left Behind Locations
Apple originally built Find My around devices: any iPhone, iPad, Mac, or Apple Watch with active Internet access can have its whereabouts tracked. This is informally called Find My Device, and those Apple items are the “devices” in question. The Find My network expanded that functionality for these devices to allow relaying via encrypted Bluetooth broadcasts through other people’s nearby Apple hardware with an Internet connection when your device lacks one. AirTags and other Find My items rely exclusively on this crowdsourced Bluetooth aspect of Find My.
Consequently, you can track both AirTags and any Apple device using the Find My network. The only significant difference between tracking Apple devices and Find My items like AirTags is that device locations can be shared automatically to other members of a Family Sharing group, while Find My items are exclusively reported to the item owner’s iCloud-linked devices. Plus, a native Find My app in iOS, iPadOS, or macOS has to be used to view and manage Find My items.
In the Find My app, you can opt in or out of receiving notifications when you have left a device or item behind. With the feature enabled, you can drill down and add locations where you don’t want to receive an alert if you leave it there—like your home.
Adam noted that when he and Tonya left their AirBnB rental each day, he received an unnecessary notification about leaving his AirPods and MacBook Air behind. That was the correct behavior on Find My’s part, but Apple offers a workaround: he could have added a location exclusion—he didn’t think of using the location exclusion feature for a place other than his house. There’s no harm in adding as many locations as make sense, even if they’re only temporarily relevant. (Apple shows AirPods and supported Beats hardware in the Devices view in Find My, even though they can’t reach the Internet like other Find My trackers.)
In the Find My app in iOS/iPadOS or macOS, enable and refine Notify When Left Behind by following these steps, with very slight differences between the platforms:
- Tap or click Items or Devices at the bottom of the app (iOS/iPadOS) or the top-left corner of the app (macOS).
- Select one of your items or devices.
- Tap Notify When Left Behind (iOS/iPadOS), or click the i button associated with the device on the map and click Notify When Left Behind (macOS).
- Enable Notify When Left Behind if it isn’t already. (On all devices except the one to which your Find My item is paired, the Find My app tells you which device will receive notifications about the item.)
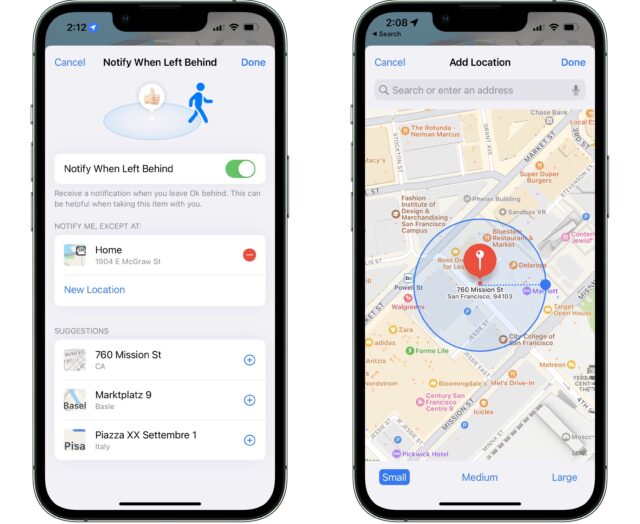
- Under the Notify Me, Except At label, a Home entry should appear. Apple determines your Home location from your contact card and other signals. Tap or click New Location to add a location, or hit the plus icon to the right of items under Suggestions if any appear or are germane.
- Enter a location or address.
- On the map, a circle with a roughly 100-meter diameter appears around the pin. You can drag it wider, or tap or click Medium or Large at the bottom to expand the exclusion zone. A larger zone makes sense if you’re moving around a set of buildings or a college campus.
- Tap or click Done.
- Find My asks if you want to apply the exclusion to all items and devices or just the current item. Tap or click the right choice for you.

You can later remove locations by tapping or clicking the red minus icon and confirming the removal. You can only remove the Home location from the iPhone or iPad with which the Find My item is paired.
Adam also said that Find My warned him several times that he had left his MacBook Air behind while driving out of a rest area even though it had never left the car. My guess is that its last known location was relayed via someone else’s iPhone, which updated at the rest area. As he drove away, the Find My system reported the problem based on the last-known location more quickly than his iPhone checked in again.
Pause AirTag “Moving With You” Notifications
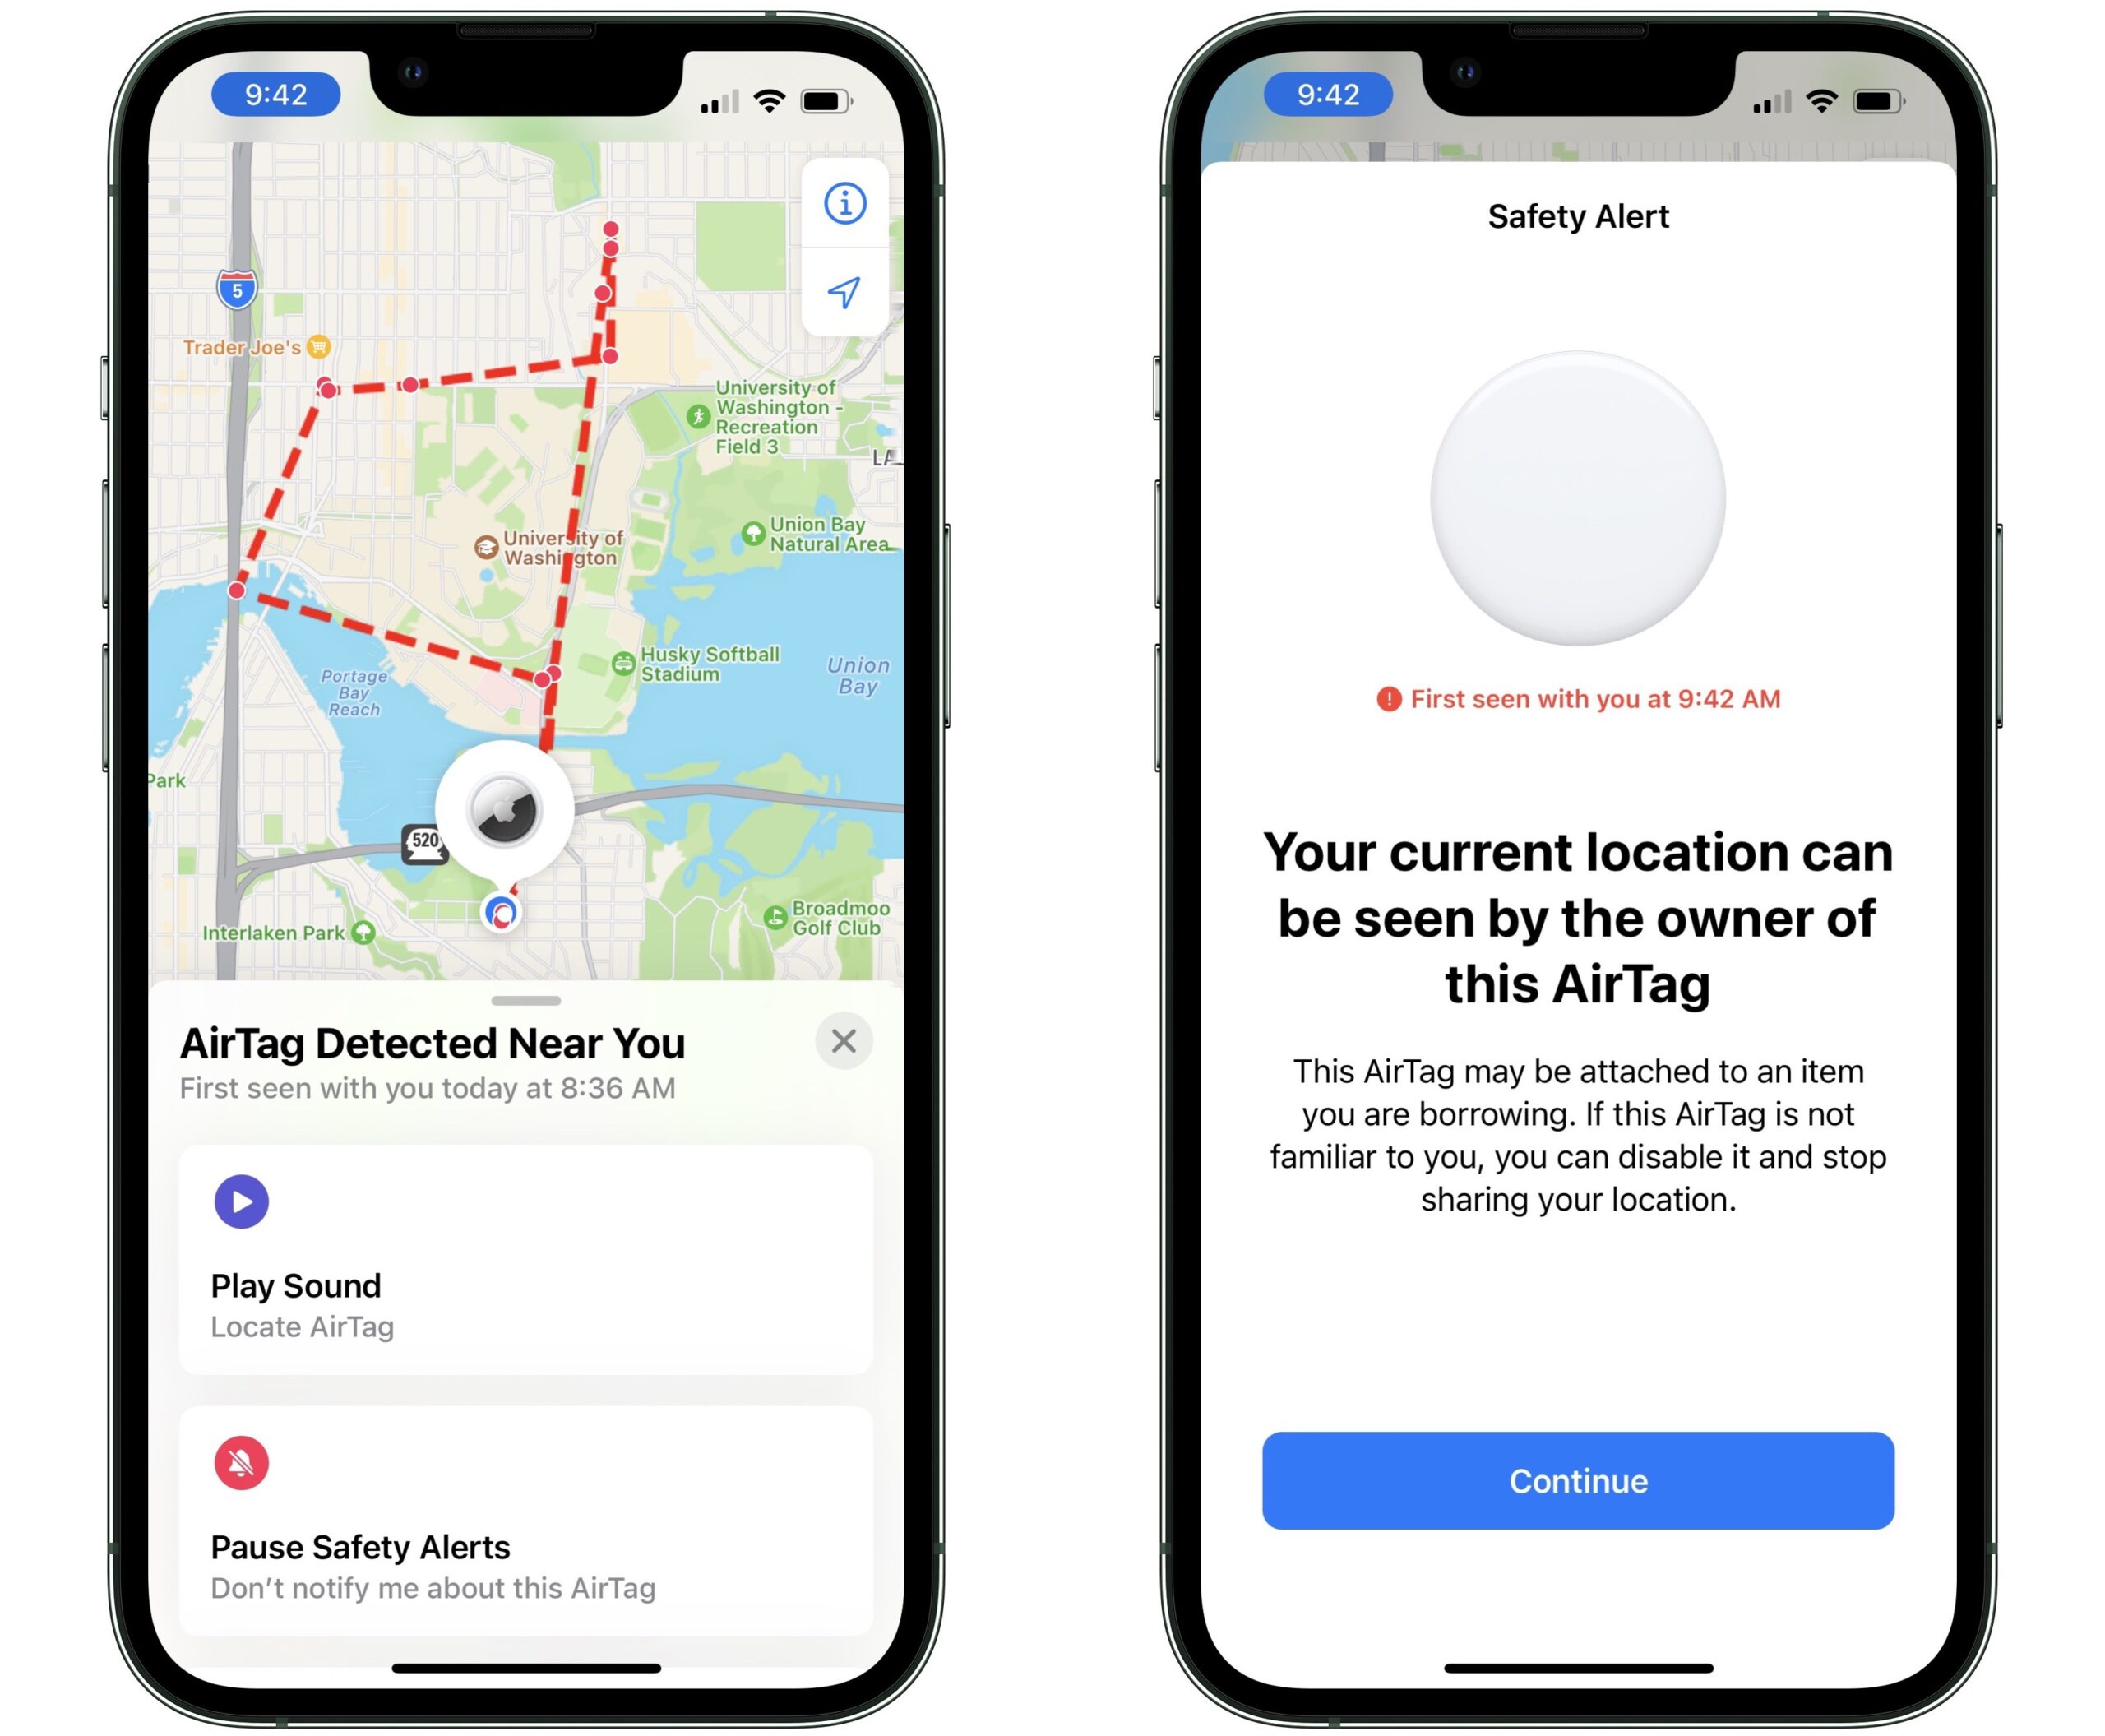
To prevent people from placing AirTags in your belongings or on your vehicles to track you without your knowledge, Apple sends alerts to any nearby iPhones or iPads that are relaying Find My location information for such items when the paired device isn’t nearby.
For instance, my wife rightly distrusts tracking technology but recently asked me for an AirTag that she could pair with her iPhone to place in the car she drives nearly exclusively. She appreciated that such AirTag tracking is limited to her iPhone and intended it only to help her find a car in a parking lot or garage. (We have both parked in too many of the same places in Seattle, and we frequently have to hunt for our vehicle, which is too old to take advantage of how Maps on the iPhone records your parking location.)
However, her use of the AirTag causes a minor issue for me and my older kid. Both of us drive this car from time to time by ourselves. Whenever we do, we receive an AirTag Detected Near You alert on our respective iPhones. That’s good! That’s what it’s designed to do. (You would also receive an alert for other Find My items, such as AirPods, supported Beats headphones and earbuds, and trackers made by third parties, like VanMoof for bikes and Pebblebee for a wallet-size card.)
You can see how this would become even more irritating when far from home and you and the person or people with whom you travel aren’t together at all times. Any bag, keychain, or other gear you might borrow or lend that isn’t near the iPhone with which it’s paired will trigger a “moving with you” warning!
This warning would also appear if the Find My item’s owner had turned off Bluetooth. They might have flipped the Bluetooth switch off, powered down their phone, or enabled Airplane mode and disabled Bluetooth. Without the AirTag or other item phoning home to its paired device, the Apple ecosystem deduces that it’s “away” from its owner and thus is moving with you. Jeremy Roussak posted a story about this on TidBITS Talk; he was getting alerts from an AirTag owned by someone else in his travel group who, it turned out, had turned off Bluetooth.
However, Apple offers a way to help here, whether at home or elsewhere: under Pause Safety Alerts, you can tap Pause for Today, which prevents new alerts until the next morning. If you’re in a Family Sharing group, you should also have the option to tap Pause Indefinitely. However, despite being in such a group, we never receive that option. Other people have had similar experiences, too— Pause Indefinitely appears for some and not for others, with no apparent reason why.
Avoid Bleeping for an AirTag Left Behind
A second anti-stalking mechanism could wake you up in the middle of the night in an unfamiliar hotel room if the item if someone moves the item or surprise you when you move a bag without knowing it has a Find My item inside. An AirTag or third-party Find My item will play a loud beeping sound after it has been separated from its paired device for a random interval between 8 and 24 hours the next time it’s moved.
Depending on the device, the sound can be quite loud when unmuffled, in the range of a dishwasher to an air horn. Of course, the sound will be substantially reduced inside a bag, pocket, vehicle, or the like. It doesn’t pay attention to the time of day, making it sound whenever its random timer goes off. (The interval is random to prevent stalkers from being able to manage the process by, say, coming near you every X hours. Apple initially set the interval to 24 hours but later reduced and randomized it to foil stalkers. It only triggers when moved to avoid excessive alerts for items that are static and not intentionally tracking someone without their knowledge.)
In a nefarious scenario—akin to those spelled out in “13 AirTag Tracking Scenarios” (15 May 2021)—an AirTag surreptitiously planted in your bag or car would be discovered when it started beeping at random intervals the next time you moved it. If you hear such a sound and don’t immediately know whose AirTag is making the noise, open Find My on an iPhone or iPad, tap the Items button, tap Identify Found Item, and see what appears.
However, the alarm might occur for perfectly innocent reasons, such as when someone you’re traveling with has left an item behind and been gone more than 8 hours, as can happen on trips, and you or someone else shifts the thing that contains the tag. Or, if the owner’s paired device has, as described earlier, Bluetooth disabled or is powered down for an extended period, the same could happen when the tracker is moved.
To avoid this problem, chat about AirTags and similar trackers with anyone with whom you’re exchanging stuff. They could let you know which items contain trackers, so you put them somewhere they won’t be disturbed. Or they could take the tracker with them or disable it by removing its battery, possible with an AirTag and Chipolo ONE Spot, but not with most third-party Find My items. (Note that you can’t use Identify Found Items for testing while the person and their iPhone are nearby because found items only include Find My items that aren’t near their paired device.) Also, make sure that people using tags don’t turn off Bluetooth or disable Bluetooth as part of Airplane mode without informing those around them!
I plan to be away from home for a few weeks later this year—and I had better disable, unpair, or careful stow all my AirTags and Apple devices I leave behind, or my family might be happier to see my AirTag-paired iPhone than me when I return home.
