How to Set Up and Use Google+ Hangouts
When we came up with the idea of doing TidBITS Presents and “Take Control Live: Working with Your iPad,” we knew we’d need some serious technology backing it up. Joe Kissell had some strong opinions about features he as a presenter would want, and we set about checking out the many different services that offer webcasting and videoconferencing options. We were rather surprised to discover that Google+ Hangouts On Air had the best combination of features, and as an added bonus, it was free to use. So we did.
But then something funny happened. As much as we had planned on using Google+ Hangouts On Air only for major events, we found ourselves using it more and more for small groups as well, including our staff meetings and even person-to-person calls that we had previously done in Skype.
Why Google+ Hangouts? — So why choose Google’s solution, instead of Apple’s FaceTime, or video chat via iChat/Messages (AIM) or Skype? Google+ Hangouts — and the public Google+ Hangouts On Air — has a lot going for it, and key benefits over the alternatives.
- It supports up to 10 users, on multiple platforms, including Mac OS X, Windows, Chrome OS, Debian-based Linux distributions, iOS, and Android. (Although iOS users cannot participate in public Google+ Hangouts On Air, they can participate in private Google+ Hangouts and watch a public Hangout On Air using the Google Chrome browser.) FaceTime is person-to-person only on iOS and the Mac and iChat/Messages is limited to four participants and is Mac-only. Skype also supports up to 10 users, but…
- It’s free. For a Skype video call with more than two users (person-to-person), the person initiating the call must have a Skype Premium account, which starts at $4.99 per month.
-
It’s good. Although we switched from iChat audio to Skype for staff calls some years ago because Skype’s audio was better then, Skype’s audio quality has been highly variable over the last year. Some calls are fine, but many more become increasingly garbled-sounding as they continue, and must be broken down and restarted to bring the quality back to a listenable state. Although Google+ Hangouts hasn’t been perfect, its audio and video quality have been more reliable than the alternatives. (We did see more trouble with private hangouts on the iPad than on the Mac.)
-
It can be public. When you start a hangout, there’s a checkbox that, when selected, turns a normal private Google+ Hangout into a public Google+ Hangout On Air that anyone can tune into via Google+ or YouTube.
-
It records. There are of course ways of recording any video call with additional software, but when you run a public Google+ Hangout On Air, Google automatically records the entire presentation to the YouTube account of the person initiating the hangout. If you want to record a private Google+ Hangout without taking it public, you’ll need additional software. But you can always mark a public Hangout On Air recording as private in YouTube later. It’s a bit like recording a talk in a university lecture hall. You can’t keep people out, but it’s unlikely that many people will wander in, and even if they do, they can’t watch later.
What Do You Need? — There are a variety of requirements to participate in Google+ Hangouts, whether or not they’re On Air.
- Fast Internet connection. The minimum bandwidth required is 512 Kbps incoming (down) and 256 Kbps outgoing (up). For person-to-person hangouts, Google recommends 1 Mbps in both directions, and for group hangouts, that’s increased to 2 Mbps down and 1 Mbps up. For the best results, you’d want at least 2.5 Mbps down for person-to-person hangouts, and 3 Mbps down for group hangouts. Frankly, the more bandwidth you have, the better, though it’s entirely possible that a hangout would work with less bandwidth than specified.
-
Although Google says nothing about this, we’ve seen better luck with the computer-to-Internet connection being made through Ethernet than via Wi-Fi. Although Wi-Fi has plenty of bandwidth, Wi-Fi connections seem to be a bit flakier, particularly with complex networks.
-
Supported Web browser with the Google Talk plug-in. This should be easy, since the Google Talk plug-in (you may also see it called Google Voice and Video) works in all recent versions of Google Chrome (10+), Safari (4+), Firefox (3+), and Internet Explorer (8+). To install the plug-in, go to the Google+ Hangouts page, click the Download Plugin button, open the
GoogleVoiceandVideoSetup.dmgdisk image (for those of you on the Mac — I’m sure it’s similar in Windows), double-click theGoogle Voice and Video.pkgfile, and run through the installer. -
Recent computer. Google says the minimum processor requirements are any 2 GHz dual core processor or greater, although I’ve seen it work fine on MacBook Air models in the 1.7 to 1.8 GHz range.
-
Video camera and microphone. If your computer doesn’t have a video camera and microphone, or if you want a better one, check out the Logitech HD Pro Webcam C920 (several of us have and like its predecessor, the C910). It offers excellent video and decent audio, and while it lists for $99.99, it’s only about $78 on Amazon.com. [Update: It turns out that the C920 doesn’t support the Mac officially, so while it should work for basic stuff, for advanced features, you’ll need the $7.99 Webcam Settings
app.] For even better audio, look at the desktop USB microphones from Blue Microphones — I use a Blue Snowball that’s about $70 on Amazon — or try a lapel mic that you clip to your clothing. You can also use a headset, of course, but you may not want the Princess Leia look with big earphones. -
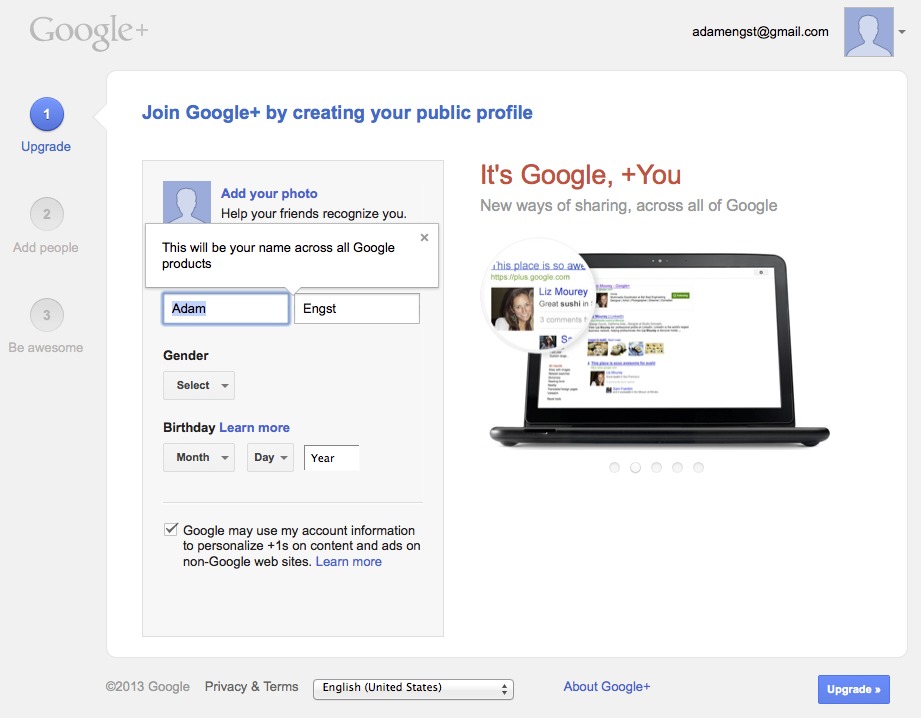
Google account, enabled for Google+. It’s likely that you have a Google account, if you’ve ever signed up for Gmail or YouTube or Picasa or any of a host of other Google services. But you do have to “upgrade” it for Google+, which involves merely going to the Google+ page, entering your desired name, gender (Other is an option) and birthday (for age-related verification).
Setting Up a Hangout — One of the places we’ve found Google+ Hangouts to be a bit confusing is in the “call” phase. With Skype and Messages, for instance, you generally make sure everyone involved is running the application and is available, and then starting the call generates notifications that are nearly impossible to miss.
With Google+ Hangouts, though, since it’s mostly being used in a Web browser, notifications aren’t nearly as obvious. (This is an advantage of having the Google+ app for iOS or Android — it has notifications that alert invitees.) So there are three basic ways to set up a hangout.
- Set a specific time at which attendees will know to visit their Google+ home page, see the hangout invite, and click a Join button.
-
Start with an out-of-band text chat in Skype or Messages or Google Talk, and tell people when you’re starting a hangout, so they can check their Google+ home page.
-
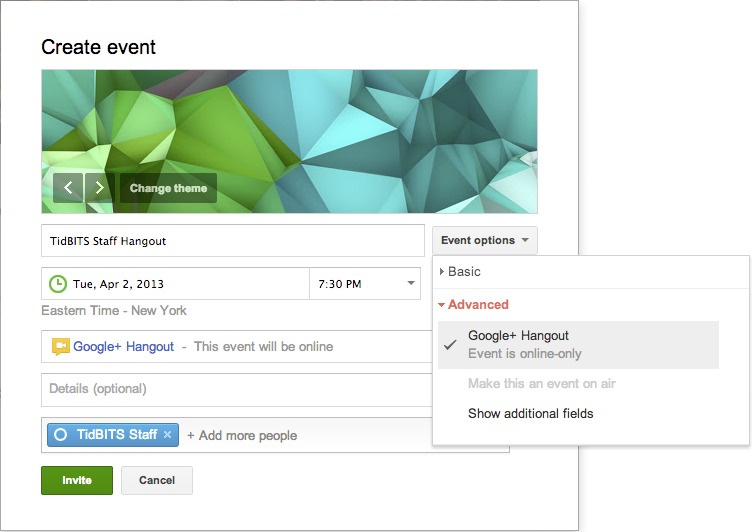
Use Google+ Events to schedule a hangout in advance (look in Event Options > Advanced for the controls to make an event a hangout). In this case, the hangout will be started automatically, and you and all your invitees will be notified to join at the given time.
For the first two methods, here are the basic steps you as the coordinator should follow to start your hangout.
- Visit your Google+ home page or the Google+ Hangouts page.
-
Look for a Hang Out or Start a Hangout button, and click it.
-
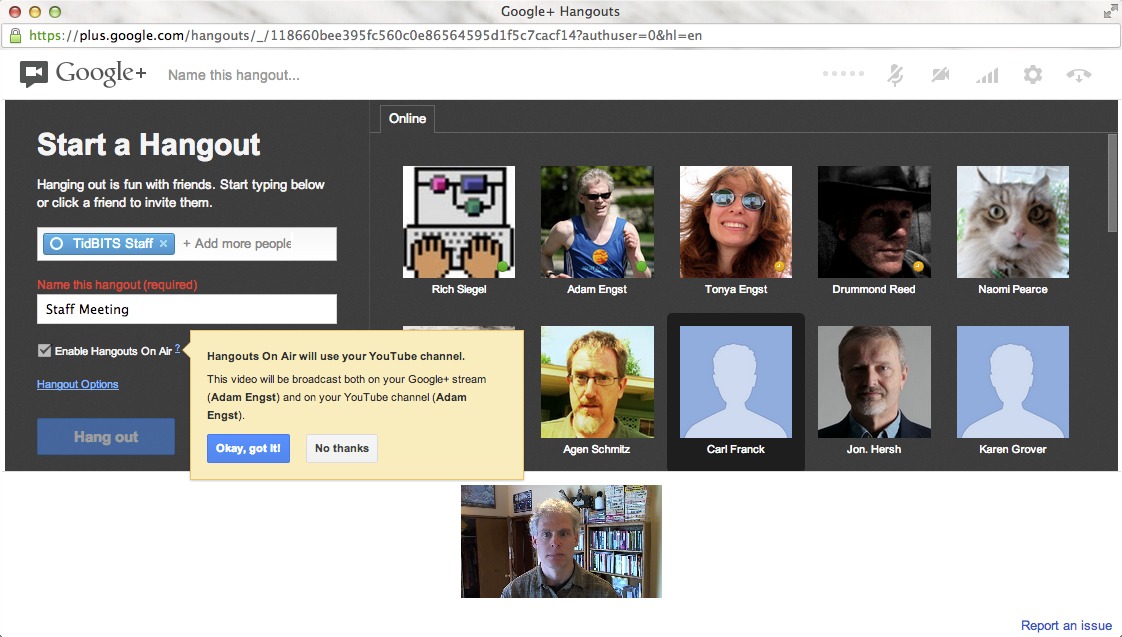
A new Hangouts window opens, showing thumbnails for your friends who are online and giving you a few fields to fill in. Click desired thumbnails or type the names of people or groups in the top field (you can make a group by creating a Google+ circle and adding people to it), and in the second field, give your hangout a name.
-
If you want your hangout to be a public Hangout On Air, select the Enable Hangouts On Air checkbox, and click the Okay, Got It! button to acknowledge that the hangout will be broadcast in your Google+ stream and on your YouTube channel. Make sure the accounts match what you want — only the initiator of a public Hangout On Air can record automatically to YouTube.
-
Click the Hang Out button to start the hangout and issue invitations to the people you invited.

A few usage tips: If you’re doing a public Hangout On Air, you choose when to start the broadcast and recording by clicking the Start Broadcast button in the Hangouts window. Similarly, when you’re done, you click End Broadcast. Starting and stopping broadcasting doesn’t affect the people in the hangout, so you can talk before and afterwards without fear of being overheard or recorded.
For the most coherent recordings, make sure you have the desired person in the top spot (click their thumbnail in the bottom row — more on that shortly) when clicking Start Broadcast so there isn’t a confusing switch right at the start. There’s a 10-second countdown before going live, and my experience is that it’s best to make sure it’s live before starting in on the introduction.
Similarly, before clicking End Broadcast, make sure the top spot is focused on the appropriate person so other people saying goodbye don’t cause it to swap among different video feeds.
When you’re done with the hangout, click the hangup button (the phone icon) in the upper right corner. If everyone leaves a hangout, that has the same effect.
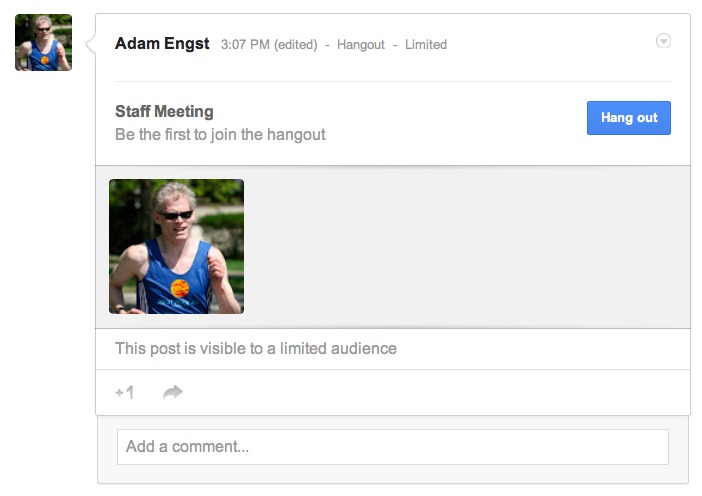
Joining a Hangout — On the other side of the equation, when you’re invited to a Google+ Hangout, the most reliable way to join in is to go to your Google+ home page and look in your notification stream for the invite. As noted before, the Google+ mobile apps will also notify you, and if you have Gmail’s Web interface open, you may also hear a sound and see a Google Talk message box appear in the corner with a Join Hangout link to click.
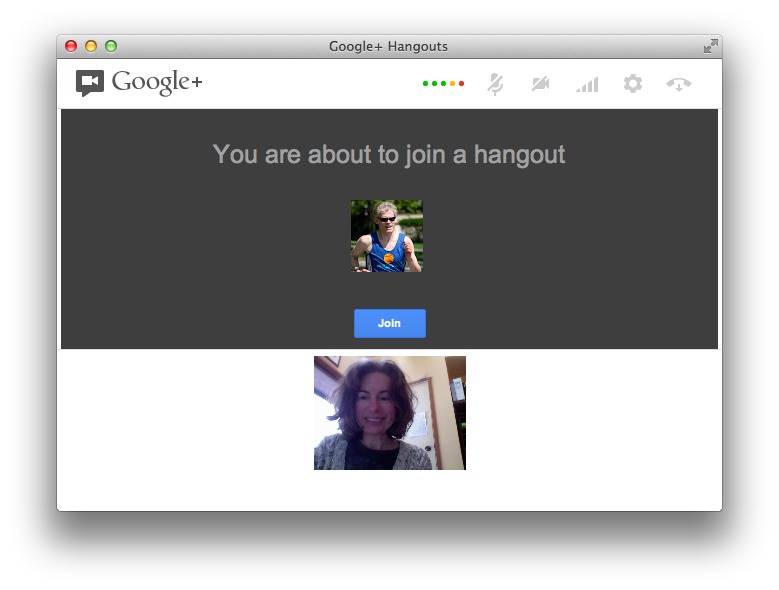
Once you click the appropriate Hang Out button or Join Hangout link, a Hangouts window opens, showing you a preview of your video image and giving you a chance to adjust audio and video settings via the gear button, before you click the Join button. (In general, the default audio and video settings are fine, unless you want to use a particular headset for audio input and output that’s not set as the system default.)
Thumbnails of each participant show up on the bottom of the window, with the large image up top showing the person who is currently talking. If you want a certain person to appear in the top spot, click that person’s thumbnail below to lock them in — a blue outline indicates which thumbnail is locked in the top spot. You can click a different person’s thumbnail to switch to them manually, or click the locked thumbnail to unlock it and let Google’s audio detection code take over again.

A series of buttons along the left side provides access to more functions. (Click the hamburger button at the top to toggle between icons and icons with text.) The Invite People button lets you add more people to the hangout, the Chat button opens a group text chat on the right side (handy for sharing links or for maintaining a back channel during a public Hangout On Air), the Screenshare button lets you share your entire screen or a particular window instead of your face, and the Capture button takes a picture of what’s
happening on screen and saves it to an album that’s shared with everyone invited to the hangout. (Fortunately, when someone opens Capture, everyone else is given the opportunity to turn off their cameras.)
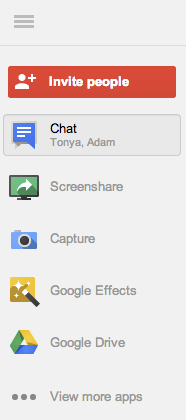
The rest of the buttons are apps that you can add or remove — Google Effects is particularly fun, letting you play sounds to all the participants, and add headwear, eyewear, and facial hair to the video image of your head. I’ve also loaded Google Drive, which promises to provide shared note-taking and sketchpad spaces. There are other apps that you can add, but I’ve had minimal success in using them.
Two quick observations about the screen-sharing capabilities. First, they’re view-only — you can’t control someone else’s screen through a hangout. Second, you can share your entire desktop (or, in my case, either of my desktops, since I have two monitors), or any particular window that’s open. That’s key, since sharing a specific window makes for a more-focused presentation that’s easier for participants to see.
I also want to share a screen-sharing trick we’ve used very successfully with our TidBITS Presents and Take Control Live presentations. Once you’re invited to a hangout, you can join multiple times from different computers logged in with the same Google+ account with no problem. So you can join once from a computer on which you’ll share your face, and a second time from another computer that will be sharing only its screen. That way you can have both your face and a presentation showing in the hangout at all times. Of course, you must mute the microphone and the speakers on the second computer to avoid feedback, and the people watching will have to lock the presentation in the top spot in the window to be able to read it.
Once you’re in a hangout, there’s not much to do but interact with your fellow participants. A few more usage tips:
- If something goes wrong and you have to relaunch your Web browser or even restart your computer, you can rejoin an in-progress hangout from your Google+ home page.
-
When you’re not talking, try to be quiet — don’t type on a loud keyboard, for instance — because Google’s audio detection code can notice the sound and move your picture into the top spot for everyone else. You can also mute yourself manually by clicking the microphone icon at the top the screen.
-
Particularly if there are a lot of people in the hangout, try not to interrupt others unnecessarily, since it makes the top spot change, which can be annoying for others.
-
Position the hangout window just below your computer’s camera, and try to make a point of looking either at the person in the top spot or, even better, straight at the camera. It’s too bad the thumbnails are at the bottom, since they tend to attract attention, and the best video results come from looking right into the camera.
-
Light is good — the more light the better, generally. If your room is dark, you can get inexpensive clamp-on shop lights from a hardware store to throw more light on your face.
-
If you’re the person who initiated the hangout, what you see is what will be recorded, so you may want to do a bit more work to focus the top spot on particular people when they’re talking, rather than letting Google’s audio detection code swap video feeds.
Watching a Hangout On Air Live or Later — To watch a public Hangout On Air to which you haven’t been invited, the only key is knowing its link, which the people giving the Hangout On Air can copy from within the hangout — there’s an Embed link at the top that provides both the raw URL and a snippet of code that enables the YouTube video player to be embedded in any Web page. When we do a TidBITS Presents event, for instance, we always copy that link and share it around on Twitter, Facebook, and Google+. In addition, we embed the video in a particular page that we’ve told our audience to visit at the appropriate time.
Watching one of these videos after the fact is no different than any other YouTube video, but we’ve learned some useful tricks for watching a Hangout On Air live.
- For reasons we don’t understand, some people have better luck viewing it on YouTube versus in the Google+ stream. Or vice versa. If you have trouble in one place, look in the other.
-
Although any modern Web browser should have no trouble viewing a hangout, since it’s just video, if you have trouble in one browser, try another. In particular, we recommend Google Chrome, since you have to figure that Google has tested the combination more than anything else.
-
Don’t want to watch in a tiny window? You can’t expand it to an arbitrary size, but you can make it full screen by hovering over the player and clicking the full screen button in the lower right corner.
-
What if you need to take a break during a public Hangout On Air? This is really clever on Google’s part — it turns out that the Hangout On Air player is like TiVo, in that you’re always playing recorded video. As a result, you can pause, go to the bathroom, and resume playing without missing anything. Of course, you’re messing with the time-space continuum when you do this, so don’t be surprised when your version of the hangout ends after the real one is done.
-
If something goes wrong and you get kicked out of the player, you can reload to get back to it. If you just want to pick up where you left off, that’s fine, but you can also click the Live button in the player to jump to the present.
-
Watching on an iOS device can be tricky. The Google+ app can’t do it, and Google’s YouTube app didn’t work either. We had no luck with Safari, but at some point recently the free Google Chrome browser started working fine. We had one report that Safari now works as well, but we haven’t been able to confirm that yet.
Give It a Try! — I’ll be honest. It took us a couple of tries to become comfortable with Google+ Hangouts, in part because it’s not nearly as app- and call-centric as Skype or iChat/Messages. But it’s more reliable than either, and has become our go-to solution for group calls, and even some person-to-person calls. Google+ Hangouts may not be the ultimate video chat service ever, but it’s pretty darn good, and we haven’t found anything better on today’s Internet, particularly for the price.
There's a third way to schedule a hangout that's better than the two mentioned. If you have a G+ account, create a G+ Event and use the Advanced Settings to make the event a private Hangout or Hangout on Air. You can choose the day and time the hangout will take place and invite people on G+, either individually or via circles or communities, to attend. This way, your invitees have advance warning and can respond whether they'll be attending or not (Yes, No, or Maybe). When the hangout starts, attendees will see a message in their G+ stream.
Hey, good to know. I've not done that before, but will try the next time I have a scheduled event. Will the hangout start automatically too, and invite everyone (including the scheduler)?
It will indeed!
I've updated the article to note that the Logitech C920 webcam is not officially compatible with the Mac, though it should work for basic stuff and can be extended with a third-party app called Webcam Settings.