Minimize Desktop Distractions
I’ve always been an easily distracted person. In college I discovered the glory of the engineering library’s basement: a pseudo fallout shelter whose bare bulbs dangled over solitary study cells, with nary a distraction in sight for an aspiring art major. Even the bookshelves lining those monastic spaces were unable to tempt me given their investigations of geological dullness and computational obscurity (subjects, I’m sure, that would titillate a more scientifically inclined mind).
It was only there, in the bowels of the university, that I was able to get any serious writing done. So where did I find myself a few months ago? On the TidBITS editorial team, with news to research, articles to write, and a desktop full of wildly entertaining time bandits. I was in serious need of intervention.
I decided to search for tools I could utilize to reduce distractions. I should note that, as an artist, I’m principally a visual person: I learn best by looking at pictures, and I work most sluggishly when there’s too much in my line of sight. If I see an email message enter my Inbox, an iChat window pop up, or a Twitter account update, I simply must check it out. According to a 2005 study conducted by the research firm Basex, I’m not alone: interruptions now consume 2.1 hours a day, or 28 percent of the average person’s workday. What I needed was a way to reduce the amount of visual noise I was exposing myself to, and to transform my desktop and screen into a more Zen-like state.
I also considered taking measures to block my Internet roaming – a principal offender in my time wasting – but decided I’d probably ignore anything that told me how much time I was wasting or turn off whatever was keeping me from where I wanted to go. The problem for me isn’t so much that I don’t know when I’m wasting time, or that a certain site is zapping productive energy, it’s that I get off track in the first place. Thus, I needed to figure out how to induce tunnel vision to the task at hand.
Word Processing circa 1987 — Writing being my main occupation, I began my search by trying to find a minimalist word processor. I discovered two very similar programs: JDarkRoom from Code Alchemists (freeware) and Hog Bay Software’s WriteRoom ($24.95). Both programs reduce your screen view to just a solid colored background with the text and cursor on top.
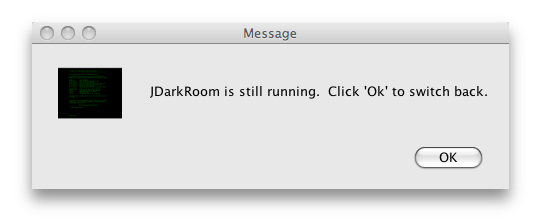
Both programs also have normal window modes, to enable users to switch to other applications without having to quit first. However, when you leave JDarkRoom’s fullscreen view, only a small dialog asking you to click OK when you want to reenter remains visible, while with WriteRoom the document appears in what looks exactly like a TextEdit window.
WriteRoom’s approach is more useful if you need to work between programs simultaneously, though presumably if you’re using WriteRoom or JDarkRoom it’s precisely because you want to reduce multitasking. Still, being able to copy and paste from multiple documents before returning to fullscreen mode to edit would be useful; in JDarkRoom to do the same thing you have to copy text, enter fullscreen mode, paste, then exit fullscreen mode to do it again. All that back and forth is a pain in the butt.
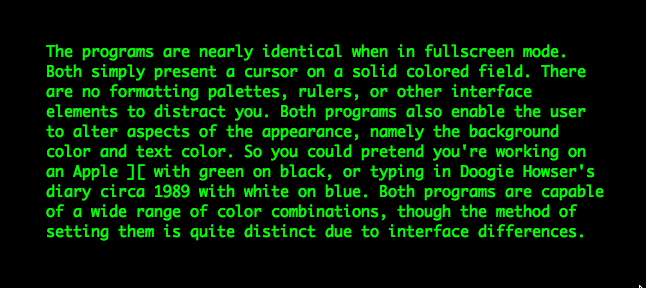
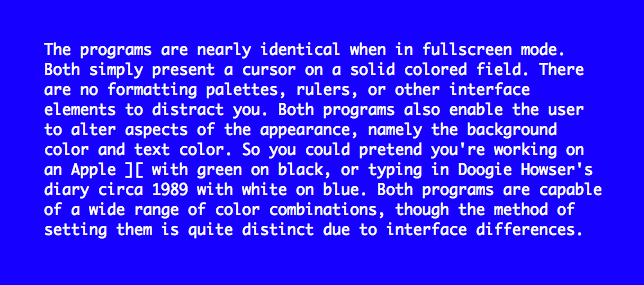
The programs are nearly identical when in fullscreen mode. Both simply present a cursor on a solid colored field. There are no formatting palettes, rulers, or other interface elements to distract you. Both programs also let you alter aspects of the appearance, namely the background color and text color. So you could pretend you’re working on an Apple ][ with green on black, or typing in Doogie Howser’s diary circa 1989 with white on blue. Both programs are capable of a wide range of color combinations.
The main difference between JDarkRoom and WriteRoom is the user interface. JDarkRoom, while only slightly less flexible than WriteRoom, initially appears to be extremely basic due to the lack of any menu bar or friendly graphical interface. Instead its menus are key-activated: F5 brings up the Help menu, F6 brings up the Preferences window, and so on. At first, I admit, I wanted my familiar drop-down menus, but soon I became accustomed to the key-based menu and command system, and even came to appreciate the speed it offered.
WriteRoom, on the other hand, has a typical menu bar with drop-down menus and an attractive and easy-to-navigate Preferences window. I found WriteRoom’s controls and menus to be more intuitive. Also, WriteRoom is slightly more flexible than JDarkRoom, enabling a little more customization and control over appearances and layout. However, while the difference between what the programs are capable of is small, the difference in how to activate those capabilities is significant.
To change your font in WriteRoom, you go to the Preferences window and pick your font from a list, as you would in Microsoft Word or TextEdit. In contrast, JDarkRoom’s font list contains only four standard fonts; to add more you must make adjustments in a configuration file (bleh!).
The only other major difference between the two programs may not be in place for much longer. WriteRoom has a feature called Edit in WriteRoom, which acts as a system-wide plug-in that places the Edit in WriteRoom feature in the Edit menu of other applications. Thus, when working in Apple Mail, BBEdit, or other programs, you are supposed to be able to export that text, work and edit in WriteRoom, and then import back into the original program. Such a feature would be a real advantage over copying and pasting from the other applications.
This would give WriteRoom a big leg up on JDarkRoom, but it doesn’t work in Mac OS X 10.5 Leopard. Jesse Grosjean, head of Hog Bay Software, says that Leopard users should instead use the replacement program QuickCursor (freeware) to perform similar tasks.
QuickCursor, like Edit in WriteRoom, is a system-wide application that enables users to edit text in their favorite text editor. However, what’s interesting here is that the QuickCursor development page says, “In future releases you will be able to change you preferred editor from WriteRoom to BBEdit, TextMate, Smultron, or any other text editor that supports the ODB Editor Suite.” Does this mean that QuickCursor could eventually support JDarkRoom? If so that would eliminate one of the few major differences between the freeware JDarkRoom and the $24.95 WriteRoom.
Either way, both programs work well to reduce visual distractions and keep your focus on your writing. I would recommend JDarkRoom if you’re on a budget and don’t mind a little less overall control, key-activated menus, and somewhat annoying configuration commands; and WriteRoom if a more standard user interface, slightly extended controls and options, current access to QuickCursor, and overall ease of use are worth $25 to you.
If you’re not quite ready for the supreme minimalism of JDarkRoom or WriteRoom, check out the free Writer from QI Software. The program doesn’t limit visual distractions as fully as the other two, but instead dims all applications running in the background and utilizes a simple interface. My favorite features are the two easy-to-access buttons; one for muting all of your computer’s sounds, and another for blocking your network activity.
A More Flexible Focus — While these word processors worked well and were fun and easy to use, I still needed something that I could apply when I wanted to work in another program such as Mail or BBEdit. Enter Isolator and Menu Eclipse (both freeware).
Isolator works on the same principles as WriteRoom and JDarkRoom, minimizing your Desktop’s visual noise to create a kind of tunnel vision. However, instead of turning your screen into a diving bell, Isolator maintains the appearance of the program you’re working in and just blocks everything else out.
When activated, Isolator pushes the application you’re working in to the foreground, either reducing everything else to minimal visual noise or completely obscuring it. Isolator’s strength is the degree to which you can control what happens to these background programs.
Within the preferences of the current development version – 3.40beta – Isolator lets you choose the background color and its transparency level, ranging from faint to opaque. Choosing opaque with a tint of black results in the foremost application being surrounded by a solid black background.
However, that kind of curtaining can be too extreme for some tasks. Sometimes you may need to move between several different programs at once, in which case it makes sense to use a fainter tint. Beyond tinting you can also apply a filter.
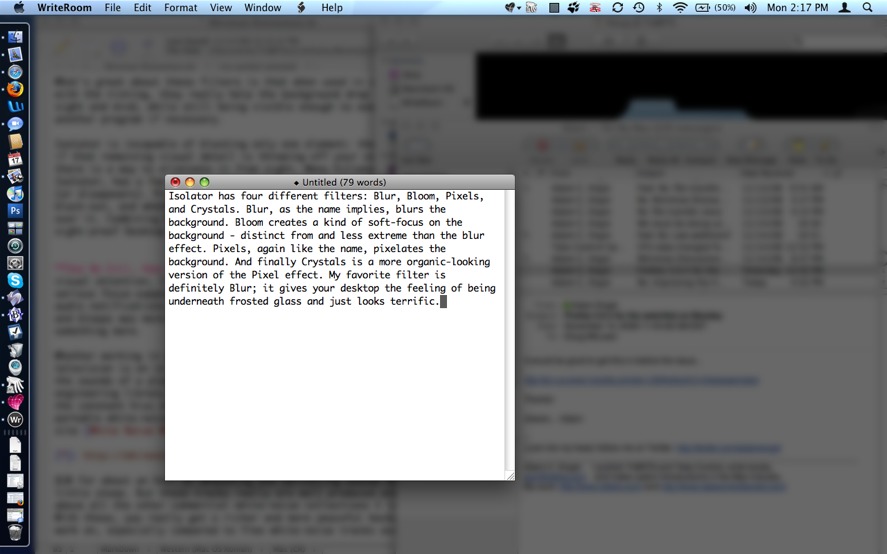
Isolator has four different filters: Blur, Bloom, Pixels, and Crystals. Blur, as the name implies, blurs the background. Bloom creates a kind of soft focus on the background, distinct from and less extreme than the blur effect. Pixels, again like the name, pixelates the background. And finally Crystals is a more organic-looking version of the Pixel effect. My favorite filter is definitely Blur; it gives your desktop the feeling of being underneath frosted glass and just looks terrific.
What’s great about these filters is that, when used in combination with the tinting, they cause the background to drop away from sight and mind, while still remaining visible enough to jump into another program easily if necessary.
Isolator is incapable of blocking only one element: the menu bar. So, if that remaining visual detail is throwing off your concentration, there is a way to eliminate it from sight. Menu Eclipse, like Isolator, has a few options and controls for how the menu bar appears (or disappears). Primarily, you can set the level of tint or blackout, and whether or not the menu bar will appear when you mouse over it. Combining Menu Eclipse with Isolator produces a fully focused Desktop – the perfect place to get some work done.
See No Evil, Hear No Evil — Once I figured out how to focus my visual attention, I realized I was still contending with another serious focus-zapper: auditory distraction. Even after disabling audio notifications in both Apple Mail and iChat (hearing those bleeps and bloops was more distracting than I realized), I still craved more silence.
Whether working in a coffee shop, bus terminal, or at home when the television is on in the other room, I find myself derailed by the sounds of a place. The belly of the beast that was the engineering library always had the gentle hum of air conditioning or the constant hiss of the heating system. I realized I needed some portable white noise. Some searching revealed the White Noise MP3s Web site.
Spending $10 for about an hour of whooshing and sprinkling sounds might seem a little steep. But these tracks really are well produced and stand above all the other commercial white-noise collections I looked into. With these, you really get a richer and more peaceful backdrop to work within, especially compared to free white-noise tracks available online.
The track descriptions on the site read a little bit like J. Peterman meets a wise-ass ninth grader, and although the latter personality is a bit off-putting, the products deliver. I downloaded and have been listening to Dreamstorm; its description was merely “DUDE.” The site also provides fairly long sample clips of the tracks so you can get a good sense of them before purchasing.
Distraction-Free, or at Least Distraction-Reduced — As I type this article I have Isolator tinting and blurring my background applications, Menu Eclipse obscuring my menu bar, and Dreamstorm playing in my ears. While of course distractions still abound – a couple of squirrels are playing tag outside my window – I am definitely working in a more focused state.
Good luck with these applications, and let me know if there’s anything out there I’ve missed or should know about.


