Take Control of Slack Basics: Chapter 2, Get Started with Slack
This article is a pre-release chapter in the upcoming “Take Control of Slack Basics,” by Glenn Fleishman, scheduled for public release later in 2016. Apart from Chapter 1, Introducing Slack, Chapter 2, Get Started with Slack, and Chapter 12, Start a Slack Team, these chapters are available only to TidBITS members; see “Take Control of Slack Basics” Serialized in TidBITS for details.
Chapter 2: Get Started with Slack
Slack offers a set of continuously updated apps for all major desktop and mobile platforms, and for the Web. When I say “continuously,” I mean it—the update frequency of the slowest schedule, which is for native apps, is about every week or two (as you can see on the Slack page at AllMyChanges.com).
The Slack apps talk to Slack’s back-end servers, retrieve data, and display the results in real time. Unlike a platform like Twitter, there are no third-party apps that mirror the functionality of Slack’s core messaging system.
Slack’s native apps for OS X, iOS, Windows, and Android (plus betas for Linux and Windows Phone) allow some elements—seemingly text labels but not interface changes—to roll out through server updates, so you don’t even have to download a new version to get some changes. Mobile apps on the same platform can appear slightly differently, depending on the size of the device’s screen.
Before you can do anything with Slack, you need to join a Slack team. Thus, the first thing this chapter looks at is handling a team invite along with how to Fill Out Your Team Profile and Set Up Two-factor Authentication.
With those important steps out of the way, I then examine the pros and cons of using the Web app, as well as how to Launch the Web App, Install a Native App, and Sign In to a Team that you’ve joined.
Handle a Team Invite
For each team to which you’re invited, Slack manages the initial account setup via an email message, which provides you with a link to the Web app. You’re allowed to use the same email address with as many teams as you want. You obtain this invitation in one of three ways:
- The team you want to join might be a public Slack team, such as SlackBITS, where you enter your email address into a signup form, which automatically emails you an invitation. (For an example, see the SlackBITS signup form.)

- In some cases, the only way to receive an email invitation is for your team’s administrator to email it to you. (These can be re-issued if lost.) The invitation may have a customized message. In Figure 2, you can see an invitation to the public SlackBITS team.

- Finally, some teams allows account creation by anyone with a given domain name in their email address. If that’s the case for you, in your Web browser’s address field, enter
team-name.slack.com/signup, and enter your email address. Slack generates an invitation email message.
No matter how you receive the email invitation, click the link in the message to continue the process of joining the team. The link opens in your Web browser. (Currently, you cannot set up an account via a native app.)
Now you can set the username that will appear in your conversations with that team (Figure 3). This username is distinct from your email address and cannot, in fact, be an email address. If you belong to more than one team, you may use the same username in different teams. Currently, Slack applies a lot of restrictions to usernames: No more than 21 characters, all lowercase, and besides alphanumerics, containing only periods, hyphens, and underscores—no spaces. The username must be unique in the team.
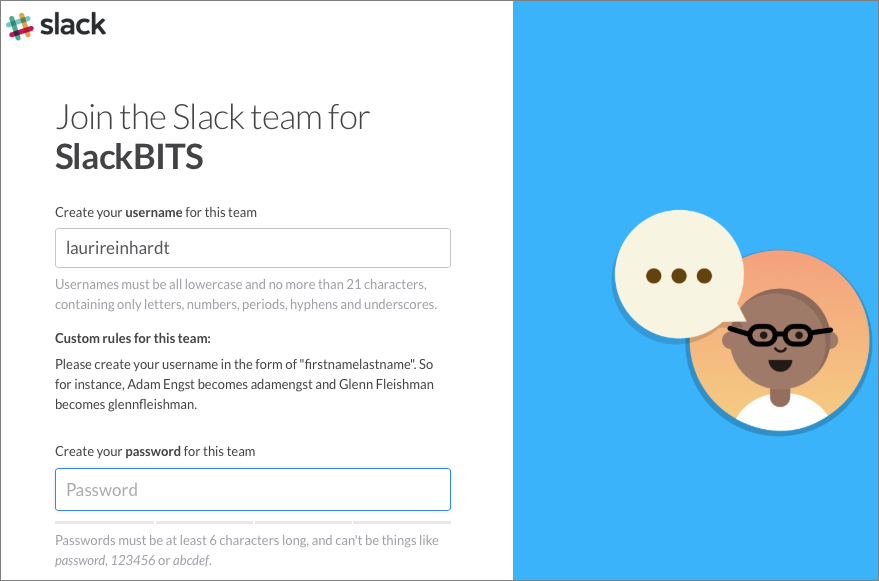
Ask for help or think carefully before you pick your username. Slack suggests that teams follow a standard rubric when picking usernames to avoid “collisions” and confusion with other team members—Slack can autocomplete names as you enter them for replies or direct messages, so it is important that all team members be able to figure out who is who. One team I’m in grew so fast that we didn’t have a convention, so we ended up with a lot of overlapping Mikes, Michaels, and Tims, which caused confusion with username autocompletion.
When it comes to entering a password, I recommend—as with any Internet service—using a password manager like 1Password or LastPass to generate and store a strong, random password of 16 or more characters (Mac users could instead rely on Safari and iCloud Keychain).
Now that you’ve joined a team, be sure to complete your team profile (described next), Explore More Slack Customizations, and Set Up Two-factor Authentication.
Fill Out Your Team Profile
Your Slack team members may want to know more about you, such as your role and how to reach you. Slack creates a skeleton profile for every member, but you should punch it up with more detail. (Some teams may even require that you do.)
You can revise your profile in any version of Slack:
- First, display your team profile. Click the Profile tab in the Slack Web app (described in the sidebar just above) or try one of the following (methods vary by app, so if one doesn’t work, try another):
- Click the team name at the upper left to open the Team menu, choose View Profile & Account to see your profile at the right, and click the Edit button.
- Click your avatar or name in a posted message, and choose Edit Your Profile.
- Bring up the Team Directory via the More … menu, select your name, and click Edit or Edit Profile (Figure 6). (In some Slack apps, the More button is sideways.)
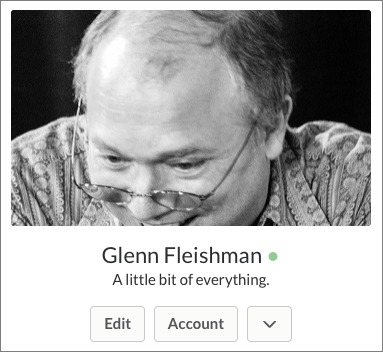
Figure 6: To change your profile, click Edit. - As desired, fill in or edit the fields (Figure 7). You may see just a few basic fields, or there may be additional fields added by your team administrator. In one team that I belong to, the team added fields for typical work area, title, and areas of responsibility. You may see fields in which you can enter Slack usernames (handles) for other team members, such as your boss or direct reports.
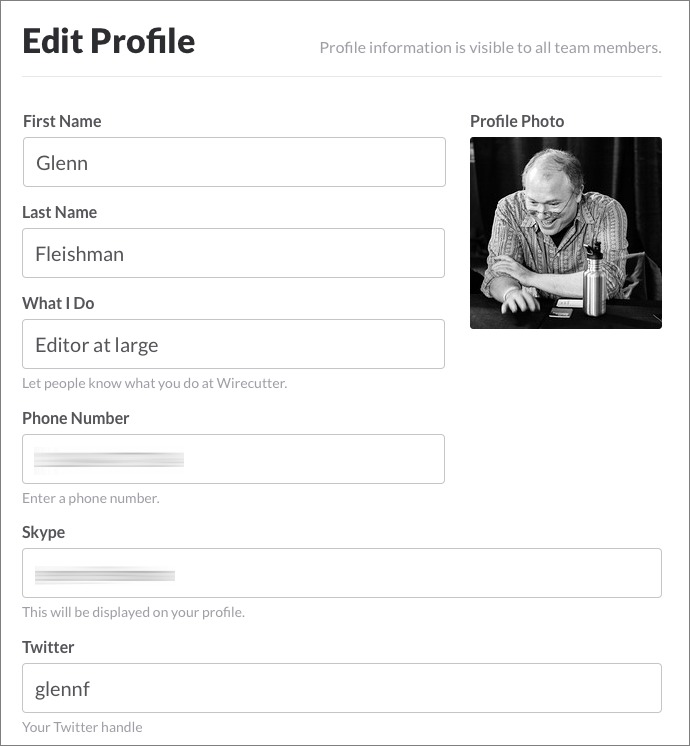
Figure 7: You can expand your profile with useful details, such as how to reach you outside of Slack. - I recommend that you add a profile photo, which I’ll call an avatar throughout this book. Click the photo well to get started: Depending on the platform, you can upload, select, or take a photo. In the desktop and Web apps, you can crop it before saving it (Figure 8).

Figure 8: What a punim! - After making changes to your profile, click Save Changes.
Keep in mind that profiles are team-specific. So if you ever join another team, you have to set up an entirely different profile in that team’s space.
Set Up Two-factor Authentication
Slack offers two-factor authentication (2FA) for all accounts, both as an option that individual users can select (both free and paid teams), and as something an administrator can make mandatory (paid teams only). With 2FA, every time you log in to a team, whether on a new device or in a new browser or just when Slack decides that you should, you must also enter a code.
Although Slack encrypts 100 percent of data in transit, and has other security precautions in place, I recommend 2FA for everyone, even for casual teams. Why? Because any Internet service can be reached by any attacker from anywhere in the world. 2FA requires a second, out-of-band authentication credential that no attacker could acquire. Short of cracking Slack’s servers—in which case passwords are of no help—2FA prevents someone with your password or a way to bypass entering your password from gaining access to your account. They must also have access to some means of grabbing your 2FA code.
This, in turn, can prevent all manner of malicious activity, even in small, personal groups. Slack is an intimate communication mechanism, in which people rarely doubt that you are you. A villain could:
- Impersonate you and pretend that you’ve been robbed while on vacation, convincing a Slack team member to wire “you” $1,000 in emergency funds.
- Extract information from your team’s posted information to engage in identity theft—of both you and your team members.
- Post vile messages and images that lead to a boss, co-worker, friend, or relative being appalled by your behavior—forcing you to explain (convincingly!) that it wasn’t you.
- Obtain corporate information used for extortion (“pay us or we post this information”), sabotage, or competitive espionage.
Slack 2FA works with not only via SMS text messaging, but also with authentication apps like Google Authenticator, 1Password, and Authy. Those apps take a seed code from Slack on setup, and then produce a unique time-based one-time password (TOTP) whenever they’re launched.
You set up Slack 2FA by visiting the Account view in the Web app (see Finding the Account View, earlier). Follow these steps on the Settings tab:
- In the Two-Factor Authentication section, click the Expand button and then click Setup Two-Factor Authentication (Figure 9).
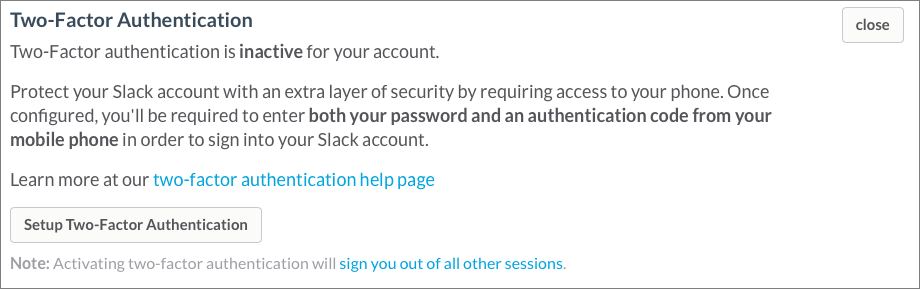
Figure 9: Start the process for setting up 2FA via the Web app. - If Slack asks for your password, enter it and click Confirm Password.
- Pick whether you want to use SMS or an authentication app (Figure 10). Don’t stress about which you choose; you can adjust your setup later, or even pick SMS now and add an app as a secondary.
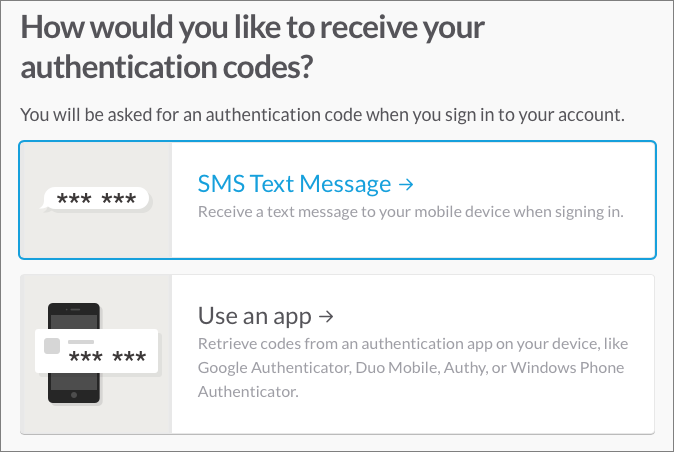
Figure 10: You can opt to use SMS or an authentication app. - If you selected SMS, enter your phone number and click Add Phone Number. Slack sends a text message with a 6-digit code to your number. Enter that and click Verify Code and Enable.
- If you chose to use an app, using the directions for your app, scan the onscreen QR code and enter the 6-digit TOTP code when requested by Slack.
- If Slack suggests having a second login method, you can follow the prompts to enable another one.
- Slack displays a set of single-use backup codes in case you lose access to all your devices and apps. Print these out, or store them digitally and encrypt them securely, such as in a password manager like 1Password or LastPass. Don’t store them in plain text on anything connected to the Internet!
- If you didn’t set up a second login method in Step 6 above (perhaps because you never saw the prompt), and if you would like to have a second login method, repeat Step 1, click “Set up a backup option,” and follow the prompts.
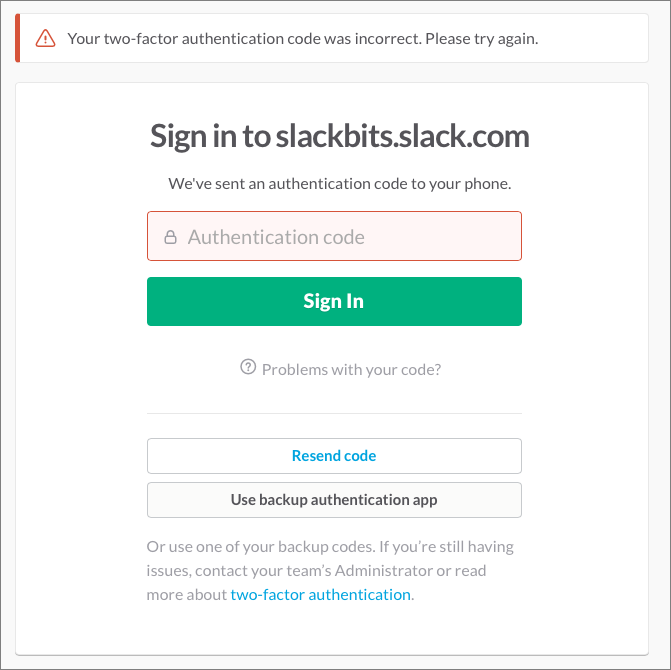
Now, whenever you log in to Slack, you’ll be prompted to enter a code through whatever your primary method is. If that’s not available, you can click “Problems with your code?” and select a backup option or try again (Figure 11).
Every Slack team is like its own Web site, and both your team account’s password and whether you’ve enabled two-factor authentication are likewise associated with one team. If you join another Slack team, you may re-use the same Slack password you used for another team, but two-factor authentication must be enabled separately.
Decide Whether to Use the Web App
Before you can start messaging in Slack, you need to decide whether to access it through your Web browser as a Web app or through a native app on a Mac, PC, iPad, iPhone, or Android tablet or smartphone. It’s also fine to use whichever is most convenient, depending on what features you want to access and which device you are using.
Slack’s Web app, which runs in the desktop versions of Google Chrome, Firefox, Internet Explorer, and Safari, and in these browsers’ mobile versions, has a strong sense of design without sacrificing utility. It’s responsive—that is, it works well in any screen size or orientation —but there remain distinct differences between what a Web app and a native app can accomplish, depending on the platform.
Part of your decision should revolve around security: Corporate Slack teams will likely contain confidential information that’s important to protect, but even casual Slack teams may be effectively private. Slack’s native apps can be much easier to secure than a logged-in Web session in a Web browser because they are designed end-to-end to preserve the privacy and integrity of data that passes over them. In contrast, Web browsers are leaky as sieves, and can leave cached information and other data behind. If you are using a shared or public computer, using Slack in a Web browser may be unacceptably insecure.
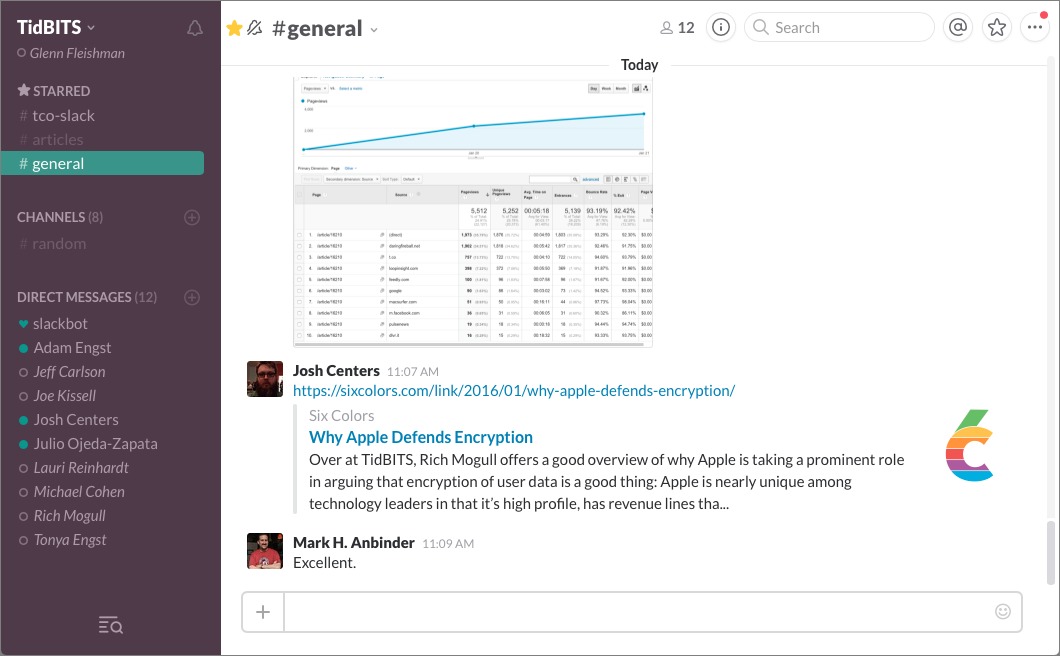
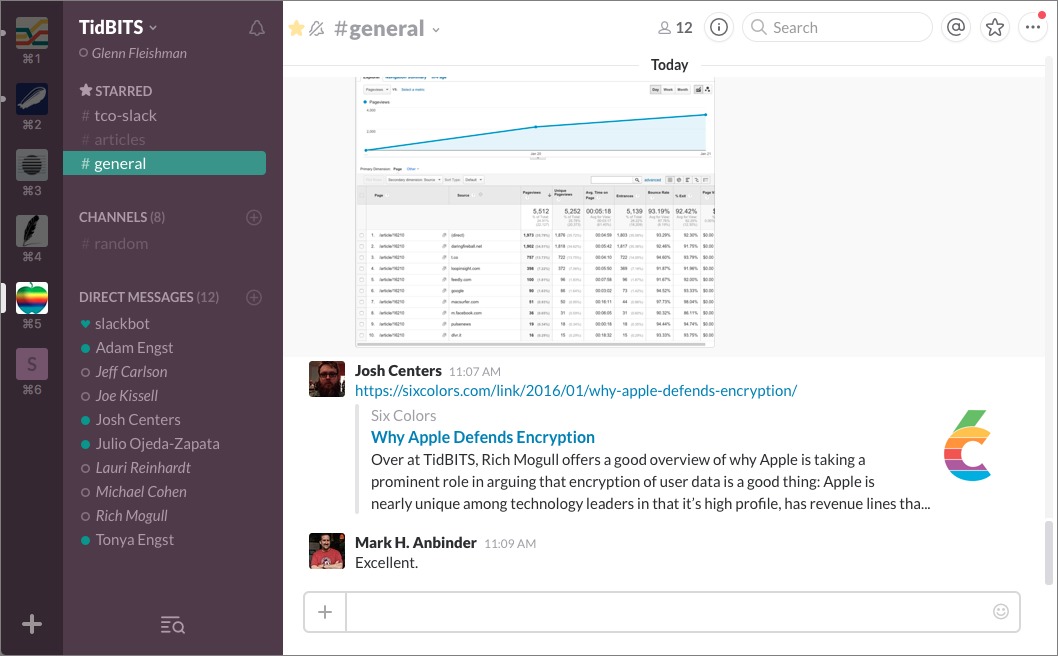
Despite their similar appearances, shown in Figure 12 and Figure 13, the Web app and native apps differ in a number of significant ways.
You should choose a native app if:
- You like the most seamless, fastest experience.
- Your team works with information that requires a high degree of privacy or security.
- While you’re working, you don’t always have an Internet connection. The native apps do a much better job at allowing offline searching, message viewing, and composing.
- You want to take advantage of native-dependent features, like notifications. (However, some browsers do support notifications for Web apps, as you can see in Figure 14.)

- Managing a browser window or tab is more annoying than working with a purpose-built app. (There are ways around this, too, on some platforms or with some browsers, in which a dedicated browser window launches as what appears to be a separate app, always opening to a selected site’s page.)
- Features that require direct platform integration, especially on mobile operating systems, are important to you, like being able to drag-and-drop images and documents into a Slack window, or using a photo picker within iOS.
Slack itself notes on its app download page, “Slack is also available through desktop browsers, but apps will give it a better experience all around.” That’s a fairly strong statement.
So why pick the Web app instead, or use it regularly?
- No installation is required, making it easy to use on the fly. You can walk up to any computer and log in.
- The lack of platform integration can keep the app from bugging you through notifications. It can also make it impossible for you to access certain native features (like your camera roll) when you don’t want those available. For instance, if you use your personal computer for a work Slack team, you might want to access it via a browser.
- Some Slack settings are available only in the Web app. This can be problematic if you don’t want to use the Web app at all.
Happily, this isn’t an either/or decision. Because each Slack app is essentially a front-end interface to data stored on the Slack servers, some of which is cached locally and temporarily, you can move among apps and platforms.
Start Using Slack Apps
Now that we’ve looked at the pros and cons of running Slack on the Web, it’s time to start using Slack. In this section, I walk through the basics of using the Web app and provide links so you can Install a Native App easily. I also tell you how to Sign In to a Team. Finally, I describe how to Sign Out from All Other Sessions on multiple devices at once—you should be aware of this option in case you, for example, need to sign out from a stolen device or are concerned that your login credentials have been compromised.
Launch the Web App
Working in your Web browser, type your team’s URL into the address field. Enter the full subdomain, as in team-name.slack.com and, if you are asked, follow the prompts to enter your username, password and 2FA code.
If you aren’t sure what the URL is, go to slack.com/signin, where you can both see which teams you’re logged in to or enter your email address to find out which teams go with it.
Notice the Configuration Options
The Web app offers many configuration options that aren’t in the native apps. For now, just be aware that a wide array of configuration controls are here, although if anything jumps out at you, feel free to configure it now.
Some settings are found on the “Home page” (Figure 15). To access them, click the Home  button at the top of the screen. (Or, if you are viewing the main Slack interface, click the team name at the upper left to open the Teams menu, choose View Profile & Account, and click the Account button at the right. Finally, click the Home button. If that seems fussy, you can also navigate to my.slack.com/home.)
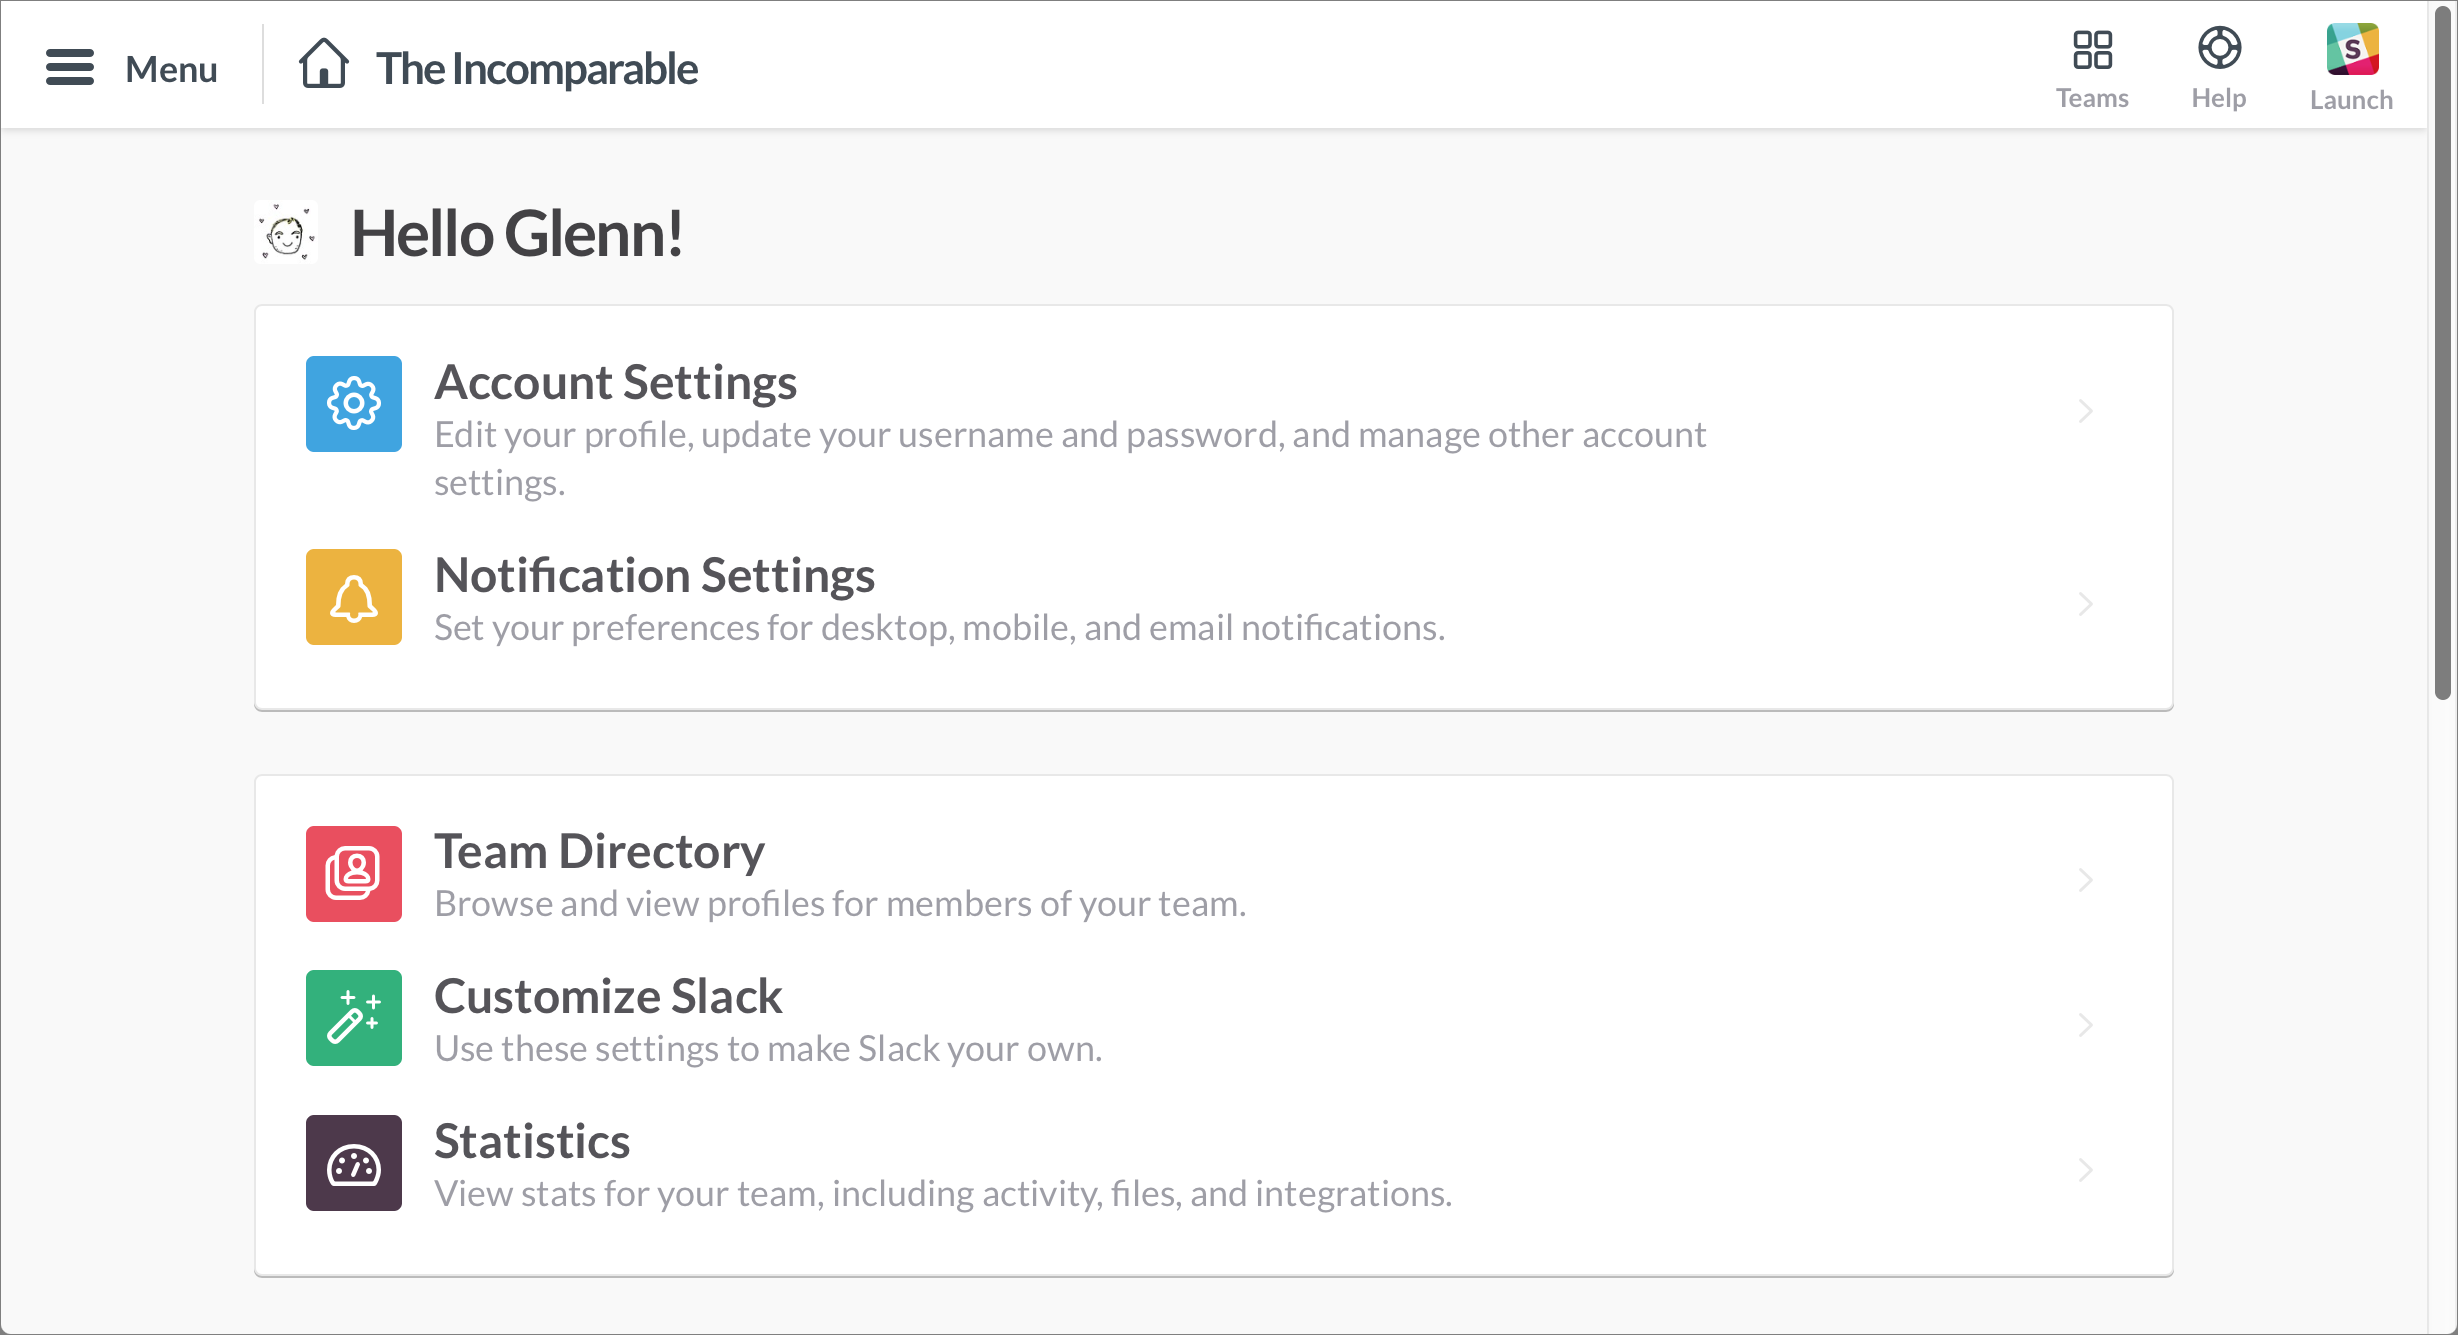
At the top of the Home page, Account Settings and Notification Settings largely mirror options found in native apps. Below that, if you’re an administrator, you see a team management section (Team Settings, Manage Your Team, and Billing). Farther down are Team Directory, Customize Slack, and Statistics.
Some settings are also accessible from the sidebar—and some are found only in the sidebar (to view the sidebar, click the Menu  button at the upper left). Let’s focus on those that are available only in the Web app (the others are discussed elsewhere in the book):
- Configure Apps: Found in the sidebar, this option lets you work with installed apps and custom integrations (for the team) and connected accounts (for you). I’ll say much more about this later, in Chapter 10, Manage Bots and Integrations.
- Statistics: This view provides insight into how frequently and in what quantifiable ways a team uses Slack. Paid teams get more stats.
- Customize Slack: This option is all about fun. You can add custom emoji (tiny icons), provide automatic replies for Slackbot to spout based on what other people in your team type, and add messages that appear when Slack starts up. (I’ll explain these in Use Emoji in Chapter 4, Post Basic Messages, and in Chapter 10, Manage Bots and Integrations.)
- Team Settings: I’ll discuss team settings in this book’s upcoming companion title, Take Control of Slack Admin.
Use Slack in the Web App
You switch from the Home page to the core messaging part of Slack by clicking the Launch  button (currently located at the upper right).
The interface of the Slack Web app is nearly identical to the native desktop apps except that the left-hand teams list isn’t available. For help with signing in to and switching teams, read Sign In to a Team, slightly ahead.
Install a Native App
Slack links to all its app downloads on a single page:
- Mobile apps must be downloaded from the stores for their respective operating systems:
- iOS (iOS 8 or later; Apple Watch component available)
- Android (version support not listed)
- Windows Phone (beta)
- The OS X app can be downloaded directly or via the Mac App Store.
- The Windows version comes in an individual user and an MSI version for system administrators.
- A Linux beta is available for Ubuntu (32- and 64-bit versions) and Fedora (64-bit version).
- For Chrome OS, there’s a Chrome extension.
Once you’ve installed an app, keep an eye out for updates. In the desktop apps, a banner appears if there’s an updated version (Figure 16). Mobile app updates are managed and pushed via their app stores.

Sign In to a Team
Slack lets you sign in to more than one team in the same native app or browser. You may want to sign in to the same team in the Web app, in a Slack native app on your work computer, in a Slack native app on your smartphone, and in the Web app on your tablet.
After setting up your team account, here’s how you add it to another Slack app:
-
Web app: In any supported browser, enter the unique URL of the team and log in. (See Launch the Web App, earlier in this chapter, for details.)
Or, if you are viewing a team’s conversations, click the team name at the upper left to open the Team menu and choose Sign In to Another Team.Or, if you are on the Home page, click the Teams
 button and choose Sign In to Another Team.
-
Desktop app: Click your team name near the upper left and choose Sign In to Another Team.
Or, in the left-hand Teams sidebar, click the Add (+) button at the bottom to bring up a login window. (You may not see this sidebar until you’ve signed in to at least two teams.) - Mobile app: Tap the More … button in the upper right, tap Switch Teams, and then tap “Sign in to another team” to view a sign-in screen. (In some Slack apps, the More button is sideways.)
Sign Out from All Other Sessions
Slack lets you sign out of everywhere all at once, on a per-team basis. Why would you do this? Usually for security reasons—you might, for example, forget whether you left yourself logged in at a public computer or accidentally leave your tablet in an airplane.
Signing out everywhere is also a good action to take if you think someone may have gained access to your Slack password. You can disable all Slack sessions except in the browser you’re using, and then you can change the password. Signing out is not irrevocable: you just have to re-log in in everywhere again on all your devices.
Follow these steps:
- If you are signed in to more than one team, switch to the team that you want to sign out from first.
- Access the Account view in the Slack Web app (see Finding the Account View, earlier in this chapter).
- In the Settings tab, click the Sign Out All Other Sessions button (Figure 18).

Figure 18: Click the button to ensure that no one has access to your Slack account for this team on any platform, browser, or device. Slack uses login tokens, much like session tokens set via browser cookies, to validate your native and Web app connections. When you click the Sign Out All Other Sessions button, Slack deactivates all the tokens assigned to your logins for the team. After the next action taken in any Slack client or the next time that client polls Slack’s servers for updates, the client is updated to show that you logged out from the team, and Slackbot should inform you in all active clients that you’re now logged out.
- If you signed in to multiple teams, click the Teams button on the toolbar to switch to each team in turn and sign out.
- If you are concerned that your password isn’t secure, change it. Still in the Account view, in the Settings tab, work in the Password area.
You’ve now signed out from all your Slack teams, though you remain logged in to Slack in the current browser. If you like, you can log out there as well: click the Menu button at the upper left and choose Sign Out.
Read More: About | Chapter 1 | Chapter 2 | Chapter 3 | Chapter 4 | Chapter 5 | Chapter 6 | Chapter 7 | Chapter 8 | Chapter 9 | Chapter 10 | Chapter 11 | Chapter 12