The Power of Preview: Annotating Documents and Images
The last time we explored Preview, OS X’s built-in document and image viewer, we discussed using it to crop and resize images, as well as how to undo those changes (see “The Power of Preview: Cropping and Resizing Images,” 18 March 2016). Although Preview has many more image manipulation tools, we’re focusing this week on Preview’s annotation capabilities, which you can use to mark up an image or PDF (you can’t annotate Microsoft Office or iWork documents).
Most of Preview’s annotation tools are available in the Tools > Annotate menu, but it’s often easier to find them in the Markup Toolbar, which you can display by clicking the toolbox icon on the main toolbar, or by choosing View > Show Markup Toolbar (Command-Shift-A).
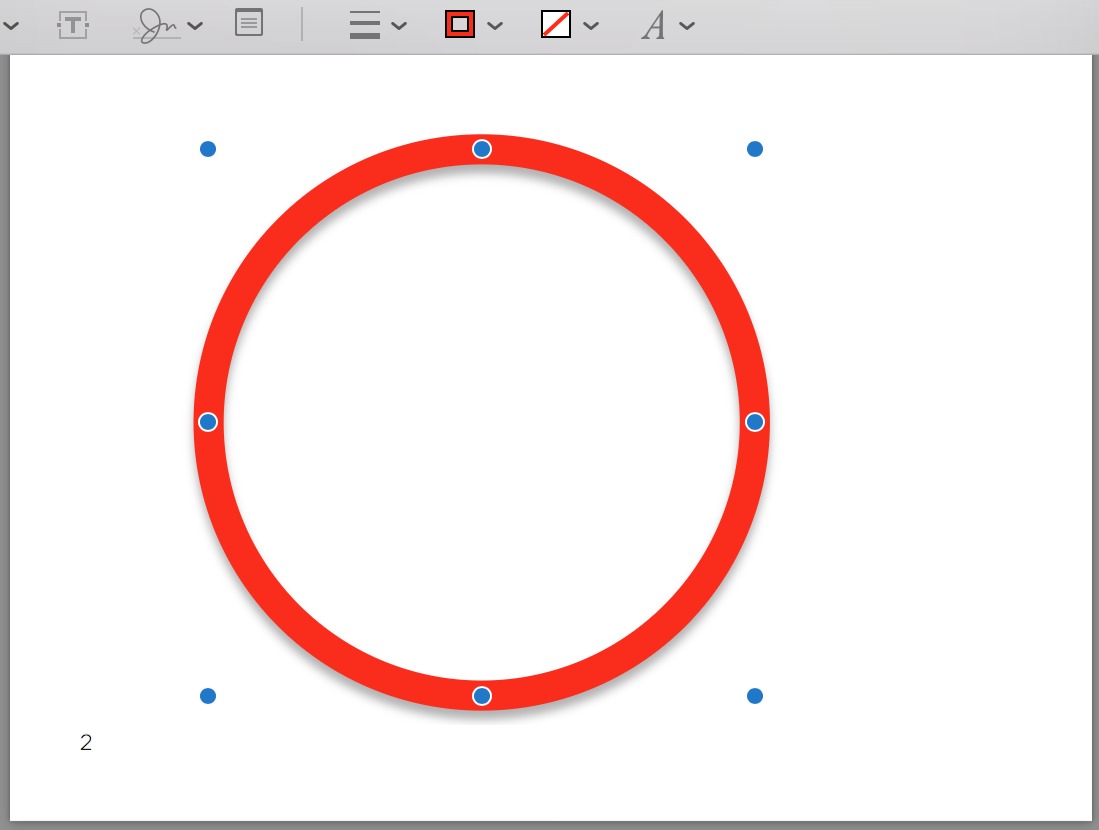
The Colour and the Shape — The Preview annotation tool we use most often is Shapes, which makes it easy, for instance, to call out a particular interface element in a screenshot. You can find all available shapes under Tools > Annotate > Rectangle, Oval, Line, Arrow, Polygon, and Star. However, it’s usually faster to access Shapes on the Markup Toolbar.
Whether using the menu or toolbar, choose a shape to insert it into your document or image. It appears in the center of your document; to insert a new shape at a particular spot, click Shapes on the Markup Toolbar, and then drag the desired shape to the spot you want.
A selected shape is surrounded by blue drag handles you can use to adjust the shape’s dimensions. As in many image manipulation apps, you can press Option while dragging a handle to resize from the center, and press Shift to maintain the shape’s aspect ratio. For lines and arrows, the Shift key constrains the line to 45-degree angles.
You can, of course, move the shape, by placing your cursor on the shape anywhere other than on a drag handle — when your cursor becomes a hand, click and drag to move the shape. Or just click once to select the shape, after which you can use the arrow keys to nudge it more precisely.
As is often the case, if you need more than one shape of the same type, you can either use copy and paste, or simply hold down Option and drag the shape, as if to move it, to create an exact duplicate.
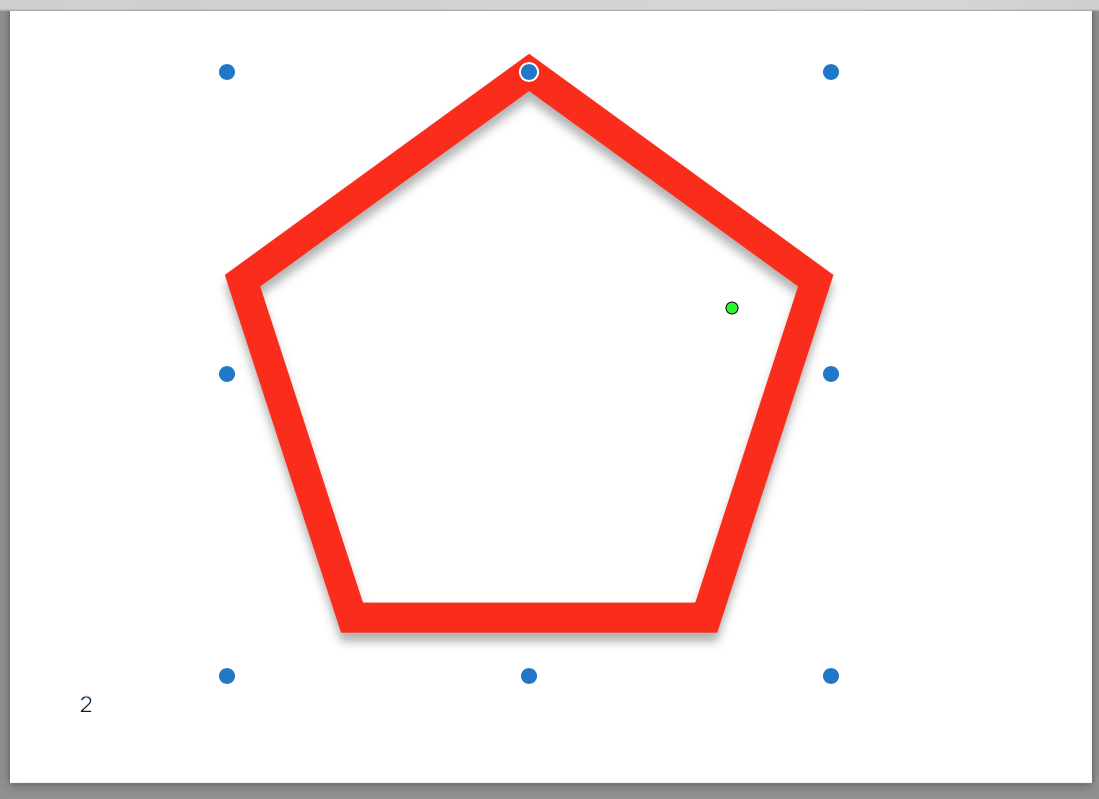
The line, polygon, and star offer additional possibilities. When first inserted, lines are straight, but a green drag handle in the middle of the line lets you make it into a smoothly curved line. By default, inserting a polygon adds a hexagon to your document. But if you select it and look closely, you’ll see another green drag handle. Move that handle counter-clockwise to remove sides, down to three, or clockwise to add sides, up to 12. The star shape works similarly, except it has two green handles, one that adds or remove points and another you can use to change the length of the points. For both the polygon and the star, the Shift key’s behavior is reversed; the resizing handles maintain aspect ratio by default, and the Shift
key lets you change the horizontal and vertical dimensions independently.
It’s possible to rotate a shape, too, but only if you have a trackpad. Select the shape, put your thumb and forefinger on the trackpad, and twist. Make sure you have a shape selected first, because otherwise Preview rotates the entire image (in 90-degree increments).
After adjusting the shape, size, and position, you can further customize the shape’s look with options on the Markup Toolbar:
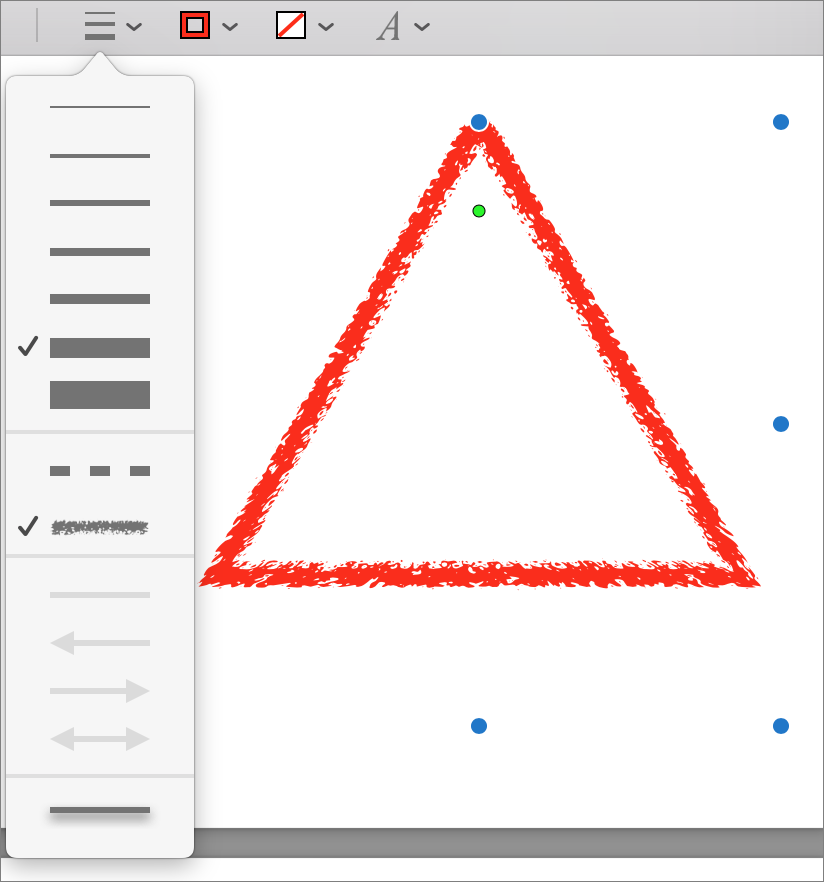
- Shape Style: Use this menu to adjust the thickness of the shape’s exterior line, generally called the “stroke.” You can also make the stroke dashed or rough-drawn, as well as add or remove a drop shadow. For line and arrow shapes, you can also choose where to place arrows.
-
Border Color: Click this button to display a color picker that lets you adjust the color of the shape’s stroke.
-
Fill Color: Similarly, this button reveals a color picker that lets you adjust the color of the “fill” — the space inside the stroke. By default, it’s set to “no fill,” signified by a red line across a white square.
There are a few ways to use these tools in constructive ways other than inserting pretty shapes. A technique we use frequently at TidBITS and Take Control is to place a red oval or rectangle with no fill around interface elements we want to draw attention to. Even if you’re not a technology writer, snapping a quick screenshot (which you can do from within Preview, as you learned in “The Power of Preview: Pulling Files into Preview,” 25 February 2016), highlighting an onscreen item, and
sending the annotated screenshot to a friend can save time and frustration when trying to assist with a technical issue. Arrows can also be useful for pointing out specific details.
Shapes can also be helpful for redacting text from PDFs that you’re planning to print. Create a rectangle with a black stroke and a black fill and drag it over a portion of a document you wish to obscure. When you print the document, the black rectangle will cover the sensitive material. (Josh once had a job that involved doing this for thousands of documents, albeit not with Preview.) Don’t assume this technique will work for PDFs you’re distributing digitally; the shapes remain editable objects that can be moved and deleted in both Preview and Adobe Reader. For a true redaction capability that deletes the text underneath the black bar, use Smile’s PDFpen or Adobe’s Acrobat Pro.
Preview remembers your settings, so if you generally want shapes with 3-point red strokes and no fill, you’re all set. Unfortunately, there’s no way to save different settings, so if you switch to a black rectangle, reverting to your previous settings must be done manually.
With PDFs, annotations remain unique, editable objects, even after you save, close, and re-open a document. However, with images, that’s not true. Once you close an edited image, all your annotations are flattened into the underlying bitmap of the image and can no longer be selected and manipulated individually. In other words, make certain that you’re done adjusting annotation shapes before you close the file.
One final tip here. You might think that you could use Edit > Select All (Command-A) to select all the annotations you’ve made and delete them. You’d be wrong; that selects all the previously existing picture content instead. However, you can Shift-click multiple objects to select them simultaneously for moving or deleting all at once.
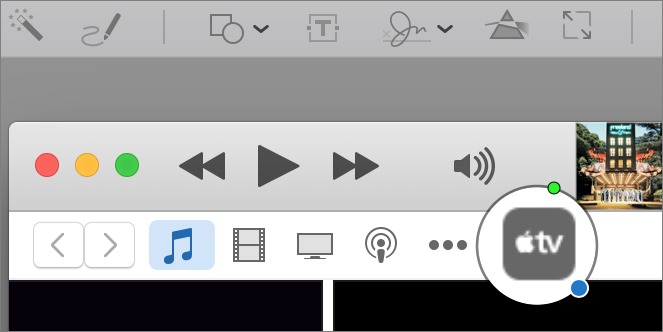
Who Was That Masked Loupe? — For an alternative way to call things out, check out the Mask and Loupe shapes, both available from View > Annotate and the Shapes button menu in the Markup Toolbar.
Mask is a bit tricky to use because it’s sort of a reverse shape: the actual shape is a large gray border that deemphasizes what it covers. Inside that border is a “no fill” rectangle that you position over the portion of the image you want to highlight. The blue drag handles work as you’d expect, but to select or move the rectangle, you must click outside it, not inside, like every other shape. Play with the mask shape on a throwaway image so you can get a sense of how you might use it.
Loupe inserts an onscreen magnifying glass, which is a helpful way to highlight small details, but it also distorts the image, which can be confusing to the viewer. You change the size of the loupe with the blue drag handle and adjust the zoom level with the green drag handle.
The Pen Is Mightier — If you’d rather draw shapes yourself, Preview lets you do that. In the Markup Toolbar, the third button from the left activates the Sketch tool, which doesn’t appear to have a menu equivalent. Select it, and click and drag to draw the desired shape.
What Preview does next depends on what you drew. If Preview thinks you were trying to draw a square, for instance, it changes your drawing to be a proper square shape. Likewise with triangles, ovals, lines, arrows, and other shapes — it’s a loose interpretation. Usually, if you draw an unidentifiable squiggle, Preview will leave the squiggle as is, but its behavior isn’t always predictable.
Thankfully, if you don’t care for Preview’s interpretations, or if Preview couldn’t see that you meant to draw a dialog balloon, you have a chance to correct it. After drawing a shape, look closely at the upper left of the window, where a small popover appears with your original and a choice of possible replacement shapes. Click the one you want, but be aware that you get only one shot, since the popover vanishes forever after you choose, or if you deselect the shape.
If you happen to have a trackpad equipped with Force Touch, note that the Sketch tool is pressure-sensitive, so you can press more firmly to darken the line as you draw.
The Sketch tool can be useful in ways you might not expect. For instance, imagine that you’re trying to give someone directions on a trail. Bring up the area in satellite view in Google Maps, take a screenshot, and then use the Sketch tool to draw a freehand line indicating where to go.
Texting While Annotating — Shapes are great, but what about when you want to add a description to an annotation or complete a PDF form that lacks interactive form fields? For that, you can insert text. And, not surprisingly, Preview offers quite a few ways to do so.
The main way to insert text is to choose Tools > Annotate > Text (Command-Control-T) or click the Text button in the Markup Toolbar. Preview inserts a text box, with “Text” as a placeholder. You can move and resize this text box just as you would a shape, although it can be a little fussy, since clicking inside the text box edits the text instead of grabbing the box. Try these techniques to make moving it easier. First, click anywhere else to deselect the text box, hover over the deselected text box until you see the hand cursor, and then click and, without letting up, drag. Second, if the text box is already selected, hover over the outlined edge to get the hand cursor and drag.
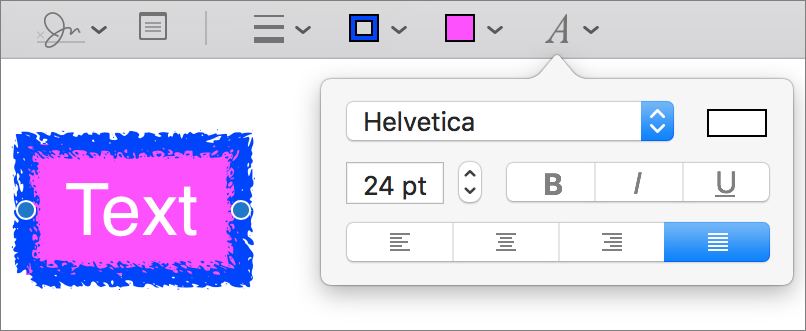
To change a text box’s typeface, point size, color, style, and alignment, select the text box and click the Text Style drop-down menu in the Markup Toolbar, which is the rightmost button. You can’t style individual words or characters in the text box separately.
You can also use the Shape Style, Border Color, and Fill Color menus to further customize the look of the text box, just as you can with shapes. Border Color lets you add a border to the text box and give it a color, Shape Style offers stroke thickness and style choices, and Fill Color adds a background color to the text.
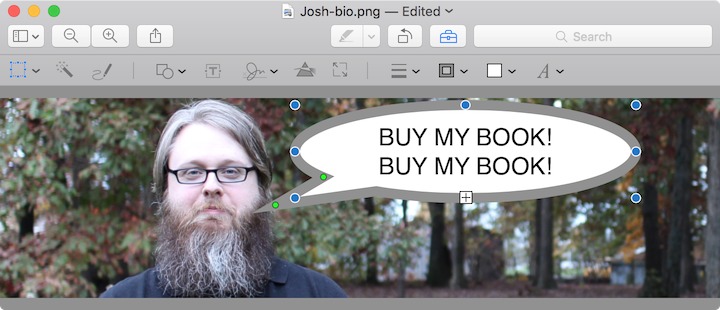
For more fun, try speech bubbles, which you insert by choosing Tools > Annotate > Speech Bubble or from the Shapes button in the Markup Toolbar. They work just like regular shapes, with the addition of two green drag handles for controlling the tip and base of the arrow. They can be fun for snapshots, but we’d caution you against using them in professional documents.
In fact, although it’s not inherently obvious, you can actually add text to any of the shapes, including lines and arrows. For those two, the text appears off to one end of the line; for the rest, the text shows up inside the shape.
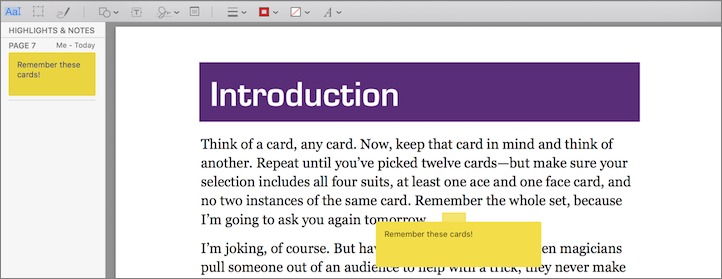
Take Note — In “The Power of Preview: Viewing Images and PDFs” (13 March 2016), we discussed highlighting text in PDFs and adding notes to your highlights. That’s all fine and nice, but what if you want to leave a comment that’s not associated with text? For that, Preview lets you insert free-floating notes, which are represented by small yellow squares that only coincidentally resemble Post-it® sticky notes. (You can’t insert notes into images.)
To insert a note into a PDF, choose Tools > Annotate > Note (Command-Control-N) or click the Note button in the Markup Toolbar. Preview adds a small yellow square to the center of the current page, popping out a larger yellow rectangle into which you can type text. Enter as much text as you want; the yellow rectangle expands to hold it. Click anywhere outside the yellow rectangle to close it, leaving just the little yellow square.
There are five things you can do with the square after clicking to select it:
- Click it again to open it for editing.
-
Move it next to the portion of the page on which you’re commenting, which is usually a good idea.
-
Option-drag it to make a copy; this could be helpful if you need the same comment applied to multiple spots on the page.
-
Use Copy and Paste to put it on another page. Cut works too, if you created the note on the wrong page.
-
Press Delete to remove it from the document.
Remember that you can navigate to these notes in the sidebar, by choosing View > Highlights and Notes. Plus, you can add text to the notes in the sidebar, or edit them there, which is often easier than opening and closing the editing rectangle.
Sign on the Dotted Line — Here’s a classic problem: someone sends you a form to sign via email. You have to print it, sign it, and then scan it back into the computer so you can email it back (or, horrors, fax it). Preview solves this problem neatly with its signature feature, found in Tools > Annotate > Signature, but more easily accessible in the Markup Toolbar. It enables you to create one or more signatures, and then easily add them to images and PDFs.
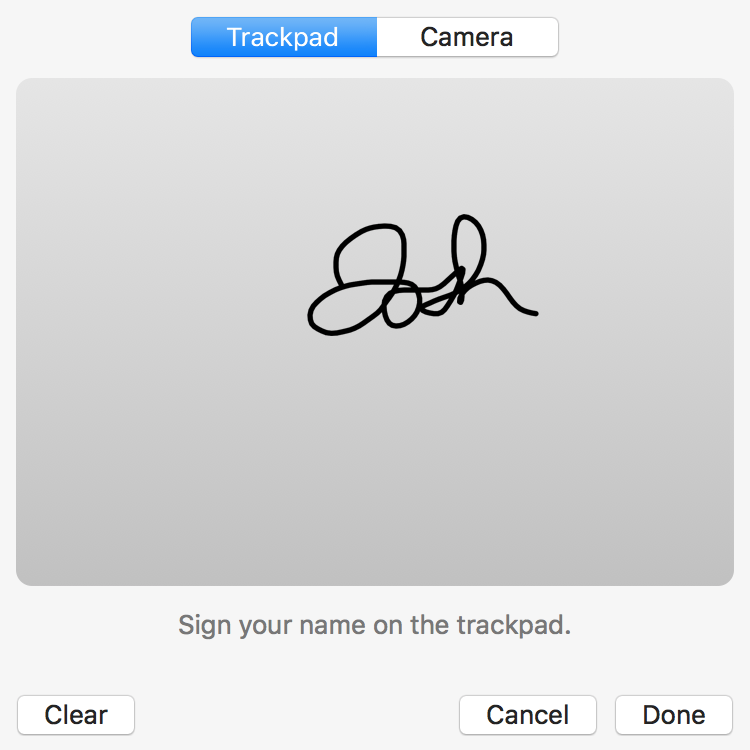
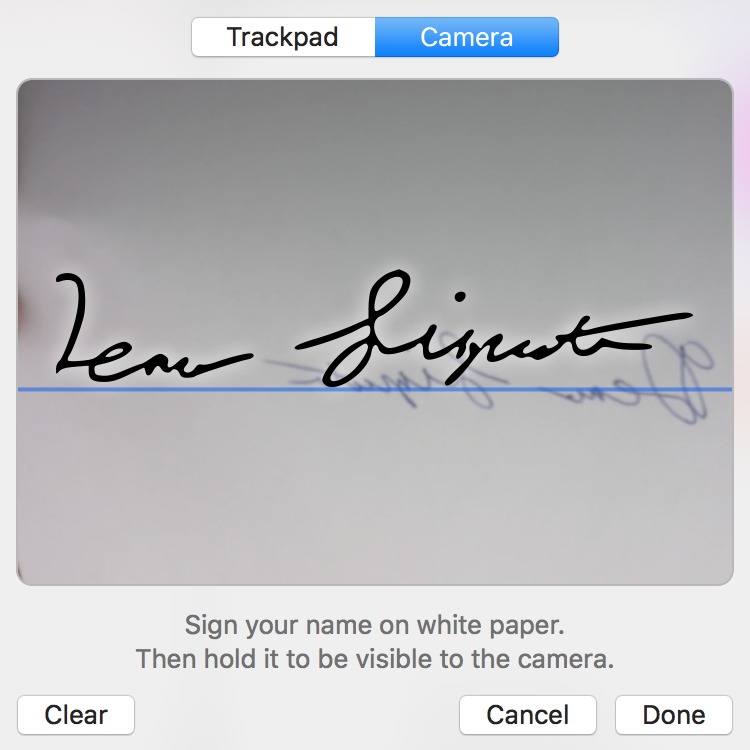
There are two ways to create a digital signature: by scanning a handwritten signature with the Mac’s webcam or by writing it on the trackpad. Obviously, if all you have is a mouse, you’ll want to use the camera method.
To create a signature with a trackpad, click the Sign button in the Markup Toolbar and choose Create Signature. Click the Click Here to Begin button and write out your signature on the trackpad with your finger — if you have a capacitive stylus for an iPad (not an Apple Pencil), it will likely work better. There’s no way to erase, so if you’re unhappy with the results, click Clear and try again. When you’re satisfied, click Done to add the signature to Preview’s list.
However, using a webcam like the FaceTime camera built into most Macs is arguably the better way to make a signature. Sign your name on a blank, white piece of paper, preferably with a black marker. Choose Create Signature and click the Camera button. Inside the popover, a window appears displaying what your camera sees. Hold your paper signature up to the camera, making sure to get it close and lined up with the blue line. When Preview detects the signature, it displays the digital version in the camera window.
Again, if you don’t like the results, click Clear and try again, or if you’re happy, click Done to save the signature.
Once created, your signature is easy to insert into an image or PDF. Choose Tools > Annotate > Signature or click the Sign button again. This time, you’ll see your new signature there. Choose it to insert it into the document, where you can move and resize it like any other shape. You can also adjust its color by modifying the Border Color settings, although signatures can’t use the Fill Color option.
Although we’re not suggesting illegal forgery, if you find yourself in a situation where you often need to sign things for your boss or for an incapacitated relative, getting that person’s signature into Preview can make signing electronic forms for them much easier.
Once you save the PDF, the signature is embedded into the PDF’s visual layer, so it can’t easily be copied out and reused. Of course, someone could extract it by taking a screenshot of it in the PDF, but they could also scan or photograph a paper document to get the signature, so there’s no real difference in security either way.
Note that these signatures will sync to other Macs if you have iCloud Keychain turned on in System Preferences > iCloud > Keychain, and you can use your signatures when marking up images in Apple Mail.
We’ve now shown you how to use Preview to open and import files, efficiently view images and documents, crop and resize documents and images, and annotate documents and images. But it will be another few articles before we’re done — stay tuned for more on the power of Preview!






Great article once again, guys. Thanks.
Is there a smart way to move text annotations (assuming you can't always select the right location before selecting annotation)? What I do now seems tedious: first create it, edit the text, deselect, then chose the move tool (somewhat confusingly labeled selection), and then finally move it.
Would be great if there were a modifier key to be able to move it directly after editing the text, but so far I can't find anything.
The main thing you're doing that seems unnecessary is selecting the move tool. Here are the steps I'd take:
* Create the note.
* Enter the text.
* Click outside the text rectangle.
* Move the note square.
Thanks, Adam. Works like a charm.
If I paste a signature using the signature tool and save/close the document, how secure is that signature from modification by others? Can it be selected and removed by another like some of the added objects?
If I were to do a print to PDF operation on the edited Preview PDF, does that lock in some of the objects into the document any more securly than just saving?
That's a great question, and I just tested. Preview does the right thing, and merges the signature into the bitmap of the page, so it can't be selected like a note and copied out.
However, nothing stops someone from taking a screenshot of the signature. But that's no different than someone scanning or photographing a paper document to get your signature, so I don't see that as much of a security risk.
Thanks. That seemed to be my experience, but wanted to check with others.
I was mostly concerned that someone would be able to just select and delete or move the signature object with little effort.
One small addition — you can drag items out of the Shapes popover, which saves you a bit of mousing.
Cool! Thanks for the tip - I'll add that.
Excellent piece. I am in the midst of preparing a demo of "Preview" for our monthly Citrus MacIntosh Users Group (CMUG) here in Florida and this will definitely be added as a continuing education link.
re redacting: "Don’t assume this technique will work for PDFs you’re distributing digitally; the shapes remain editable objects that can be moved and deleted in both Preview and Adobe Reader."
Couldn't you redact on-screen with Preview then take a screen shot of the result? The shapes couldn't be moved in the screen shot, could they?
Yes, since the screenshot would be nothing but an image of the document, with no electronic text, it would not contain any of the redacted information. But it would also be a bigger file and not have any of the properties of a PDF which are desirable.
I can tell you that covering the text with an object then using OS X's print dialog to save it as a new PDF does *not* remove any of the covered text.
Curtis is absolutely right. If redacting is something you need to do for real, get PDFpen. It's cheap and effective.
How do I add my signature in Preview if I have no camera or trackpad on my MacPro?
You'll have to buy a camera or trackpad or use an app like PDFpen.
To move shapes and text boxes around with finer control, you can use the arrow keys.
An excellent point we forgot to mention, but will add in. It's absolutely true—once you've selected a shape, you can use the arrow keys to move it around, which is often more precise than using a pointing device.
Great series! Do you plan to put this out in a consolidated article/pdf/mini book? Would save me cutting and pasting all the individual pieces together.
We're definitely looking into it, yes.
Yes, please! I would certainly buy an Ebook.
We hear you!
Adam and Josh, will you be adding an article on PDF forms in Preview soon? I have some questions and observations on that if so.
Hmm, that's a good question. As far as I'm aware, Preview can only fill in PDF forms, and I'm not sure that's a topic that would have fit anywhere so far, or in the articles coming up. We'll ponder.
So yes, please do share your thoughts and questions!
Sure, here's my observations:
1. My primary concern is that there seems to be, in my experience anyway, an incompatibility between Preview and Acrobat/Acrobat Reader. Forms completed in Preview, when opened in Acrobat Reader, often display blank fields. I've created forms in Acrobat, filled them in with Preview, only to have my Windows friends view an empty form when viewed in Acrobat or Reader.
I haven't done a lot of investigation or experimentation on this to find conditions or patterns, but Preview is too unreliable for use in filling forms, I've found.
2. I like using Preview for PDFs, and think that the signature mechanism is superior to Adobe's but there are still shortcomings in Preview with forms that prevent it from becoming a 100% substitute for Acrobat Reader.
In particular, it cannot do field arithmetic, which can be quite a hindrance when creating and using forms.
Though annotations and markup in Preview are pretty good, as you've described, it seems to fail pretty hard in dealing with forms.
Do you know if you or others have obserfed similar problems or if there is a comparison between Preview and Acrobat Reader features/capabilities anywhere?
Josh, we'll have to think about how to integrate PDF form filling...
Just experienced the Acrobat/Preview incompatibility again. I scanned a paper form and made it into a fillable form with Acrobat. Completed it with Acrobat. If I open in Preview, only the checkbox fields and the pasted signatures are visible. I can forward to you if you like to see if you get the same results.
Please do - I have Acrobat and PDFpen Pro too, so I can compare. [email protected]
If I annotate a PDF and then drag it into Nisus the annotations disappear. Am I doing something wrong?
No, but I'm not sure what you're trying to achieve. Nisus Writer Pro is a word processor and when you drag a PDF into it, it imports the text of the PDF. Annotations would be on another "layer" of the PDF, so I'm not surprised that it wouldn't import them. In general, PDF annotations are only viewable in PDF-specific apps like Preview and Acrobat Reader and PDFpen.
Thank you. I am laying out an Ebook for my husband from a paper book on historical landmarks. It has maps inserted with numbers showing where the landmarks are located. In Preview once I close the jpg I can't make changes to the map. Trying to find a way around this problem.
Yes, when Preview saves any image, it "flattens" the image, putting all your changes into the single layer that contains the rest of the picture. That will be true of all final formats like PNG, JPEG, GIF, and so on. Only source formats like Photoshop can have layers that keep things like your inserted numbers editable. So you'd have a source file in Photoshop, say (or Pixelmator, or many other apps) and then you'd export the PNG or JPEG out for the book. If you need to make a change, you go back to the source file and export a new copy.