Explaining Sierra’s Optimized Storage
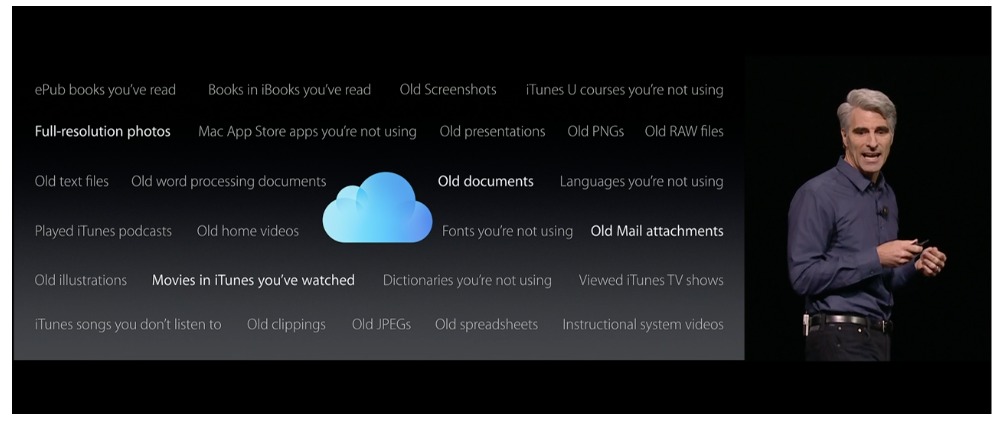
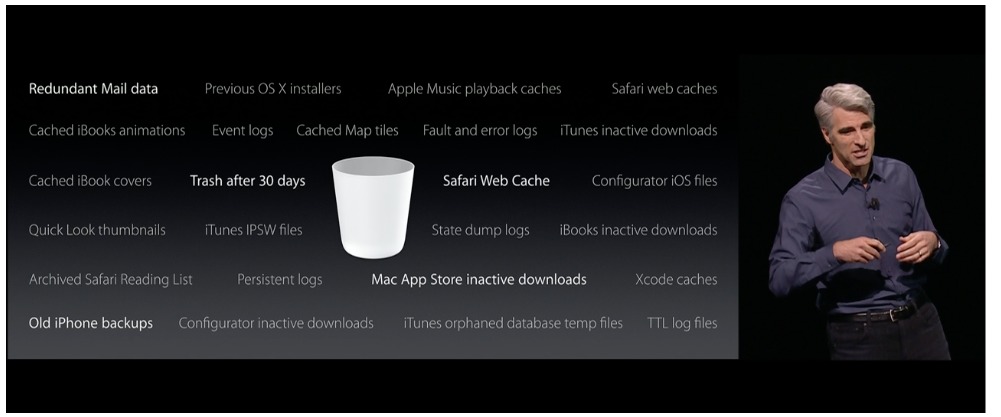
One of the marquee features of macOS 10.12 Sierra is Optimized Storage, a marketing term that Apple’s SVP of Software Engineering Craig Federighi introduced during the Worldwide Developer Conference in June (see “macOS 10.12 Sierra to Succeed OS X 10.11 El Capitan,” 13 June 2016). He described Optimized Storage as having two core functions, making room for new files by keeping old ones in the cloud and getting rid of files you’ll never need again.
Federighi claimed that Apple took a representative Mac with 20 GB free on a 250 GB drive and “turned on all the switches” to clean out another 130 GB of space. For those struggling to free up space, particularly on a notebook Mac with relatively little internal flash storage,
Optimized Storage sounded great, at least if you don’t mind paying for online storage in iCloud Drive. And while it could be a great boon for such people, it turns out to be a somewhat confusing collection of seemingly unrelated features, burdened by one of the stranger interfaces that Apple has produced in recent years.
Plus, although we haven’t had time to test all the possibilities, I recommend care when it comes to Optimized Storage in general, and extreme caution with one of its settings. That isn’t to say you shouldn’t enable all its features, but that you should understand the possible implications before doing so.
Accessing Storage Management — Before I get into the specifics of what comprises Optimized Storage, since you won’t find that exact term anywhere in Sierra’s user interface, let’s look at how you access it. Choose > About This Mac, and click the Storage button. You’ll see a stacked bar graph for each of your drives showing how much data of each type is on each drive — the categories include items like Apps, Documents, GarageBand, iBooks, iCloud Drive, iOS Files, Mail, System, Photos, and Other. At the end of the chart, you may see a hashed area that Sierra labels as Purgeable. Apple doesn’t clarify what’s included in Purgeable, but I suspect it
comprises things like logs, cache files, and the contents of the Trash. Also new in this window is a Manage button.
Click Manage to bring up the centralized dashboard for Optimized Storage. In a truly odd interface decision, Apple chose to let you turn on Optimized Storage features from within the System Information app, rather than a pane of System Preferences, where nearly every other system-level setting resides. You can also bring up this window directly within System Information by choosing Window > Storage Management. The main thing to realize about the Storage Management window is that it’s more of an
assistant than a control panel — you can enable Optimized Storage’s settings here, but what you see depends on what other settings you’ve selected, and you can’t turn off or adjust any settings here. You do that in completely different parts of Sierra’s interface.
Managing Files Manually — The Storage Management window presents a familiar interface with a left-hand sidebar and large pane on the right that changes based on what you select in the sidebar. The top item, Recommendations, is where the most interesting stuff happens, and I’ll explain its contents in a moment. But first, notice all the other entries in the sidebar, which correspond to the blocks of color in the About This Mac dialog’s Storage view. For some app-based items, like GarageBand, Mail, and Photos, the Storage Management window merely gives you a button to open the app so you can manage its contents from within the app itself.
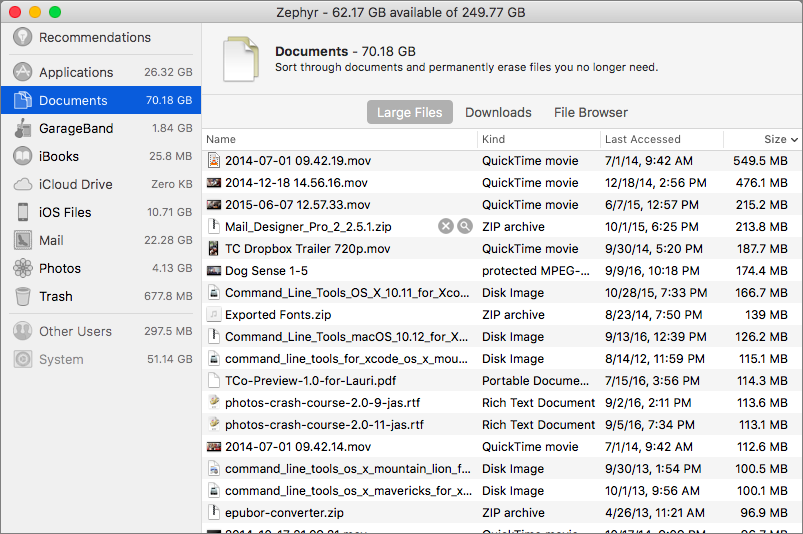
For a few app-based items like iBooks, and folder-based items like Applications, Documents, iOS Files, and Trash, Storage Management instead provides a Finder-like list view that shows each file’s name, size, and last accessed date, along with kind for apps and documents. Click the column headers to change the sort, so you can focus on versions of similarly named files, see which files you haven’t touched in years, or just look at them sorted by size.
Hover over any item and you see an X button for deleting the file and a magnifying glass button that reveals the file in the Finder. With these tools, Apple is trying to make it easier for you to delete large files you no longer need. You don’t need to delete files one by one, either — just Command-click or Shift-click to select multiple files and press the Delete key to remove them all at once. You’re given the combined size of all the selected files and warned before they’re deleted, so you can
use this technique to preview how much space a multi-file deletion will save.
The Documents view of Storage Management has three sub-views that help you focus on the task of clearing out unnecessary files, starting with the largest:
- Large Files, which on my MacBook Air lists files larger than 50 MB
-
Downloads, which shows the contents of the Downloads folder
-
File Browser, which provides a column view that’s sorted by folder size and shows file sizes as well
Other nice touches abound. In the Applications item, the Kind column shows you which apps came from the Mac App Store, which didn’t, and which are older versions or duplicates that you can probably delete. I was surprised to find nearly 1.4 GB of old and duplicate apps on my MacBook Air. Notice too that different screens have different buttons, so Applications has a button to open the associated folder and Trash has an Empty Trash button. One thing you won’t find is a graphical view like what GrandPerspective provides; nonetheless, I suspect that Apple’s Storage Management interface will put a significant dent in the demand for utilities like CleanMyMac and Onyx.
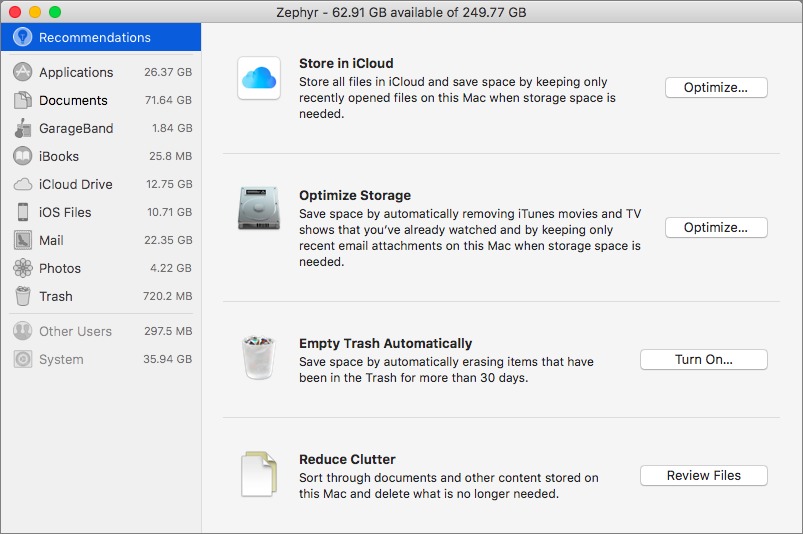
But let’s move on to the meat of Optimized Storage, as represented by the sections in Recommendations view: Store in iCloud, Optimize Storage, Empty Trash Automatically, and Reduce Clutter. I’ll explain these in order of increasing complexity. Note that the wording (and even the icons) in this section changes depending on what options you may have already set. I’ve even seen it change multiple times as I’m watching, which is a horrible user experience. If it doesn’t reflect what you believe it should, quit and relaunch System Information, open the Storage Management window again, and let it sit for a few minutes.
Reduce Clutter — I hesitate even to give this section a subhead since it’s merely interface sleight of hand. All clicking the Review Files button here does is switch you to the Documents view so you can sort through and remove unnecessary files manually, as I discussed above.
Empty Trash Automatically — Moving up, the next section is Empty Trash Automatically, which is easy to understand. As it says, once a file has moldered in the Trash for 30 days, the Finder deletes it automatically, much like Photos automatically removes unwanted photos in its Recently Deleted folder after 40 days. Before this, files accumulated in the Trash until you emptied it manually, even if you ran out of drive space. I don’t yet know if Sierra’s Finder will offer to empty the Trash if you run very low on space.
Amusingly, Microsoft Windows has been capable of automatically deleting files from its Recycle Bin at least since Windows 98, although back then it deleted older files when adding a newer file to the Recycle Bin caused it to exceed a user-specified size. I’m surprised it took Apple this long to get to the point of taking the trash out for the user.
Whether or not you choose to enable this setting depends on what sort of person you are. If you can’t stand the concept of wasting space — even space you don’t need — on the contents of the Trash, you’re probably emptying it manually all the time now. Automatic deletion of trashed items after 30 days likely won’t scratch that itch for you. However, if you, like me, almost never empty the Trash unless you start to run low on drive space, I recommend turning on Empty Trash Automatically to help keep your Mac’s drive from getting too full. It’s a bad idea to let your drive fill up since that can cause crashes, corrupted files, and even directory corruption.
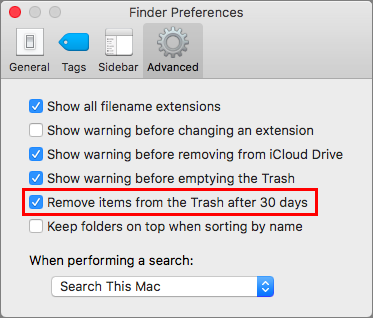
This setting also appears in Finder > Preferences > Advanced as the “Remove items from the Trash after 30 days” checkbox.
Should you ever wish to turn it off, you’ll need to do that in the Finder Preferences, since enabling it in the Storage Management window replaces the Turn On button with a green Completed checkmark icon.
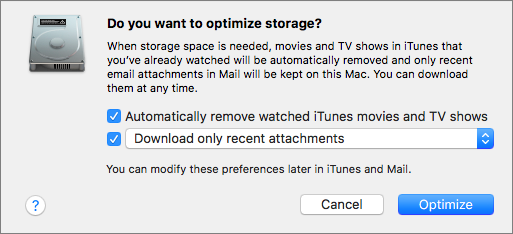
Optimize Storage — Now we’re getting into the confusing bits, starting with the fact that this aspect of Optimized Storage is called Optimize Storage (notice the missing “d”?). Clicking the Optimize button provides two options, one to automatically remove watched movies and TV shows and another to keep either only recent email attachments or no email attachments.
Although I haven’t been able to verify this for certain, I believe the Optimize Storage button affects only movies and TV shows purchased from the iTunes Store. When enabled, iTunes deletes watched movies and TV shows automatically, which is likely a good way to save a lot of space quickly, given the size of most video files.
Again, the Storage Management window of System Information only allows you to enable the Optimize Storage feature. To enable it directly within iTunes, or to turn it off if you want to make sure you can hold onto an already watched movie or TV show, go to iTunes > Preferences > Advanced, where you’ll find a checkbox called “Automatically delete watched movies and TV shows.”
Of course, you can always retrieve a deleted video in iTunes by choosing Movies or TV Shows from the Media Picker, clicking the Library button in the navigation bar, and clicking the Download button that looks like a cloud with an arrow coming out of it.
In an earlier incarnation of this article, I said that the email attachment feature had been removed in a late beta. That was wrong; the Storage Management window initially failed to present it to me, and to others, as an option, but after tweaking the feature in Mail manually, it returned. To find that setting, open Mail > Preferences > Accounts > acccount-name > Account Information. There’s a pop-up menu for Download Attachments that can be set to All, Recently, or None. The Optimize button in Storage Management gives you the choice of setting that menu to Recently or None for all your accounts; once set there, you can change it only in Mail’s preferences.
There isn’t that much new here; Mail has long had the option to not download attachments automatically (the Recently option is new). When you read a message with an attachment that’s not downloaded, you can click its icon in the message to retrieve it. Apple hasn’t said at what point Mail will consider an attachment no longer “recent,” but I presume that it will at some point delete older attachments from the local mail archive such that you’d need to retrieve them again from the server.
Store in iCloud — The most confusing aspect of Optimized Storage comes in the first section of the Storage Management window, which is called Store In iCloud. The controls available in this section encapsulate two entirely separate features in Sierra, and worse, even the wording and checkboxes change depending on what you’ve already done.
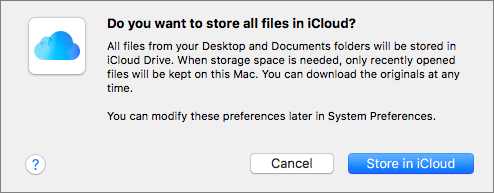
On a Mac that doesn’t have iCloud Photo Library enabled, when you click Store In iCloud, you get a dialog that gives you two checkboxes, one that lets you turn on syncing for your Desktop and Documents folders and another that enables you to turn on iCloud Photo Library. If either of those features is already on, the dialog changes (in the second dialog, I have iCloud Photo Library enabled, so it focuses on Desktop and Documents folder syncing).
At this point, I need to explain Desktop and Documents folder syncing, a new feature in Sierra that’s only peripherally associated with Optimized Storage. When enabled via the Storage Management window of System Information or the master switch at System Preferences >
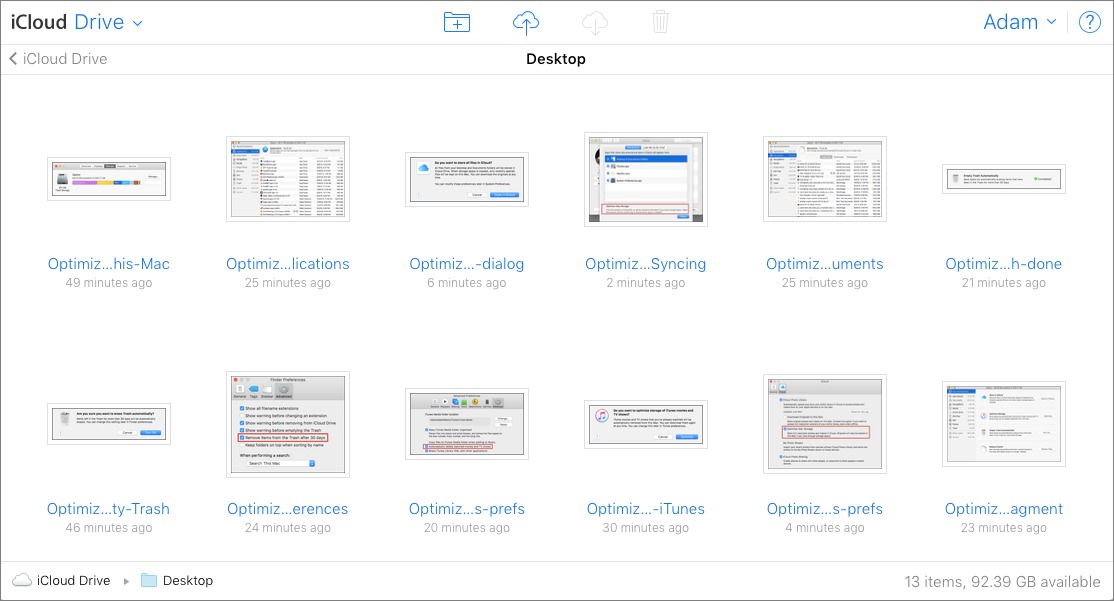
iCloud > iCloud Drive > Options, this feature moves your Desktop and Documents folders from your home folder to iCloud Drive (itself a chimerical folder/volume). Don’t look for them in your home folder because they’re gone — I can’t imagine why Apple didn’t make symbolic or hard links to them in the spot where every user has been trained to look for them for the last 16 years. You can still access them from the sidebar in Finder windows, from the Finder’s Go menu, or from within iCloud Drive.
The beauty of Desktop and Documents folder syncing is that as you enable it on other Macs using the same iCloud account, the contents of those folders on other Macs are merged via iCloud, so you end up with a single unified folder for Desktop and another for Documents. Even better, you can access the full contents of those folders via the iCloud Drive app on any iOS device signed in to the same iCloud account. It works well from what we’ve seen, but it may take some getting used to for those who have long maintained very different systems. I’m looking forward to using it to transfer screenshots made on one Mac to another automatically, since the Mac saves screenshots to the Desktop.
I have two warnings surrounding Desktop and Documents folder syncing. First, if you have gigabytes of data in one or both of these folders, you may have to start paying, or pay more, for storage space on iCloud Drive. The first 5 GB is free, and after that Apple offers several tiers from 50 GB to 2 TB. The storage space is shared with iCloud Photo Library, so if you’re already paying for more to sync photos, you may have enough. But if you are going to start paying, it might be worth getting enough to use both Desktop and Documents folder syncing and iCloud Photo Library.
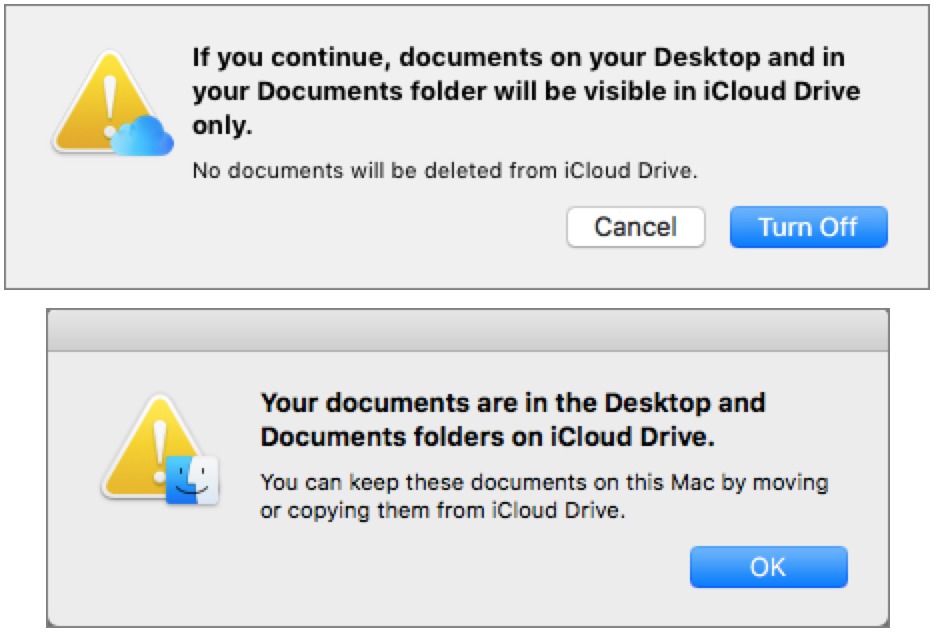
My second warning is that turning off Desktop and Documents folder syncing is stressful. When you do this, in System Preferences > iCloud > iCloud Drive > Options, Sierra tells you that all your files will be available only in iCloud, which seems wrong: if you’re turning off syncing, you’re doing so because you want them locally. However, that dialog is followed immediately by another that tells you that you can recover your files from iCloud Drive.
In fact, what happens when you turn off that feature is that Sierra recreates empty Desktop and Documents folders in your home folder. You can’t replace those, so you can’t drag the old Desktop and Documents folders from iCloud Drive to your home folder; instead, you must open each folder in iCloud Drive and move (Command-drag) its contents to the local Desktop and Documents folders in your home folder. You can try to delete the now-empty Desktop and Documents folders from iCloud Drive, but in my
experience, iCloud keeps recreating at least the Desktop folder.
In general, if you ever turn off an iCloud Drive feature and seem to be missing files, restart your Mac and wait a bit. You can also check for the files on iCloud.com itself.
Trust in iCloud? — Now that you understand Desktop and Documents folder syncing, we can return to what happens when you enable the checkboxes that you get in the Storage Management window when you click Store In iCloud. The effect of clicking these checkboxes goes beyond just turning on Desktop and Documents folder syncing and iCloud Photo Library, and this is where Optimized Storage comes in again:
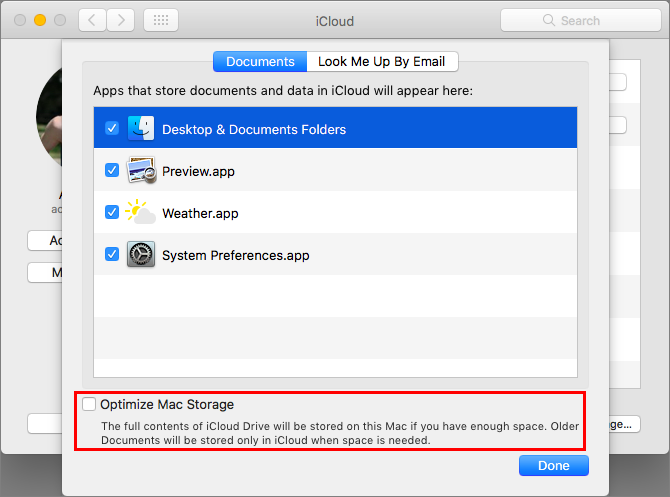
- With Desktop and Documents folder syncing, when you open System Preferences > iCloud > iCloud Drive > Options, there’s a checkbox called Optimize Mac Storage. When selected, it allows Sierra to delete old, large files from your local drive to save space, leaving just a copy in iCloud Drive — you’ll still see the icon in your Finder, but it will have a cloud badge on it, indicating that it’s not stored locally. If that gives you the willies, you’re not alone.
The question here revolves around backup. Let’s say you turn on this feature, and it copies the contents of your Desktop and Documents folder to iCloud Drive. Time passes, and some old, large files in your Documents folder are deleted from the local drive to free up space. They still exist in iCloud Drive, appear on your local drive as stubs that you can click to download, and in any local backups created before they disappeared from your local drive. Now imagine that your backup drive dies, and you need to
create a new backup. Will those old, large files be downloaded from iCloud Drive and backed up? Or will the version in iCloud Drive be the only extant copy?I cannot currently recommend selecting this Optimize Mac Storage checkbox. It will take time to test what happens with backup strategies when Optimized Storage starts deleting files, and since you presumably have sufficient space on your Mac now, it’s better to be safe than sorry.
-
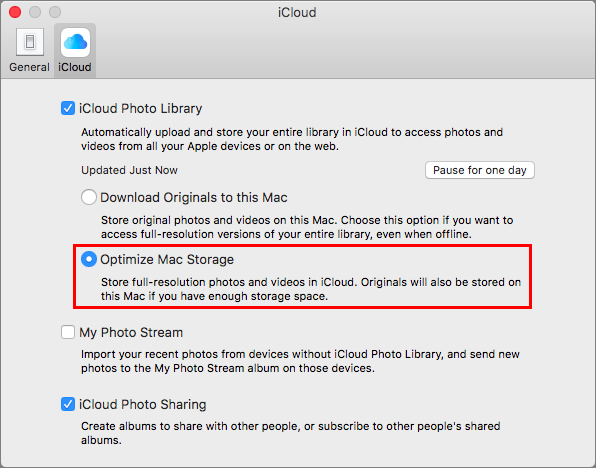
With iCloud Photo Library, selecting the checkbox in Store in iCloud also selects an Optimize Mac Storage radio button in Photos > Preferences > iCloud. That has the effect of storing full-resolution photos and videos in iCloud and only keeping them on the Mac if there’s space. (When you work with an item whose full-resolution original is in iCloud, Photos downloads it first.)
There’s nothing new about this iCloud Photo Library setting; it has been in Photos since the launch of iCloud Photo Library. In the past, however, you had to enable Optimize Mac Storage manually, and we have firmly recommended that you never enable it on your primary Mac, where you presumably have sufficient drive space for your entire photo library. Optimize Mac Storage is great for a MacBook Air that lacks room for all your photos, but in our view, you should always have a full local copy of
all your photos, backed up on local storage.
In the end, the question comes down to whether or not you trust iCloud, because once you enable these features, iCloud becomes the “truth,” in the lingo of syncing. That’s fine if you have local copies and local backups to restore from should something horrible happen to iCloud or your account, but in both of these cases, it seems theoretically possible that you could end up with no local copies at all. If you’re not all that attached to your data, or if you’re willing to cede all responsibility for your data to Apple, that may be acceptable. Personally, I want to know that I have a copy of every document and photo stored locally on at least one Mac and backed up locally in at least one spot.
During WWDC, Craig Federighi said that Apple has over 10 billion documents in iCloud today, although I wonder if that number includes photos or reflects mostly iOS storage, given how few people I see using iCloud Drive to store Mac documents. The problem is that I’ve heard too many stories about people experiencing problems with data stored in iCloud to trust it implicitly. I’m not perturbed about iCloud security in particular; Apple makes all the right noises about iCloud security and privacy. But there’s a big difference between having the right intentions and eliminating all bugs. iCloud is usually fine as a syncing service, but that’s a far stretch from trusting it with
the only copy of valuable data.






Are any of these options turned on by default? You never directly say one way or another, but the implication is that none of them are turned on by default. I would like confirmation, however, before I even remotely consider upgrading. In particular, I know that I DO NOT want to use the Documents & Desktop syncing to iCloud (I already paid Apple for a 1 TB SSD, so I don't want to pay them for iCloud storage as well...and I don't particularly trust iCloud for document storage). I also do not want iTunes nuking movies as I use external storage (two 5 GB drives in RAID 1, plus a backup) for my iTunes purchased content. Thanks.
No, none are turned on by default — that's why there's the whole Storage Management > Recommendations screen for turning them on.
Thanks for confirming it for me. As I said, it seemed like that was the case, but I wanted to 100% sure.
Re iCloud syncing...Yipes! Glad I read your article all the way through. How is this better than Dropbox?? A 1TB subscription to Dropbox is very reasonable; it lets me sync selectively if one of my machines is short on space, but doesn't remove files from machines that aren't. Backing a folder *out* of dropbox storage is easy: just use the Finder to move it out of my local dropbox folder. (Of course, you all knew that.) And thank goodness, with Dropbox, primary copies of my files (and their local backups) are under my own control. I admit to being old-fashioned, but to me, cloud storage is a) *very* welcome as a syncing tool, and b) an anxiety-relieving *third redundancy* backup. But getting into a position where the cloud copy is the *main and maybe only* copy of my files is a big no-go for me.
Optimized Storage features are just different from Dropbox. The closest is the Desktop and Documents folder syncing, which merges those folders from your multiple Macs and provides access from your iOS devices. But there's no sharing with others, like Dropbox.
I was talking with a friend last night who uses SubEthaEdit on Dropbox. SEE uses packages, not plain files. He accidentally deleted a file/package, and figured no problem--DB keeps 30 days of history! But DB couldn't discriminate the paths of files from inside deleted packages, so all SEE inner files were jumbled together with the same names. He's run into a bunch of other poor Mac file handling, too, from loss of metadata to corrupted files, and I've had a couple of users who thought they could use DB as a backup solution have similar problems. With even a little luck, iCloud should be far more reliable for Mac files, and even without end-to-end encryption, their security should be much better. Though I'd wait for any teething issues to get ironed out...
But I do agree about not wanting my only copy of anything to be on someone else's server.
My understanding is that package-based files shouldn't really be stored in Dropbox or iCloud. The DEVONthink developers warn against that too.
Yup. But since it superficially works, it's hard to convince people not to do it. And most users haven't a clue about packages, or how tell them from regular files.
Question on Desktop and Documents folder syncing: what happens when I'm in airplane mode, or visiting my sister's place in the mountains with about that same level of internet access? In Dropbox, I have local copies . . .
The files are local as well as in iCloud, but if you have no access, changes won't be saved back until you regain an Internet connection. I don't think that will be an issue, since it's very unlikely that you could create a version conflict between your two Macs.
But it is conceivable, and I'll have to test that at some point.
Not necessarily stored locally if Optimized storage for documents is turned on, if I understand the article and intentions. So when you want to access some old file it might have to be downloaded but you cannot then .... . I already in El Capitan started to get strange conflicts with Pages documents in iCloud Drive, that I sort of understand, but when busy working on a document i do not want to have to figure out if I should save "anyway" or revert etc.... thinking of that scenario with all files I am working on is not exactly something I want to pay for. Time for bigger SSD drives in new Macs I would say ... . Only those with a 128 GB MBA/MB would need to consider using this optimized storage, I think. Dropbox & CrashPlan works better for most scenarios, but some new uses this iCloud syncing could have ... .
Oh, yes, sorry. If you want to get at an old file that exists only in iCloud AND you have no Internet access, you're out of luck until you can reconnect.
What I was responding to is the far more common scenario where you want to work normally on recent files in your Desktop and Documents folders while offline.
Wonderful write up. It addressed my questions and confirmed my suspicions. I wish more tech writers could produce this level of quality.
For anyone reading now, I've updated the article with correct information about how Optimized Storage interacts with email attachments. For reasons we're still investigating, it doesn't notice that it can "manage" them until you've done something in Mail — not sure what. Once it notices, then email attachments are included in the Optimize Storage section. Sorry for the confusion, but I blame Apple for constantly changing the Storage Management window's wording and interface based on other settings. :-)
Having read your article, it seems to me Apple has introduced this feature for three reasons. First to help buyers of its products overcome concern about size of internal hard drive. Second to pave the way for smaller capacity internal hard drives in future. Third and arguably the most important to increase the number of paying customers for icloud.
My approach to clutter is to manually delete unwanted files every so often.
I agree entirely with #1 — Apple does want to help overcome concerns about drive sizes. I don't believe #2 at all — storage gets cheaper all the time, so there's no reason Apple would want to put less storage in new models. And #3 is undoubtedly true, although it's impossible to know how important it is to Apple. Services are becoming a much more important part of Apple's business, so it's not trivial.
Perhaps my comment is peripheral to Optimize Storage, but I cannot understand the need software developers have to group files by type: all jpg's here, all Word docs there, Excel sheets elsewhere. It is the computer's job to keep track of file type and associated application to process it, I am far more interested in "Theme" or Topic or Subject! I want all my files for Project X together, The presentation I gave to management, the spreadsheet I made to calculate costs, the emails I sent to colleagues (and especially including the attachments) all together in one place visually so that I have an overview of what has been going on in the project. This also applies at home - pictures of my son's birthday together with the congratulatory tweets we got, but separate from the pictures of the broken guttering I made the same day and sent to the building contractor for a repair quote, etc. but you get the idea. Apple's Optimize Storage wants to continue this fixation with dealing with files by Type and not by Subject, and for me makes it too difficult to use and of no value in managing my files.
JGP, You are absolutely right. I use iCloud for files in several research projects as well as language courses, travel preparation &c., and I have to fight with iCloud regularly because one project is usually a mixture of Word files, Excel files, PDFs, Pages files ...
I continue using iCloud because of the convenience and safety (taking up work in the same file in the reading room of the Royal Library exactly as I left it on my screen in Møn 100 km away, and being sure that my files are safe on Apples servers not just on my frail old MacBook. But it is a pain every time having to tell that dumb machine: No, dear, this does not go into the Pages folder, this goes into the Hansen-project folder together with the scans I took with my iPhone...
Adam rightly points to the (to me at least) most crucial problem: backup of those files and folders in iCloud. I use iCloud a lot, and basically like it, despite my reservations. And I do trust Apple with my data. But I would still like a local (backup) copy of all my files. I have amassed about 28 years worth of Word, Excel, PDF, jpg, ... files, and every now and then I have to dive into an old map that I copied in the late 1980's. I shall not feel safe and secure untill my trusted Carbon Copy Cloner - or another similar backup utility - can make a "hard" backup from iCloud to my external USB data harddisk. I hope we will hear good news about that soon
This is an excellent and detailed assessment of a confusing aspect of Sierra. Just exactly why I support TidBITS. There's another effect of this change that Apple doesn't seem to have considered: the prudent need to check with developers to ascertain if iCloud is compatible with their application's data file(s). The answer I got from Zengobi was "probably compliant" and from DEVONtech was "using iCloud is not advisable; create ~/Databases instead of ~/Documents/Databases". I don't think I'll continue polling developers. Too much effort. I'll just avoid putting Desktop and Documents into iCloud.
Another issue is someone inadvertently uploading sensitive data to the cloud. These features open a large can of worms for the uninformed user!
Indeed! iCloud security is pretty good, especially with two-factor authentication, but there are people who absolutely can't be uploading any data to the cloud, whether because they work in government or are restricted by HIPAA or the like.
Yeah, Apple doesn't do FERPA, unless for certain K-12 projects. Our university does allow iCloud for non-sensitive use only (and bans personal Dropbox for everything.) But getting users to even try the authorized options and to keep work/home and sensitive/not sensitive separated is nearly impossible. Even the potential for public record disclosure that could make much of their personal information public because they put in on a university owned computer doesn't cause more than momentary concern when it's mentioned. It's hard to blame them; thinking about that all the time would be a huge distraction from what they should be thinking about for their jobs, and no single option can be used for work and home and secure and collaborative and enough disk space and mobile and...
Great article! Thanks for helping on this issue. Before I upgraded to Sierra I wanted to make sure that ALL these facets of 'Optimized Storage" would be disabled. And contrary to what I believe was mentioned, Optimized Storage for me was turned on by default in System Preferences in the iCloud pane under iCloud Drive Options. I have since disabled it. I have had loads of issues including losing files with regard to iCloud Drive so I will never trust that service.
That's fascinating - I wonder what could have caused it to be on by default, since we've not seen that.
Regarding this new interface, I currently am showing a 130.2 GB partition of "purgable" storage. I can't use it and I neither know why it's there nor to remove it. Can anyone assist?
Apple isn't saying exactly what it considers purgeable, but it may just be the kinds of things that Optimized Storage could move up to iCloud. Check the various listings in the Storage Management window and see if anything jumps out at you.
I can't explain what went on here, but it's a cautionary tale about why turning on Desktop and Documents folder syncing might be a bad idea:
http://talkingpointsmemo.com/edblog/maybe-be-careful-with-osx-sierra
When I've seen weird behavior here, it has usually be resolved by letting iCloud finish syncing and then rebooting to clear out caches and the like.
I love the idea of dektop and data icloud syncing so that I would have one folder on both computers that was kept in sync and stored files from both computers, but that's not what I got. I ended up getting two new folders when I turned it on with a "- computer name" at the end. I currently have it on my mac mini, but turned it off on my MBP, but considering turning off on both. Another strange issue I had is that I keep an alias for my downloads folder on my desktop and for about 4 days, none of the attachment download buttons in my gmail would work, which I'm guessing is because I had Safari set to automatically download to the downloads folder.
I wish I knew why some people are seeing the extra folders rather than getting merged contents. I can't think of any reason why that would be at this point.
Optimize Mac Storage was automatically clicked after my upgrade. I turned it off but now I see a couple gigs of "purgeable" content so I am worried I am half on/half off.
Interesting data point, thanks. As long as that's off, I wouldn't stress about the Purgeable content, since we believe that just indicates content that could be moved to the cloud or deleted if you were to allow that to happen.
This is interesting: in Terminal I have a ~/Desktop and ~/Documents folder, with the expected contents, but neither of these appear under my home directory in a Finder window. It appears Apple's syncing the actual ~/Documents folder, but is hiding that from the user — presumably to make it obvious what's being synced to iCloud.
Yeah, they're doing some squirrely stuff behind the scenes. I remains surprised that they didn't symlink the folders back to their original locations in the Home folder.
Oops… you can still see the Desktop and Documents folders under your home folder, if you drag your home folder into the Dock.
Oh, that's just too weird!
Gah! Photos and System Prefs both say Optimize (NZ Optimise) Mac Storage is off, but Store in iCloud in System Information says they're both on. I'm assuming the former is definitive.
EDIT: no, I see, in System Info it's suggesting I turn on Store in iCloud with those 2 optimise options, even though Store in iCloud is already on.
Yes, that's correct. The Storage Management window encourages actions, whereas the Photos and iCloud System Preferences settings reflect what's actually happening.
Does MacDropAny have the same concerns? It uses symbolic links which sounds different.
I have not upgraded my home network to Sierra for reasons you mention. I have not been hesitant with prior upgrades.
You say different e.g. ~/Documents folders and files from different machines with the same iCloud account will be merged into a unified iCloud home folder with Optimized Storage, but how are collisions handled? As an example, consider two Numbers spreadsheets on two machines with the same iCloud account, one on my MacBook Air and one on my MacBook Pro, both of which have different updates. Even with text files, I would still have to manually merge and select which information from both files would be included in the final, third, new file to be created in the cloud. Given that iCloud cannot properly sync my files between one machine and the iCloud already, and people's many adventures in losing files to iCloud, and the long-standing unreliability of Time Machine and traditional networking I don't feel that I can trust Apple to handle my files at all without risking loosing data.
Once iCloud has a copy of the Desktop & Documents folders from the first machine, any subsequent machines where you turn that on are uploaded into sub folders — so no chance of collisions.