Investigating ChronoSync 4.7 for Cloud Backup
Some Mac users remember Apple’s Backup app more fondly than it deserves because nothing quite took its place. Although it was never a good backup app, Backup went through several versions, and in its best-remembered incarnation, it could selectively copy files from your Mac to a MobileMe iDisk, a Finder-mountable version of what would later be called “cloud storage.”
iCloud eliminated the Backup app’s iDisk option, and iCloud Drive took years to materialize after that, but only for general file storage. Time Machine filled the gap for local backups but has never offered a cloud-based option. Independent cloud backup options, like Backblaze and CrashPlan, back up your data for a recurring fee. (CrashPlan can also perform local and LAN-based backups.)
The nominal successor to Apple’s Backup app may be the 4.7 release of Econ Technologies’ ChronoSync, a long-standing Mac app that offers on-demand and scheduled synchronization and backup. We at TidBITS were excited to see ChronoSync add options to use Amazon’s Simple Storage System (S3) and Google Cloud Storage as sources or destinations. ChronoSync 4.7 also added support for SFTP (Secure FTP), which gives you even more remote file storage options.
ChronoSync has a bazillion options, and we generally like how it works. We also like that the $50 price includes lifetime updates (better yet, TidBITS members receive 20 percent off!). In this article, I’ll offer just an overview of ChronoSync’s features, as it would require a book to explore them at any depth. Instead, I focus specifically on whether ChronoSync can serve as an effective offsite backup system.
Because of ChronoSync’s extreme flexibility and the complexity of understanding and setting up cloud storage services, the discussion below gets quite involved. The executive summary is that ChronoSync is a great option for those who need the ultimate control over offsite backup, but ends up being more expensive and slower than dedicated cloud backup services.
(If you’re looking for more general information about backup strategies and software, consult Joe Kissell’s “Backing Up Your Mac: A Joe On Tech Guide, Second Edition,” which is updated for macOS 10.12 Sierra.)
ChronoSync’s Endless Bucket of Options — Let’s just say that ChronoSync is, uh, feature rich, and Econ Technologies keeps adding features. The app’s primary function is to copy files for synchronization, mirroring, bootable volume cloning, archiving, and backing up. ChronoSync can work with mounted drives, networked volumes, and even with iOS using an additional app.
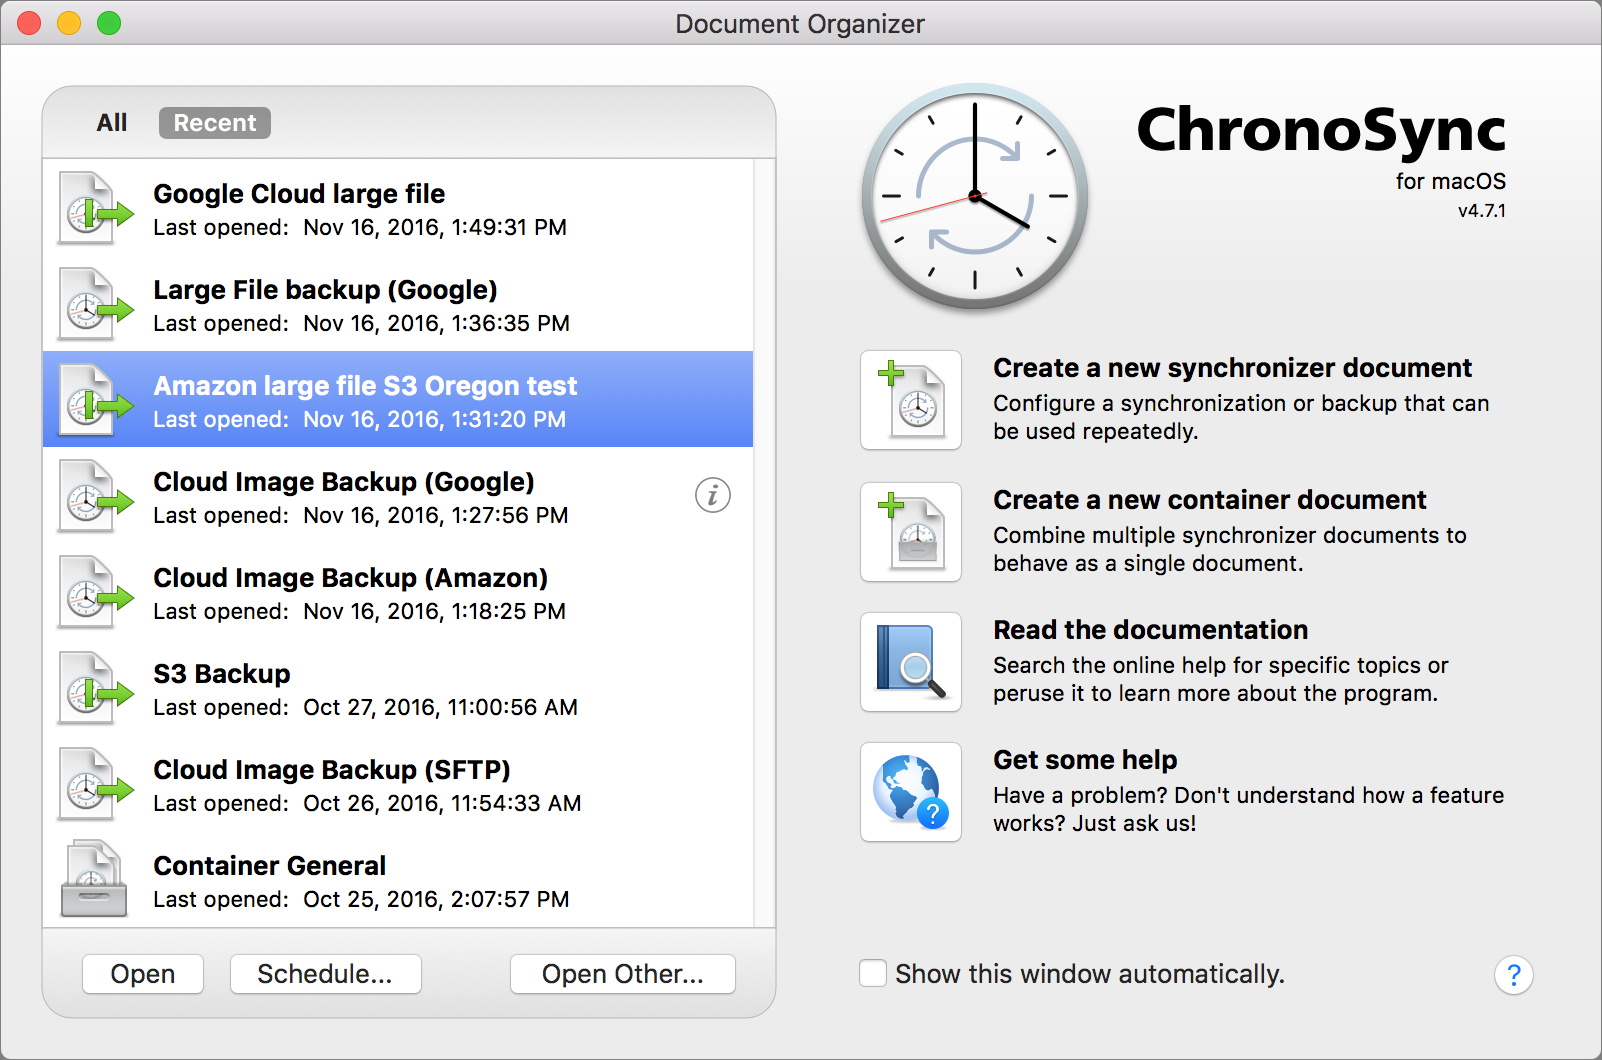
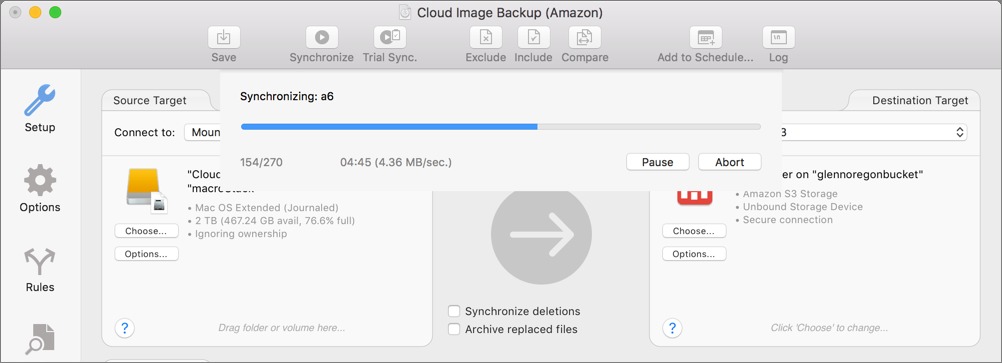
To use it, you create either a “Synchronizer,” which specifies a pair of locations between which to move data, or a “Container,” in which you can group multiple Synchronizers for scheduling and other behavior. Most of the action happens in the Setup view of a Synchronizer window, which is where you specify a source and a destination target. From the Operation dropdown menu, you can set a one-way copy or a bidirectional sync.
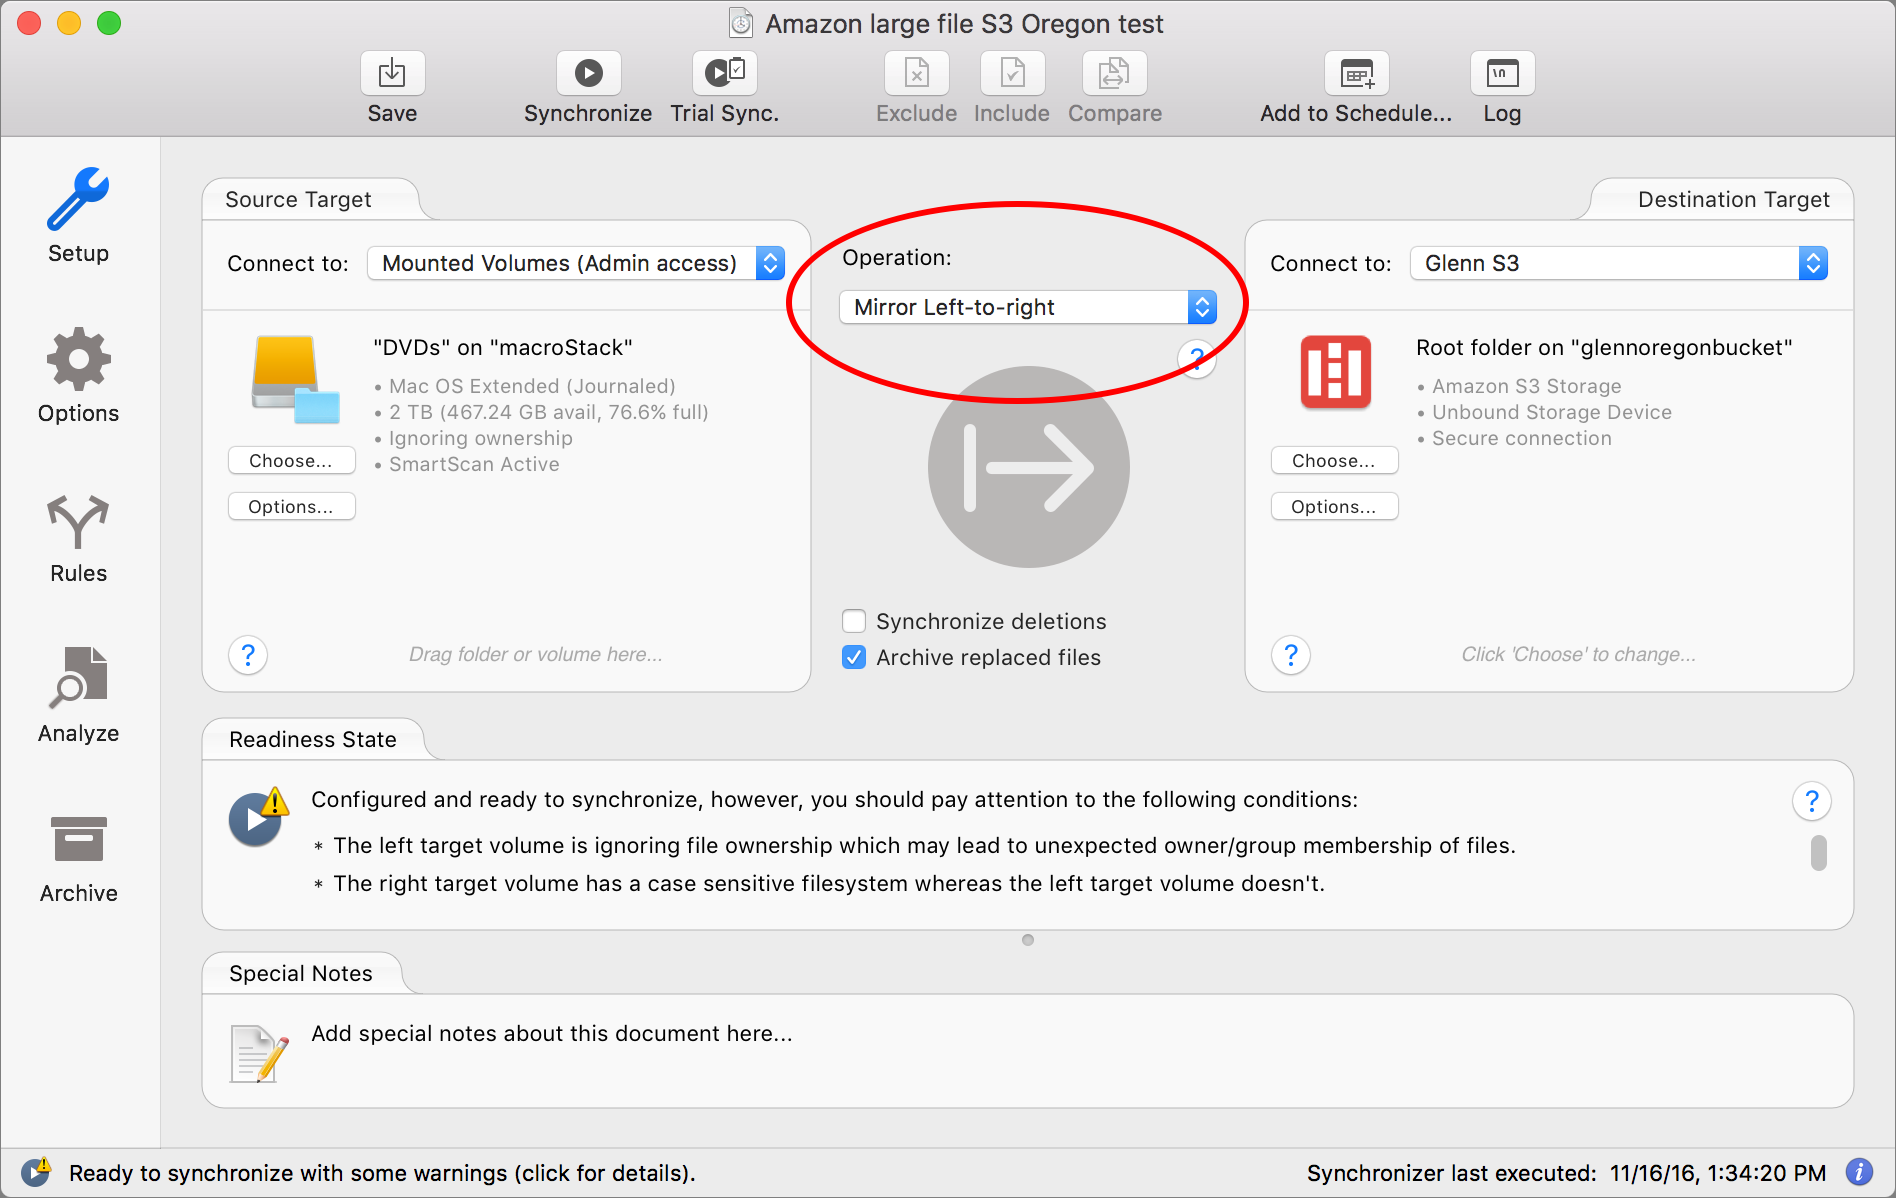
ChronoSync tries to be as flexible (and international) as possible about identifying the source and destination with one-way operations. It uses tabs above the left and right sides of the operation to help you see how data will flow from one place to another. The tab labels reflect the direction of the operation you selected.
For instance, if you choose Backup Left-to-Right from the Operation pop-up menu, the left tab reads Source Target and the right side reads Destination Target. Choose Backup Right-to-Left (because that direction makes more sense to you, or you’ve decided to swap which target is the master), and the tab labels update to reflect that. You can click a tab to customize its name, too, if you want to identify it even more precisely, like “Home Computer” and “Work Computer” or “Updated Local Copy” and “Synced Remote Copy.”
The third major option in the Operation menu is Synchronize Bidirectional, which lets you keep two targets up to date with each other. That’s highly useful when you or other people are making changes to a shared set of files. Say a group is working on a project in multiple locations, or you work on the same material at home and work or on a desktop and laptop. You want to sync the files in all locations, no matter where the updates occurred. If files are modified on both targets when a sync takes place, ChronoSync warns about conflicts and lets you resolve them.
(Dropbox, Box, Google Drive, and other file-sharing services offer smoother continuous multi-location file updating, but when you use a service you’re syncing your data through their servers, which is a point of weakness. Also, these services charge recurring fees for each user who stores more than a few gigabytes, whereas you can use ChronoSync’s Synchronize Bidirectional option with your own servers, which are either free or an already sunk cost.)
Bidirectional syncing is easy to understand, but one-way copying involves more complexity:
- Backup: ChronoSync copies files found on the source and not present on the destination, but doesn’t delete files on the destination that are missing from the source. It also copies any changed files so as to make the destination versions identical.
- Blind Backup: Same as Backup, except that if a file present on the source is deleted or modified and the source file remains unchanged, the destination file (or absence thereof) will remain. (Yeah, it’s confusing; you’ll know if you need it.)
-
Mirror: Same as Backup, except that files modified on the destination are replaced with the corresponding source files, whether or not the source files have been changed. And, importantly, any files on the destination that aren’t present on the source get deleted.
-
Bootable: Clones the source volume to the destination volume as a bootable drive. This option works only with volumes, not folders.
-
Bootable Mirror: Same as Bootable, except the app overwrites files modified on the destination with the source version, and deletes files from the destination not present on the source.
Underneath the Operation pop-up menu, you can select the Synchronize Deletions checkbox. It’s a squirrelly option: if you delete a file from the destination, ChronoSync then deletes that file from the origin, a kind of reverse sync. Most people won’t touch this, but it’s there if you need it.
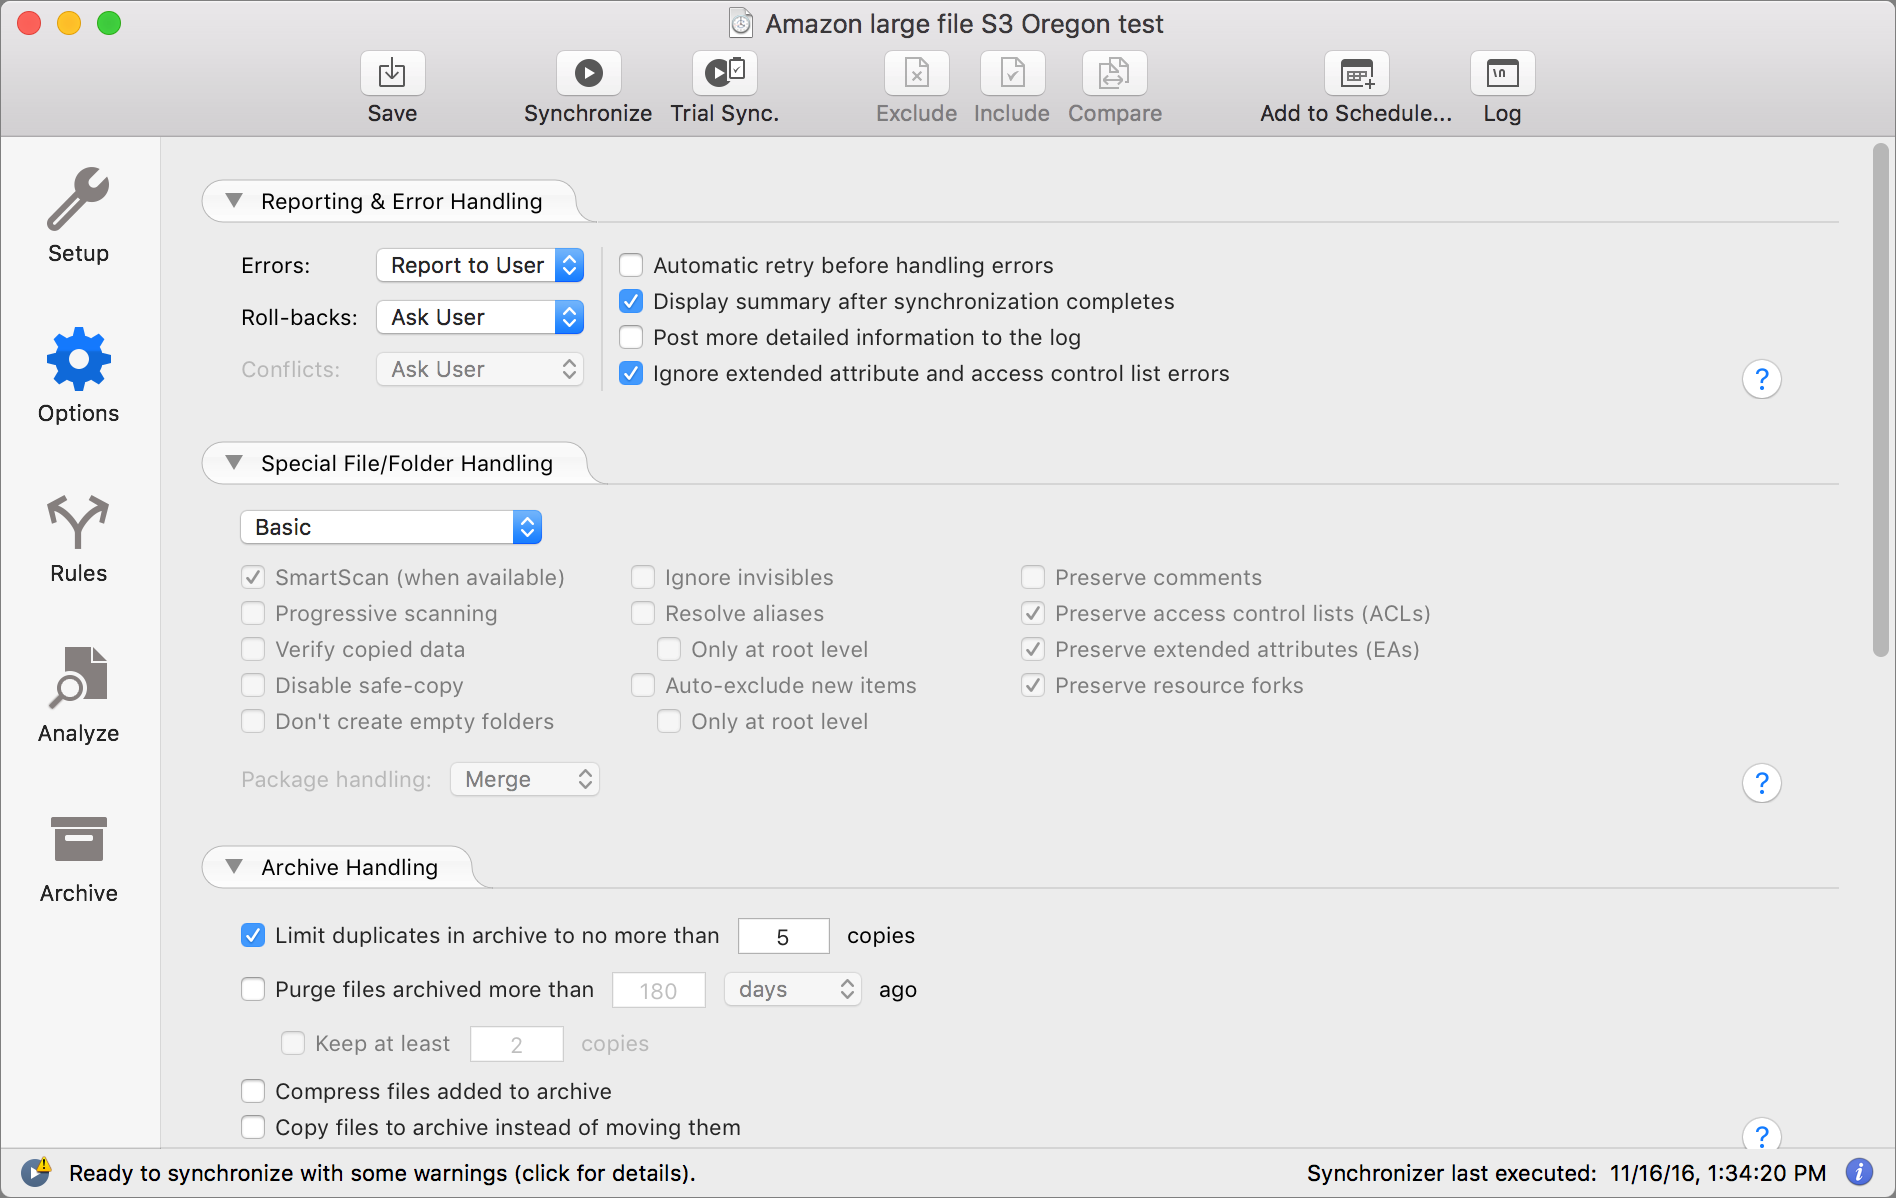
Also available underneath Operations is the Archive Replaced Files checkbox, which stows replaced files in a special folder. The Options view in a Synchronizer lets you control archive options, such as how many versions to maintain and for how long. The Archive view displays older and removed files, and enables you to restore them in a variety of ways.
ChronoSync’s Analyze view helps you make sense of all this. It effectively previews what will happen when you run the operation you defined with all its many options. You can also use it to override what happens, including resolving conflicts and excluding items.
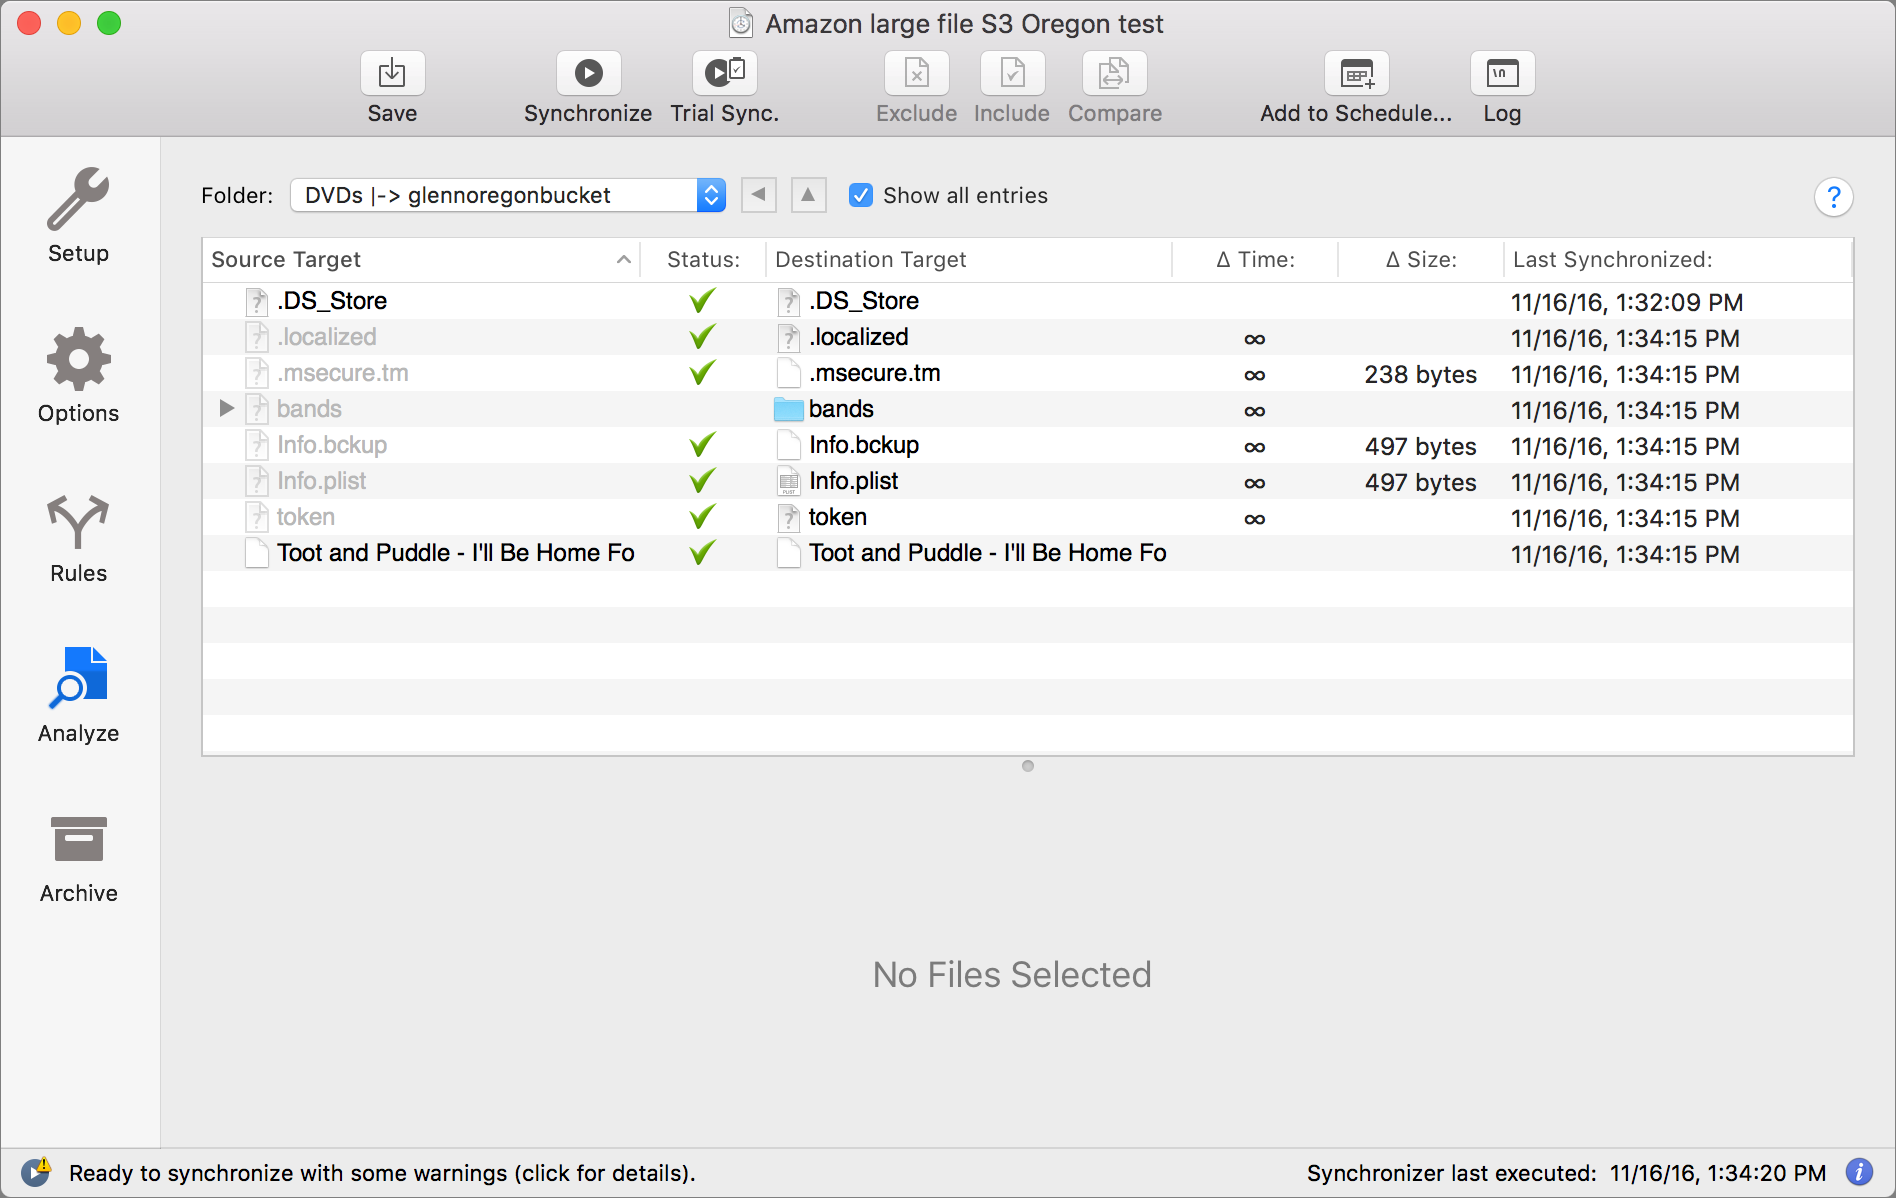
If you don’t want to include all the subfolders in a path that you chose, you can work in the Analyze tab to right-click the folder and choose Exclude for many operations. You can also set up guidelines in the Rules view to exclude folders, file types, and any number of other elements. To give you a sense of how deep ChronoSync is, the Rules view has Simple, Intermediate, and Advanced methods of creating these matching tests.
For a remote backup, you’ll choose one of the Mirror options, select Archive Replaced Files, and leave Synchronize Deletions unchecked. That’s because, for a remote backup, rather than a remote working copy, it’s unlikely that you would ever intentionally modify the destination or want files to remain in the same location in the destination after you’d deleted them from the source. The Archive option would help you recover deleted files. That, in combination with a local Time Machine backup, would provide the most flexibility.
The last piece of the puzzle is scheduling, which you can set for an individual Synchronizer. However, you may want to back up several locations or drives, each with separate options. For that, you’d create a Container, and then schedule it. It’s simple to set up and explained well in ChronoSync’s documentation.
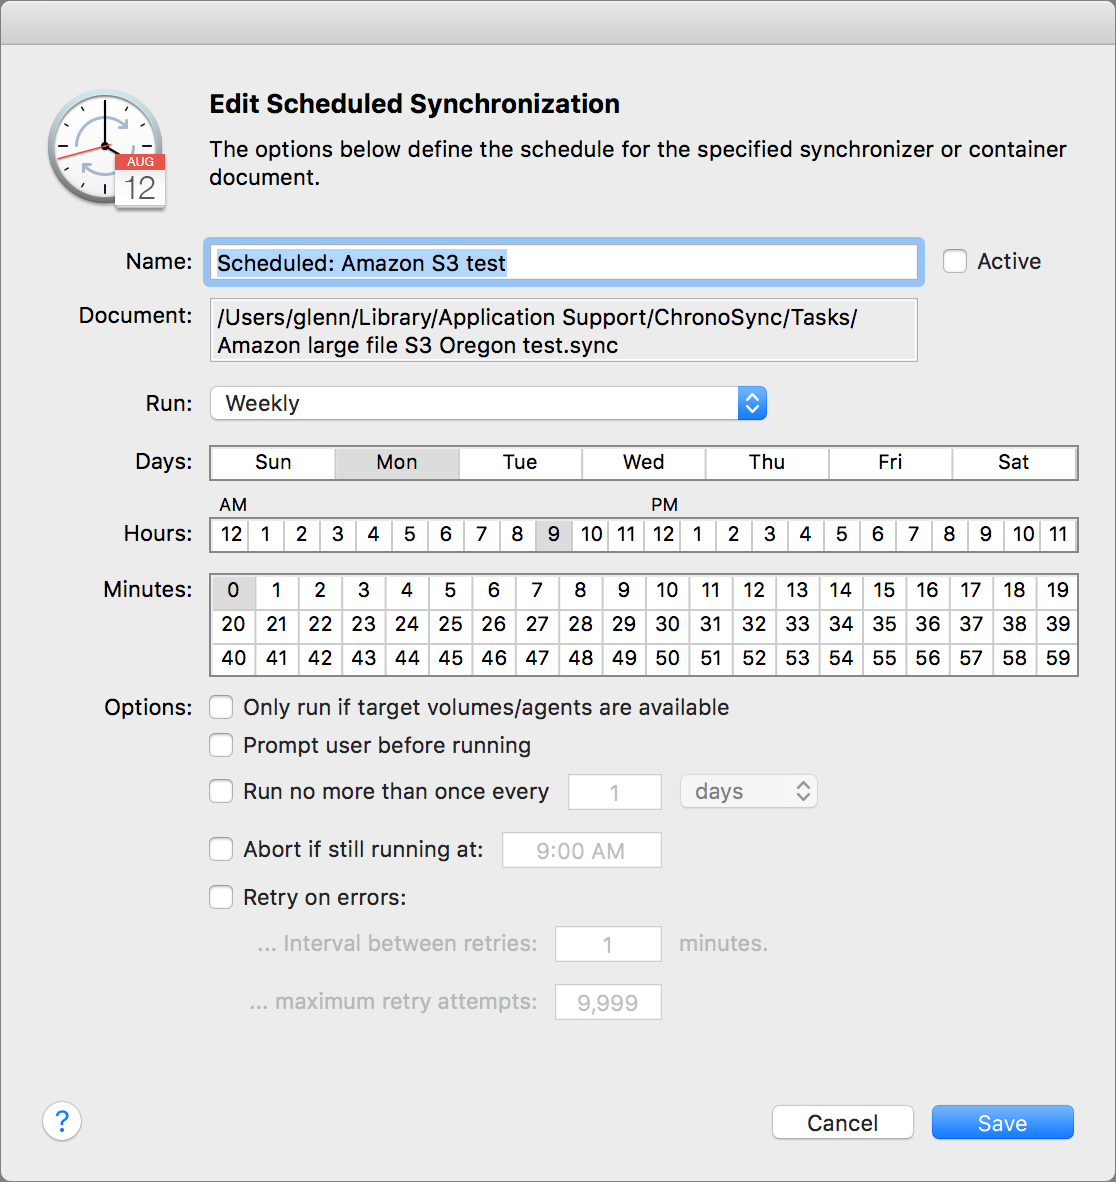
As with everything else in ChronoSync, there are oodles of tweaky scheduling options. For most people, the simplest approach will be to choose a Daily or Weekly recurring basis from the Run menu and then specify the best time to start it.
You can add multiple schedules for the same Synchronizer or Container, and even trigger them based on events, such as when a volume mounts on your system. That’s great for when you plug in a drive you carry around, and you want ChronoSync to back it up or bring it in sync immediately and automatically.
With those basics covered — and, believe me, I’ve just scratched ChronoSync’s surface — let’s move on to remote data destinations, which is what’s new in version 4.7.
Comparing with Cloud Backup Services — I started writing this article because I wanted to see if you could use ChronoSync to set up a recurring off-site hosted backup with encryption that was fully under your control. ChronoSync 4.7 now lets you use as a destination Amazon S3 (part of Amazon Web Services) or Google Cloud Storage (part of Google Cloud Platform), which charge by usage and transfers. You can also use SFTP (Secure FTP), which lets you create an encrypted connection to any SFTP server to which you have access.
I wanted to compare ChronoSync’s new capability with cloud-based backup services, which have millions of users because they let you back up an unlimited amount of data from one or more computers for a flat monthly or annual rate. For instance, for a single computer, Backblaze charges $5 per month, $50 per year, or $95 for two years with no limit on the amount of data you can store. Restoring online is free; you can pay $99 to get your files back on a 128 GB flash drive or $189 for a 4 TB hard drive. Cloud backup services also track file version changes, and include those backup versions as part of the unlimited price.
Cloud-hosted backup services also offer a variety of encryption options, with CrashPlan and SpiderOak among the leaders for Mac users in letting users own and control all the encryption pieces. Backblaze is a bit behind them in some aspects, but also allows user “ownership” of keys. (See my PCWorld article, “The best online backup service for securely encrypting your data,” for details.)
Fortunately, with both Amazon and Google, you can specify an encryption key and have the server perform cryptographic scrambling without storing the key. It’s a reasonable compromise that keeps most control in your hand: the files are encrypted at rest and the encryption key isn’t stored with them or held by the cloud provider. Amazon and Google both offer extensive information about how this works. ChronoSync lets you enter any key you choose in the appropriate connection field, and it generates the correct format for the services. (You could also use local encryption,
such as encrypted sparse bundle disk images, and just sync the disk image bundle elements, but that can consume a lot more bandwidth and has other drawbacks when restoring files.)
I’ll walk through Amazon’s storage offerings first; Google’s are broadly similar, so I won’t need to repeat much of the information you learn from Amazon. One bit of nomenclature: cloud storage like this is designed around what Amazon called “buckets,” and everyone else has followed suit. A bucket is a uniquely named directory across the entire cloud infrastructure: no two buckets owned by anyone, anywhere, can have the same name. Buckets can be assigned to a set of data centers (called a “region,” and geographically defined) or a cloud service can locate it wherever it wants — it doesn’t matter. Depending on the cloud platform, buckets also can be set to use a particular tier of storage, described below; have
individual items marked as a specific kind of tier, regardless of the overall bucket’s tier; or have rules applied that shift items from one tier to another.
Econ Technologies has published excellent guides to setting up an account with Amazon Web Services and Google Cloud Platform, including how to create and configure buckets. That’s great, since the process isn’t trivial.
Amazon S3 offers three kinds of storage, which correspond to how rapidly you need to retrieve the data: Standard, Standard–Infrequent Access, and Glacier. (A fourth kind, Reduced Redundancy, has a higher potential failure rate and isn’t appropriate for backups and archives. It’s meant for “easily reproduced” or temporary data.)
All three types have the same high level of “durability,” a measure of the likelihood that data will be lost. This durability stems from Amazon replicating all your data across multiple geographically dispersed data centers. The difference in storage types, and thus cost, is how frequently and quickly you need to retrieve data. Standard promises that no more than 1 out of 10,000 file requests will fail, meaning a file request would need to be retrieved again, often as an automatic retry. Infrequent Access drops that to 1 in 1,000, which is great for backups. Glacier is for archival storage you rarely need, and it takes around 4 hours to initiate a request to retrieve files, which are moved to temporary normal S3 storage.
You’ll pay a vastly different price for each. In three of four U.S. regions (Oregon, Ohio, and North Virginia), you pay $0.023 per GB per month for stored data with Standard, $0.0125 for Infrequent Access, and $0.004 with Glacier. The price is slightly higher for the Northern California region and in global regions except South America. (Amazon dropped its prices by double-digit percentages in December 2016; cloud prices regularly drop by large amounts.)
Amazon charges nothing for uploaded data, but you’ll pay $0.09 per GB for downloads for Standard from U.S. and European data centers, and more from other data centers. For Infrequent Access, the download cost adds $0.01 per GB to regular retrieval prices from any of Amazon’s regions, making it $0.10 per GB at best. There’s also a tiny charge related to each request to upload or retrieve files, charged per 1,000 requests. If you’re uploading one million small files from a Mac, you could wind up paying $5 for Standard or $10 for Infrequent Access ($0.005 per 1,000 and $0.01 per 1,000, respectively).
You can set up Infrequent Access as an option when you configure Amazon S3 as a ChronoSync target, after which each item you sync is written using that class of storage and inherits that pricing. ChronoSync can’t write directly to Glacier as such: you have to set up an archive rule within the Amazon Web Services Console on the Web. That sounds complicated, but it’s really just a couple of clicks. And ChronoSync can’t retrieve files from Glacier, either. You have to use the console for that — again, it sounds complicated, but the Console can help guide you through it.
Glacier used to have complexities around the cost of retrieving data, because it was based on how much data you have stored. There was even a horror story, in which someone almost racked up vast retrieval fees. Fortunately, Amazon radically simplified this recently, and there are now three tiers of retrieval cost by how quickly Amazon processes your requests. You pay a retrieval fee that can be as little as $0.0025 per GB — that’s just $2.50 per TB — if you can wait from 5 to 12 hours for the retrieval to start. You then pay the regular download rate ($0.09 per GB) to retrieve the data from
a temporary storage location within S3. Amazon throws in 10 GB of free Glacier retrieval per month.
There’s a lot more detail about using Glacier in a cost-effective manner, including uploading files as ZIP archives or in other monolithic archive formats, found in the Glacier FAQ.
To store 200 GB of data in Amazon S3’s cheapest regions, you would pay $4.60, $2.50, and $0.80 per month for Standard, Infrequent Access, and Glacier. That’s just for ongoing storage — retrieving all that data from Standard would cost $18.00, $20.00 from Infrequent Access, and $18.50 ($0.50 for retrieval and $18.00 for the download) at Glacier’s slowest retrieval rate. There would be a bit more of a charge for all the file requests, which could be from a few cents to a few dollars for a large number of files. Excluding storage space used for archived versions, the 1.3 TB of files backed up from my main office Mac would cost me $29.90, $16.25, and $5.20 per month and $117.00, $130.00, and $120.25 to retrieve plus the file request
fees.
Google offers three kinds of storage that make sense for backups: Multi-Regional, Nearline, and Coldline. Rates listed are for most of the world; it’s slightly more expensive to use Google’s Asia-oriented data centers in Japan and to retrieve Multi-Regional data in China and Australia. These tiers work as follows:
- Multi-Regional is like Amazon Standard, intended for high-intensity use and not backups unless you’re concerned about having immediate access. (Google also offers Regional and Durable Reduced Availability flavors that have drawbacks similar to Amazon’s Reduced Redundancy tier.) Multi-Regional costs $0.026 per GB for storage; retrieval is $0.12 per GB.
-
Nearline is like Amazon Infrequent Access except that it’s slightly cheaper for storage and slightly more expensive for retrieval. In most regions, it costs $0.01 per GB for storage, but you pay $0.13 per GB for retrieval (as with Amazon, that’s $0.01 above the Multi-Regional retrieval price).
-
Coldline resembles Glacier but has instant retrieval. It’s super cheap for storage, like Glacier, but costs more for interacting with storage and retrieving files. You’ll pay $0.007 per GB for storage and an additional $0.05 per GB over Multi-Regional ($0.17 per GB generally) to retrieve data from most regions. Unlike Glacier, there’s no delay in retrieving Coldline files. Coldline is intended for an inexpensive extra backup of huge amounts of vital data — a kind of last resort, given the costs of retrieval.
Google charges similar per-operation prices for uploading or retrieving files, too.
To store 200 GB of data in Google Cloud Storage, using the cheapest regions, it would cost $5.20, $2.00, and $1.40 per month for Multi-Regional, Nearline, and Coldline, respectively. Restoring 200 GB would cost $24.00, $26.00, and $34.00, plus the small per-operation fees. For storage, my 1.3 TB of files would run me, in the same order, $33.80, $20.00, and $9.10 per month; for retrieval, $156.00, $169.00, and $221.00.
All that is the long way around to say that, Backblaze’s $5 per computer per month fee is almost always low relative to the cost of storage for all but the Glacier/Coldline tiers of Amazon S3 or Google Cloud Storage, and super low relative to retrieval costs for any significant amount of data. In short, if you’re interested in using ChronoSync as your offsite backup solution, it won’t be for cost reasons unless Glacier suits perfectly for long-term storage and rare retrievals of subsets of data.
(By the way, Backblaze offers a cloud file-storage service called B2 with flat-rate $0.005 per GB upload and $0.05 per GB retrieval fees, plus $0.004 per 1,000 requests of any kind. That’s $1 per month for my 200 GB comparison and $6.50 per month for 1.3 TB — cheaper than both Amazon and Google’s cold storage offerings. ChronoSync doesn’t yet support B2, but it’s available for use via the file-transfer app Cyberduck.)
What about SFTP? — You could also consider backing up your data with ChronoSync via SFTP, where you control even more of your data ownership and encryption options, because you have to own or lease a server on the other end of the connection. Because you’re running that server or are paying a firm to do so, you don’t get the redundancy, data-center security, and built-in encryption that comes part and parcel with using Amazon S3 or Google Cloud Storage.
These kinds of generic servers you can reach via SFTP don’t have data encryption for data at rest built in by default. You’d have to run additional software on the server to encrypt incoming files; otherwise, anyone who could log into your server could potentially read all your data. This limitation makes SFTP most useful as DIY option that’s an extra, extra backup — one that’s in addition to your other copies.
SFTP is a generic protocol for transferring data using an encrypted tunnel between a client and an SFTP server. If you have a cloud-based virtual private server with extra storage, or want to swap storage with a friend who can run an SFTP server on their computer (and you both have high-speed Internet links), it’s an alternative. It may not be cheap, and it certainly won’t be easy, since you’ll have to set up and maintain the SFTP server, but it could be an alternative if you want complete control.
For instance, I have a Linode server for my various Web projects. I already pay $100 per month for it and I have about 100 GB of storage available that I could use for critical documents or files. I also found a similar service that offers 1 TB of SSD storage and 5 TB of monthly throughput for just $25 per month (I haven’t tested it, and thus am not linking to it).
Performance Testing — I set up and tested several kinds of backups and similar operations to see how well ChronoSync worked and how fast it was. I then compared those operations with straight file copying in Transmit (for Amazon S3 and SFTP) and Cyberduck (for Google Cloud and SFTP). I performed all the cloud tests over HTTPS for encrypted transit, but without server-side encryption, as neither Transmit nor Cyberduck supports it.
While ChronoSync detected changes and performed backups flawlessly, it lagged in throughput. This unfortunate result stems in part from the fact that I have uncapped symmetrical gigabit Internet service, an extremely unusual situation.
I tested with directories of files of varying sizes, some tiny and some in the hundreds of megabytes and to over a gigabyte, as well as using what Econ Technologies’ lead developer recommended: a sparse bundle disk image created in Apple’s Disk Utility. Instead of relying on a single monolithic file, the sparse bundle format divides the disk image into small files of 1–8 MB each, depending on the image’s volume size, which makes backups much easier. Changing a few files might result in updating just one bundle element that’s a few megabytes in size.
In every test, ChronoSync suffered from some inefficiency that bogged it down. I reported this to Econ Technologies, and they were very responsive. As a result of my testing, they updated the app from 4.7.0 to 4.7.1 to implement improvements for smaller files that more than doubled throughput with Amazon S3 and tripled it with Google Cloud Storage. The company tells me they are working to crank it up even further in future updates.
I created a 2.16 GB sparse bundle disk image and tested it via several methods. I also tested a single monolithic 1.5 GB file to check the difference in throughput for a single-file transfer. I’m in Seattle; the Amazon bucket I created lives in the U.S. West (Oregon) region, and the Multi-Regional Google bucket in my hemisphere. The SFTP server is in a Linode data center in California. At the time I ran these tests, Google’s Fiber speed test showed that my connection could push 300 Mbps upstream.
For the sparse bundle image:
- Amazon S3: 65 Mbps using Transmit, 40 Mbps with ChronoSync
- Google Cloud Storage: 200 Mbps using Cyberduck, 40 Mbps with ChronoSync
- SFTP: 140 Mbps with Cyberduck, 190 Mbps with Transmit, and 12 Mbps with ChronoSync
For the monolithic file:
- Amazon S3: 280 Mbps using Transmit, 94 Mbps with ChronoSync
- Google Cloud Storage: 250 Mbps using Cyberduck, 182 Mbps with ChronoSync
- SFTP: 140 Mbps with Cyberduck, 190 Mbps with Transmit, and 20 Mbps with ChronoSync
With Backblaze backups from the same computer, I routinely hit rates of 200 to 400 Mbps upstream.
Although these numbers would seem to be a huge mark against ChronoSync, the reality is that its slower throughput makes a difference only if you have a very high-speed upstream connection and routinely backup more than a few gigabytes a day. Still, that first backup is going to be pain: priming a backup set with 200 GB would take about 1.5 days at 12 Mbps; copying 1 TB would take about 8 days. Speeding this up to come closer to the performance of direct transfers would make ChronoSync a much easier choice.
Is ChronoSync Worthwhile for Cloud Backup? — Cloud-hosted backup services offer an attractive price for automated backups, strong support for retaining older versions, and excellent redundancy. But that all comes at the cost of ceding some level of control, and that’s what you get back with ChronoSync.
The key advantages to using ChronoSync and separately contracted storage are that files end up stored in a directly retrievable format, and you control all the encryption options. On the downside, it’s slower and will likely be more expensive, particularly if you have to restore significant amounts of data.
In the end, if you have a variety of storage and backup needs, don’t trust the black-box of a cloud-backup provider’s software, and want more encryption control, ChronoSync may be able to provide the set of options you want.
In December, Amazon lowered their prices for S3 and changed their Glacier retrieval pricing and options so it should be cheaper for most but with options to pay more for those who want their data faster.
https://aws.amazon.com/blogs/aws/aws-storage-update-s3-glacier-price-reductions/
This article was so delayed (as not perishable) that I didn’t fully check all the rates when we published! I’ve gone back and revised the Glacier and other data rates for Amazon. Thanks for your good eyes!
"Same as Backup, except that if a file present on the source is deleted or modified and the source file remains unchanged, the destination file (or absence thereof) will remain."
I bet there is a "source" in excess here.
It's "deleted *or* modified and the source file remains unchanged"
not "deleted or modified *and* the source file remains unchanged"
I agree this sounds ambiguous!
I'm sorry maybe I'm a bit dumb but shouldn't it be like this?
"[…] except that if a file present on the *destination* is deleted or modified and the source file remains unchanged, […]"
I agree with Andrea. How can a file on the source be deleted OR modified, but still be considered "unchanged"? Modifying a file changes the file; deleting a file is the ULTIMATE change to a file.
I use ChronoSync for backup to a mounted drive. I run the backup with the Bootable Mirror option. I have two backup documents. One is a full backup and one is a daily "incremental" backup. The full backup simply mirrors the source to the destination. Any file in the source not on the destination is copied there. Any file on the source with a new mod date is copied to the destination overwriting the one that is already there. Any file on the destination that is not on the source is deleted from the destination. That's a mirror. I do the same thing with the daily backup except that I have Archive replaced files selected as well as moving deleted files to the Archive. That means no file is ever deleted.
Also, I have an Applescript that runs after the sync that empties the Trash. That means those files, in the Trash, get Archived on the destination. The Applescript also writes to a text file the date and time of the run. What this does is changes the mod date of the file so that I can track what happens to the file. It gives me a way of verifying that no file is ever deleted and versions of a file just accumulate in the Archive. They are appended with a numbered extension.
Another note, I rotate 3 backup sets. When I bring a media back for recycling and run the full mirror backup it is VERY fast. It will backup 200+ GB in about 2 hours. That's because a lot of file have not changed. Files such as my music, videos, and photos.
After I do a full backup I immediately do a daily/incremental backup starting with a "Baseline Scan" forcing the backup to think it's in sync. Then I run the actual daily backup.
It's also important to delete the Archive Folder before doing the full backup. I also delete the log files in the document as well so that the only entries in the log pertain to the current backup and not the last time the sync doc was run.
All in all Chronosync is fast and reliable.
How about using ChronoSync to iCloud?
Thanks Glenn.
Glenn,
Great information and well-written, as usual. However, it didn't answer the question I have; namely, is it possible to use ChronoSync to back up wirelessly from a Mac (or two) to a HD connected to an AirportExtreme? In other words, to use ChronoSync's functionality rather than Apple's TimeMachine.
Thanks,
Les
It works with any local and networked drives as well as cloud drives, so anything that a Mac can "see" will work.