iOS 11 Brings New Document Manager to iWork
Within hours of the release of iOS 11, Apple also released new iOS versions of its iWork apps: Pages, Keynote, and Numbers. Among a handful of new features, these revised apps offer new file management capabilities, courtesy of iOS 11, which turn the way you get at your iWork documents into something rich and strange. Using Pages as my primary example, what follows is a tour of the new document management appearance and the features that iOS 11 brings to your no-longer-familiar iWork document screens.
Note that amid the seeming complexity of iWork’s New Way of Doing Things is a welcome consistency: Pages document management screens look like not only those in Numbers and Keynote but also iOS 11’s new Files app, which replaces the iCloud Drive app. This isn’t surprising: in macOS, standard file dialogs look very much like Finder windows, and Apple is now doing the same thing in iOS — document management screens within apps are now close relatives of the Files app, the iOS equivalent of the Mac Finder.
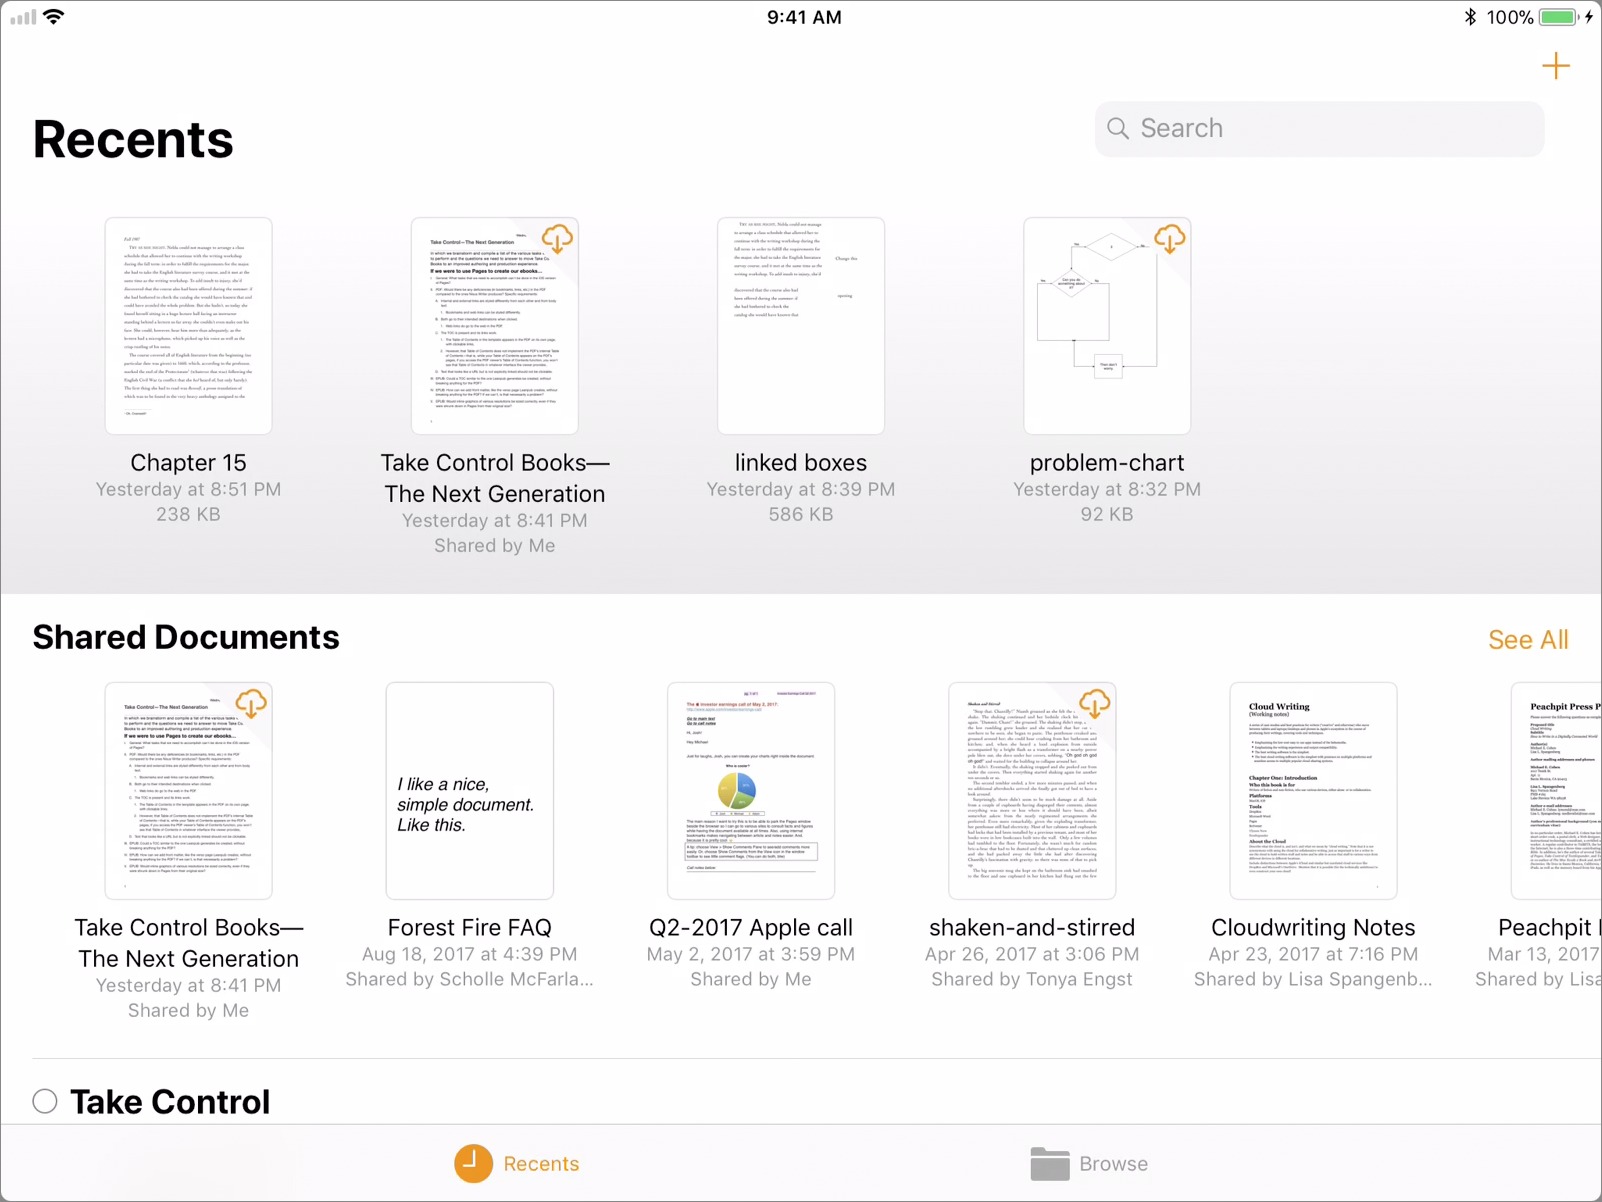
What Have You Done for Me Recently — When I first opened Pages 3.3 on my iPad, I saw a new Recents screen instead of the familiar Documents screen from the previous version of Pages.
Whether this is what you see when you first open an updated iWork app doesn’t matter, though. That’s because there are only two views — Browse and Recents — and it’s easy to switch from one to the other by tapping the corresponding buttons at the bottom of the screen.
Recents, as the name implies, shows you the documents you have worked on most recently. Tap one to open it. It couldn’t be simpler.
However, “Recents” is not an entirely accurate name because it also lists any documents you have shared with others using iWork’s iCloud collaboration features. Plus, following those, it shows documents you have tagged, grouping documents sharing the same tag together.
As on the Mac, you can apply tags to any document, and you can make up new tags. To add a tag, follow these steps:
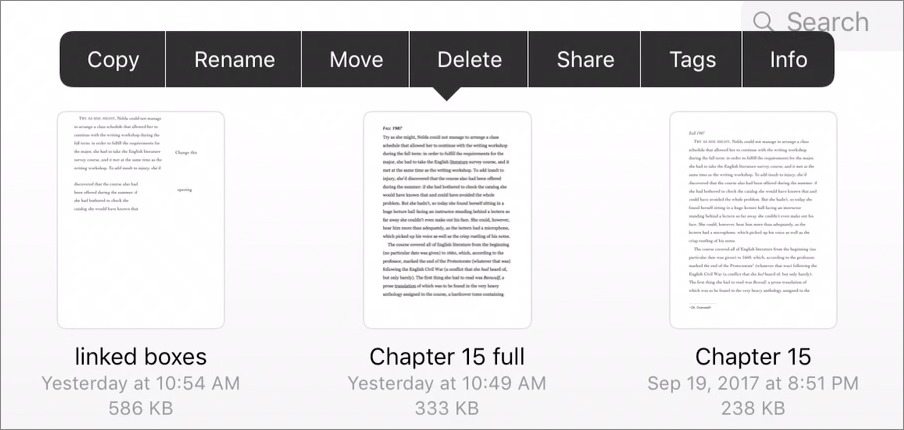
- Touch and hold briefly on a document, and then release.
- On the menu that appears, tap Tags.
-
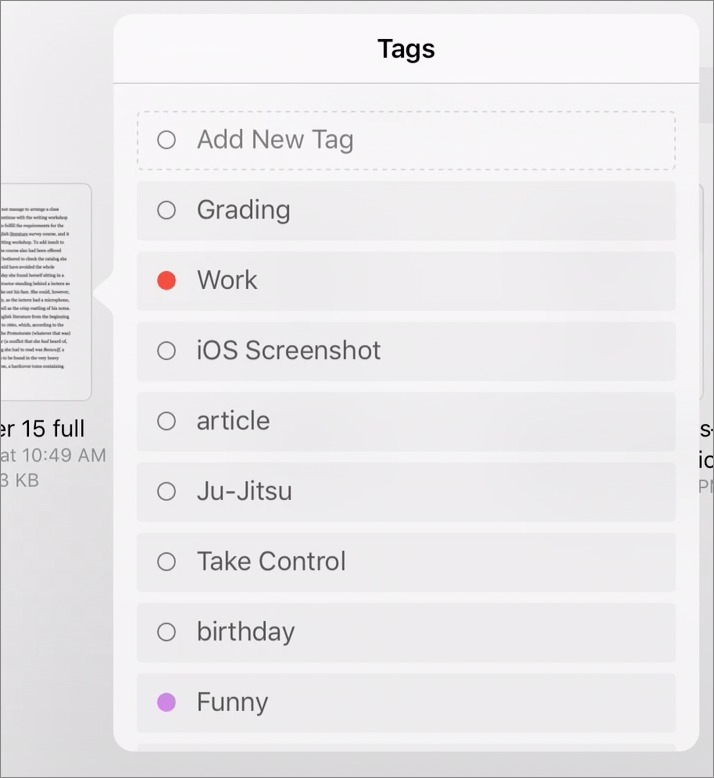
A popover with a list of available tags appears, as well as a button you can tap to create a new tag.
-
Tap one or more tags to assign them to your document.
Between the lists of recently opened documents, shared documents, and tagged documents, you may never need to leave the Recents screen. You can even create new documents there: tap the + icon in the upper right corner.
You may be wondering where newly created documents are stored. By default, they end up in the iWork app’s App Library folder on your iCloud Drive, just as they always did; e.g., in the Pages, Keynote, or Numbers folder. (Although these App Library folders look just like normal folders, they can hold only files compatible with the associated app — you can’t even drag in an incompatible file in iCloud Drive in the Finder.) However, if you aren’t using iCloud Drive, your files end up in the app’s local storage area on your device. Which brings us to…
Location, Location, Location — To browse among all the locations in which you may have stored a document compatible with your iWork app, you use the Browse interface: tap Browse at the bottom of the screen to see it.
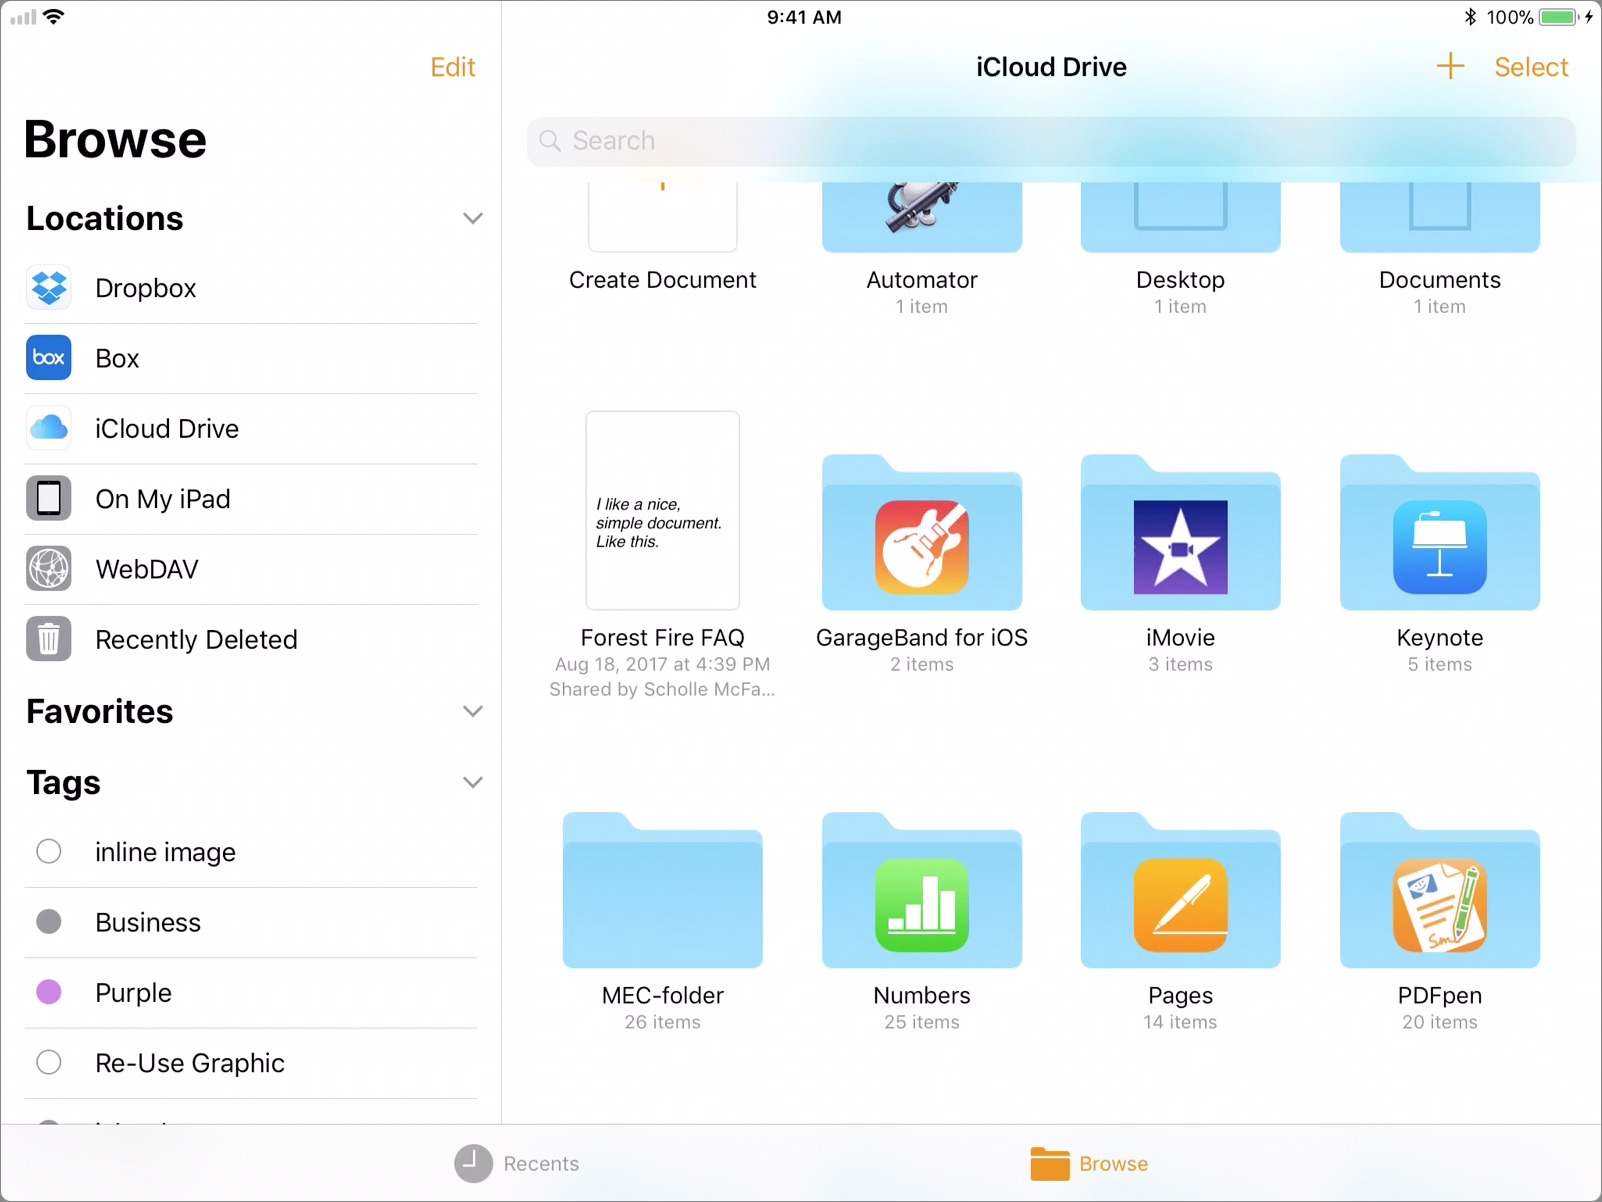
The Browse interface features a sidebar listing locations in which you can open and create documents and a main pane that looks like the iWork document manager screen of yore (“yore” being a few weeks ago). That is, it looks this way on an iPad: on an iPhone, the Browse sidebar occupies the whole screen in portrait mode, and you get to it by tapping Locations at the top left of the screen.
The main pane you see when browsing shows you the documents stored at the currently selected location; the location’s name is displayed at the top of the pane. The gestures you make in this pane are familiar:
- To work on a document, tap it.
-
To open a folder to see the documents inside, tap it.
-
To rename, move, delete, share, or tag an item, hold on its thumbnail briefly and then release to see the contextual menu I described earlier. (Note that you can simply drag an item to move it into a folder if the folder is visible on the same screen.)
-
To move, share, or delete multiple documents, first tap Select at the top right; the commands for handling selected items appear at the bottom of the pane.
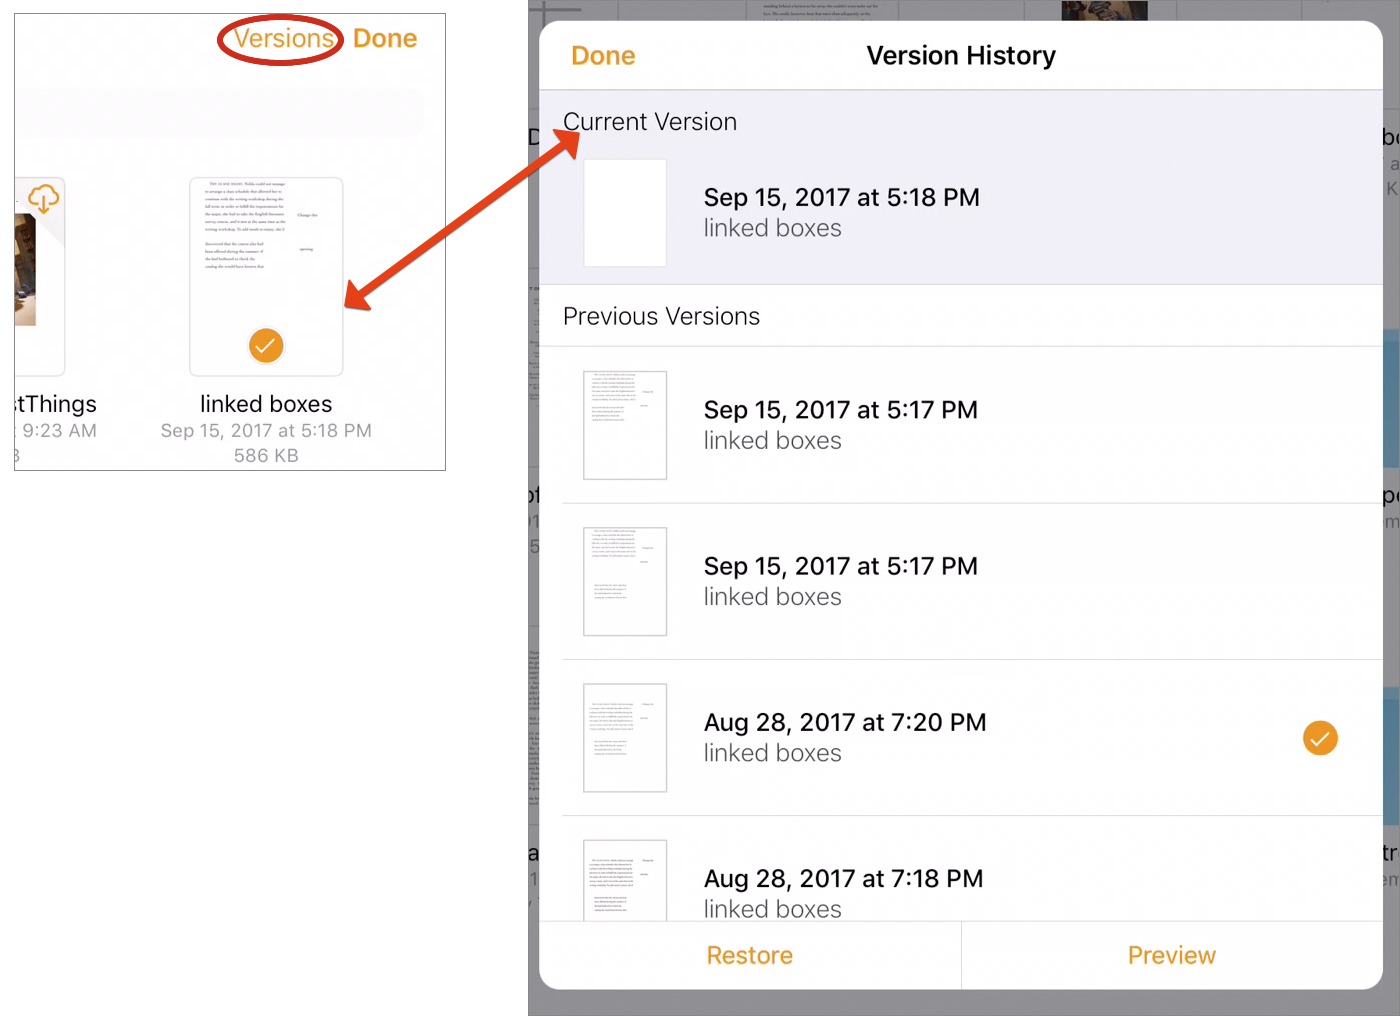
Selecting a single document also gives you access to earlier versions of that document. Tap the Versions button that becomes active at the top right of the pane to see a list of previous versions of that document. You can then tap an item in the list to view a preview of that version or to restore it to become the current version. When you preview an older version, you can also save a copy of that version as a separate document.
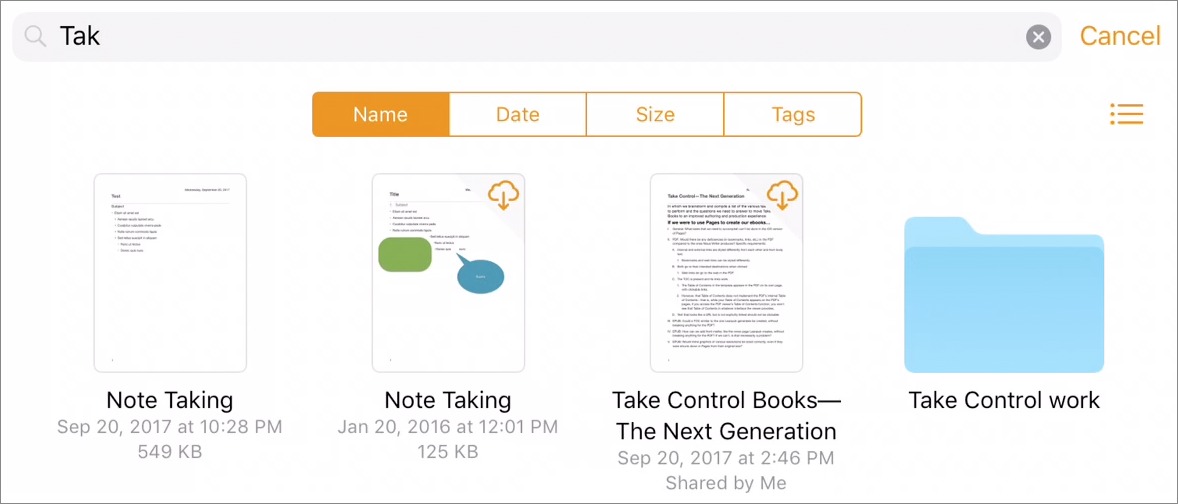
A Search field also appears at the top of the main pane. Type in there to see documents that match your search string, no matter where they’re located.
To change the currently selected location and view its contents, tap a location in the Browse sidebar’s Locations list. Although the location you’ll probably use most often is iCloud Drive, you can use On My iPhone/iPad to keep documents in the app’s local storage instead of in the cloud.

In addition to the Locations list, the Browse sidebar offers a Tags section: tap a tag to show items that bear the tag in the main pane.
No matter what location you are viewing, the area at the top of the main pane contains buttons you can tap to arrange the pane’s contents and a button at the right to change the display from a thumbnail grid to a more compact vertical list. If those buttons aren’t visible, pull down on the main pane to bring them into view.
You also have other storage locations available to you. These locations can be supplied by third-party vendors, such as Dropbox or Google, or be provided by connected WebDAV servers. Tap the Edit button at the top of the sidebar to show or hide any of them and to change their order.
There is one item in the Locations section of the Browse sidebar that you can’t move or hide: Recently Deleted, at the bottom of the list. Tap it to see all the items you have deleted from the app over the last 30 days — that is, anything that Apple has a say about; third-party developers and server administrators may keep or discard items according to their own policies.
Finally in the Browse sidebar, between the Locations list and the Tags list, you’ll find a list of Favorites. I’ll describe what that is all about when we turn to…
Folder-all and Fiddle-Dee-Deep — iOS 11 treats folders differently than in the past. In prior versions of iOS, folders within an app’s iCloud Drive App Library folder (such as the Pages folder in iCloud Drive) could be nested only one level deep. That restriction has gone away; you can now nest folders within App Library folders as deeply as you like.
You also create folders differently than in earlier versions of the iWork apps. Rather than dragging one document onto another to create a folder containing them both, you now tap the New Folder button near the top left of the pane. Yes, you can now have empty folders!

You delete a folder by using the Delete command on the contextual menu that appears when you press the folder’s icon briefly and then release. You can delete folders along with their contents; they don’t have to be empty — and, like deleted documents, deleted folders end up in the Recently Deleted location, from which you can recover them.
What about Favorites? That section of the Browse sidebar comes into play when you press and release a folder thumbnail and then choose Favorite from the menu that appears. Doing so adds the folder to the Browse sidebar’s Favorites list, and makes it easy to navigate to with a tap. To remove a folder from the Favorites list, tap the Browse sidebar’s Edit button and then tap the delete button beside the folder. (For example, I have favorited my Pages iCloud Drive folder so I can get to it quickly no matter what location I happen to be browsing.)
Not Quite the Finder — These vastly enhanced document management capabilities provided by iOS bring it closer in capability to the Mac’s Finder than ever before. However, it isn’t quite the Finder. For example, you can’t store things anywhere you like: apps must be programmed to provide access to their local storage areas. Plus, some storage providers may only partially implement iOS 11 management capabilities. For example, when I began to write this article, the Dropbox and Google Drive locations were still relegated to a dialog rather than being fully integrated into the Browse interface; that changed with app updates, but it highlights the fact that app
developers have work to do to integrate with the new iOS file management capabilities.
Nonetheless, iOS 11’s document management capabilities are a great advance over the way previous iOS versions sandboxed (and usually hid) their apps’ data storage locations, and they make interoperability between apps far more flexible.
While this rich and strange new world might seem complicated and confusing at first, it is for the most part logically implemented and easy to learn. Now that I’ve spent a little time with it, my sense of its strangeness and complexity has fallen away, and I find that I really like it. Try it; I suspect you might like it too.
I am experiencing strange problems with the files app on my iPad. Like: ePub files (books) have the Google Drive icon and if I tap them the app tries to open them with Google Drive... I also can't find any way to open a file in any other app.
As soon as you move out of the "one file type per app" comfort zone this still is basically pointless as a file manager in any way.
I don't know why your iPad sees EPUBs as Google Drive documents.
But the new file manager is, in my opinion, not pointless. I like being able to navigate in Pages to locations, like Dropbox or a user folder in my iCloud Drive, where I may have stored compatible files (e.g., RTF and Word docs) so I can open them. And the Recents screen is quite useful for me as well.