Network Time Machine Backups: Moving on from the Time Capsule
Since its introduction in Mac OS X 10.5 Leopard, Apple’s Time Machine has become one of the Mac’s most essential features, providing transparent, fully automatic, full-machine backup to an external drive, with retention of backup history limited only by the external drive’s capacity.
For desktop Macs, it’s easy to keep an external Time Machine drive permanently connected. But, speaking from my experience as a consultant, I find that the vast majority of laptop users, myself included, are unlikely to plug in a drive regularly. (If you have to remember to connect a drive for backup, the backup system is no longer fully automatic.)
Apple answered the need for ongoing wireless laptop backups in 2008 with its AirPort Time Capsule, a Wi-Fi router with a hard drive inside. In other words, it was a Network Attached Storage (NAS) device, though Apple never described it as such. The Time Capsule acted as a destination for automatic, hourly Time Machine backups from Mac computers on the same network. As an unusual hybrid, Time Capsule did not earn the confidence of some Mac users as a reliable backup device. I have seen it fail occasionally, though it saves users’ data much more often than not. Unfortunately, when Apple discontinued its AirPort line of home networking products in 2018, the Time Capsule was one of the casualties.
A potential alternative is a cloud backup service such as Backblaze, which I frequently recommend, and such a service works even when the laptop is not on your home network. However, I see cloud backup as a complement to Time Machine, not a replacement for it. It is less comprehensive and requires considerably more work to restore from, especially if you need to restore an entire machine. Plus, two automated backup systems provide better insurance than one.
iCloud Drive’s Desktop & Documents syncing also provides some protection from lost files, but it’s even less comprehensive, omitting, for example, everything else in your Home folder, including your Downloads folder and local cache of mail. Plus, any technology that synchronizes also has the power to delete files from your computer. For this reason, I don’t consider synchronizing to be equivalent to backup. Real backup is one-way only.
The Time Capsule’s void has been filled by third-party NAS products, though I suspect many Mac users are generally unaware of this category of product. I have set up several NAS devices as Time Capsule replacements for clients, and while they do work, none are perfect, many are too complex or expensive, and some share problems (notably slow performance) with the Time Capsule while introducing a few of their own.
In this article, I will detail my quest to find or build a better Time Capsule and solicit the collective wisdom of the TidBITS community to further that quest. To the extent that I conclude anything, it is that when it comes to network backup for the Mac, there are many choices, each with tradeoffs, and you’ll need to decide what makes the most sense for your situation.
But first, one product stands out purely on simplicity—Western Digital’s My Cloud Home. As a network backup device, it is nearly a direct equivalent to the Time Capsule. As you’ll see, it meets almost none of my preferred technical requirements, but it’s dead easy to set up, and it fulfills its purpose reliably. As such, if all the other possible solutions—some of which are less expensive, offer better performance, and provide more flexible restoration options—seem overwhelming, just get yourself a My Cloud Home and move on. For an extra level of protection, you may opt for the My Cloud Home Duo, a model that writes your backup twice across two drives.
Requirements for Network Time Machine Backup
I’m looking for a network Time Machine solution that isn’t just good for me, but for my clients, who don’t share my tech skills and many of whom I support remotely. Therefore, some of my requirements might not apply to a tech-savvy Mac user, though I bias toward simpler solutions even for my own use. I will present various options for various needs. I want:
- Minimal assembly required: The hardware has to be simple enough to coach someone through connecting the device to their network, at which point I can configure it further, if needed, by remotely controlling their Mac.
- Ease of configuration: I want something that I can easily set up myself, maintain remotely if needed, and, if necessary, even guide someone through its configuration.
- Reasonable cost: You can’t really put a price on backup, but we all must. Many NAS products are sold and priced as full-fledged servers, making them excessively expensive. Of course, reasonable cost is subjective, so I’ll present different solutions at different price points.
- Decent performance: Time Capsules and many off-the-shelf NAS products are dog-slow due to the vagaries of network connections (especially over Wi-Fi), underpowered CPUs, and, in particular, slow spinning hard drives. I want a NAS that can support a solid-state drive (SSD) and performs well when equipped with one.
- Support for USB 3.0 externally attached storage: I’d prefer to use an external SSD as the backup target unless high capacity requirements demand a hard drive. In a full-disk restoration situation, the drive could be directly connected to the Mac; I don’t want Wi-Fi inefficiencies to be a bottleneck during an emergency. Further, if there are unexpected problems with the backup volume, I want to be able to access the drive directly to see if those issues can be addressed, rather than having to go through the NAS, subject to whatever capabilities it does or doesn’t possess.
- Robust underlying file system: Time Machine’s approach on a network means that the target drive will contain one sparse bundle disk image, which contains the backup data, per Mac. The file system on which these disk images are stored needs to be designed for data survival during unexpected network disconnects and power failures. That rules out formats like FAT32, ExFAT, or non-journaled Mac OS Extended (HFS+); they lack this resiliency and are thus more prone to corruption of the backup. Better choices that macOS natively recognizes include APFS, journaled Mac OS Extended (HFS+J), and Microsoft’s NTFS. However, non-Apple NAS products are usually based on Linux, which does not support APFS or HFS+J, and whose NTFS support is mediocre; these products perform most reliably with the time-tested Linux native Ext3 or Ext4 file systems. A drive formatted as such, when directly connected to a Mac, is readable with inexpensive third-party software, but see below for warnings about using it. (Some Synology products also offer Btrfs as an especially fault-tolerant underlying file system, which has the benefit of automatic snapshots, meaning the entire disk can be reverted in the event of corruption of the Time Machine backup. A disk formatted this way is not readable in macOS at all, though, for those with Linux skills, a virtual machine is a workaround.)
- Support for Time Machine via the SMB networking protocol: Apple’s stalwart file sharing protocol, AFP, has endured steadily eroding support in macOS for years, and as of macOS 11 Big Sur, Apple has reduced it to client-only operation. It’s not hard to anticipate a future in which Apple excises AFP entirely from macOS. Furthermore, non-Apple NAS products provide AFP via an open-source software package called Netatalk, whose development status doesn’t instill confidence. Instead, I recommend sticking with products that support Time Machine via the SMB protocol, based on the actively developed, widely used Samba package. Apple now defaults to SMB for file sharing in macOS and even states that SMB is a requirement for NAS products when using Time Machine, though it is not technically true… yet.
Even the Time Capsule wasn’t perfect, but could there be something out there that would meet most of these requirements?
Candidates for Replacing the Time Capsule
Alas, after trying numerous options, I found no one right answer that ticks off all of these boxes. Thus, I’ll present various products that I think are worth considering, so you can weigh the pros and cons yourself. Depending on your needs, the right network Time Machine device could be (in order of increasing cost):
- A used 802.11ac or 802.11n AirPort Extreme
- A Raspberry Pi 400 or 4
- A router (even operating in a non-router capacity) with a USB 3 port and Time Machine support, such as a Synology MR2200ac or various Asus models
- A Synology DS118 or other model NAS
- A Western Digital My Cloud Home NAS
- An always-on, Ethernet-connected Mac, like the M1-based Mac mini
Here’s an overview of how well the products I considered fit with the capabilities I laid out above. Costs are approximate and do not include storage (except for the WD My Cloud Home). As of this writing, a 1 TB Samsung T5 external SSD costs $110 at Amazon; a 2 TB model is $220.
| Simple Install | Simple Config | Cost | Fast | External USB | File System | Sharing Protocol | |
| AirPort Extreme | Yes | Yes | $40* | No | 2.0 | HFS+J | AFP |
| Raspberry Pi 400 or 4 | Yes | No | $100** | Yes | 3.0 | Ext4 | SMB |
| Synology MR2200ac router | Yes | No | $140 | No | 3.0 | Ext4 | AFP |
| Synology DS118 NAS | No | No | $180 | Yes | 3.0 | Ext4 | SMB |
| Western Digital My Cloud Home (4 TB hard drive) | Yes | Yes | $200 | No | Not usable | Proprietary | AFP |
| M1-based Mac mini | Yes | Yes | $700 | Yes | 3.0 | APFS
HFS+J |
SMB |
* No longer made; this is the going rate on eBay for a used 802.11ac model. Any generation of the even older 802.11n model will also work; these units sell for around $20.
** Cost for Raspberry Pi 400 kit with power supply, mouse, and SD card with the operating system. The cost could vary for a Raspberry Pi 4 ($45) with a la carte power supply, SD card, keyboard, and mouse.
AirPort Extreme 802.11ac or 802.11n, Any Generation
To my surprise, a used AirPort Extreme is an attractive choice, not as a router or Wi-Fi access point, but simply as a network backup device when paired with an external SSD. The main reason I like it is its support for a reasonably robust native Mac file system, Mac OS Extended with journaling, on an external drive. An AirPort Extreme is quick to get up and running, and its price can’t be beat if you don’t mind used hardware. However, I’m less sanguine about an AirPort Extreme with an external hard drive due to its slow performance. I would probably look toward another solution if you require higher capacities.
This discontinued product, of course, has plenty of knocks against it: Apple will laugh at you if you call for help, its external drive speed is limited to USB 2.0, leading to long initial backup times and subsequent “Preparing Backup…” phases, and it requires that a client Mac use AFP rather than SMB to connect. It’s probably not a long-term solution, especially if Apple one day drops either AirPort Utility or AFP from macOS, but for what it costs, it doesn’t have to be, and, for now, it does the job. The 802.11ac model (sixth generation) performs a bit better than older versions, has the newest (and thus most optimized and bug-fixed) internal software, and is still nominally supported by Apple (but I wouldn’t count on that for long). The older 802.11n model (fifth generation or earlier) also works, but I recommend it less, as it is completely unsupported, somewhat slower, and has more out-of-date internal software. Still, you may prefer its lower price and much shorter physical height—though larger footprint. (You can’t use an AirPort Express; it doesn’t support external drives.)
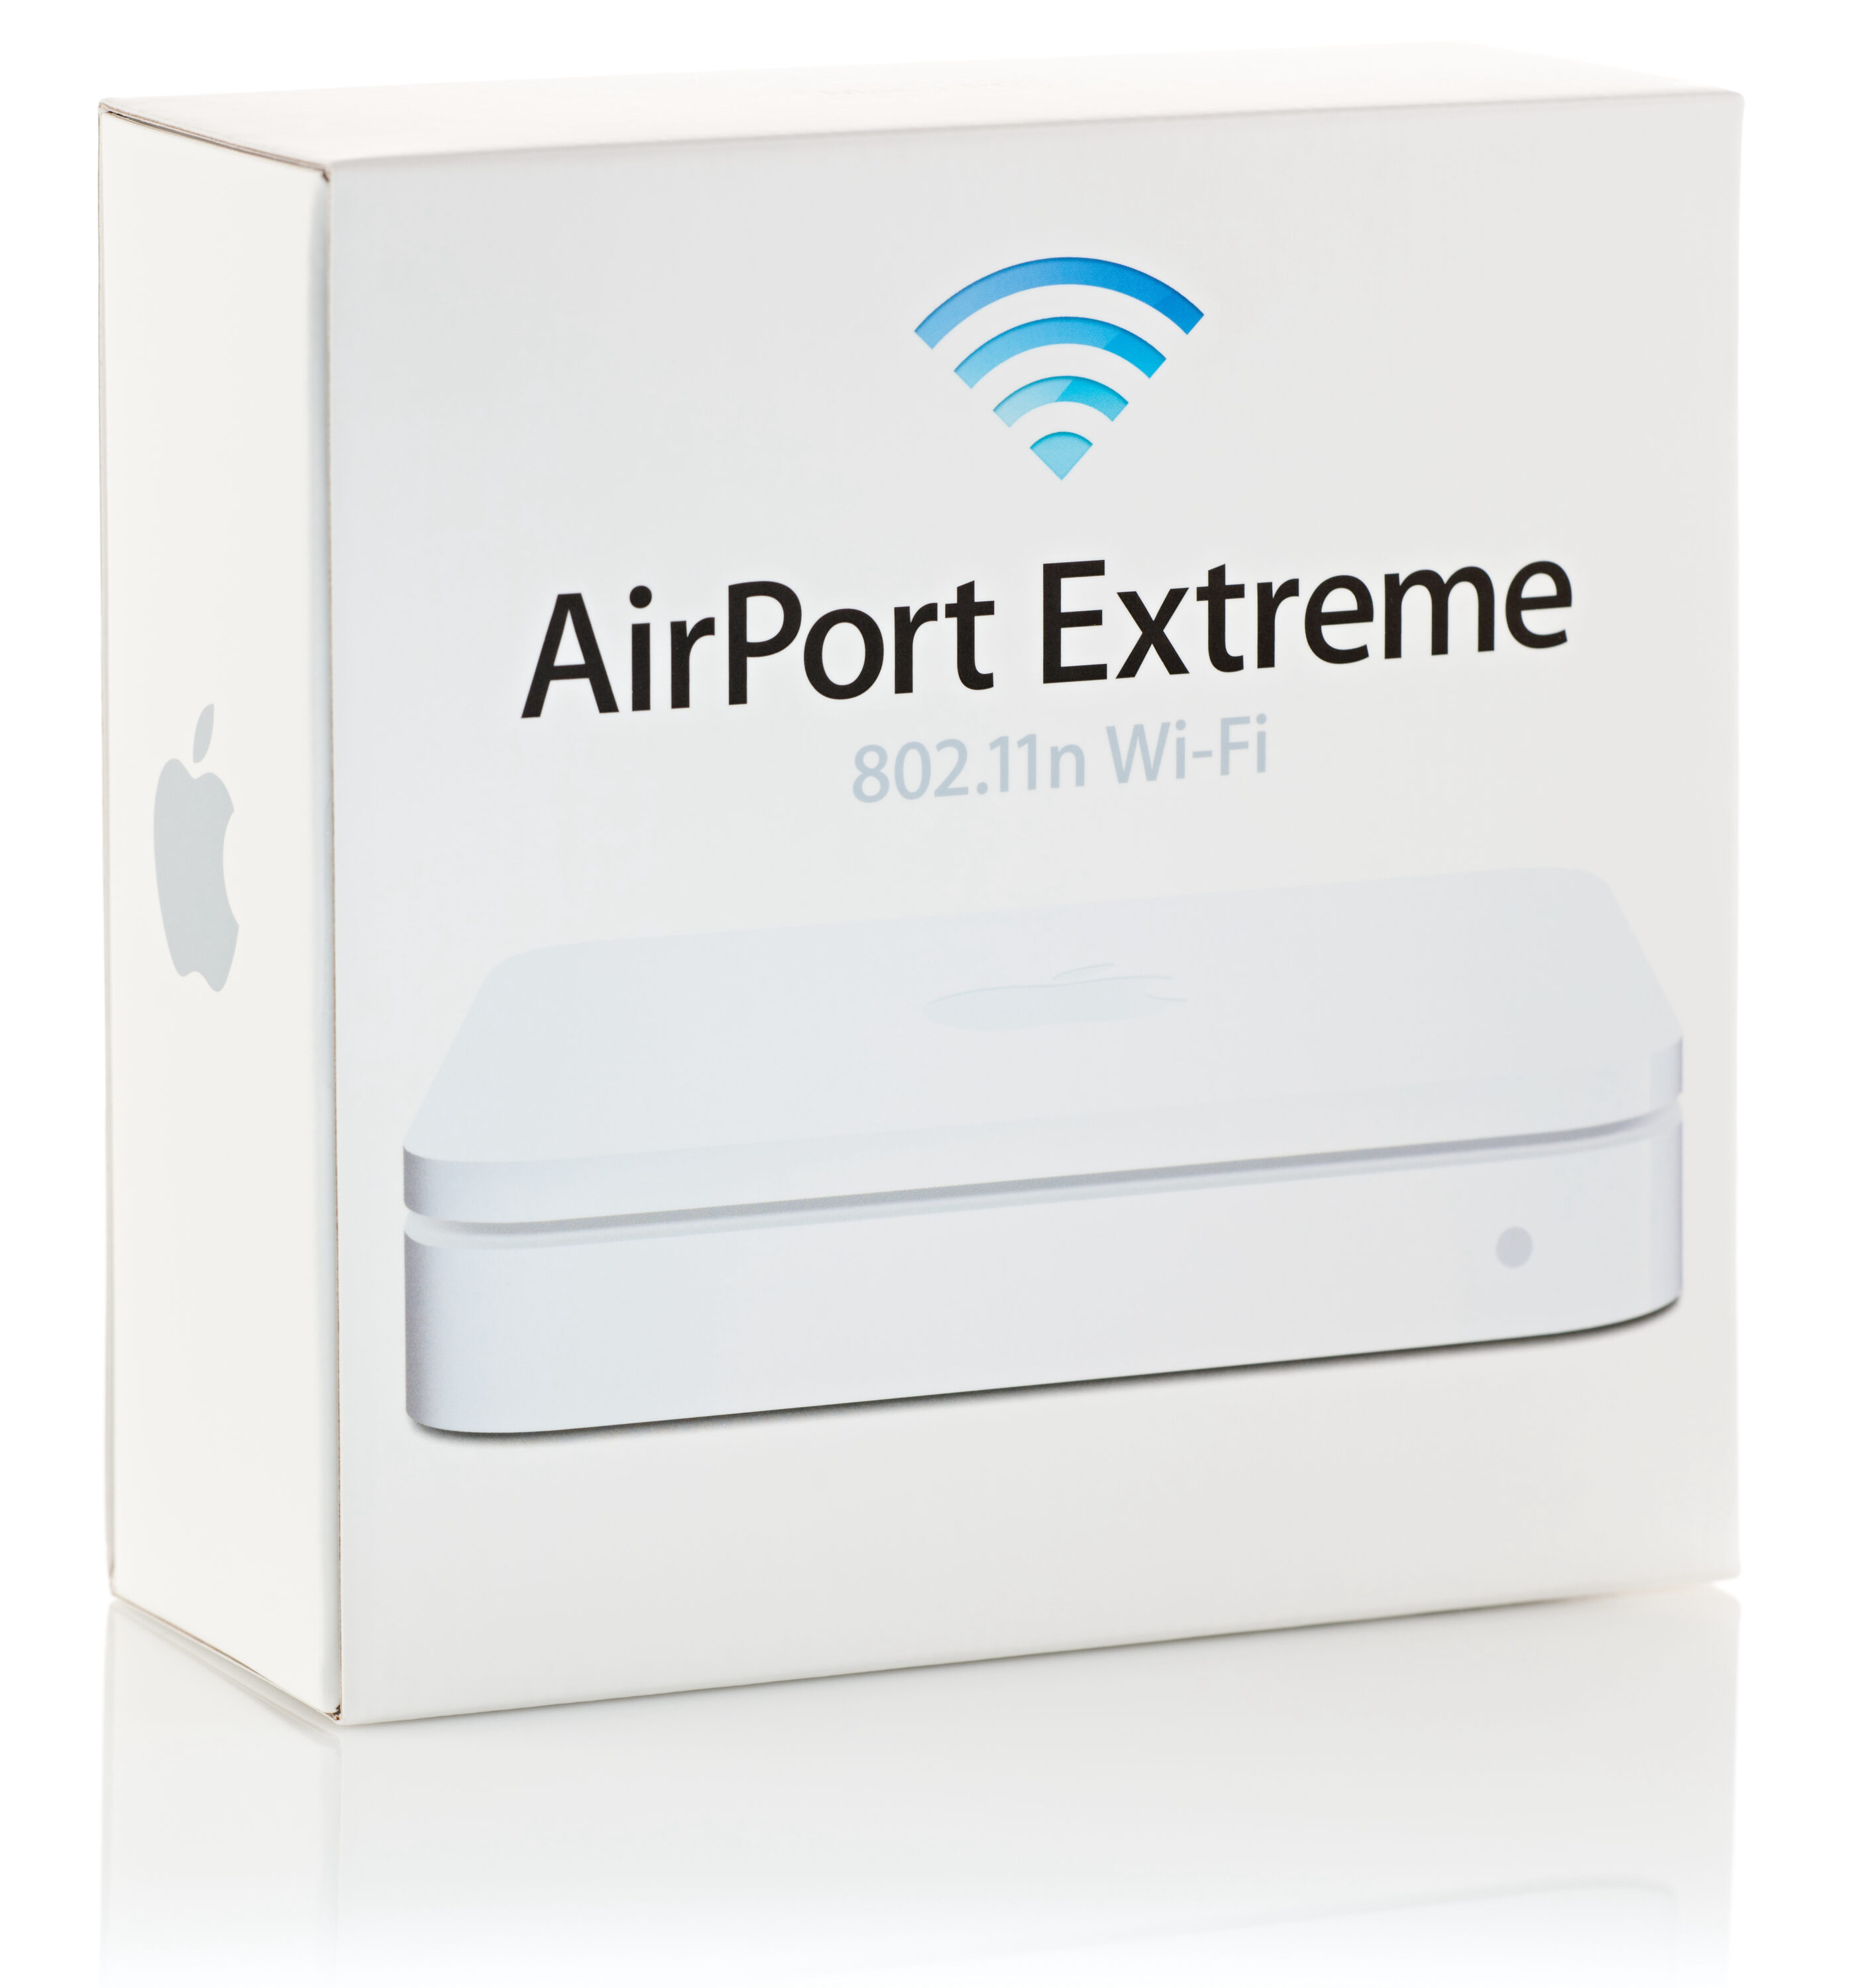
If you do get an AirPort Extreme for network Time Machine, after initial setup, ensure it is in bridge mode (DHCP & NAT networking turned off) and disable wireless networking, so it doesn’t conflict with your existing router and Wi-Fi network. You may also use multiple drives as Time Machine targets by attaching a powered USB hub to the AirPort Extreme. I don’t recommend using any AirPort Extreme as a router because Apple no longer provides security updates for its firmware.
I specifically recommend an AirPort Extreme over a Time Capsule, though you could technically use the latter, too. However, Time Capsules are prone to overheating and component failure, and you might also accidentally back up to the slow, very old drive within. If you do use a Time Capsule, I would still back up to a USB-attached external SSD.
Raspberry Pi 400 or 4
The Raspberry Pi is a very tiny, very cheap ARM-based computer that normally runs Linux. The Raspberry Pi 4 is just a bare credit-card-sized circuit board to which you can attach, at minimum, Ethernet, USB drive, USB-C power, and a Micro SD card containing its operating system. If you wish, you may also attach a keyboard and mouse via USB, and a screen via Micro HDMI. The Raspberry Pi 400 provides a housing with an integrated keyboard, making it larger but easier to use when directly connecting it to a monitor. Neither includes a USB-C power supply, so make sure you get one, or a kit that includes one. Or you can repurpose a power adapter from a Mac or iPad. For the Raspberry Pi 4 only, there are also various integrated UPS (uninterruptible power supply) kits you can purchase to protect your Time Machine backup from corruption due to sudden power loss.

Because it’s a full-fledged computer, the Raspberry Pi can be customized to do whatever you like, including being a network Time Machine appliance with all the characteristics I’m looking for. It also yields some of the quickest backups compared to the other choices. The challenge is the Linux skills required to get it all going. (I intend to release a publicly available script, or premade boot disk image, to ease the setup process, though I have no time frame for when that will happen.) If you don’t have a monitor, you can access the Raspberry Pi from your Mac either graphically with the macOS Screen Sharing app or via the command line using Terminal. If you know what you’re doing, you can even set up a Raspberry Pi without a screen or keyboard from the very start, configuring it entirely from your Mac via SSH and VNC/RDP.
Apart from the challenge of setup, the major negative with using a Raspberry Pi as a network Time Machine device is that it likely requires Linux skills if Time Machine over your network stops working as expected. Further, as with NAS products, its Ext4 file system is foreign to macOS, requiring Paragon’s ExtFS software if you want to connect the external drive directly to a Mac. See below for warnings and cautions when using ExtFS; it works great if you’re careful, but it can ruin your backup if you’re not.
Synology MR2200ac Router
Synology is not as well-known for its router products as it is for its NAS products, but the routers are pretty neat, running a stripped-down version of Synology’s NAS operating system internally while supporting external drives via USB 3.0. The MR2200ac is the cheapest model, and I was attracted to it due to its lack of visible antennas, which I don’t need for network Time Machine purposes. I disabled all its Wi-Fi and routing functions, attached an external SSD to its USB port, and sorted through its Web interface to share the drive for network Time Machine.
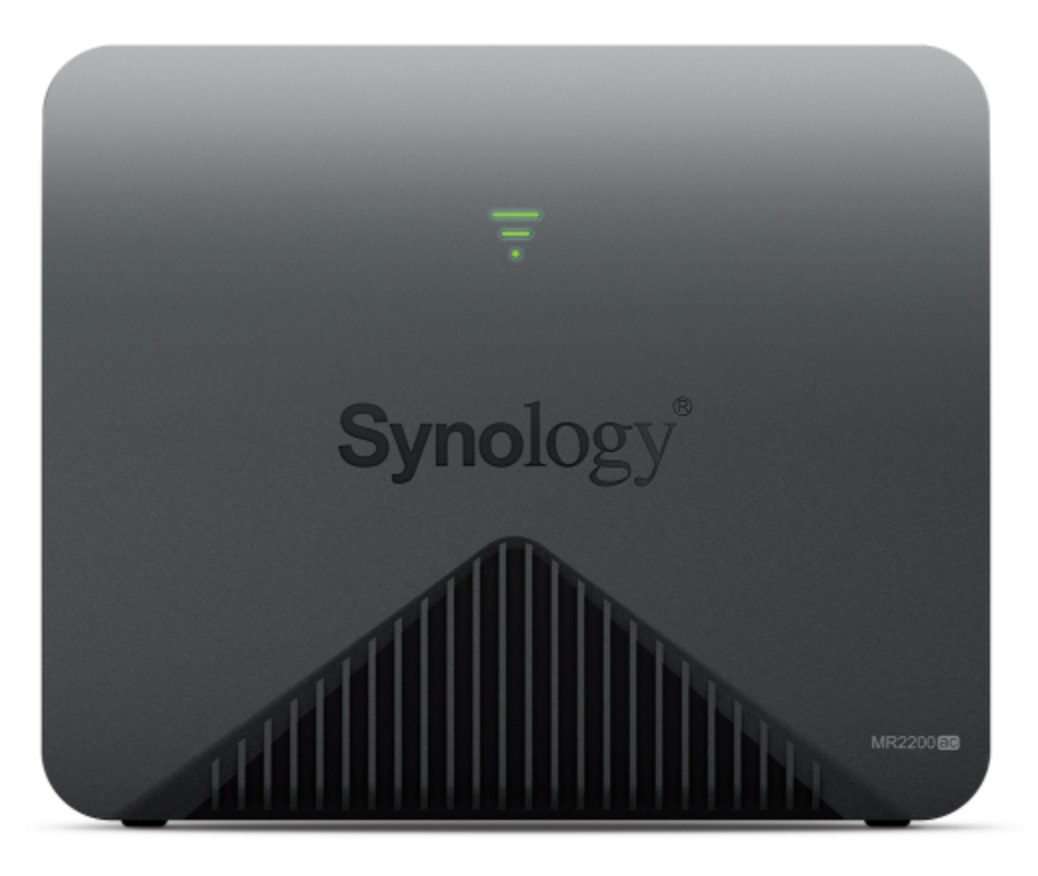
I was disappointed to discover that even though Synology’s NAS products offer network Time Machine connections via SMB, its router products do not, requiring that client machines connect via AFP. I also was underwhelmed by the network performance, even exclusively over Ethernet, with copying at speeds I might expect from a directly attached USB 2.0 drive. In other words, this device didn’t do much more for me than an AirPort Extreme did, and it has the negative of the Linux Ext4 file system that requires handle-with-care third-party software on a Mac (see warning below) if directly attached. Nonetheless, it is a product that is still manufactured, sold, and supported. Still, if I were going to go in this direction, I would prefer the Synology DS118 NAS for a bit more money, with its better performance and support for SMB, or I would try another brand and model of router.
In fact, I did that: I happen to have an Asus RT-AC68U router, which also offers a USB 3.0 port and network Time Machine. However, it also suffered from poor performance and requires AFP. This particular model of Asus router requires the storage drive to be formatted with the older (but still adequate) Linux Ext3 file system, which it can do via its Web-based interface.
Several other router models from these vendors and others offer network Time Machine as a feature, and there’s a website that has ranked their performance. It clearly lists both of the ones I tried as weaker entries, but several of the better ones cost as much or more than a NAS. Still, with some research, a router-as-network-Time-Machine may well be a viable option for you, especially if you’re in the market for a new router anyway.
Synology DS118 (or Other NAS Model)
Synology is well regarded for its NAS products, and with good reason; its DSM operating system, based on Linux, is reasonably easy to get around via its Web interface, and it provides a lot of desirable options and capabilities for a standalone server. As a Time Machine appliance, the Synology DS118 offers much of what I want.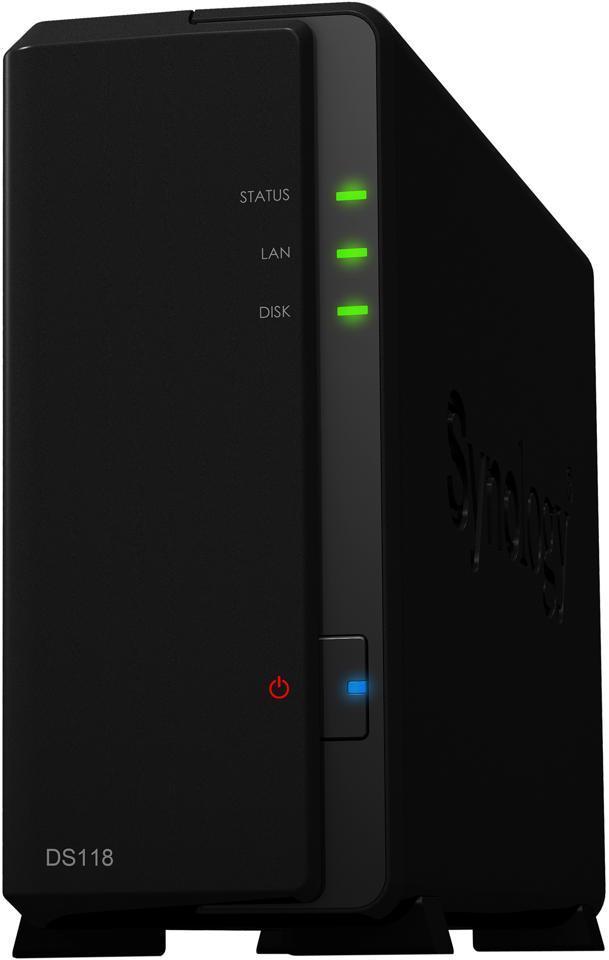
The major negative is that, like most NAS products, it requires an internal SATA drive, which isn’t supplied, so you’re gonna have to bust out your screwdrivers. I recommend just getting a cheap 128 GB internal SATA SSD and then connecting an external SSD (or hard drive, if you need more capacity) to the unit’s USB 3.0 port to use as a backup target. I strongly prefer having the option of being able to directly connect the backup drive to a Mac when restoring, but if you’re content with network-only restoring, you could instead just get a larger internal drive (or drives, if you elect for a multi-bay model).
While it’s not difficult to set up a Synology NAS, configuration is more involved than with some of the other products discussed. You will want to ensure, using its Web interface, that your shared folder (e.g., the root of your external drive) is configured to advertise SMB Time Machine connections over Bonjour/mDNS, and that the drive is formatted for Ext4 (or Btrfs, if you know what that is and are comfortable choosing it, and if Btrfs is supported by the Synology model you own; the DS218 and DS220+ are the minimum options). Note that Synology products won’t even recognize a drive as being eligible for reformatting if it’s not already in one of its natively recognized formats, which can be an issue with external drives that come preformatted for ExFAT. To resolve this, use Disk Utility on your Mac to format the drive as FAT32 (and, as long as you’re bothering, give it a GUID Partition Map scheme), then reformat as Ext4 in the Synology interface. Avoid the temptation to use HFS+ as a file system; like all Linux-based products, the Synology operating system does not support the more reliable journaled variant.
If you choose to attach your Ext4 formatted backup drive directly to your Mac when restoring, you will need Paragon’s ExtFS software to read its contents, but please see the warnings below before doing so. If your drive is instead formatted as Btrfs, there is no way to read it on your Mac apart from a Linux virtual machine.
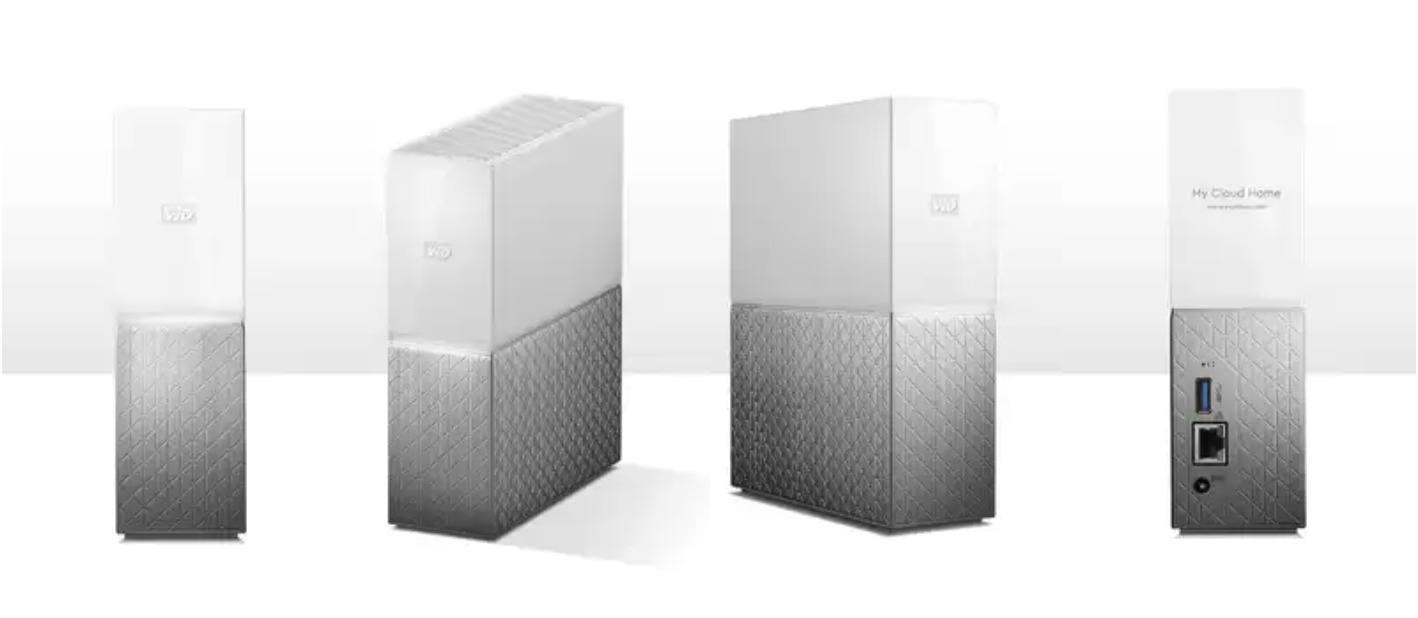
Western Digital My Cloud Home
Western Digital’s My Cloud Home gives me almost none of what I want, as you can see from the chart above, but it’s essential to include because there is no easier network Time Machine drive to set up (including the Time Capsule). You literally just plug a My Cloud Home into an empty Ethernet port on your router, and it’s ready to use, without any software, registration, or configuration (you can actually ignore all of the setup steps). Just set your Macs to use the My Cloud Home as a Time Machine destination, signing in as Guest when prompted for authentication. That’s it.
The triviality of setup makes the My Cloud Home easy to recommend to my clients who need a plug-and-play remote installation and who don’t require an SSD. The My Cloud Home Duo is a dual-drive version that provides redundancy; your backups are written to two drives, rather than one, so if one drive fails, you don’t lose your backup history. Because no password is required to access the drive itself, I recommend that you encrypt your Time Machine backup when you initially set it up on your Mac.
A word of warning: if you have any intention of using this product as a network file server, consider instead a Synology NAS, such as the model discussed above, or any other traditional NAS device, such as Western Digital’s My Cloud EX2. The very simplicity that makes the My Cloud Home an appealing Time Capsule replacement also makes it an inferior NAS device, lacking even the most basic features you would expect from a typical NAS product. The My Cloud Home is not designed to be an ordinary local network file server, but rather a “consumer cloud” device, so all user and even much file management must be performed via the sluggish and limited WD Discovery desktop software or My Cloud Home mobile app; no internal Web interface is provided. Access to private folders for individual users isn’t available in the absence of the software, and Mac users cannot set up additional shared public folders beyond the “TimeMachineBackups” folder provided by default. Consider the My Cloud Home to be a Time Capsule replacement, nothing more.
Mac Configured for Network Time Machine
Using an entire Mac for network backup is not the most elegant solution and feels like overkill, but it is the only actively developed network Time Machine product made and supported by Apple, and it provides all of what I want. It’s clunky and expensive, given the $700 cost of Apple’s cheapest M1-based Mac mini, so I’m not as enthused as I might be. However, it may cost you nothing at all, if you have an older Mac you wish to dedicate to the task, or if you use a desktop Mac that you can leave on 24/7 and that’s connected by Ethernet to your router. If not, you may also reduce the cost by buying a used Mac.
Although network Time Machine capability, as demonstrated by this Apple support page, is available from macOS 10.13 High Sierra onward, I advise that you run the latest version of macOS available for your Mac to benefit from the most recent security and bug fixes. All Mac models from late 2009 onward are eligible (with the exception of the late 2010 MacBook Air, which lacks any means of connecting Gigabit Ethernet). If you opt for a Mac laptop or iMac that has USB-C ports but no Ethernet port, you will need a USB-C to Gigabit Ethernet adapter, such as this Anker model ($25). For older Mac laptops with neither Ethernet nor USB-C ports, you can purchase an Apple Thunderbolt to Gigabit Ethernet Adapter ($29). If your router is in a tight space, you might wish to consider a used 11-inch MacBook Air or a Mac mini set up to operate without a screen, keyboard, and mouse. For either, utilizing macOS’s screen sharing capability should ease ongoing maintenance. If the Mac you have chosen for network Time Machine also requires backup, its own Time Machine should target a separate volume on the drive being shared, or a different drive entirely.
When using a Mac as a network Time Machine device, I recommend backing up to an external SSD (or hard drive, if high capacities are required), rather than the drive inside the Mac, for maximum flexibility, but that’s a judgment call on your part. One advantage to this setup is that you have many choices for restoring, such as Migration Assistant, Target Disk Mode (or disk sharing on an Apple silicon Mac), and backup software such as Carbon Copy Cloner.
How Would You Restore from a Network Time Machine Backup?
Backup is actually less than half of the equation—restoration is much more important. It doesn’t matter how good your backup is if you can’t restore quickly and reliably. That’s especially true if you need to restore an entire drive. So what is the best way to get to your Time Machine data? There are a variety of issues associated with both hardware and software.
Disconnect from NAS, Connect to Mac
Apple always intended the Time Capsule to operate exclusively over a network connection—its internal drive is not designed to be removable, and its contents are not accessible via USB or Thunderbolt. As such, it was great for backing up laptops but terrible for restoring—depending upon how much data you had, you could wait all day and all night, especially over Wi-Fi. Sometimes you could wait many minutes while looking for a single lost file, hoping that earlier dates would eventually make themselves available.
Some of the NAS products are a bit better in that regard, particularly if you put an SSD inside them. But, when restoring data, direct attachment to a Mac will always yield the quickest operation, even for a hard drive. For this reason, I focused on network backup to external drives, which can be quickly detached and plugged into a Mac, if restoring via the network is not working well.
Attaching a network Time Machine drive directly to a Mac does work, but it has always been unsupported, and it has its quirks, as detailed below. The volume contains a sparse bundle disk image, which itself contains an APFS-formatted volume with nothing but backup snapshots, assuming the backup was started while using macOS 11 Big Sur or later. Time Machine disk images created with macOS 10.15 Catalina or earlier remain formatted as HFS+J, even when used with newer versions of macOS; these utilize directory hard links instead of file system snapshots, so some of the comments below may not apply. You must mount the disk image prior to restoration.
Mac Compatibility of the Underlying File System
The underlying file system of the network Time Machine volume adds to the complexity. If you are using a Mac or an AirPort Extreme for your network backups, great—the backup disk image sits on an APFS or HFS+J volume that your Mac natively understands (which is one reason I like these solutions). When you mount the disk image, you can easily browse the backup snapshots in the Finder, or you can use the Time Machine interface by holding down the Option key and choosing Browse Other Backup Disks from the Time Machine menu.
However, mounting the backup disk is a challenge if your backup drive came from a third-party NAS, router, or Linux computer like a Raspberry Pi. While it’s possible to use an HFS+ formatted volume on these products, I don’t recommend it because the lack of journaling capabilities increases the risk of corruption of backup data.
So, what to do? I was hoping that Microsoft’s NTFS as the file format for the Time Machine volume might provide a happy middle ground, as macOS will natively recognize and mount it read-only (in my view, that’s a plus in a data recovery situation). Unfortunately, I discovered that standard Linux NTFS capabilities are very slow and less than fully featured, omitting some of the journaling capabilities that would make this file system a dependable choice. I was excited to learn that the latest version of the Linux kernel (version 5.15) has all-new NTFS capabilities contributed by Paragon, authors of commercial file system translator software, and indeed I found their new NTFS3 Linux kernel module to perform well on a Raspberry Pi. Unfortunately, it’s not clear that the developers have integrated all of the NTFS journaling features yet, and, worse, I experienced an NTFS-formatted volume that would no longer mount after a sudden power disconnect. I’m hopeful that NTFS might yet become a way forward in the future, but, for the time being, my experience led me to shelve this idea in favor of the tried-and-true Ext4 file system developed for Linux.
Access Linux Ext4 from a Mac, Carefully
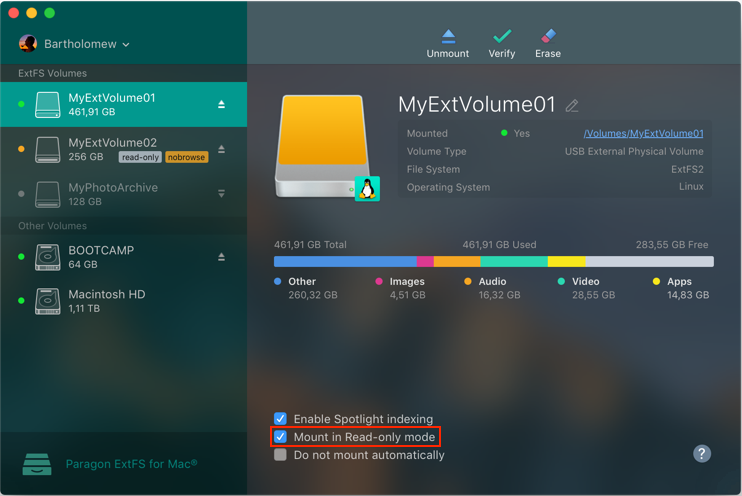
Fortunately, Paragon makes a $39.95 Mac utility called ExtFS, which lets macOS mount a volume formatted with Linux Ext4 or Ext3, as you would likely find when directly connecting a drive that came from a third-party NAS to a Mac. I sought to avoid relying on this software because it’s a system extension, meaning permissions must be granted, your Mac must be restarted, you can’t use it while in Recovery mode, Apple could disable it in the future, etc. But it works… sort of. Alarmingly, ExtFS reliably corrupts the sparse bundle disk image if you attempt to open it, making ExtFS a dangerous bit of software to use in a data recovery situation. (I have reported this bug to Paragon, and the company has added the bug to its database.)
So, before attempting to mount the disk image, you must designate the drive as read-only. This is easily accomplished using Paragon’s software; once done, you just unmount and remount the drive, which will then be shown as read-only. At this point, you may safely open the disk image. If you follow this sequence, you will be able to recover individual files or an entire drive, but the razor’s edge you are walking on to get there might advocate for a second, third, or fourth backup destination, whether via Time Machine or another backup solution. If you have the free space, you might also want to first copy the disk image to an APFS or HFS+J volume and mount it from there.
Read-Only Issues
Another quirk of Apple’s new APFS-based Time Machine is that if you mount the backup disk image read-only, as you must when using Paragon’s ExtFS software, you can’t see the backup snapshots in either the Finder or the Time Machine restoration interface. To work around this, you can use software like Carbon Copy Cloner, which can see those snapshots.
An alternative solution is to mount the disk image from the command line in Terminal using a shadow file stored on a writable volume, which will make the disk image faux read-write (changes go into the shadow file, not the actual disk image). When mounted this way, backup snapshots appear as usual in the Finder. The syntax is:
hdiutil attach -shadow /tmp/tmvolume.shadow /Volumes/[Disk Volume Name]/[Backup Disk Image Name].sparsebundle
I strongly recommend making sure you can restore individual files and even entire drives in a controlled test situation before you find yourself in urgent need.
Full Drive Restore via Migration Assistant
Should you wish to restore a Mac’s entire drive, it’s no longer possible, as of Big Sur, to perform a Time Machine full-disk restoration from Recovery mode. Migration Assistant is your only option. You must first reinstall macOS to an empty volume, and then, during initial setup, choose Not Now for data transfer (and in general skip past everything you can, including Apple ID sign-in) to create a user and then install Paragon’s ExtFS if necessary. You may then mount the backup disk image from the Finder (or command line) prior to running Migration Assistant.
If you are using ExtFS, remember to designate the volume containing the disk image as read-only, as described above, before mounting the image. It is not necessary to mount the image read-write via a shadow file for Migration Assistant to be able to transfer from it, even though the backup snapshots are not otherwise visible. You can just double-click the image file in the Finder and then run Migration Assistant after it mounts.
Accessing Older Backups when a Drive Is Directly Connected
When you directly attach a network Time Machine drive, Migration Assistant will see only the most recent backup; it won’t present any backup history. If that’s what you need, no problem. But if you want to restore an older backup, you have a few workarounds at your disposal.
- You can mount the disk image with a shadow file, as described above, and then (non-destructively, because of the shadow file) delete recent backups using the Finder until the backup you want becomes the most recent entry.
- You can copy the disk image to an APFS or HFS+J volume, provided you have the space; double-click the copy to mount it, and use Finder to delete newer backups blocking access to the one you want.
Let’s Back It Up
This odyssey was not as singularly satisfying as I was hoping it would be, but it has been illuminating. My requirements were never what Apple had in mind, even in the era of the Time Capsule. But, with the Time Capsule no longer sold and barely supported, I was free to think about what might work best for network Time Machine backups.
In the end, I’m unsurprised that there is no single right choice, and, due to currently available products using foreign file systems, there probably never will be, at least from my point of view. But I hope what I’ve learned will help you decide how best to back up your Macs over your network. If you have anything to contribute from your own experiences and experiments, please post them in the comments!
Very nice article.
Just a tip for other notebook users who might be in the same situation. Also in light of the article’s conclusion that there really is no product on the market that checks all the boxes for a desirable network TM solution.
If you regularly plug in your MB to charge, be it at the office or at home, you can make a local inexpensive backup work without any added effort. Just get a simple USB-C hub with PD passthrough and connect your USB drive and your charger cable to that. From then on, instead of plugging in your charger cable, just plug your hub into you MB. No extra effort required. Your MB will charge just the same, it will automount the attached USB disk, and TM will perform its thing. The only step to remember is to eject the TM disk before you disconnect your MB when you’re done charging.
Here’s a decent USB hub with passthrough for 100W power. $20.
https://www.amazon.com/uni-Charging-Thunderbolt-Aluminum-Pixelbook/dp/B08SVZFFPP/
Your article came about a week after I had to deal with the same thing! Luckily, I came to similar conclusions, even if I didn’t find all the options that you did.
We decided to replace our Final-generation Time Capsule with a mesh Wi-Fi network, so we needed something to replace the Time Machine functionality. I ended up taking an existing (large) hard drive and connecting it to my 27-inch iMac (2020), setting it up for sharing as a Time Machine volume. One benefit that you didn’t mention about using an Ethernet-connected Mac for Time Machine backups is that you can also use it for Content Caching, since both functions require the Mac to be on at all times. I’ve been using that functionality since Caching Server was first introduced, so this didn’t require any change in my routines. So far, so good.
Since this is a USB 2.0 solution, I don’t think the slow performance of a hard drive will matter that much.
For example, a Toshiba N300 (3.5" internal) HDD has a maximum data transfer rate of 230-270 MB/s (that is 1.8-2.1 Gbit/s, depending on model). This is far far faster than USB 2.0’s 480 Mbit/s maximum speed. Even lower-performing consumer desktop HDD’s (which, unfortunately, don’t publish performance specs) should have absolutely no problem keeping up with the slow speed of a USB 2.0 interface.
In other words, if you think USB 2.0 is acceptable, then I see no reason why you would consider an HDD unacceptable. Conversely, if you feel HDD performance is unacceptably slow, then anything with USB 2.0 will be even more unacceptable, ruling out the use of an AirPort Extreme router altogether.
It’s available for earlier versions of macOS via Apple’s macOS Server app.
Note, however, that modern versions of Server have far far less functionality than the older versions. If your system is running High Sierra or later, there is no point in getting Server - all of the features you’re likely to care about (e.g. Time Machine server) have been deleted and/or moved into the base macOS installation.
I also did that math; USB 2.0 is the bottleneck, even with smaller 5400 RPM drives. Yet, subjectively, it has been my experience that while it makes little difference for the intiial backup, subsequent incremental backups get through the “Preparing…” phase more quickly with an SSD, and that if your backups include numerous small files (e.g. a Mail or Outlook database), the SSD performs better as well.
With that said, I did not do any formal measurements or comparisons of SSD vs HD with an AirPort Extreme, especially with a high-performing hard drive like you describe, and there may be less difference than I imagine. My guidance here is based only on my impressions.
Where is it available at that price? On the Paragon page it’s listed at $39.95. I also checked whether there was a discount for TidBITS subscribers, but none is listed.
One can format an SSD in Ext4 on an Asus router, though admittedly it’s not for everyone. I managed it without any difficulty by following the excellent post: How to partition bigger than 2TB disk with GPT and ext4. I’m running Time Machine on it and it’s been rock solid.
Actually…I’ve concluded that TM over the network is simply unreliable and basically useless for laptops that don’t have the drive plugged in all the time. I’ve tired to set it up at least 3 different times for our two laptops under various macOS versions back to Mojave and despite building the shares on the destinations exactly identically to each other and setting TM up identically…it just randomly fails to find the destination or doesn’t finish the backup.
After that…I rolled my own solution using CarbonCopyCloner and using the destination option of Remote Mac after creating a share for each laptop on both my late 2014 mini and 2019 iMac. I set the CCC jobs for daily and alternating between the two destinations…and they’ve worked perfectly for months. And best of all it’s a Finder readable backup instead of a .dmg file and the Safety Net function in CCC. I did setup TM with a spinning OWC drive that only periodically gets plugged in so that the automatic hourly local TM backups would happen in case I need to recover something…that won’t protect as well against a total drive failure as TM would but at least I know the backups work. I also have a pair of Samsung T7s setup for full disk clones automatically when they’re plugged in and those jobs email to remind us to plug them in weekly. Everything really important either lives in iCloud, DropBox, or on the iMac which is also the house file server and it’s got BackBlaze on it for offsite backup as well as local CCC jobs.
My bad for not catching that. I’ve corrected the price now.
It’s a shame it was a mistake as I’d have bought it immediately at that price.
Amazing article! My takeaway is: Just plug a damn drive into the laptop.
Well, I have the WD MyCloud (Two Drive RAID) and have tried multiple times to use it as a Time Machine backup device for my MBP. Initially it works, but then after about a week or so, I get a message saying the backup is corrupted and I need to start over. I try again, and the same thing happens. Apparently the Sparse Bundle created to hold the backup is very fragile. I have now switched to CCC for backups - they strongly recommend against using a NAS for backups, and specifically recommend against the WD MyCloud device. I have CCC working now (without the snapshot functionality) on the WD MyCloud - but WD pushed out a firmware update to the device, and my CCC backups failed. This is not a good solution. I have considered just getting a MBA, connecting a SSD and using that, but the expense exceeds the value.
You could still use the Time Capsule in this case, if the network has a spare ethernet port. You could switch the Time Capsule wifi off, optionally.
Is it a My Cloud, or a My Cloud Home? The latter is a totally different product, inside and out. I haven’t seen that degree of corruption and unreliability with the My Cloud Home, at least with the single drive unit.
MyCloud Mirror. Two drives in RAID configuration. It has the new OS5 software.
Disappointing to hear your experience. I haven’t used that product.
The My Cloud Home is a very different beast, with different software than all other My Cloud models. It does not run My Cloud OS at all. It’s performed ok for network Time Machine in the various places I’ve installed it, except for one where I suspect the unit is defective.
That said, its primary virtue and the reason I included it is that it requires zero configuration for network Time Machine, not that it’s a best of class device. If one doesn’t mind configuring a NAS, I’d opt for a Synology over the My Cloud Home.
I have lost too many files during my computing life, some of them valuable projects that cannot be reconstructed. I have always tried to maintain a stringent backup regime, but sometimes events overtake you, like the time when all external drives started failing catastrophically in very quick succession at a time of zero available funds.
I have looked at all kinds of configurations and for now have ended up with the following configuration for my M1 MBP 13":
Power is provided over an OWC three-way TB4 switch so only one TB cable to attach. The switch connects my MBP to three WD USB-3 12TB harddisks. Nr 1 is for the Time Machine backup. Nr 2 is for user data, mostly media files like movies, books etc (but also iOS and iPadOS iMazing backups) that far exceed the MBP’s 2TB internal storage, some 6TB in total at the moment. Nr 3 is the clone from Nr 2, updated by ChronoSync each night. Besides all of that, Backblaze is running in the background.
Time Machine backups are notably fast. The media storage is just there and its cloning is unobtrusive.
I use DriveDX for drive monitoring.
In all it isn’t perfect, but hopefully it will go some way into the future.
On a side note: I never automatically restore a machine from a full backup. I do a clean install and then reconstruct my account manually. Therefore I use DAS for my backups; no tinkering required for getting at my files.
eMail is in several clouds and will sync from there. Passwords will sync from my iCloud keychain and a few password managers. Photos, music, Safari data etc sync from iCloud. Reinstalling a machine anew is relatively easy this way. Avoiding reintroducing the crud a system inevitably accumulates over time is worth it.
This seems like an overly convoluted approach with regards to restoring. Despite Time Machine’s many quirks, I’ve found restoring over the network (preferably wired) to work very well. You can easily choose the Time Machine network share as a source from Recovery or during install with migration assistant. This seems a lot less janky Than trying to connect the network storage device directly to your Mac.
My current setup is a TrueNAS Mini running three 14 TB drives in a RAIDZ (single failure tolerance). This provides plenty of space to back up all my family’s Macs to the same destination, and also some Windows systems as well
That said, I’ve found network Time Machine backups do not scale well. As the images get bigger, they are slower to mount and unmount, and they inevitably seem to end up with some sort of corruption that requires rebuilding the backup.
My solution is to only back up the system configuration with Time Machine. I exclude all my user data. Basically applications and settings only. For user data (Documents, Music, Photos, etc), I use Carbon Copy Cloner and back up everything directly to my NAS device’s filesystem. ZFS is great for this as it has very flexible character and pathname support, and supports large file extended attributes, so Mac extended attributes can all be preserved as native ZFS attributes - even legacy Resource Forks. This is extremely fast and I don’t have to deal with any of the weirdness of using disk images on a network share.
Once a week, my TrueNAS box copies everything to BackBlaze B2 storage (including Time Machine disk images) using Duplicacy.
I also leverage ZFS snapshots - the backup volume is snapshotted daily. This is something I highly recommend because it helps avoid the situation where you go to restore only to find your Time Machine disk image became silently corrupt at some point in the past. This is easy to set up with TrueNAS, and also with Synology if you’re using btrfs.
In a total restore situation, I would first restore the Time Machine backup using the transfer data option during a fresh macOS install, than copy over the user data with Carbon Copy Cloner.
Yep…that’s one of the errors I kept getting…hence my move to my own CarboyCopyCloner solution.
So many disadvantages to the My Cloud Home that it would not be an attractive option for me. I did go to the WD Support Site and they have a support document (Answer ID 977) that shows the differences between My Cloud and My Cloud Home. Interesting in that it shows My Cloud Home as using OS 4. And it shows both My Cloud and My Cloud Home as supporting Time Machine backups. I know it doesn’t work on My Cloud Mirror which is what I have.
Actually, I think I will go back to connecting an external SSD each night for an overnight CCC backup. It’s not a lot of trouble - I just keep forgetting to do it! It is much easier to restore from the attached SSD. (I don’t have a need for frequent backups on my MBP 16 Max - the stuff I really care about is in iCloud.) My iMac Pro is connected to an external SSD also for CCC backups.
The My Cloud Mirror does work well for file storage (my photos) and is available for all devices connected to my local WiFi network.
Very interesting article - the first I have seen that really goes into detail on NAS used for backups.
David
That’s what I do, and CCC can remind you to–but only if you choose the “Run on disk appearance” option.
If the iMac Pro is on all the time…just create a share on it named Laptop or something and then set CCC to that as the destination using the Remote Mac option under destination…then the backups will happen even if the machine is asleep. I don’t do that one hourly, just daily, due to transport time and I o ly backup /Users since the rest of the boot drive gets periodically backed up to a Samsung T7 that gets plugged in weekly. If you e got a TM destination set but the drive is t plugged in, the laptop will still do local hourly TM backups to itself for in between recoveries if necessary.
I turn it off when I am not using it. The MBP stays on all the time. I thought about buying a refurbished MBA and using that as an always on “file server”. But that is too expensive and too complicated. I already have three Macs in a house with two people…
David
This is a very interesting solution, both in the segregation of Time Machine components and CCC components, as well as using ZFS to store Mac-originated files, which is not something I would have conceptually trusted enough to even try. The fact that even resource forks survive seems remarkable to me, but I guess speaks to the versatility of that file system. Are you using AFP or SMB with it?
As for restoring – in 90% of the situations I’m helping with, restoring over Ethernet isn’t viable; think iMac and modem on opposite sides of a (non-wired) home, or MacBook with misplaced Ethernet adapter, etc. So for a full restore, it’s all night and crossed fingers over Wi-Fi if direct attachment isn’t an option. But what became clear to me when I was looking at the various options is that one size does not fit all, and if you’ve got a setup where you’re confident when it comes to network restore, and the benefits of a file system like ZFS outweigh those of directly attachable storage, then sure, that’s the right setup for you. However, even setting wired vs. wireless aside, I’m not sure that a system like TrueNAS is accessible for everyone (and a prebuilt unit ain’t cheap), and even as a consultant, I prefer to deploy broadly supported solutions for my clients in case I’m not available to help in a moment of need. But your solution sounds robust; thanks for sharing it.
Just to be perfectly clear, I don’t think the My Cloud Home is some kind of amazing product that I suggest you switch to, especially if you want to use it for network file storage. It’s adequate and super easy for network Time Machine, but that’s all I can say about it. And, thank you for correcting me regarding the OS – regardless, its variant of the My Cloud OS is certainly very different from all the other My Cloud products, much to the consternation of many of the people who purchased it, expecting a NAS in the vein of previously released My Cloud models.
I’m glad to see what I was hoping would emerge in the comments – different ideas about the best way to address a common need.
I understand - I think you made the limitations clear. The fact that you can’t create file folders and use it (conveniently) for file storage was a problem - and the idea that you have to connect as “Guest” without being able to secure the data with a password was really bad (you noted that the TM database should be encrypted). Also, apparently it is exposed to the internet by default - I have that turned off for my WD NAS - too risky. I could live with a TM backup only - but it seems too risky. And Mike Bombich of CCC specifically says to avoid the My Cloud Home device - apparently he has lots of customers who have tried to use it with no success.
The article is a nice overview of NAS backup - but my conclusion would be Don’t do it!
David
Unless you have an old Apple Time Capsule or connect the drive directly to your Mac, the Time Machine feature over a network is basically unreliable. I never could find anything that would reliably over a network with the same features (backup verify and disk repair), so I bought a few extra Time Capsules to keep in service. Time Capsules just worked. There are of course other solutions but none are as good as Time Machine.
If you have an old time capsule, you may want to replace/upgrade it’s HDD.
Here are some iFixit links to various models of Time Capsule so you can review the procedure. It doesn’t look too complicated, but some models have some delicate cables you need to be careful about not damaging.
Once you replace the drive, you need to format it in the Time Capsule. According to this article, you do that using the AirPort Utility.
For some reason, Apple supported using a drive connected to an AirPort Extreme for Time Machine
for only the last model of the AirPort Extreme. If you were using a prior model of the Extreme, however, you could still select the drive in Time Machine, and it seemed to work.
Like others, I found backing up my MBP to the AE’s disk to be flaky at times. In contrast, the iMac, which backed up to the same drive, rarely had a problem. I suspect the problem was caused when I would close the lid of my MBP during the middle of a backup. Usually Time Machine and the AirPort Extreme could handle that, but occasionally, it would result in a corrupted backup. The problem seemed to go away in later versions of macOS after I set Time Machine to run only when my MBP was plugged into power.
About a year ago, I received a Synology NAS as a Christmas gift, and I use it now for backing up with Time Machine. (Well, at least I do with the iMac. Time Machine doesn’t work on my M1 MBP running Monterey.) One advantage of the Synology over the AE is that it can do a lot more than just provide access to storage over the network. For instance, I use mine as a Plex server, an OpenVPN server, and a Channels DVR server.
But the Synology RT2600ac DOES support Time Machine under SMB! I have had 3 computers making Time Machine backups to my RT2600ac for a year now. Since the MR2200ac runs the same OS, I would guess that it too DOES support Time Machine (I use them only for mesh networking).
However, the documentation is just plain wrong, and the setup is counter-intuitive: Under “Mac File Service/Enable Mac file service/Time Machine:”, change “Time Machine:” from Time Machine (which seems logical) to Windows (which does NOT seem logical, since Windows does not support Time Machine nor vice-versa), and voilà!
Does that change your calculus of solutions?
Great tip! Who knew that this works with SRM. The UI would suggest anything but. (Certainly a different experience from DSM 7.0, which is straightforward in terms of what you might expect). I sent back my MR2200ac, so I can’t verify, but, based on your report, I don’t think it would change my calculus much, at least for the MR2200ac, because the performance was still weak.
Generally speaking, I think router-as-network-time-machine solution can certainly make sense if you need a new router anyway, and the one you choose performs well (I felt I could only sustain so many Amazon returns, so I didn’t make an exhaustive survey of this category). Or if you’ve already got one that has the feature. But if you’re already happy with your router (e.g. if you already have an Eero mesh or whatever), then I’d probably veer towards one of the other solutions.
As I have mentioned a few times on other threads, a big plus for Time Machine is its ability to alternate backups between several drives. It even reminds me when I forget to connect an off-site backup drive from time to time. I am disappointed that Apple dropped the Time Capsule but other drives are working well for me (touch wood!)
Yep…which is exactly why I have my roll your own CCC jobs alternating destination between the two Macs on my network that are always on.
This is an extremely helpful article, that is very timely for our household, after spending a whole weekend restoring a MBP from an old Time Capsule, and looking for better solutions in the future. We eventually had to archive the TC to another drive over USB-2 to get Migration Assistant to work. However, I would like to ask whether anyone understands why Apple has abandoned the Mac community in this way. I understand them not wanting to make Time Capsules any more, but surely they could have licensed other manufacturers to create equivalent products that don’t require arcane knowledge of file systems or network protocols? Is the market for Mac-compatible NAS backups so small that there is no commercial opportunity here? Is there a danger perhaps of Apple dropping Time Machine altogether in favor of iCloud sync’s?
I just noticed that my Asus ZenWiFi AT-8 mesh network supports the Time Machine for disks attached via the USB port of the router. You need to turn on the support via the system’s web interface USB section (not the mobile app support), but the process looks pretty easy. If you considering a stand-alone router or mesh system from ASUS, you can check to see if there is Time Machine support by looking at the USB Application section of the specs for a router from ASUS’s web page.
There already was a lot of competition in the market for routers and backup storage equipment, but nothing that added it all together in a way that was super easy to set up and use. When Time Capsule was introduced, it was a totally new, easy to implement and an extremely innovative product. It followed the recent introduction of iPhone, and iMac was still relatively new. Steve Jobs was already laser focused on wireless communications and secure networking for all Apple devices. He realized that Apple users and prospective consumers and business would welcome easy to set up and maintain WiFi networks. He also stressed privacy and security; IIRC, it was another unique selling point for Time Capsule.
The strategy behind Time Capsule was like the strategy for LaserWriter, which was developed because nobody at Apple or Adobe could convince printer manufacturers that there would be a business or consumer market for any personal computer, including anything DOS. Once comparable printers hit the markets at much lower prices than LaserWriters, Apple exited the market. Strategic planning such as this is why and how Apple became the first, second and third three trillion $ company in the world.
A similar argument could be made for dropping wireless routers, once mesh networks became cheaper to buy and easier to set up. But this whole thread shows that the analogy doesn’t work for wireless backups. There are no alternatives on the market. You can’t go to an Apple Store and buy third-party replacements because none exist.
I should have mentioned that Time Capsule has also been competing with cloud backups and storage in the business and consumer markets for many years now. I’m sure that iCloud is a gazillion times more profitable for Apple than Time Capsule ever was or could ever hope to be. And the storage market is flooded, and hard drive storage is really suffering. The scenario for hard drives is likely to get a lot worse a lot sooner
But they don’t market iCloud as a destination for Time Machine backups. Basically though you are saying that Apple doesn’t care about the user experience for Mac owners as long as they persuade enough of us to keep buying laptops. That may be true, but it is also depressingly cynical. Steve Jobs wanted the entire experience of owning a Mac to be insanely great, but we seem to have lost that vision forever.
I’ve got my 2012 iMac on a shelf serving as the Time Machine server (and other important uses), with internal backup drives mounted in a 2-slot OWC “toaster” drive adapter. I rotate a number of drives through, with some offsite. As noted in the article, this only requires Mac OS X High Sierra or later.
I found a different Apple support article on this than David C. above,–this one suggests setting SMB.
I do get occasional errors when the backup fails to complete, but these are transient, and subsequent backups are ok. Why yes, Adam, I do verify my backups by restoring something on International Verify Your Backups Day as you recommend, and other times. Networked TM is a lot less painful than when I kept a drive connected to the Mac, and was continually waiting with the Finder frozen for 5 seconds when the drive had to spin up.
There are concerns about Time Machine that you can read about in Take Control of * books, and I do clone from time to time.
Frankly, I think the time capsule was just a victim of Apple deciding not to continue to offer wifi routers. Apple continues to decide that it’s better to concentrate on specific product lines, ones I assume that are profitable to them, and likely decided that maintaining wifi router hardware and software wasn’t worth the effort anymore.
You can connect any external disk to a Mac to use for Time Machine and I’m sure that’s what Apple would recommend going forward.
Which is a little surprising at this point.
I suspect that Mac backups just would not be profitable for Apple. That would be, on average, much more data than iPhones and iPads. It’s still lame that Apple isn’t providing a good solution here.
Yes, but to me the big advantage of a Time Capsule is that it can be connected to my router, which is always connected to my MacBook Pro via Ethernet, thus saving a port.
Also, compared to other drive enclosures with fans – and even some fanless ones – the Time Capsule is really, really quiet. Mine sits on my desk about 30 inches away from me and at that distance is completely silent. (I have to put my ear within about six inches to hear it at all.)
It’s just data, and Apple charges for data. Apple could add a 4 TB tier to iCloud Drive, or introduce a new iCloud Mac Backup service that would offer unlimited data and be priced to account for the average size of Time Machine backups.
So the question becomes, how much would Apple need to charge to make it profitable while still offering a price that was compelling to users and competitive with services like Backblaze?
I understand the advantages, particularly to consumers. Just pointing out the disadvantages to Apple, which is probably why they’ve stopped. Continuing to support a product that isn’t moving lots of windows consumers to Mac just probably isn’t worth it, and it’s one less thing to support.
I think that’s because they primarily focus on iCloud for storing content. Apple would have to charge users a hell of a lot more money to back up everything on a Mac in iCloud, and it would cost them a lot more to build out the service. It probably isn’t profitable enough at this point. I think this will change in the future.
Well, they already provide the ability to store your Documents and Desktop folder contents in your iCloud account. It wouldn’t be too much of a stretch to extend that so it backs up your entire home directory and any app installations that didn’t come from the App Store.
Billing you, of course, for the storage used by all this data.
I was actually intrigued by the Asus mesh Wi-Fi products – they were highly rated in one review I read the other day, after this was published. If you give this a go, I’d be interested in how well it performs. I’ve generally been an Eero fan, but better performance (allegedly), multigig LAN, built in network Time Machine support, and non-data-mining-company ownership might make it an attractive system for those choosing among mesh options.
My original complaint was not that Apple haven’t solved this for us, but that they haven’t made any efforts to persuade third-party manufacturers to fill the void. They boast of companies producing HomeKit-compatible products, presumably because it provides another rationale for buying Apple devices. Why don’t they license TM-compatible products for the same reason? It wouldn’t even cost them any money - they could probably charge manufacturers for providing technical support when developing their products.
Strongly agree with this. Pretty much every third party product that exists is rolling their own, as a secondary feature for a NAS, enabled by what Linux enthusiasts have reverse engineered.
A Mac-centric vendor like LaCie (or anyone, really) could make a pretty good dedicated purpose network Mac backup product, or line of products, with Apple’s support, and I’d be telling every client to buy one.
He wanted that in the 80’s. In 1996, before he was running the show again, he said to Fortune “If I were running Apple, I would milk the Macintosh for all it’s worth — and get busy on the next great thing.” Well, he did exactly that. Apple in 2022 makes ultraportable, easy to use, always-connected computers called iPhones, and the Mac product line is a legacy business that exists largely to support the iPhone business, and reap halo effect revenues from it. I think today’s Apple certainly still cares enough about the Mac to want to keep it competitive, but its priorities lay with iPhone.
And iPhones get automatically backed up to iCloud. Even if you have a terabyte of data. Or two terabytes on an iPad.
Because Apple has many very stringent requirements for HomeKit, and developers have to be certified before they even get started:
The whole development, manufacturing and is strictly regulated, and developers and manufacturers need to be approved. There are guidelines even for interfaces. HomeKit final products go through an extensive testing process before they are finally approved and certified to be sold.
Apple does not certify third party hard drives:
Like I mentioned before, Apple developed and sold LaserWriters until the market was flooded with equally high quality printer models that were selling for much less. The profits were no longer there. It’s the same old story here.
I agree with David. And add…Apple doesn’t want to invest in wifi networking or backup solutions. TimeMachine is all we get.
Solutions some of you offer are simple (WD My Cloud has some software issues, reliability and likely WD green or blue drives…I don’t trust them-anyone crack one open?). Others solutions are expensive (TrueNAS, Synology NAS, MacMini headless with Ministack or external storage via Tbolt/USB-C) or too difficult for average user. But…ZFS is the way. Not cheap, but man, the storage volumes …
I just read on the Asus Mesh/wifi 6 Router RT-AX86U that nothing is mentioned on Time Machine support, and any USB storage drive has a 2TB limit. One might want to check with Asus since it hasn’t updated its Time Machine Support document since 2019. I won’t recommend since I’m not familiar. I’m stuck with Orbi, and on my LAN, have a 2013 Time Capsule that I replaced the 2TB HDD with enterprise-grade 4TB HDD. (oh, I also own CCC 6.0.5 and under Catalina, clone my main SSD weekly to internal HDD on an old 2012 Macmini…that may have future as TimeMachine share box…always have that option!)
So… I recommend most use a cloud service (Code42, BackBlaze, etc) as secondary, with a USB-C external, as primary TM drive, to attach as needed (if users have portables). It doesn’t fit everyone, but for most, its least worry. Many I dealt with that are Mac Only, have moved to iCloud+, along with a Time Machine backup to USB-C drive they “schedule-a-reminder” to attach with portables. With desktop, it stays attached. Remember, external USB-C drives (HDD are larger than the SSDs, but SSDs are faster to restore from/backup to) are cheap. I mean, under $70 for 2TB.
Apple really showed their cloud plans when they discontinued wireless LAN (Time Capsule and Airport Express) products forcing most to other brand routers, along with Apple Music, AppleTV+, iCloud+, iOS Photos subscriptions.
Would it have been awesome and innovative if Apple sold a HomePod+ that was Wifi 6 mesh with HomePod Mini+ as Access points/Mesh repeaters, and the main unit, a speaker/router and had optional 2TB/4TB M.2 sticks inside, and could backup to HomePod+ iCloud plan? .
.
We know that would never happen
Note: we could debate backups forever. And there are dozens of alternatives, both local and cloud. But I think we can agree, Apple removed a prime solution for user to have easy, local, backup. Atleast Time Machine is included and works for most, and allows migrations to new macs. Let’s hope they don’t offer some TimeMachine+ as the only future solution…
ASUS provides horrible looking documentation when you dig deep. I believe that they may be bad translations from the original Japanese. Anyway, there is a later version from 2020 of the 2019 Time Machine documentation. From CNet, here’s an article, written when Apple discontinued the Airport line of replacement routers, with several of them able to use an external disk for the Time Machine. I suggest looking at currently available routers from the appropriate manufacturers to see if they would fulfill the requirements of the original poster.
By the way, I recently obtained a 2TB SSD to back up my 1TB laptop and plan to use the snapshot feature of CCC to replace the Time Machine.
As mentioned earlier one can format drives of more than 2 TB in ext4 on most ASUS routers. Such a USB attached ext4 formatted HD drive on my ASUS RT-AX86U has now provided rock solid Time Machine service for two laptops for months (I never had that reliability with either a Time Capsule or an Airport Extreme).
However one thing that likely has helped is that I don’t use the stock ASUS firmware but the Merlin firmware.
Re: networked Airport AC with ext drive.
You can perform the initial backup with the drive attached directly to a Mac and then select the backup it creates, once it’s plugged in to the Airport AC.
Downside with the AirportAC-extHD is that it is often unable to connect and you have to restart the Airport. However, I’ve found that powering the Airport via a simple mains-adapter-timer, so that it is powered off/on during the night, solves this issue to a large extent. TM caters to sudden loss of connection, so it’s not been an issue for me. I’m fairly sure that this is a network address issue and restarting gives it a new address, which is fine until it’s not.
Re: My Cloud Home.
I bought one for backups from Amazon some years ago. It was a disaster. Totally unreliable and I had to send it back. I reckoned it was just not made for Mac. Perhaps that’s changed since?
Re: Networked Mac
I used this for years, with an old ethernet attached Mini, in a fireproof safe in the basement. It worked flawlessly and being over ethernet, was actually quite fast. I managed it via Remote Desktop, which was occasionally a bit awkward and once or twice I had to remove it and attach it to a monitor to manage some settings. I also used it for Chronosync backups, which worked flawlessly via their Chronosync Agent software. Any old Mini should work, or an old portable, which would be easier with having a monitor that can just be turned down/off for most of the time.
Also NB, that Mac portables keep a backup locally. So recently changed files are available and very fast to load. There is also ‘versioning’ in apps like Pages, which is part of the TM system. Very cool.
I have Chronosync backing up all of my various drives and content areas, either mirroring drives onto each other or onto my WD PR4100. I have Time Machine set to backup on that WD raid, it’s working flawlessly, but my main tool is Chronosync, so versatile and useful.
While not a complete solution…and I agree that Time Machine on a laptop really needs to be via wifi and not via plugging in the drive since it’s a laptop…when one finally just acknowledges that TM over wifi to a .dmg file on a TC or another Mac just doesn’t work properly…then if you do have another Mac that is always running just hang a drive off of there and create a share. Don’t use this for a TM network backup though…since it doesn’t reliably work…get a copy of CarbonCopyCloner and set it up to do the same thing that TM would normally do…and it just works.
I’m not saying that TM over wifi does not work for anybody…just that it is unreliable and fails for inexplicable reasons. For instance…my last attempt at trying it…I set up 2 different shares on my iMac that were configured and permissioned identically and set one laptop to use one share for TM and the other one to use the other share. All machines running up to date Monterey and both laptops are M1 models. The one for my laptop worked for a week and then broke. The one for my wife’s laptop worked fine for the initial backup but then failed with an error message that made no sense at all. The result was my CCC roll your own TM over wifi solution.
I’m interested in the CCC approach. I have a 10-year-old MacBook Air that we could leave plugged in somewhere. I think it can run High Sierra, which supports APFS, and it has a Thunderbolt 2 port, so with the right adapters, we could presumably connect it to a couple of backup drives. If we need to restore the whole system, does Migration Assistant work with CCC clones?
MA can directly copy back your data from a CCC clone.
https://bombich.com/kb/ccc6/i-want-clone-my-entire-hard-drive-new-hard-drive-or-new-machine
Yep…works fine for a locally attached drive while restoring…I haven’t tried to restore over the network since local is much faster. Reinstall macOS, run MA with the drive plugged in and pick the drive.
Great article but I needed a home lab in addition to NAS and at the time, FreeNAS / TrueNAS wasn’t all that great (much better now). If all you need is NAS storage and Time Capsule support, you should consider a TrueNAS solution as it is superior to the other small NAS solutions on the market. It can even run some things in a FreeBSD Jail container such as a Plex Media Server, UniFi Controller, HomeBridge, etc.
Here’s my DIY solution (technically overkill for most people):
Couple of Mini-ITX cases with 8-bay hot swappable drives on a backplane with two power inputs and two SAS connectors to hook up all 8 SATA drives to an LSI 8-way RAID card configured in JBOD mode. Using a Supermicro M11SDV-8C±LN4F which includes the AMD EPYC 3251 SoC, 8 Cores 16 Threads @ 55W. Includes heatsink with cooling fan. Can handle up to 512GB ECC RAM. 4 Gigabit Ethernet Ports plus one IPMI management port. Two USB 3.0 ports and 6 USB 2.0 ports and additional 4 SATA3 ports on the board.
Running Ubuntu Server 20.04.3 LTS, LXD 4.22 (Linux Containers), and ZFS file system across 8 HDD’s with a couple SSD’s for read/write caching and booting. LXD containers share the host system kernel so they run at near bare metal speed and can access the disks at full speed. LXD can run virtual machines for other operating systems but they run slower than native LXD containers due to the overhead of hardware virtualization.
I have many containers but one to emulate a Time Capsule. The container is minuscule because that’s all it really needs. It needs to boot a very minimal Linux server instance and it needs to load SAMBA and avahi-daemon and that’s it. 1 CPU core is allocated, 256MB’s of RAM (never needs to swap) and 3GB of storage is allocated to the container. Then I mounted a ZFS dataset into the container and the dataset is allocated a 4TB quota. This is where the Time Machine backups actually go. I run a job to periodically check ZFS for errors and report if there is a problem. I use smartmontools to monitor and alert me if an HDD is going bad. I use the OPENOID tool (bunch of fancy Perl scripts) to snapshot the ZFS dataset and rotate the snapshots as well as replicating to a second and third NAS server, one in my home and one in the corner of a data center offsite. I backup critical data files to Cloud services such as iCloud / OneDrive.
Been running for years without issues, need to replace the drives as they start going bad after about 5+ years. Probably build out a whole new rig when more than a few drives start failing. It runs rather quiet, consumes little in the way of electricity and is ridiculously reliable. ZFS is absolutely rock solid and extremely reliable.
Hot Tips: Make sure you use HDD’s that are designed for RAID and make sure those drives are not SMR drives. ZFS requires all the drives to be the same capacity. Avoid buying drives in batches where the serial numbers are sequential. If there is ever a factory defect you could end up with several failing drives. Watch out for WD Red Drives smaller than 8TB’s as they likely are SMR drives which can fail spectacularly in ZFS. If you use SSD’s you are going to need Enterprise class SSD’s or they are going to wear out rapidly in a RAID configuration. Enterprise class SSD’s have a lot more over-provisioning meaning they have a lot of extra flash sectors which are swapped out by the drives firmware as the sectors reach their maximum number of writes. If you are going to use SSD’s you should definitely setup 10GbE Ethernet or you won’t realize the full speed benefits over 1GbE networks. Still using HDD’s with SSD caching because SSD’s are still very expensive.
WD makes three different series of “Red” drives:
In general, if specifications matter to you (and for your application, they absolutely matter), you must read the data sheet for the drive. Marketing material can suggest/imply/hint at all kinds of things but the data sheet will tell you the truth for each specific model sold.
Two points: First, time machine is much more than a “backup”, because it stores many snapshots from the past. Most of the time I use it not because my disk has crashed, but because I deleted a file or email I want to get back. (Good luck with email; it’s a nightmare to restore.)
Second, as many have pointed out, it works fine with an attached hard drive, so the problem is one of networking, or possibly time machine’s ability to handle interruptions.
I don’t really understand why TM needs so much complexity (including drive format) at the drive end. Of course it doesn’t make any sense for apple to get into the drive business. Is it possible they (or someone) could re-write time machine so it would work reliably on a commodity network storage devices? Have the issues that cause the storage-side complexity changed since it was originally conceived?
Sure…it’s quite possible. In fact…Mike Bombich who used to work at Apple and left to start CarbonCopyCloner has already done so. It isn’t as simple to setup as TM…but it isn’t much harder and it actually works.
There’s also Chronosync. It was used years ago at a company I worked for, and I never heard any complaints.
Yeah…that works too I’ve heard but I don’t have any experience with it so don’t really know how it plays with network shares but I presume it works fine.
A few years ago, the HDD in my Airport Time Capsule started to fail. I bought a 4TB external drive and connected it to the USB port on the TC. ( It was supposed to be an interim solution until I found something better.) It has happily been backing up 3 laptops and a Mini and there it sits - I just haven’t bothered to implement another solution. If it ain’t broke, don’t fix it!
Time Machine like Apple Mail and Preview- are limited PIA apps. Designed for users who just want plug and play out of the box with limited intelligent user experience. It’s the ‘duh’ school of thought.
I just have (redundancy) external drives (one NAS) and use CCC. Perfect- can backup and restore and/or migrate with no hassles. Apple wanted some sort of flashy space experience with Time Machine- but I have run into so many problems restoring other peoples computers. I send them down the Super-Duper and CCC roads and they are very satisfied.
A higher-end option worth considering would be a TrueNAS device, especially if you build it to be more than just a backup machine. (I’ve built one for my parents which is doing Time Machine for their two laptops, as well as running a media server.) Disks will also be on ZFS - which is more robust than any of the file systems listed in the article. (BTFS in theory is as robust, but in practice is not.)
You could also use just the software on your own lower-end or older hardware, to reduce the cost. Most PCs with 8GB of RAM or more would be fine to run it.
I went down the Raspberry Pi path, and to make my life easier used Open Media Vault 5.6 as the software distribution. This provides all the NAS features you would expect with a Web GUI interface. Using a single USB 3.0 drive and a pi4.
My experience (after 10 months of use)…compared to my old mini.
GOOD
BAD
It is important to backup your Raspberry Pi boot volume, and I use a USB micro-SD card reader housing the backup volume. I backup prior to every software update.
This was a really useful article and it prompted me to look at my Time Machine configuration. However, most of the solutions were to complex for my capabilities, and only the Western Digital MyCloud option seemed appropriate. Of this, Ivan writes “Just set your Macs to use the My Cloud Home as a Time Machine destination, signing in as Guest when prompted for authentication. That’s it.” However, there is no mention of how to migrate an existing Time Machine archive to the new hard drive. Or am I missing something obvious.
I hope this post is appropriate – I have only just joined TBT
What a weird article. The author states that SMB is a key criterion and then goes on to review several possible solitons that don’t support SMB. He largely rules out NAS devices as being too costly, and then goes on to review a low end Synology unit, makes no mention of QNAP (the NAS maker I use whose operating system provides explicit support for Time Machine backups), or indeed other NAS makers, but does include a Mac Mini as a potential backup device (at a price that is significantly higher than most low end NAS units).
There does seem some confusion regarding file system formats. As the article explains network Time Machine backups use sparse files, So any product that provides a correct SMB interface is fine. The underlying file system isn’t important.
Great subject, great article, great comments so far.
Long time Time Capsule user. When my last time capsule died, I replaced it by external USB3 small size drives (without individual power supply) connected to an old network mac doing High Sierra located in the basement with my router and such. Piloted using screen sharing.
Drawbacks and associated questions:
(1) Is it really advisable to use SSD in this function. A long discussion was held on mac forums recently advising about the difficulty for a SSD to support the delicate carving of time machine. Any suggestion to defend the SSD in this role ?
(2) I failed to associate the network mac to the protection granted by the UPS to my router. Hence a short time after power failure, the backup dies suddenly when the UPS battery is drained empty and I found no way to associate the mac to the UPS : clean shut down of the mac and automatic restart of the mac upon return of electric power. Is this prudent ? Is there a cure ?
SSDs have no intrinsic problem with being a TM drive, whether now with APFS nor before with HFS+. The issue would be frequent read/writes cycles that could eventually reach the limit in certain areas (blocks of bits) as specified by the manufacturer on the SSD (can be only few thousand on inexpensive consumer grade SSDs).
So if you plan to use one TM disk forever, where old backups will eventually get purged to make room for new backups (i.e. bits get overwritten frequently), this could eventually indeed become a problem. However, if you follow the old adage of filling the drive up only until it has reached about 80% of its capacity and then you swap it for a fresh drive, there should be absolutely no problem with SSD or HDD. The difference is really just cost/GB, noise, and power.
Some people have warned that SSDs can die abruptly where there’s usually no advance warning. Note there is no guarantee of such advance warning with HDD failure either (although sometimes people get an indication the disk is about to fail through SMART warnings, etc.). Regardless of SSD or HDD, good practice to ensure this doesn’t bite you is to simply use multiple TM drives. Several disks can be assigned to TM concurrently. TM will use whatever it’s hooked up to at the time. In fact, if it’s been too long since it has seen a certain disk (10 days IIRC), it will even warn you and tell you which disk it should back up to again.
Disk docks (or SATA-USB adapters for SSDs) make swapping multiple drives straightforward. They offer little physical protection for the drive itself, but OTOH swapping becomes a 2-sec task. Very simple.
https://www.amazon.com/dp/B07B3S5FSF/
https://www.amazon.com/gp/product/B011M8YACM/
Can you take an SSD offline, erase it - or more - does it reset the “bit limits” so it can be used for another “few thousand" cycles?
I would be a bit concerned with this choice of hardware. Particularly:
I personally don’t see a specific problem with it. But I don’t see a particular reason why you should use an SSD either. Your backup device doesn’t have to be high performance - even with an HDD, each hourly backup (after the initial one, of course) should run just fine, even if it takes a little longer than it would on an SSD.
New Time Machine volumes (created on Big Sur or later) all use APFS, which is designed and optimized for SSD usage, so an HDD will experience a lot of head thrashing, but again, since this is not a high-performance scenario, it shouldn’t matter. Unless the sound of the head motion bothers you.
My personal opinion is that the lower cost-per-TB of an HDD is most important when choosing a backup device. Especially when you can buy/build HDDs with humongous capacities (4, 8, 10 and more TB), where an SSD of similar capacity would be prohibitively expensive.
Any decent UPS should support monitoring - typically via a USB cable. Connect it to the computer it is powering.
macOS will probably auto-detect this and add a “UPS” tab to the Energy Saver preference panel, which can be used to configure automatic shutdown. The main energy saver panel can be used to configure automatic restart after a power failure:
No. It doesn’t work that way. The “write cycle” limit is the maximum number of times each physical block of flash memory can be erased and re-written This is a function of the hardware.
When a block exceeds its limit, it can no longer reliably store data. Any remotely competent SSD controller chip will detect this and take the block out of service when it happens (using other storage locations to hold its data).
The ATA spec includes a “secure erase” command which is supposed to completely wipe all the storage on an SSD. (I assume NVMe drives have a similar command.) This will make all previously-stored data inaccessible, but the specific mechanism is not defined by the standard and different manufacturers may implement it in different ways.
Because not all SSDs have a secure erase command (especially those connected via USB), and there’s no guarantee that every SSD implements it in a way that is truly secure, it is not considered a reliable solution for the general case. Instead, the best way is to encrypt the volume when you set it up. Later on, you can simply change or discard the key, which will make all the data inaccessible, no matter what the underlying hardware does.
Simply writing zeros to the entire SSD does not erase all the flash memory blocks. As a matter of fact, depending on the SSD controller, doing so may actually be a bad thing - creating lots of “garbage” that subsequently needs to be “collected” before the physical blocks are actually erased.
I found a solution that combined off-site backup with a resource I was underusing.
Over the many years of using TM I have maybe restored a file from a TM backup just a handful of times, so I regard TM primarily as a gold-standard method to restore the entire Mac in case of disaster.
I have a TM drive permanently connected to my OWC T3 Dock and M1 MacBook Pro to which I make regular manual backups during the day (such as during meals) as well as clones of the Data volume to an alternating pair of external drives with the excellent ChronoSync. I also make an additional TM backup to a drive stored in a fire safe once a week.
To address the off-site issue, a friend recommended an application named Arq (URL) which is capable of making backups to Dropbox. I have a 2TB plan but was only using a fraction of that for my clients so it was a perfect match. My broadband connection is not fantastic - 16 down and 6 up, but scheduled to run overnight, it gradually chomps its way through the gigs of data after which refreshing the backup is relatively light work. Restoring data is very simple.
Instead of backing up everything, I select top and 2nd-level folders from the MacBook Pro internal store and from other attached drives and setup separate backup plans in Arq to save the data to Dropbox. This has been working really well and the only additional cost was that of Arq, which is modest.
Arq sits in the background, doing its work quietly, efficiently and without fuss, just as all good software of this kind should do.
I use Arq for offsite backup as well (to Backblaze B2, and to AWA glacier for media files, and also to OneDrive, where I have 1 TB of storage that I hardly use otherwise), plus backup onsite to an external drive of another machine, which works as Time Machine does - thinned to daily, weekly, and monthly file versions. I’ve had TM several times inform me that its drive can no longer be used for backup, and needs to start over, but I can’t recall ever getting that message from Arq.
Of course Arq is not free but it is a great backup utility, and I know it’s been mentioned on these boards many times.
No. The process of “erasing” it and then rewriting to it later would just increase that read/write cycle count by one. You cannot undo read/write cycles on these disks. Think of it as wear and tear, and this cycle count is a wear level indicator. It only gets worse as time progresses and use increases.
Of course this is really only an issue for disks that see lots of read/writes (like a boot volume or scratch partition). If this is a TM backup and it gets swapped once it’s filled up, you’ll be fine.
Time Machine back to Synology NAS has worked for me. Of course you should always have more than one kind of backup.
long time listener, first time caller. Appreciate this article and all the knowledgeable comments.
I am trying the option with the 24/7 mac mini with a USB SSD connected devoted exclusively to be the TM drive for my Macbook Air.
I am following the directions in the linked Apple article but no matter how often I reformat the drive and retry it, I get an error when trying to select the SSD on the mac mini as a target. It shows up in my MbAir TM preferences as a viable target, but I get the following error:
“Time Machine Can’t Connect to the Backup Disk / There was an error authenticating with the provided username or password” even when using a known good username/password (that works through the Connect to Server dialog)
Any ideas?
That’s precisely the issue and error I kept getting. I would create two identical shares, one for each laptop with identical permissions. One of them would allow selecting as a TM destination…and the other wouldn’t. Eventually got both to work and they worked until they randomly failed.
At that point I rolled my own CCC solution but it only happens daily. I set up TM with a direct connected drive on both laptops but only plug it in every couple of weeks. The Davao having it set instead of TM off is tht the local TM snapshots keep happening so I can recover something from an hour ago if needed.
If you use the CCC option…make sure to use remote Mac as the destination instead of a mounted share…the latter didn’t work reliably if the laptop was asleep but the former just works.
Thanks Neil I have a similar CCC nightly backup as well, but I’d like to have the hourly versioning and ease of use of a functioning TM backup. Also redundancy.
I also use Arq via SFTP to the same Mac Mini (so it continues to back up when I travel) as well as a Hackintosh that lives in my parents basement across the country.
But I’d really really like to get TM over network. I hate attaching and unattaching the damn USB SSD drive throughout the day — it’s mind boggling that it’s 2022 and we still rely on that.
Thanks Simon. This leaves an issue open. Le 25 janv. 2022 à 16:45, David C. <[email protected]> a écrit :
This leaves for me, unfortunately, open the question of only powering the backup drives when and if a backup is forthcoming or in progress. Why ? To save energy and in view of my old laCie Big being noisy event when its drives are unmounted.
If you’re replacing your old mechanical HDD with a new SSD you’ll already be saving quite heavily on power. If you want you can disconnect the drive when you’re not using it to force it to power off (probably makes more sense in terms of ransomware protection but whatever). If you prefer to leave it connected at all time, you can connect 2.5" drives through switched USB hubs such that you can actually turn off the individual USB port that drive is connected to. I’m not sure I trust those hubs a whole lot though and my suspicioon is their trickle currents (they like to come with lots of lights and bling) will likely outweigh the minute savings of powering off the already unmounted drive.
There are external cases 2.5" cases that offer their own power input ports so you don’t have to rely on bus power. I have never had an issue with bus power—using quality powered TB hubs or direct connections to Macs that is—but if added protection is your concern, one of these will do the trick. Obviously, you then need to supply it with a reliable quality power supply for this to really add to your protection.
As I’m sure everyone here who uses it already knows, CCC can be set for hourly backup too.
@neil1 I solved this by turning file sharing off and on on my mac mini 24/7 server with the TM target SSD attached. I relaunched the finder on My MbA for good measure. Backing up now. Who knows how long it will last, but small steps
Yeah…I had tried that too and it worked…for awhile but then it failed randomly again on one or the other of the two laptops…I finally decided that if TM over the network was that fussy and finicky it’s not really a good backup scheme at all…hence my roll your own scheme. The really strange thing was that since I was using 2 TM drives…one on my Mac mini and one on my iMac…for both of the laptops and the 4 shares were all set up the same which one broke randomly switched between the two destinations and even when TM said the drive was not available I could easily open up the share for that laptop…so how can it not be available/
Yep…but since for a laptop even the daily ones are multiple GB and I decided it wasn’t worth it to do hourly based on network bandwidth. I might go back and set them up for a couple of times per day though…I didn’t do that originally since the backups to my mini were to a spinning Seagate Backup+ drive and it only writes 20 or 30 MB/sec. Now that I’ve got an SSD on that machine for the shares it’s 10x that fast so even multiple GB backups aren’t really that long. The iMac which is my other destination is writing to a TB RAID so it’s plenty fast even through they’re spinning drives.
Huh, bandwidth point taken in some cases, but does a CCC backup interrupt work while it’s running? I don’t do them hourly and wouldn’t know.
It shouldn’t, although you may notice some CPU and disk usage as it runs (much like you do for Time Machine).
When making a backup of an APFS volume, CCC creates a temporary snapshot, and then it performs an incremental backup of the snapshot. So the backup will contain your drive’s content at the time the backup started (and won’t be affected by files you change while it is running).
V. cool, thanks, David
This is a really interesting point for M1 Mac users.
On Monterey we observe that TM runs exclusively on the E cores because it has been set to the lowest Quality of Service level (9). For non-Pro/Max M1s this also means it runs on E cores at their lowest frequency of 1 GHz, they will not ramp up to their 2 GHz peak clock for this thread (on the Pro/Max M1s if there are multiple threads at QoS level 9 [and ignoring things like i/o throttling in the case of backupd], the E cores will ramp up their clock to match the peak E performance of the regular M1 E cluster despite having only half the E cores in its E cluster). One really nice thing about this is that it means it’s very hard for the M1 user to notice TM is running at all—apart from perhaps i/o bottlenecks in certain special cases, whatever you’re actively doing and certainly all the GUI action is driven with priority over what TM is doing in the background. The one downside to this is that there is presently no known method for the user to elevate the QoS level (“promote” a thread using eg. taskpolicy) and get it to run on the P cores if, say for example you’re stepping away from your Mac from an hour and in the meantime you want that initial TM to run through. In such a scenario you’d want it to complete in minimum time rather than at minimum noticeable impact, hence you want the P cores to fire away. But that is something we cannot presently adjust (at least to our present knowledge).
How does CCC deal with this? What is it’s QoS level for its backup threads? If it’s set to higher values it could also run on P cores. The advantage this has is that indeed a user can force it back down to run on E cores (and even later select to return it to E cores) if you prefer the backup to run unnoticed instead of in minimum time, because taskpolicy, or rather the underlying setpriority() function, does indeed work in that direction. Does CCC expose any of this control to the user?
Here’s an example of such an option:
Does anybody have the details on how CCC deals with this on M1?
I’m always on the lookout for interesting Raspberry Pi projects so I setup a Pi 3 as a Time Machine target for an M1 Mac mini. Its storage drive is a 500GB Samsung T5 SSD formatted as HFS+J. It uses Samba. It’s networked over wi-fi.
The Pi is running a, just released from beta, 64-bit version of Raspberry Pi OS Lite, a server edition.
The combination of the modest Raspberry Pi 3 hardware–1GB RAM, 1.2 GHz clock speed, USB 2.0–and wireless connectivity means that backups and retrievals are noticeably slower than those on my previous TM setup with a Thunderbolt-connected SSD. However, after its first few days the system is working reliably, if slowly.
In general, the answer is don’t bother migrating a Time Machine backup from an old drive to a new one. Just put the old one in a drawer in the highly unlikely event that you’ll need to go back to a version of a file that’s on it and not on the newly created Time Machine backup. Eventually, you’ll get bored of keeping it in the drawer and will reformat it and use it for something else.
Very good advice.
In fact, you cannot reasonably do this with TM to an APFS store anyhow because of the way APFS TM stores snapshots and the lack of user-facing ability to copy such snapshots. If you’re still using TM to HFS+, you could in principle clone your old HFS+ store to a newer drive and then use that (in fact a long time ago I did that myself). It works, but these days you don’t really want to be on HFS+ for TM anyway. Go APFS for TM and follow @ace’s advice when it’s time to move to a larger/newer TM drive.
Thanks, Adam. That’s really sensible advice. I’ll do it.
It would be an interesting test to see if you could do it with an image copy. Something like:
Connect source and target drives. Make sure the target is equal to or larger than the source
Make sure all volumes on both drives are unmounted
Perform an image-copy from one device to the other. This should duplicate everything, including the partition table and all file system control structures. For example, if the source is /dev/disk8 and the target is /dev/disk9, you might type:
When completed, disconnect (or power-off) both drives. Then power-on the target. If the image-copy worked, you should see it mount and its snapshots should be available.
Now use Disk Utility to enlarge the APFS container to fill the entire drive (assuming the new one is larger than the old one was)
Assuming this works, you will want to make sure you do not try to connect both the source and target drives at the same time, because they will have identical UUIDs and this may cause problems.
In theory, you should be able to use the internal
/System/Library/Filesystems/apfs.fs/Contents/Resources/apfs.utilcommand (typeman apfs.utilfor its documentation) with the-soption to generate a new UUID for an APFS container, but I have no idea if it will actually work, nor do I know how/if it will affect the volume’s ability to work as a Time Machine volume. But if it fails, the worst that should happen is that you may have to re-duplicate the volume (which may take several hours for a large drive, of course).Have working 2 TB Time capsule ethernet connected to my iMac running Catalina. Works fine but is full which is OK but does not allow adding a second computer…
Have new M1 MacbookPro running Monterey and will use 2 TB external SSD for backup using CCC. Is very fast but needs to be initiated manually.
Have 3 TB Time capsule that is unused. Any way to use it on the network (Uses Verizon Quantum router) for the M1 Macbook - connecting it to existing 2 TB time capsule or??
You can easily set this for auto initiation on a schedule or when the drive is connected if it’s not always so.
Thanks, but I( was not clear. The existing 2 TB is Ethernet connected direct to the router and works Erin for backing up my iMac (OS 11). I now have a new M1 Macbook that will connect by WiFi.
My question?, if I want to separately use my 3TB Time capsule for the WiFi connected M1Macbook (OS 12), can I just connect it to a LAN port on the 2 TB working Time Capsule and will the MI MacBook see it as a second Time capsule.? Am not sure even that Monterey Has Time capsule installed.
Thanks @IvanExpert for a really excellent article. It’s so useful to have these different options explained and evaluated, and has opened my eyes to some potential options for replacing my existing creaky network Time Machine backup.
@gordon589 mentioning that they use ZFS on their NAS made me wonder if this filesystem could be used with the Raspberry Pi+external drive backup solution. Would it then be possible to plug the external drive into a Mac for a restore? Can MacOS 12 Monterey read ZFS disks, or is there a driver available if not?
@curtis, are you saying that you are using an HFS+ Journaled disk attached to a Raspberry Pi? And it can read/write to it? In the article, @IvanExpert said HFS+ wasn’t an option with the Raspberry Pi because there are no Linux drivers for HFS+ that support journalling. But have you found one that does? That would seem to be the ideal solution.
After reexamining my procedure I think @IvanExpert is correct. My storage drive is HFS+ but it is NOT journaled.
On macOS, I erased and formatted the drive as Mac OS Extended (Journaled) using Disk Utility.
On Raspberry Pi, I installed the following additional packages:
On Raspberry Pi, I attached the drive and checked its status:
Output:
I ran the following “parted” command:
Output:
Quit
parted:partedreports the drive asHFS+but not asJournaled. But as stated above, I formatted the drive HFS+J on macOS.As I write, I’ve been backing up to my Raspberry Pi Time Machine target since Feb 3rd. I’ve successfully restored files over the network using the default macOS interface. My setup is working reliably.
Great article @IvanExpert
I’ve been using a Synology NAS over SMB, but for some reason since around the time of my Monterey upgrade (difficult to say exactly) Time Machine now says “Looking for backup disk” more often than it does a successful backup.
If I reselect the disk then the backup will proceed. But that negates the automatic backup feature!
Both the Mac and the Synology are connected using Ethernet to the same network.
Any ideas anybody?
Thanks to everyone who has commented here, and to the OP, for lots of good info. I will share my approach.
I have two machines to back up. I wanted to redo the system. My old system had a 4TB drive connected via hub to my main machine. I used a push from the other machine using Carbon Copy Cloner to that drive. It worked, but sometimes I would forget, unplug the laptop without ejecting the drives. More than once they became corrupted.
New approach. Really wanted a networked solution. But after reading everything here about NAS, and reviews on online shopping sites, and warnings from my employer’s data center about security issues with Qnap devices in particular, decided that they as a class are unreliable (for Time Machine anyway), not to mention expensive. I concluded that only Mac-to-Mac would be reliable.
I thought about getting a Mac mini and hanging it off my router. But a new is expensive for the intended use. I had an old (2011) MBP sitting on a shelf unused. I knew it wasn’t supported by modern OS versions, and was concerned about security. Then read an article about OpenCore Legacy Patcher (OpenCore Legacy Patcher) and decided to give it a try. I was pleasantly surprised that it actually works! Now have a fully patched Monterey 12.2.1 running. The GUI is slow; but only real downside is screen brightness stuck on high, but runs in clamshell w/o problem. Long story short, using as a target for both TimeMachine and CCC works just fine from both machines. If the machine dies, I will pick up a used Mac Mini for $200 or so and move on. OpenCore is pretty amazing. Takes some IT chops to go through the process, but it’s pretty well documented. Highly recommended.
Does this only happen when you boot the Mac? Many years ago I used to have to add a network drive to my startup items (in Sys Prefs/Settings) in order for Time Machine or other apps to use it after booting up.
My current configuration does not need this but you may have this issue.
Sadly not, my Mac is on 24/7.
Of course I did try a reboot but the issue prevails.
Annoying as it worked so well for so long.
There’s a utility named ConnectMeNow that automates 5is much better than an alias in Login items…because that one frequently disappears after sleep (the network volume, not the Login Items entry. Solves this problem nicely and you can easily mount or dismount volumes t startup, login, or as needed. It also remembers the appropriate name and password since connecting via Network in Finder defaults to the iCloud account rather than whatever user you really want to use.
This an interesting thread. Have been struggling with backing up the Apple M1 Mac for a while now. My main concern is ability to recover the iPhoto library, which is about 90GB (across 15 ish years). I have a Synology NAS connected. Backing up via Time Machine resulted in various failures and rebuilds over the last year. After the going through the thread, I am going to split up the backup of the M1 into User data (Pictures, Music, Movies) using CCC vs. everything else via Time Machine. Both to back up to the Synology NAS.
Question. CCC has this notification that system files are skipped during backup the NAS. How do I know that the iPhoto library has system files? I can’t find an indication that iPhoto library has system files somewhere, It would be great if the CCC of iPhoto on the NAS is sufficient to recover to the M1 if needed, and do not have to also include iPhoto in the Time Machine backup. Hope that someone can share their experience
None of your user files (such as your photos) or settings are affected by that. CCC is warning you that it will not do a complete “clone”, as in back up everything the way we used to. Nowadays, it will not copy over files that belong to macOS itself (/System) as such items that are recreated on the fly when you install a fresh copy of macOS on your M1 or when you choose to install a fresh macOS over an existing installation.
Note that those macOS items CCC is not backing up are part of the SSV in Big Sur and Monterey, that is, they are mounted as read-only during boot. Nothing you do as a user (saving data, installing apps, setting prefs) affects those parts anyway, so they don’t have to be backed up. macOS installers (and Recovery) will provide those parts when needed. And that’s why it makes sense for CCC not to back up those. And because this is rather different from the way things used to be (pre-Catalina) and the way they used to be backed up, CCC is letting you know about it.
I had a little improvement disabling power nap. But my issue prevails.
Thanks for the tip. I’ll try it!
Link:
Sadly ConnectMeNow does not help with my “Looking for Backup Disk…” issue.
I’m having a little more success deactivating Time Machine automatic backups and instead using TimeMachineEditor with some additional options.
Speaking of auto backups…as I’ve said before I gave up on network TM and rolled my own with CCC since the former doesn’t work reliably. However…I also wanted to get local hourly snapshots but the only way I could do that was to setup Tm to a USB drive and then unplug the drive. That works so I can recover a file I deleted yesterday more easily if need be…but then TM keeps nagging me that it hasn’t backed up in xx days.
So…is there a way to get local only snapshots hourly without enabling TM? I will have to look and see if CCC will do that but is there another way to do this?
TimeMachineEditor, see above.
Thanks Matt…I was going to give that a try and see if it would do the trick but figured you would be able to answer the question for me. Downloaded and I’ll check it out.
I just checked the WesternDigital support site and as of the firmware 7.16.0-217 the My Cloud Home device no longer uses AFP for TimeMachine but instead requires that you use SMB connections for TimeMachine backups. My Cloud Home: macOS Time Machine Error "Backup Disk Not Available"
Howard Oakley just summarized his findings on the topic. Interesting high-level statement:
More below.
It’s a shame he’s dancing around the information because the review is only in print.
And also that he didn’t test for more than one initial backup and one update backup, so he didnt encounter the “looking for backup disk…” problem.
I’m having a bit more luck with the combination of TimeMachineEditor and ConnectMeNow.
Article is available Apple News+ FWIW. It was so techy, and as I already have a Synology, I skimmed through it.
I read the article in a newsagents whilst on the road. The top reviewing unit was an Asustor Drivestor 2 Pro AS3302T which was awarded 5/5 stars. The full article is here: MacFormat - 04/2022 - page 84
imgur mirror of article: https://imgur.com/gallery/j7bkJc1
In other news, my Time Machine backups to Synology NAS are faultless for me now with the combo of TimeMachineEditor and ConnectMeNow. Such a relief.
My Synology is so old it won’t get any more updates so nothing has changed there. So it occurred to me that perhaps macOS 12.3 fixed the problem? I don’t have the desire to risk breaking m y working setup by checking.
Hi Ivan. Many thanks for this article & apologies if this set-up has already been discussed in the Q&A thread: I am attaching my external drive to an old Time Capsule. So the external drive is doing the Time Machine backups, and the old Time Capsule is what connects to the router. Is this set-up sound? I’ve just bought a SanDisk Professional 6TB G-DRIVE, 7200 RPM Enterprise-Class to replace the WD My Passport drive I have been using (another story for another thread on the problem I was faced with this one).
Replying to Alan Forkosh re Asus routers. I have a ZenWiFi AC mesh and am trying to attach a hard drive to the USB port to use as Time Machine. However, (1) the Zen only ‘sees’ the drive when attached to the main node not the remote node, (2) the disk status does not give any details (see attached), and (3) the Asus Time Machine functionality doesn’t have a path to the drive.
Notably, if I attach an SSD it works fine but I am not going to spend the $$$$ for an SSD with sufficient capacity to backup my system.
Do you have any experience attaching a hard drive to Asus? Thank you.
Sorry, I haven’t actually played with attaching anything to the USB port.
Thanks. I can’t find anything on line other than connecting an SSD and the Asus help is pretty useless.
In case anyone is interested, Mike Bombich (Carbon Copy Cloner) finds NAS backups to be slower and less reliable:
https://bombich.com/kb/ccc6/choosing-backup-drive
Interesting. i can’t say I’ve ever noticed either of those things.
I backup over USB3 to a LaCie Rugged 1TB.
And network over Samba to a Synology 3TB drive.
Both are traditional spinning disks, not SSD.
OK, I know it is silly, but nice call on Time Machine backing up to the Tardis.
Hahaha! Thanks. It seemed perfect many years ago and I haven’t grown bored of it.
In other news, I’m back to using standard Time Machine for NAS backups (no ConnectMeNow or TimeMachineEditor) so I do think whatever the “Looking for backup disk” issue was it has been resolved by a recent macOS update. Which with modern Apple is surprising!
I have had a few clients who experience disconnects or not-found issues with their Time Machine backup drives. Usually just re-pointing TM to the device corrects things. Worst case you do the full, manual “undo/re-do”: toggle TM off, unmount the drive, restart the Mac, re-mount the drive, re-assign drive to TM and toggle TM back on.
Excessive, but it usually clears things, at least for a while.
Super worst case is a new drive, of course.
When this was an issue that dance gets boring fast and takes the automatic out of automatic backups!
I know this article is a year old, but it is very relevant to me right now. My AirPort Extreme 802.11ac (which hosts the TM backups for my household on a 6TB external drive) has gone unreliable, and since my “just in case of emergency” 2014 Mac mini is not only obsolete but is also flakey, I picked up a refurbished 2018 Mac mini to replace both devices (for a little over $400, which, given the dual-purpose of this replacement, addresses the cost-effectiveness issue that Ivan cited).
But I am running into a problem: After carefully following Apple’s simple directions for configuring the mini as a TM destination https://support.apple.com/en-us/HT202784, I find that it does not accept the access credentials for any of the user accounts that work perfectly when logging into the mini directly.
In other words, when I manually mount the external (TM destination) drive from the Finder (after putting in login credentials), it mounts correctly. But when the same credentials are used within System Settings / General / Time Machine, they are rejected.
If anyone has any idea what I am doing wrong here, I would be most grateful.
One of the reasons I eliminated TM over the network…with 2 different destination machines selected for alternating laptop backups…they random and inextricably fail despite all userids, numbers, shares, permissions, and passwords being the same…then the one that broke fixes itself with no action on my part and the other fails a few days later. Add in the .dmg instead of folders and I gave up. Set up rotating CCC clones which are finder readable…they mostly worked when I mounted the destination once, set up the job, and told the job to mount and I mount the destinations as needed. Still intermittent failures but fewer. Per either me thinking about it or maybe advice from Bombich…shifted the destination to the Remote Macintosh option with Safety Net enabled…and it just works.
Thank you for your perspective Neil. I also have CCC backups, but there are good reasons to have TM as well – not the least of which is ease of “turning back the clock” to recover an older copy of a file.
I just successfully did a Recovery using a Time Machine backup for an Intel iMac running Mojave. Also managed to migrate settings and data from a Macbook/Mojave to a Macbook Air M2/Ventura using another TM backup. In my book Time Machine is indispensable. My experiences are described here:
BTW - I also do CCC backups every few months.
The news of the Time Capsule’s demise may be somewhat premature. Mine’s (2TB) been in continuous use since I bought it when it first came out. It backs up 2 Macs. It was never 100% reliable, but the few times we’ve needed it, it was useful (not for mail - at least, not easily). Over the years I’ve occasionally had to repair it, erase it, remove and then reinstate it and such, but it still works as well as ever. I’m a belt-and-suspenders guy, so I also have a Time Machine on a fast external SSD over Lightning, which also contains a bootable clone, which I plug in every night; very fast. I also decided that I don’t need hourly backups, once a day (= night) is enough.
I’m aware that Time Capsules sometime die, and maybe I’ve been lucky, but before I’d quit on them I’d try to do whatever I could to keep them alive; it sometimes works. If not, then, of course, these other replacements need to come into play.
You could try mounting the Mini when you boot up the iMac (?) - add it to Account Login items. This might help Time Machine find the Mini with the backup files.
I have been remiss in following up with this thread. @mpainesyd, you are on the right track. To get the process started, I had to manually mount the share via SMB, and then got Time Machine going, After successfully inheriting the previous TM backup, it was no longer necessary to have the remote drive mounted in the Finder. The new/old (refurbished) Mac mini is working like a champ. That step (manually mounting the volume) is something I think Apple should include in their instructions.
There is one rub, however: The Mac mini itself cannot back up to that attached drive, Any attempt to use it comes with a warning that it will wipe out the contents of the drive (thereby killing the ability to use it as a remote TM backup for the other computers). I think the solution will be to create a new APFS volume on the external drive, and designate that as the TM backup for the Mac mini. That will be my experiment for later this week.
Thanks to all for the suggestions, and I promise to provide a more timely update with the results of this new experiment.
@gbdoc, tried mightily to keep it going. For the past year, I’ve had it on a weekly reboot schedule (which prevented a lot of problems with Time Machine complaining that backups were unreliable and had to be rebuilt), But reliability in backups is of paramount importance, and when rebooting it stopped being an effective means of maintaining reliability, it was time.
Do older Synology NAS units function as Mac Time Machines? I can plug my laptop into a nearby hard drive when I think of it, but I’d rather have it happen automagically. I owned a Time Capsule until it blew its power supply, and I’ve tried putting an old router with a USB port into service. But a Synology DS210J is available for something like $50-60. Yeah, the reviews of the new model are dated 2010. But would it work?
Picking this up 20 months later… Because of course my Time Machine’s HD has died, and Google points to this discussion…
This gets me about 75% of the way there, largely because it corroborates what is on the Apple Support pages. (Sidebar but Bob Timmons and LaPastenague are consistently great on the topic of drive failures and where to go next in a place which is plagued with people wanting points for telling you to read Apple’s help page and general 1984-style gaslighting. I have long wondered what the other people get out of it: does it help with a Genius interview? I digress.)
Given the many caveats on the WB product, clearly the Synology is the way to go—now the DS120j, which is also cheaper. I’m left intrigued and a little unsatisfied with the article though and given that the conclusion seems to be this is the “correct” way forward (most people, most of the time) I’d benefit from a little more exploration. I see the part about the 128GB SSD and appreciate the point that recovery would be a lot faster, but what does that mean for energy consumption? I am trying to do the maths on the cost of the Time Capsule: I think I got to about $17 (annually) taking guesstimates of idle to disk-writing, and my kWh rate through the day. Based on what I think the Synology numbers are—they say 9.81W at “full operation” (whatever that is!) and somewhere between 6W and 11W for a “representative” 6TB WD external, that’s going to be about 180% of a Time Capsule, which seems to run between 10W and 16W (I guessed 12W as an average).
It’s pretty small potatoes but combined with the neatness of one box—the point of Time Capsule, at any rate—it looks better just to use an internal drive (for me) but am I missing any other benefit of external storage besides quick restores for the as-and-if? In the case of failure presumably an internal is almost as easy to swap out?
The second thing is SSD vs. HD: of course there’s a cost differential but I’m coming from a 2 TB Time Capsule and have never found that problematic. There’s the whole constantly writing to SSD—is that still the thing it was say 10 years ago? No one talks about it. On the other hand, with Time Machine there’s the time for copying files, but there’s also the overhead of just firing up Time Machine to begin with, which can be glacial. Does an SSD help with that?
Then there’s formatting the thing which I am beginning too see is maybe not a world of pain, but a planet of moderate discomfort.
Which to bring my thread reanimation to a close is to say I kind of think there was a super-useful discussion in the article, but the conclusion seems like it could be fleshed out.
Would welcome thoughts! Maybe I should even write this up…! :)
I believe the best way to solve this problem is at its source: Apple should replace the old, discontinued Time Capsule with a reincarnation: a new, improved Time Capsule. I have one of the first ones, and after over a decade it still backs up our two Macs relatively reliably. Sure, there are many other options available today. But none of them sets up so easily and work so seamlessly as Apple’s used to; it just works. What with WiFi speeds and drives so fast today, and modems so much improved - they’re probably making and using some of this stuff already, and probably developing more and better - I’m sure they could do it. We ought to pressure Apple to do so.
Attaching a hard drive directly (e.g., via usb) to a networked mac (I have a MacMini) is as easy as a Time Capsule, namely you choose the networked disk from the Time Machine preferences.
—e.
One would think this is the case…but even after going on 30 years of using Macs I’ve found that Time Machine to a network destination is very brittle. It fails frequently to find the destination even though Finder easily finds it on the network…and when you can get it to work it doesn’t work the same to 2 different destination computers reliably the same way despite being set up identically. I ended up rolling my own Time Machine like solution using Carbon Copy Cloner and setting “remote Mac” as the destination, and the versioning it provides does the same thing for me as Time Machine is supposed to do…and it reliably works even if the laptops being backed up are lid closed when it’s time whereas TM fails a lot in that situation. For a locally attached drive…TM is a good solution and works as advertised, but for backup to a remote Mac it simply isn’t reliable. I tried completely resetting up from scratch at least a half dozen times and it works…until it doesn’t. So…shifted to CCC a year and something ago and it is bulletproof. Setting up TM to a remote destination is easy as you say…if only it reliably worked.
What I like most of TM is the file restore interface. I am not sure how CCC deals with a file restore. How usable is the CCC restore interface?
It is true that rarely TM fails, and I have to to some random magic to make it work again…
—e.
There isn’t one because it’s not needed. The clone is Finder readable and you either drag and drop for restoring a lot or dig through the hierarchy to find an individual file. Older versions are put in a folder of you choose that option. I suppose one could just use CCC and create a new job with the old destination as the source and the destination where you wanted to restore to…and that saves the permissions so might be better than a Finder copy anyway.
OTOH…for a full disk clone maybe there is a restore option…never looked for one. You can clone disks or folders or some su folders of a higher folder to a local drive or across the network and thee are a lot of options on what gets cloned as well as reporting, chaining jobs together, and the like. I just looked and the docs cover this.
Now 2 years later, I wonder what people have settled for, or are they perhaps still looking?
I will only consider a network connected solution as we have several laptops, and backing up by manually plugging in external drives is just not an option after more than a decade with the TC’s automatic backups.
I generally have mixed feelings entrusting Time Machine backups to any other than a Mac-native file format. This makes a dedicated Mac (Mini) really the only solution. I’ll be able to increase storage easily as needed, by adding larger external HDDs or SSDs formatted with APFS.
Of course most of all I would appreciate Apple introducing an all-new TC.
I have some Time Capsules in use for myself and relatives and, not having experience, I wonder if old Mac minis kicking around would work.
I would think so… as long as it’s not ancient. Personally I will look for a used M1/M2 Mini with basic specs. All it needs to do is manage the sharing of an external drive. Once the Mini has been set up, it won’t require a monitor and you can administer it remotely from any Mac.
If a screen is available, the Mac mini route is great.
If not, you could contemplate a refurb MBA or perhaps a used but well kept M1/2 MBA. All you need is a port for attaching an external drive or a hub for multiple external drives. Since this is for backup of a limited number of clients and over wifi, 10 Gbps USB-C is likely plenty for the drive(s). Such a system should not run you much money at all and thanks to Apple silicon it should have more than enough oomph while still running quiet and reliably for many more years.
In fact, if Apple does indeed release a ~$600 A18-based MacBook as rumors keep mentioning, such a system could also take over duty as a “modern Time Capsule”.
I haven’t read the whole long thread but can’t see that simplest, Apple provided option needing no special hardware, is mentioned:
Works for me. My M1MBA backs up to a Time Machine volume on my M4 Mini.
CCC also backs up to my M4 Mini. No wires, no need to plug MBA in. Also no need to keep the backup volumes mounted on the MBA.
Although I have used TM successfully in this way I have switched to CCC because when it comes to whole drive restoring, the CCC backup would be much faster as it can be direct connected for the restore, unlike the TM backup.
Agreed on all counts, with a small caveat. You may recall discussion in other threads about how macOS 27 will require Time Machine to use the SMB protocol for network backups, which I believe only arrived in macOS 10.13. Consequently, if you plan on backing up a macOS 27 machine to an older Mac, the older Mac will need to run macOS 10.13 or newer. For a Mac mini, that means a 2010 model or later, though you’d want at least a 2012 model to support USB 3 speeds. That said, a machine capable of running a supported version of macOS would be best.
If you do decide to set up an old mini as a “Time Capsule”, I’d give some thought to limiting it to that specific purpose and limiting the mini to local network access only for security reasons, i.e., no Internet access.
You can run a mini “headless”, i.e., without a display, but you’ll need a display dongle and a way to share its screen. (Also discussed on other threads.)
I do see a few “How To” guides on the net that describe setting up a Linux machine to be a Time Machine server using the appropriate SMB protocols and extensions to support macOS 27 clients. Famous last words, but it looks pretty straightforward if you are comfortable running a few commands on the command line and editing text configuration files. This may actually be a better option than running an unsupported version of macOS, even on older Apple Intel machines.
Further to that point. I get the impression that the SMB implementation has evolved as I’m using an old Intel MBA for this purpose and it didn’t work when I initially tried with the latest official supported version of macOS for this MBA. The solution was to install open core legacy patcher and a more recent version of macOS. It has worked reliably since.
Also I’ve set up this MBA with screen sharing to check it remotely and ensures it doesn’t sleep when closed with this command:
sudo pmset -a sleep 0 disksleep 0 disablesleep 1 displaysleep 5 womp 1 powernap 0 autorestart 1Is anyone doing networked Time Machine backups with macOS 26 Tahoe? I’m corresponding with a reader who feels that networked backups to any destination are broken.
I use an M2 Mac Mini running Tahoe as a networked Time Machine backup destination for a machine running Tahoe and another machine running Sequoia. Twice in the last month, the Tahoe client has had trouble backing up, yielding nothing but a cryptic sort of “Can’t back up to destination”. For some reason, restarting the client machine seems to fix this issue. Another time it got stuck with a different error (I think it was something like “backup is busy”) and this wasn’t fixed by restarting either the client laptop or the Mac Mini, but I eventually mounted the backup image directly on the Mac Mini, ran disk first aid (which didn’t report any problems or fixes), and then fully unmounted the backup image device, and that finally seemed to make it work again.
I haven’t seen any such issues with the laptop running Sequoia that backs up the same Mac Mini.
In short, I don’t have definitive information, but I can offer additional anecdotal evidence of trouble with networked Time Machine backups in Tahoe. Time Machine’s error messages are extremely lacking in detail, so problems are very hard to diagnose. I will try to remember to try Howard Oakley’s “The Time Machine Mechanic” next time I run into trouble… maybe it will unearth more useful information about the failures.
I do networked TimeMachine backups from my M4 pro Mac mini to a Synology 1821+. Everything has been solid, connection wise, since day 1.
Only issue I have is an incompatibility between Synology and some GarageBand files which is a known issue. (Has to do with the name of the files).
I am and yes, broken for me. I have a WD raid which has a designated Time Machine share. Been beating my head against it, about to designate a directly attached disk and move to that. I have Chronosync backups too so covered in that regard.
I’ve got macOS Tahoe clients with TM running on macOS Sequoia working fine. Sharing over SMB.
I have TimeMachine on a Ubiquity NAS and it seems to be working fine for two machines.
I’ve got 2 Sequoia Macs doing TM network backups to an Intel Mini with an OWC “toaster” holding 2 cheap internal drives. I rotate them for redundancy. Also do an offsite backup. Network TM works fine, although the restore browser is get-a-cuppa-coffee-while-it-loads slow. About once a week I get a “couldn’t back up” alert. I ignore that, and within a few hours I notice that it’s backing up again.
A few times (yearly-ish) I’ve had to un-configure the shared backup folder and re-log in from the client Macs.
I’ve never seen a Mac Mini (back to PowerPC) that required a dongle to run headless, but maybe some models do. If running headless, there’s a fdesetup command you can use to reboot a FileVault-enabled Mac. [ed: insert link
That reminds me, International Verify Your Backups Day is next month!
I went back and read this entire thread. I have never used Time Machine but have always been interested in a network backup until I look at the cost.
I am reevaluating my backup flow. I use Chronosync and have been very happy with it.
I have a 2T USB drive that I move from machine to machine to back up user data. (MyPassport)
I also have two older 4T drives (MyBook) that I was backing up entire machines on (one was a backup of the backup). They are both pretty full now, I think I got them in 2016. They also have copies of other backup drives I had over the years from the beginning of time (thankfully those are way smaller)
I have a separate Lightroom drive (4T) and have bought an identical drive to back that up on (plus I’ve copied them to one of the older 4Ts as another backup). In the meantime my LR library went corrupt so that’s on my list.
Oh and I also have one of toaster docks (recommended from here a few years ago). I just have two drives for it and one is a bootable backup for the laptop. They are small though and boy have they gone up in price!
I am thinking of getting a newer drive and putting the MyBooks in storage. But I struggle with the thought of a larger drive that could go bad and cause me to lose everything.
I believe CS will backup over the network but I haven’t tried it yet. If it works I may hang a drive or two off the 2014 Mini.
So if I have a question, this would be it. What kind of drive sizes do you use if you’re not using a RAID type of system?
And considering I now have multiple technologies, is there anything I need to watch out for? 2015 MBPr on Sierra, 2011 iMac on Sierra, M4 Mini on Sequoia. The 2T MyPassport that I’ve had for a few years works fine on the Mini.
I’ve started buying 6TB (3.5”) drives, although I’m still getting along fine with mostly 4TB, backing up a 2TB work Mac and a 512MB home mac. I assume that any one drive may fail at any time, so rotation of multiple drives is important. Plus, it is preferable to run a second, completely separate other backup system. If your toaster has two slots, you can have two drives set to back up to and they’ll just alternate.
My backup host Mac has always been older than the client Macs. Sierra is a lot older than anything I have involving backup, so YMMV.
There are better backup experts around here than me, though!
You are right that it is not strictly required, but using a headless dongle can make an enormous difference in performance and available display resolutions. At US $5-15 per dongle, it’s 100% worthwhile, especially for older, slower machines.