Ensure Sufficient Free Space before Upgrading to Ventura
Two macOS releases ago, I wrote “Ensure Sufficient Free Space before Upgrading to Big Sur” (10 February 2021) to warn users that an installer bug could result in a Boot Recovery Assistant loop. Apple fixed that bug in macOS 11.2.1, but I was reminded of it when TidBITS reader Marc Heusser wrote to tell us that upgrading from macOS 12.6.1 Monterey to macOS 13.0.1 Ventura on an M1 MacBook Pro with insufficient free space resulted in errors that prevented the MacBook Pro from booting. Marc had to restore from backup to bring his MacBook Pro back to working order.
So what counts as “sufficient” space? In my previous article, I linked to the tech specs for Big Sur, in which Apple says that it could require up to 44.5 GB of available storage. Unfortunately, Apple hasn’t published similar specs for either Monterey or Ventura. However, our old friend Charles Edge recently published the necessary details in Free Space Required for Modern macOS Upgrades. In it, he says that Ventura requires 25 GB of free space and that its installer clocks in at 12.19 GB, suggesting that it would be safest to add those numbers and make sure you had at least 37 GB free.
Without Apple providing specs, I was curious where Charles came up with that 25 GB number, and he told me that it was from personal experience. He had tried to install Ventura on a Mac without that much space and received a prompt from the installer telling him he needed to free up at least 25 GB. A post from Trend Micro confirmed that number wasn’t somehow specific to his Mac. So a minimum of 37 GB it is, for safety’s sake.
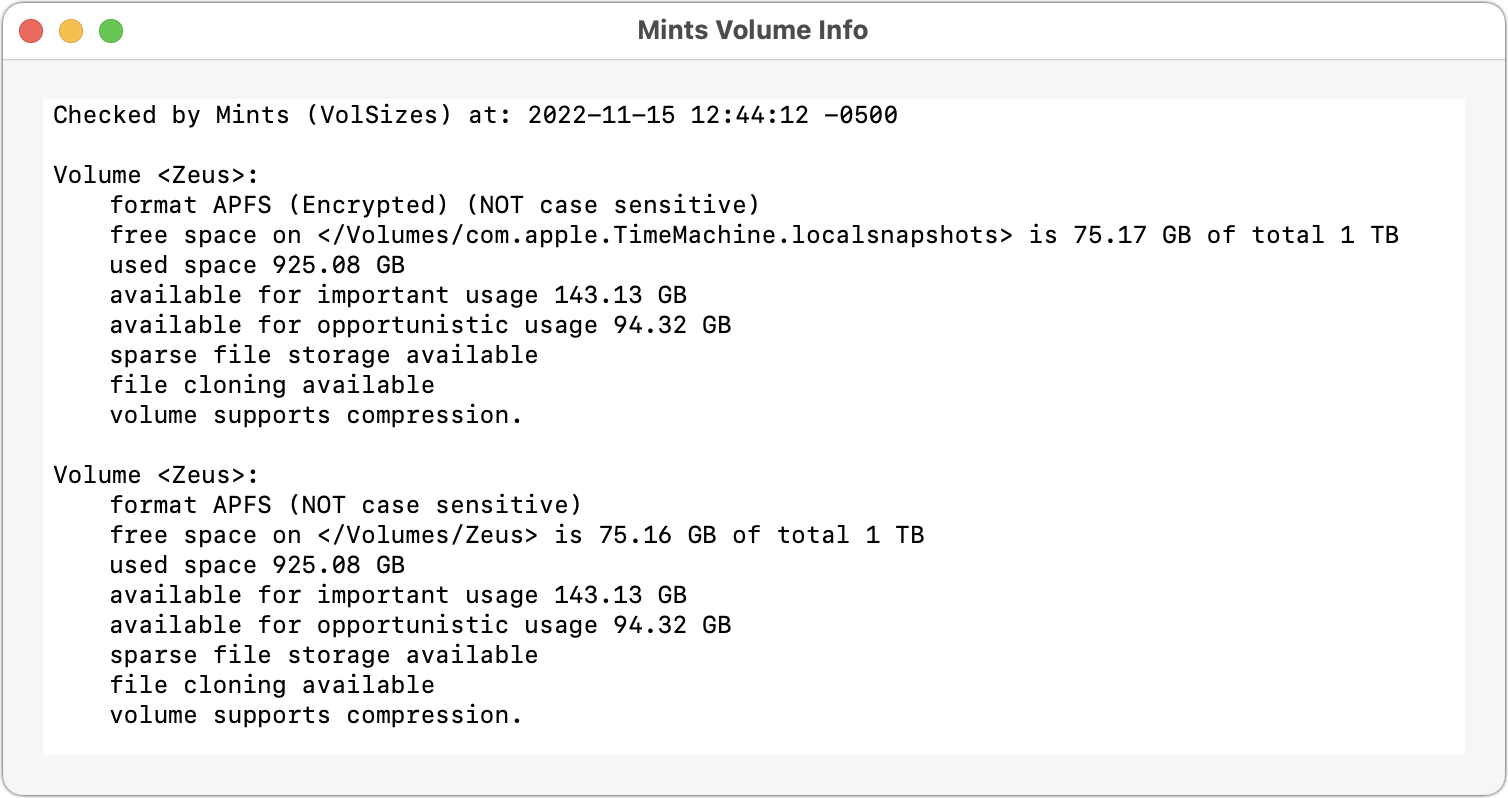
What could have happened in Marc Heusser’s case? The Ventura installer clearly thought he had enough free space to continue, rather than throwing an alert as it did for Charles. Marc speculated that the problem was due to APFS snapshots, and unfortunately, that’s likely. As useful as APFS is, it renders the concept of “free space” somewhat indeterminate. Howard Oakley explains some of the complexity involved. As you can see in the screenshot from Howard’s Mints utility (click the Volumes button), my Mac’s primary drive has 75 GB free, but 94 GB available for “opportunistic usage” and as much as 143 GB available for “important usage.” The Finder reports the 143 GB number.
My best guess is that there’s an edge case where the installer believes there’s enough space available to start (assuming that an upgrade is either opportunistic or important), but when it starts copying files, APFS doesn’t always release the needed purgeable space.
Charles reported that since he published that article, he too has heard from a handful of people who have suffered a failed Ventura upgrade and have thus been forced to start over with a clean install.
So, what should you take away from all this?
- Back up first: Make at least one full backup of your drive before upgrading to Ventura. I say that every time, and I will continue to do until the heat death of the universe. (What, you didn’t make a copy of the Milky Way?) And when I say “at least” one backup, I mean it. I would never upgrade my main Mac without both an up-to-date Time Machine backup and a duplicate. Drives fail, and you don’t want your only backup to fail when you need it to restore after an unexpected catastrophe. (While writing this article, I unmounted my Time Machine SSD, and it didn’t want to remount again, even after a restart. It mounted fine on another Mac, where I’m running First Aid on it right now.)
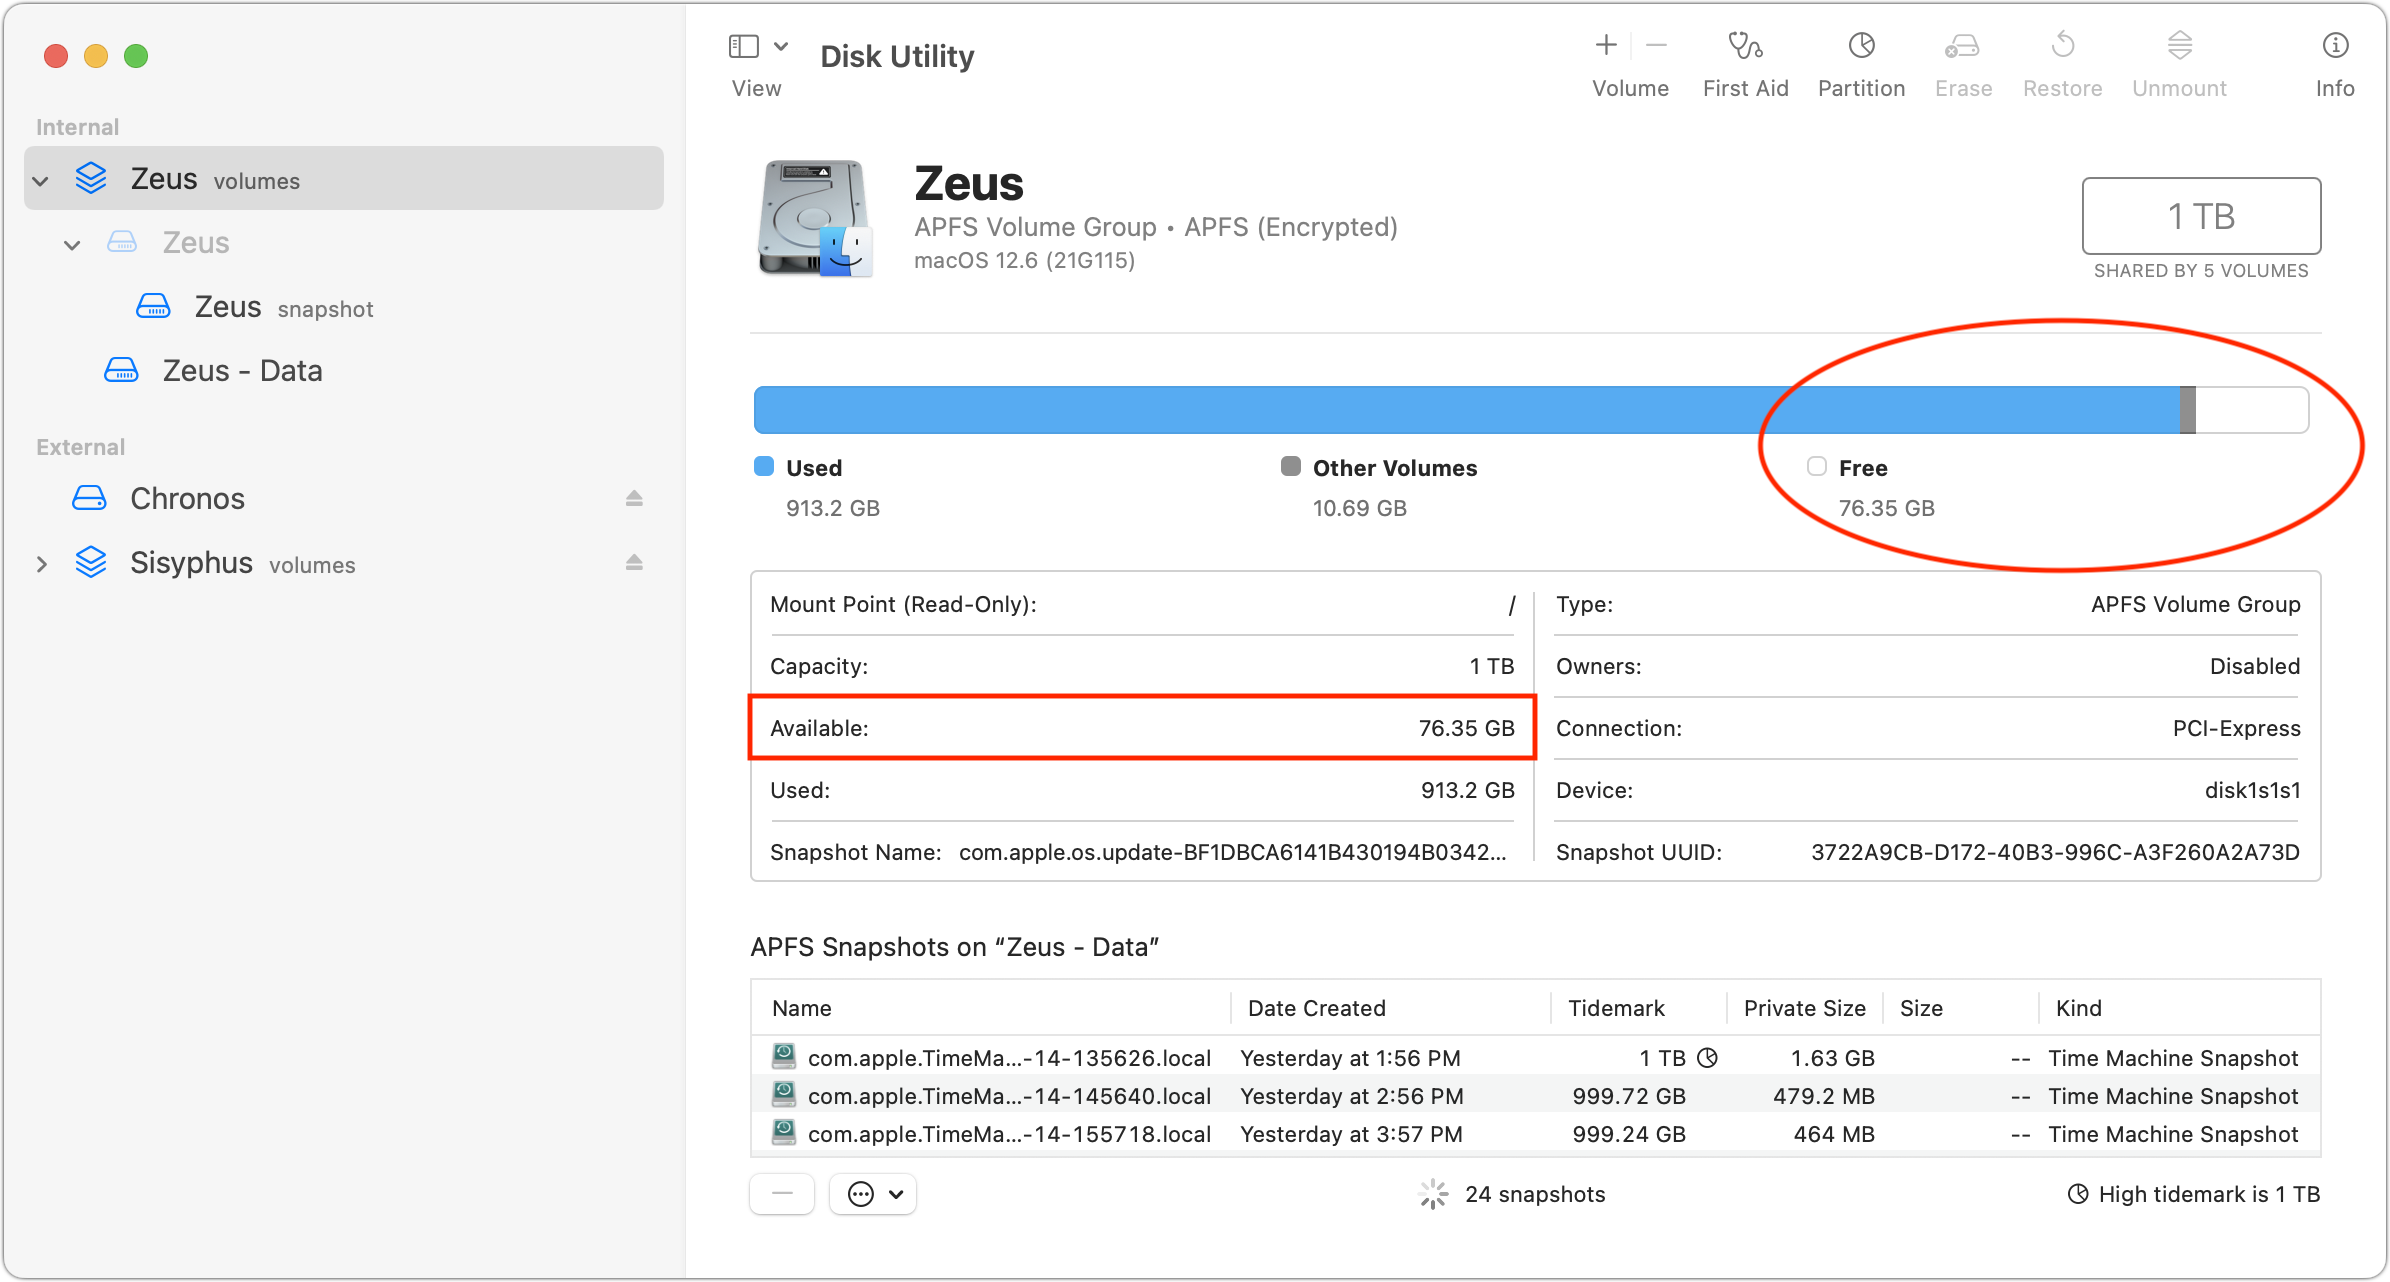
- Check free space carefully: I’m going to go out on a limb here and suggest that you shouldn’t trust the Finder’s claims of free space. It reports the maximum amount of free space that could be achieved after deleting purgeable data. Instead, open Disk Utility, select the top level of your boot volume (not the Data volume underneath), and use its free space number—76 GB in the screenshot below.
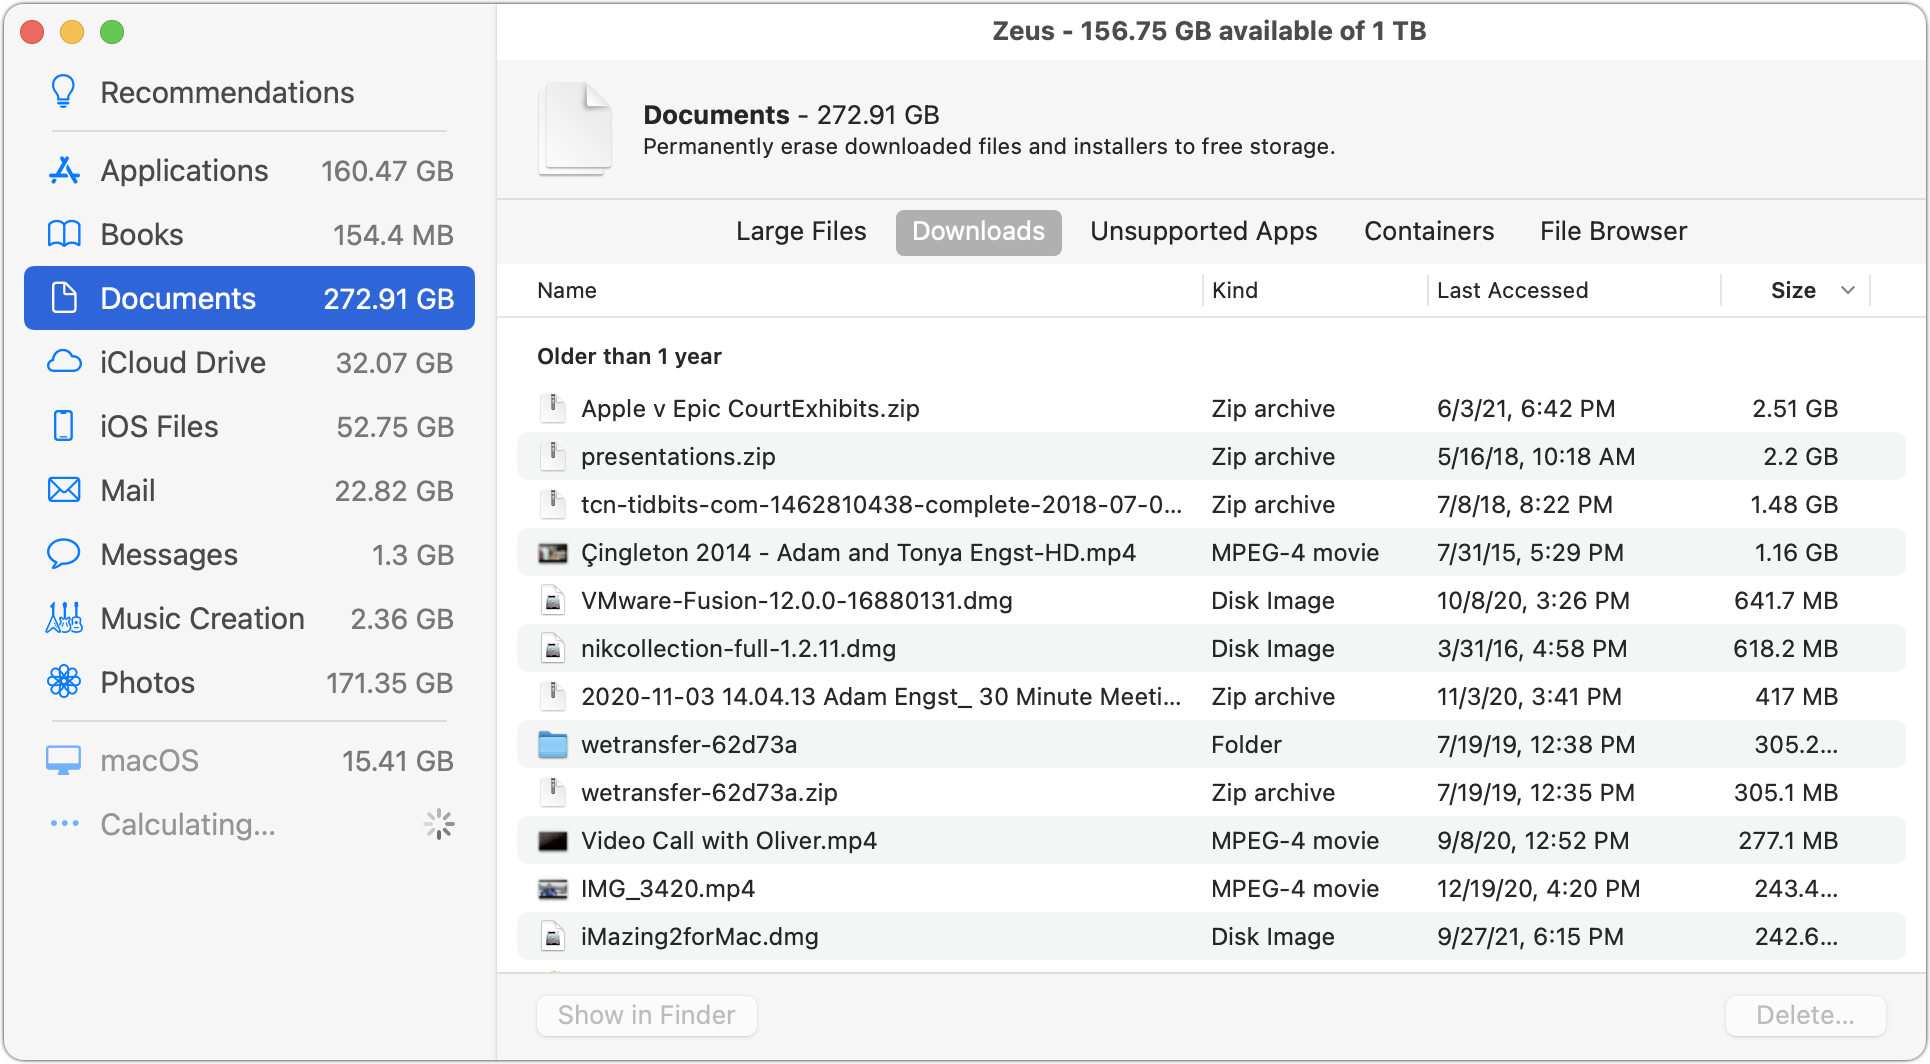
- Clear at least 37 GB: If that free space number isn’t at least 37 GB, remove enough data to get it to that point. To begin, empty your Trash and restart. I had about 1 GB of data in the Trash, which brought me up to 77 GB free, but that number jumped to 86 GB after I restarted. If you need to remove more data, choose About This Mac from the Apple menu, click Storage, and click the Manage button next to the desired drive to open System Information’s Storage Management window. Then click Documents and work through Large Files, Downloads, and Unsupported Apps, deleting unnecessary data, preferably larger files. Alternatively, a utility such as GrandPerspective or OmniDiskSweeper can easily identify large files and folders.
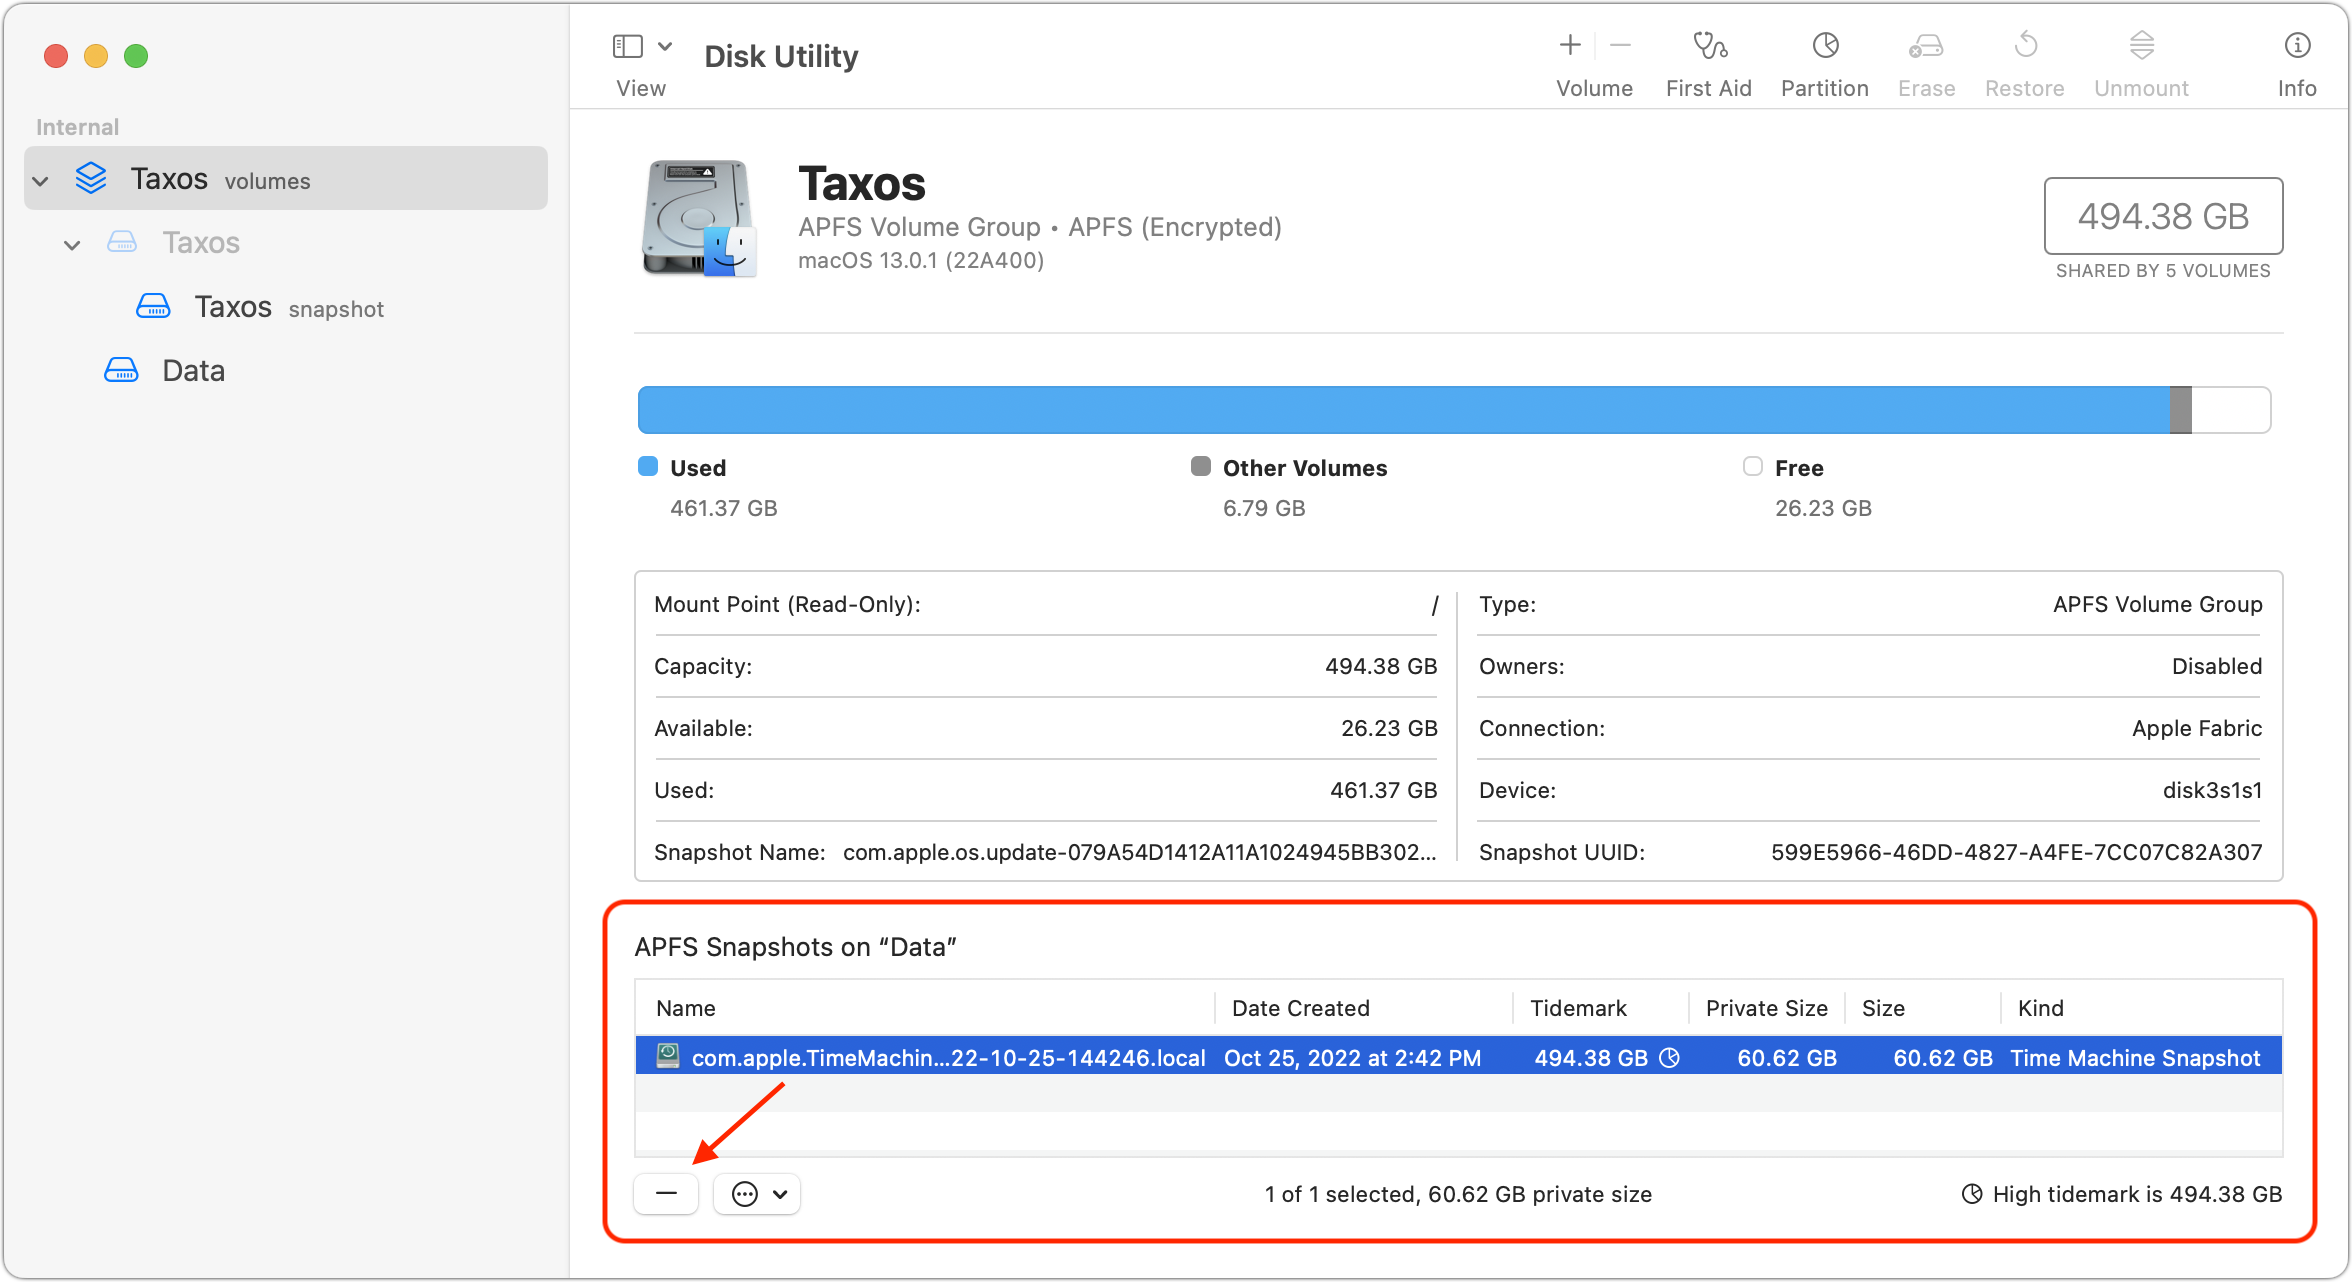
You could also use Disk Utility to delete Time Machine snapshots, but I’m uncomfortable recommending that without being able to test it myself. (As I noted above, my Time Machine drive isn’t happy right now.) If you want to experiment with this approach, open Disk Utility, select your boot volume, and choose View > Show APFS Snapshots. Then you can select a snapshot in the list and click the – button to delete it. (The screenshot is from my MacBook Air, which seldom does Time Machine backups because I rarely work on local data.)
Let us know in the comments if you run into space-related problems upgrading to Ventura.
The free-space problems you saw in trying to upgrade to Ventura probably explains why my MacBookAir 2017 with a 128 Gig hard drive is not able to upgrade to Ventura. I had to delete a lot of file and some apps to be able to upgrade it to Big Sur (and later Monterey). I wonder if Apple really has a reliable way to assess how much free space is needed, and why they offered a 128 Gig hard drive in 2017?
“The devil is in the snapshots!”
Reminds me of this, from the New Yorker a few years ago. Very funny.
So, if you have that 37 GB to install the system, does that mean that once it’s installed, you have no room to actually do anything?
No, because Ventura is probably roughly the same size as Monterey and you’ll delete the 12 GB installer when you’re done. You should end up with about the same amount of space free at the end—it’s just working space during the install.
On a related note, Howard Oakley suggests that updating Ventura, say from 13.0 to 13.1, requires a minimum of about 14 GB free, but 25 GB free would be wise to continue updating in the future.