TidBITS#1113/13-Feb-2012
Finally, a breather from non-stop breaking news! This week we step back a bit to share some useful evergreen content from a variety of contributors. Glenn Fleishman leads with a short article pointing to a 15-minute screencast he has created to walk users through the new AirPort Utility 6.0, and Marshall Clow joins us with a review of the improbably named iSesamo (it’s a spudger, and if that doesn’t help, you’ll really have to read the article). While trudging through an hour-long installation process to get a Fujitsu ScanSnap scanner working, Michael Cohen points out that hardware companies need to devote just as much attention to their software. Steve McCabe contributes a look at FileMaker Go for the iPhone, which lets you use FileMaker Pro databases while out and about. Finally, Tonya anchors the issue with a detailed look at some of the real-world strategies she has developed for switching from Microsoft Word to Apple’s Pages. Notable software releases this week include Bookle 1.0.3; Piezo 1.1.2; Firmware Updates for iMac, MacBook Pro, and MacBook Air; Carbon Copy Cloner 3.4.4; and ChronoSync 4.3 and ChronoAgent 1.3.
AirPort Utility 6.0 Screencast Walkthrough
After receiving quite a few questions about the new AirPort Utility 6.0 for Mac OS X 10.7 Lion, I’ve recorded a 15-minute screencast, available via YouTube, showing all the ins and outs of the new version. Some people like 6.0 and others do not, but I find it has a lot to recommend it, especially for people setting up a new network. (Those with existing networks can still use the 5.x versions.)
I’ve embedded the video in the Web version of this article, but because it’s recorded at a high resolution, I recommend clicking through to view it at YouTube, where you can use the resolution picker to choose 1080p HD. In that view, the text on the screen is readable.
For a text walkthrough of AirPort Utility 6.0, consult “AirPort Utility 6.0 Adds iCloud Support but Removes Many Features,” 1 February 2012.
iSesamo: Building a Better Spudger
Every now and then, I have to disassemble some electronic gadget. Sometimes it’s easy — the Mac Pro, for example, is beautifully designed to come apart with the flip of a latch and the removal of its side panel. The Mac mini — particularly the older models — is harder. [Having spent the better part of an hour installing an SSD in Tonya’s 2010 Mac mini just recently, I can attest to that! -Adam] Tougher yet are most MacBooks and all iPods; in general, they’re designed to snap together at the factory and never be taken apart other than by Apple-trained technicians.
Sometimes, however, the rest of us just gotta get inside, a task that’s a whole lot easier thanks to resources like iFixit and Other World Computing’s Install Videos. To break into and work on one of these sealed devices, you also need the right tools, including a collection of straight blade, Phillips, and Torx screwdrivers in different sizes. (If you don’t have a set already, Newer Technology has a $17.95 11-piece portable toolkit that contains the basics.) But while you might think you could use straight blade screwdrivers to separate two pieces of an iPod case, for
instance, they don’t work well. Normal-sized screwdriver blades are too thick to slip between the pieces, and thin jewelers’ screwdrivers are too pointy — they poke holes in the plastic rather than providing the even leverage necessary to separate the pieces.
The solution is a remarkably simple tool commonly called a “spudger.” It’s a thin metal or plastic blade, whose edge fits between the two plastic pieces and lets you lever them apart without breaking anything.
I had a set of plastic spudgers that I got from the discount site Meritline. They were indeed incredibly cheap — $1 including free shipping from China — and they worked great… once. After using both of them on that first job, they were ruined thanks to being made from too-soft plastic (and even Newer Technology is up front about the limited lifespan of their plastic spudgers). So when the folks at Newer Technology offered to let me play with one of their new iSesamo spudgers, I was eager to give it a try.
The iSesamo is a very thin, flexible piece of steel, about 5 inches long and .75 inches wide (12.7 by 1.9 cm), with a soft rubber covering in the center to provide a firm grip. One end is rounded, the other comes to a gentle (but not sharp) point. The uncovered parts on the end slide between pieces of plastic, and the metal flexes enough to pry open all the different things I tried: a MacBook, an original white iPod, and even a beer tap at my local nano-brewery.

The iSesamo currently costs $8.79 at Other World Computing, and is easily nine times better than the plastic $1 spudger that I had before. It’s a one-trick pony, but without that trick, you won’t be getting into your iPod or iPhone. Do note that “spudger” is a rather general term, and Other World Computing sells another one — the $3.95 Apple Nylon Probe Tool — that won’t work as well as the
iSesamo for opening cases, but will be better for levering tiny wires from their sockets without damaging or scratching nearby components.
Installing ScanSnap Not a Snap
At the recently concluded Macworld | iWorld 2012 conference (see “Macworld | iWorld 2012: In a Word, Confident,” 30 January 2012) I spent some time chatting with vendors of various products, often by invitation (those who have never attended such an event as a media representative have no idea how many email invitations you get requesting such tête-à-têtes). One such chat was with the Fujitsu representatives, who gave me a quick demo of their various scanning products, something I found interesting because of my work helping to produce Joe Kissell’s book, “Take Control of Your Paperless Office,” in which
scanners are prominently featured. At the end of our chat I was surprised to be given a review unit of the Fujitsu ScanSnap S1100, a tiny scanner designed for the digital road warrior.
First, the good news. This little item weighs slightly under three-quarters of a pound (350 g) and is very slim, easily fitting into a backpack or briefcase. It’s completely USB-powered, so it doesn’t require a power brick, and the included USB cable even has an attached Velcro tie, making it, well, a snap to coil and store. Although the ScanSnap S1100 can handle only one sheet at a time, and scans only a single side at a time, feeding sheets through it does not require you to line them up precisely, and the scanning process is quick. The quality of the scans, while not super high-end (600 by 600 pixels per inch), is more than adequate for my needs. Once I got it home and set it up, I found it works well enough for me to take my
first steps toward, if not a paperless office, an office that has much less paper cluttering it.
Ah, but setting it up: that was the rub. As you may recall, Apple’s Mac OS X 10.7 Lion was released in the July of last year, and was in developer testing for months prior to that. Yet the ScanSnap S1100 still comes with a DVD-ROM for setup that contains software compatible with only Mac OS X 10.4 through 10.6. And Fujitsu does mean it: the Getting Started guide actually tells you that one of the bundled applications, Cardiris 3.6, requires Rosetta, which, as we all know, became an ex-parrot pining for the fjords under Mac OS X 10.7. (Note that different ScanSnap scanner models may well come with different software bundles, so my description applies only to the S1100 unit I received.)
However, a flimsy sheet tucked away in the packaging does say, “To use the ScanSnap on Mac OS X v10.7 (Lion), you first need to update the bundled software,” and the sheet provides a (rather long) URL that you need to type into a Web browser to find out more. The referenced page, though, provides only a set of links; you must click the S1100 link to get to another page that provides even more links to the required updates, and you must scroll a ways down that page to find them. And, yes, it is “them” — there are two separate updates that need to be downloaded, one for the ScanSnap Manager software and another for the bundled
Cardiris software. It gets even better (and by “better” I mean something rather the opposite): you can’t just download the Cardiris software, but, instead, must register a request for the software and wait for a confirmation email message that provides a link to get the update.
What the flimsy sheet with its single line of Lion instructions (in eleven languages) does not make clear is the order in which you should do things to make the ScanSnap software happy under Lion. Should you just bypass the DVD and download the updates, or should you install the software on the DVD first and then download and run the updaters? I made an educated guess and ran the installer that was on the DVD first, since the scanner comes with a big warning piece of tape on it that tells you not to connect the scanner until the software is installed.
The installer allows you to choose which components to install: since I knew that Cardiris would not run on my Lion-ized iMac, I unchecked that component — a mistake, I soon discovered, since the Cardiris updater requires the older version be present, even though the older version cannot run at all under Lion. I also discovered that the ScanSnap installer is one of those that requires a reboot upon completion. Sigh. Double sigh, because I had to run the installer again to get the Rosetta-requiring Cardiris application installed so I could update it after I jumped through the email hoops to obtain it.
The entire out-of-the-box experience took me well over an hour. At the end, I had a functioning scanner and the requisite software to use it. Not to say that the software is perfect: though it is usable, portions of it look like they escaped from the earliest days of Mac OS X, and other parts look like the barest of old-school gray-dialog utilities. What’s more, the pieces are spread around in various components, some in your face and others behind the scenes, and you never know which one is in charge at any given time: you really do have to read the online help to know who’s on first and what’s the name of the guy on second. Nonetheless, I can use the scanner to create PDFs (searchable ones, courtesy of the bundled ABBYY
FineReader OCR) and even send documents directly to Word or Excel or Google Docs (though not to any of Apple’s own office apps like Pages). For my needs, the ScanSnap, now that the hurdles have been overcome, works well enough.
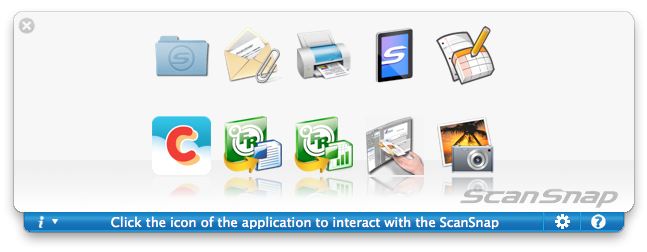
But when it comes to hardware peripherals, it doesn’t matter how good the hardware is (and the ScanSnap hardware seems very good) if the software is lacking. Software that drives a peripheral should either get completely out of the way (hiding behind the scenes, doing its job silently and efficiently), or it should provide a user experience that is as simple and as seamless as possible. The ScanSnap software I received does not deliver on that score. And there’s really no reason in 2012 for a major player like Fujitsu to be
giving such short shrift to its Mac software when smaller, more agile players like Doxie can produce a roughly equivalent mobile scanner that doesn’t even need a cable (it can scan to memory and wirelessly transmit scans to a Mac, PC, iOS device, or the cloud), and drive it with easy-to-use software that looks like it was designed for a Mac in 2012, not 2002.
I’m grateful to Fujitsu for providing me with a review unit, and I hope to make good use of it. The hardware really is polished but the ScanSnap S1100 could benefit from a complete software makeover.
FileMaker Go Brings FileMaker Databases to iOS
It’s easy to forget that FileMaker, Inc., is a wholly owned subsidiary of Apple. The direct successor to Claris, FileMaker has, to a degree that saddens its main product’s many dedicated users, become something of a red-headed stepchild within the Apple universe. In many ways, FileMaker (the database program) is an anomaly in that universe, a throwback to the days when Apple’s software bore the Claris label.
Since 1998, Claris has been FileMaker, Inc., a company so utterly separate from its sole owner that one could easily be forgiven for imagining that the two companies have no connection at all. While you can find reference to FileMaker, Inc., at the Apple Web site if you search for it, it’s not easy to find. In fact, only Bento, Filemaker’s personal database, is available on the Mac App Store while its grown-up stablemates are not. And nowhere has the distance between the two corporations been more clear than on the iPhone.
When Apple unveiled the iOS App Store in 2008, FileMaker devotees were sure that Apple’s very own purveyor of fine database software would be among the first to place products in the App Store. FileMaker, after all, wasn’t a total stranger to the mobile market: FileMaker Mobile provided a solution to Palm and Pocket PC users as early as 2006. But it took the company two years after the opening of the App Store to release FileMaker Go in July 2010. I’ve been using it for some time, and wanted to share my impressions.
FileMaker Go for the iPhone is not an impulse purchase. At $19.99, it’s not the cheapest app in the App Store, and it’s not even the cheapest FileMaker client — FMTouch costs half that amount. And $19.99 gets you only the iPhone version — FileMaker Go for the iPad costs $39.99. (Note: This article focuses on the iPhone app, but the conceptual issues, if fewer of the screen size concerns, are the same.)
FileMaker Go is essentially a FileMaker thin client — data within FileMaker databases can be manipulated quite easily on the iPhone using the onscreen keyboard. You enter fields by tapping them; absent a Tab key, you move between fields by tapping the Next button. Buttons trigger scripts as they do on a desktop machine. Calculations, well, calculate. Overall, the software’s functionality, once a database is open, is quite acceptable.
Where a FileMaker developer will find new challenges is in configuring a database for an iOS device, and, in particular, an iPhone. While a desktop-based FileMaker solution can take advantage of relatively large expanses of screen, an iPhone held in portrait view has a limited available display area. FileMaker’s design guidelines recommend limiting layouts to 312 pixels in width to avoid forcing users to zoom out in order to view an entire layout.
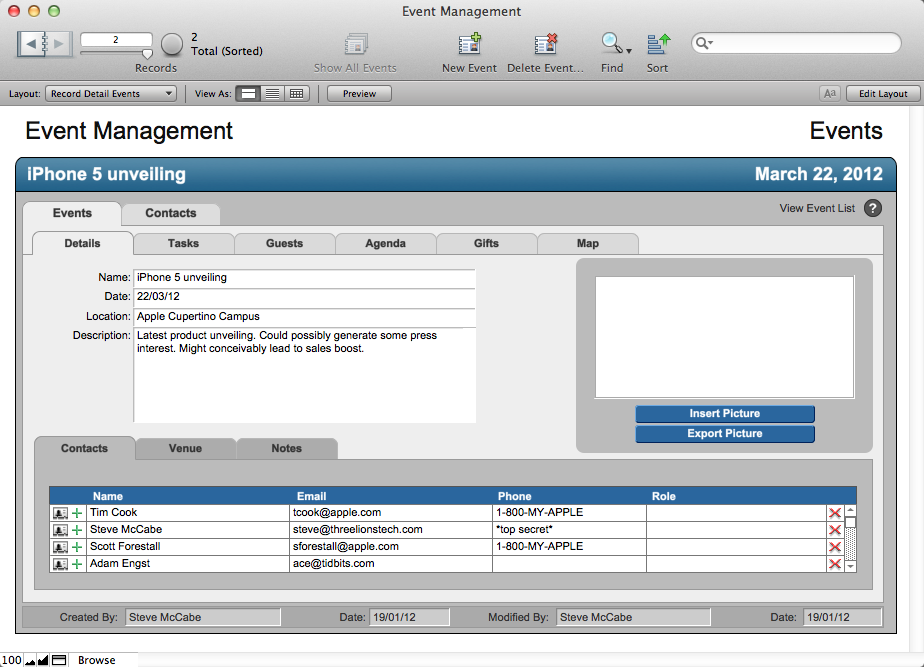
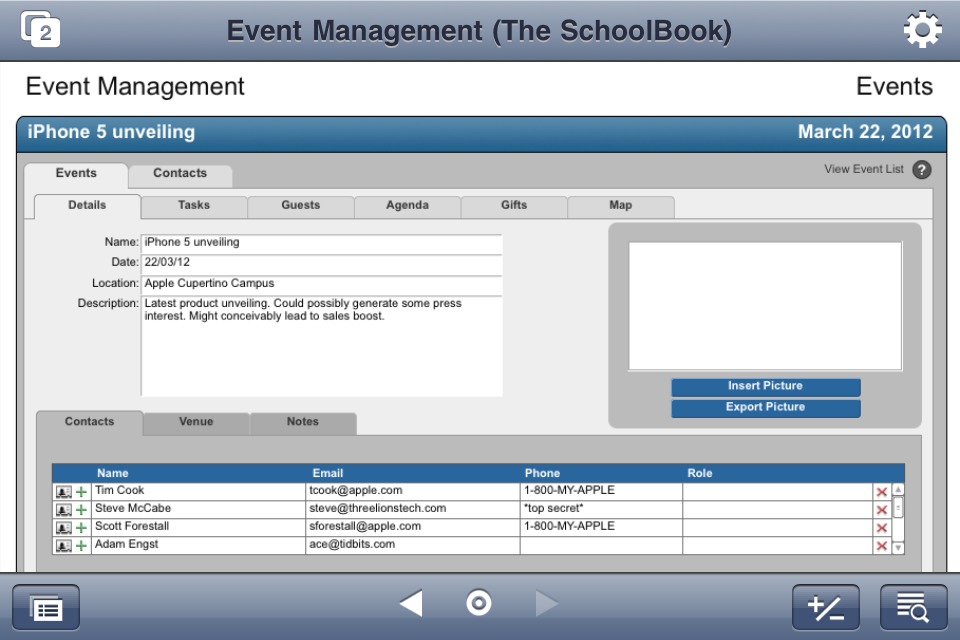
The small iPhone screen means less data is visible, and scrolling lists of related data presented in a portal can be viewed only with difficulty — the scrolling navigation cues that are comfortable on a desktop or laptop computer’s screen don’t scale well to the iPhone’s screen. Therefore, layouts have to be designed carefully, and cunningly scripted sequences of forms become the most practical way of manipulating data. To help with that, FileMaker’s Get(SystemPlatform) and Get(ApplicationVersion) script functions can be called to identify an instance of the database running on FileMaker Go, and the database can then be scripted to switch to a mobile-friendly layout. Compare the top (desktop FileMaker Pro) and bottom
(FileMaker Go on the iPhone) screenshots below.
Data structures also need to be prepared quite thoroughly, because once a database has been loaded onto an iPhone, its database schema can’t be changed there. Although records in any FileMaker table can be modified (if the user has the right access privileges), that is the extent to which FileMaker Go can interact with the
data. Tables can’t be added or deleted, nor can fields, and relationships between tables cannot be modified. Scripts can be run, but cannot be written or edited. Similarly, any layout can be made accessible to the iPhone (although not all layouts will be suitable), but they cannot be modified on the iPhone.
Databases, therefore, need to be prepared in FileMaker Pro on a desktop computer and then transferred to the iPhone via one of two methods. If a database is shared, either using FileMaker sharing under FileMaker Pro or via FileMaker Server, then FileMaker Go can access it in much the same way that a desktop version of FileMaker Pro would; that is, by using a file-browser interface on the iPhone that offers a list of all available files on a selected server. The major advantage of this method is instant updating — since FileMaker Go is interacting directly with the database on the server, updates made to the data with the iPhone app are automatically updated live on the server, and those updates are then reflected on any other clients
that happen to have the database open.
FileMaker Go can access shared databases over a Wi-Fi or a cellular data connection. This means that a salesman on a sales call, for example, can check inventory or the status of an order from his iPhone — provided that he has a decent Internet connection and his company’s database is shared over the Internet, of course.
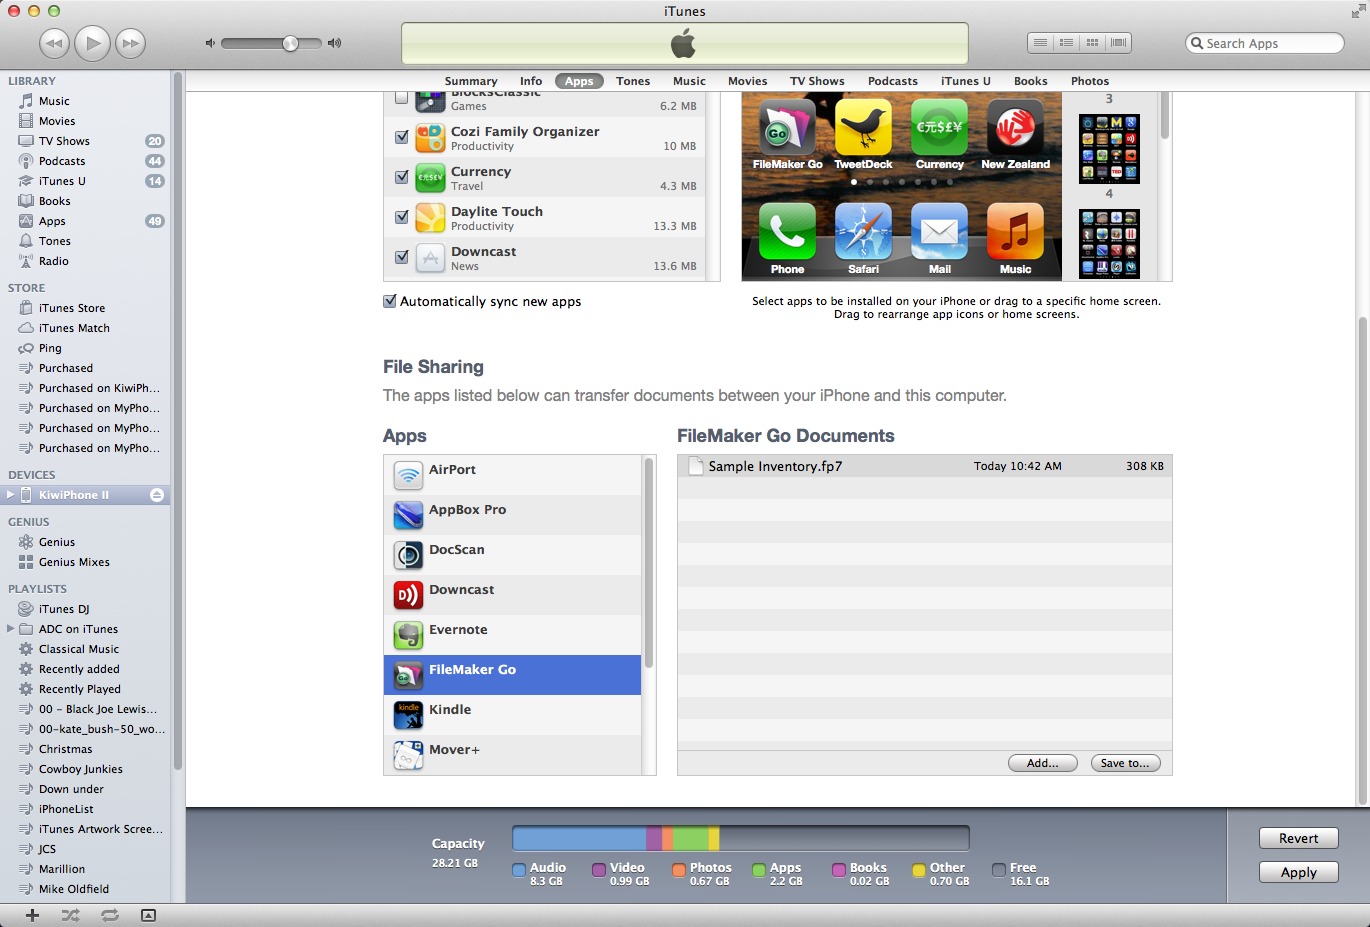
Databases can also be synced to an iPhone via the Apps tab in iTunes. Databases installed this way reside entirely on the device, not on a server, and so changes made locally stay local until the file is copied back to the computer to which the device syncs.
Layout compromises aside, FileMaker Go does offer a couple of new opportunities for capturing data. Container fields in FileMaker Go databases can contain the same variety of data as their desktop counterparts, but data entry becomes a little more interesting.
Tap a container in Browse mode and, in addition to the obvious Choose From Library option, two new data sources are available. Take Photo enables the user to take a photo — but not a video — with the iPhone’s built-in camera (front or back, if it’s an iPhone 4 or 4S), with a button offering a choice of full, large, medium or small file sizes and resolutions. A third choice, Get Signature, offers a plain white screen with a horizontal (in landscape mode) line labeled “Sign Here.” Sign with your fingertip (or a stylus), and then tap either Clear to try again — it’s not easy to sign legibly with your finger — or Accept to place your signature in the container field. Once a container field is filled, a tap on its contents
reveals two additional options, Email and Open.

The ability to use fully scriptable databases on an iPhone offers interesting possibilities beyond simple database manipulation. There is a small degree to which FileMaker Go could be considered a development platform for iOS, offering developers, as it does, the capability to build rich and complex solutions that can then be ported to the iPhone simply by syncing, rather than having to develop from scratch using Objective-C.
Database-like applications have been available on the desktop for some time now, with FileMaker Pro Advanced, née Developer, having the capability to generate stand-alone applications encapsulating the functionality of a database. The significant difference with iOS devices is the fact that stand-alone solutions are not possible — you must be running FileMaker Go on your iPhone or iPad in order to access the database, but that’s not a massive price to pay in order to develop, quickly and quite easily, a custom iOS “app.” FileMaker claims they’re apps; they’re not, of course — they’re documents. They’re rich and complex documents, granted, but they’re still documents.
Unlike Bento, the iOS versions of which are limited to sharing data only with Bento on the Mac, FileMaker Go is a solution many FileMaker users have been waiting for since the day Steve Jobs announced third-party apps on the iPhone. (For more about Bento, see the various articles TidBITS has published about the software.) Despite the inevitable layout and design compromises that the small size of the iPhone imposes on the FileMaker developer, FileMaker Go for the iPhone is a solid piece of software that integrates well with the existing FileMaker universe. Why Apple keeps it at arm’s length remains a mystery.
[Steve McCabe is a Mac consultant, tech writer, and physics teacher in New Zealand. He writes about his adventures in New Zealand, he blogs about technology, and he has just finished rebuilding his personal Web site.]
Strategies for Switching from Word to Pages
Last year, when the Take Control ebook series migrated from Microsoft Word 2008 to Pages ’09, I faced the challenge of not only acquainting myself with an unfamiliar piece of software, but also of helping a group of authors make the switch, all while under time pressure to keep up with Apple’s breathless product-release schedule. (If you are curious about why we chose to switch, or about our EPUB-savvy production process, see “How Take Control Makes EPUBs in Pages,” 30 September 2011.)
Now that the commotion from the transition has died down, I want to share the strategies we used in switching from Word to Pages, along with some of my favorite Pages tips.
Look at the Bottom — A classic mistake of the long-time Word user switching to another program is to assume that if you look long enough in the menus and dialogs, you’ll encounter all the important commands available (that’s even more true if you include Word’s Customize Keyboard dialog, which lists a wealth of obscure commands). In Word, you can use the menus and dialogs as training wheels and pretty soon you’ll start using keyboard shortcuts for commands that you choose often.
This approach failed dismally in Pages. In Pages, key functions are stuck hither and thither in the user interface and there is no apparent reference that lists them all.
Important options appear at the lower left of a Pages document, in a location that is precariously close to the Dock with a full-height Pages window and a horizontal Dock. I’ll explain the three options I use, but note that there is also a checkbox in the Pages General preference pane to show the word count in this lower area; I work with that turned off.
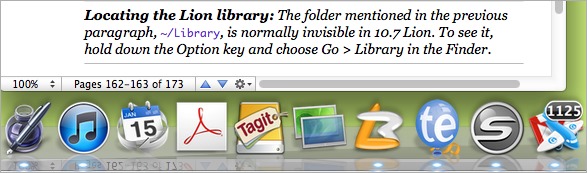
The leftmost pop-up menu lets you change your zoom level and how many pages are showing at once. Although Pages does have a Zoom command in the View menu, it won’t let you choose a specific zoom percentage and it lacks the pop-up menu’s One-Up and Two-Up commands that control how many pages appear. I like to work at 100% with two pages showing, but many other Take Control folks prefer a higher zoom level in only a single page, so each time one of us opens the file, the zoom and display layout must be adjusted, which can be done
only from this little pop-up menu.
The Pages area in the bottom window border turns out to be clickable. Click it, and a “Go to Page” box appears where you can type the page number that you want to move to. Again, you can’t access this navigational control from any normal menu, dialog, or keyboard command.
The Scroll To triangles and associated gear menu that appear next are incredibly valuable. You use the gear menu to set what the triangles do. For instance, they can advance you to the next comment in the document, or the next hyperlink. If you want to flip through all the comments in a document quickly, this is where to work.
Reveal Hidden Track Changes Toolbar — Another popular chunk of interface real estate for a group of people working on a document is the Track Changes toolbar, which you can bring up by choosing Edit > Track Changes or by clicking the Track Changes button on the main toolbar. The Track Changes button isn’t present on the main toolbar by default, but you can customize the toolbar with View > Customize Toolbar or by Control-clicking it and choosing Customize Toolbar, just like in other Apple applications.

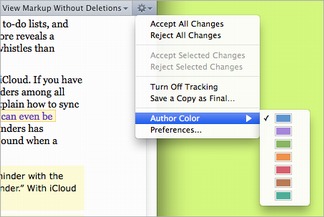
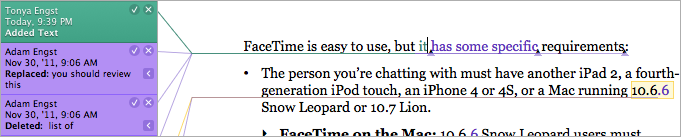
The Track Changes toolbar has two pop-up menus on its right side that most Take Control people failed to spot on their first few rounds of writing or editing. The View Markup menu controls the extent of tracked changes that you can see, which is essential for hiding your tracked deletions (you might think you could hide them using the Deleted Text menu in the General preference pane, but you’d be wrong). The gear menu gives you commands to accept or reject changes wholesale, and it is useful for picking the
color of your change-tracked text. (I have a great deal of fun monkeying with the colors; the second figure below shows Adam editing in purple and me editing in green; comments are always in yellow.)
To establish a comfortable workflow with the commands available only in the Track Changes toolbar, I had to extend myself outside the confines of Pages because I needed keyboard shortcuts for some of its functions, particularly for accepting changes and for toggling track changes
on and off, both functions that I might invoke hundreds of times in a typical day. I finally turned to Keyboard Maestro to create macros that give me keyboard shortcuts for those actions.
One warning. It’s not uncommon in a workgroup situation to end up with two copies of a file, each with marked changes. There is, unfortunately, no way in Pages to copy text between files and retain marked changes, or to compare two documents to identify changes between them.
Inspect the Inspector — The Inspector is a panel that comes up if you choose View > Inspector (Command-Option-I) or click the Inspector button on the toolbar. Many Pages options are available only from the Inspector, and the Inspector has a bank of tiny buttons at its top, which you click to switch between the different panes of options. I find working with the Inspector easy now, but for the first month it felt slow and cumbersome.
Frustratingly, each of the Inspector panes is a different size. I like to keep the Inspector open, for faster access, but it seems that as soon as I get it in the right spot on my screen, I switch panes and it becomes the wrong size for that spot. Some authors get around this by opening multiple copies of the Inspector with View > New Inspector. Personally, I wish the Inspector would open to one size and then lock onto an edge of the Pages window in a neat way, as palettes in InDesign do, since all too often I wind up
with it in the way of something else. (Word has a similar problem with its Formatting Palette, but since most of its functions are available in other ways, you can keep it closed most of the time.)
Rummage around in the Styles Drawer — Another exciting chunk of Pages real estate is the Styles drawer, which can be opened from the View menu, with a keyboard shortcut, from a button on the Format bar, or with a non-default toolbar button. Within the Styles drawer, it took me a while to realize that an accurate hover over the right of a style name would reveal a tiny triangle pop-up menu and it also took a while to be able to click that minuscule menu reliably on the first click. It all seems easy now, but at first it required persistence.
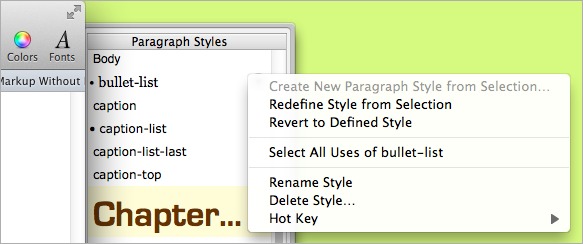
Eventually, I made that menu open enough times and absorbed its capabilities to the point where I tried the Hot Key command, which lets you assign a function key (like F3, say) to a style, so that you can apply it by pressing a key on your keyboard. However, most of the Take Control crew already have our function keys assigned to other functions. Third-party software again came to the rescue, this time in the form of AppleScripts for popular styles — each writer could install the scripts on his or her Mac and then use a macro
utility (such as Keyboard Maestro or QuicKeys) to assign a keyboard shortcut to each script. In case you’d like to try this, here’s an example:
tell application "Pages"

set mySel to (get selection of front document)

set paragraph style of mySel to "Chapter Name"

end tell
(Chapter Name is the “Heading 1” style that you must assign to your top level headings when exporting an EPUB from Pages.)
Although we read the manual and searched high and low in Pages, we’ve yet to find a way to configure a paragraph or list style by hand, by selecting the various attributes that we’d like it to include. This is sort of possible when creating (but not editing) a new character style by choosing Create New Character Style from Selection from the None character style’s pop-up menu and then expanding the Include All Character Attributes control. But there is no equivalent to the technique in Word where you choose Format > Style, then click New or Modify and select all the style details via checkboxes and menus. Instead, you must make a paragraph or list look the way you want and then redefine the existing style. Wacky.
My Kingdom for an Outline! — A great feature in Word, and one that I am sorry to have left behind, is the Navigation bar, which has been given different names in different versions of Word, all while remaining functionally the same. You open it as a left-hand bar in the Word window, and it shows the outline of your entire document, as long as you’ve used Word’s built-in heading styles (any experienced Word user will always use those built-in styles — they are Word’s crown jewels with their elegant integration with the Table of Contents feature and full, useful Outline view; Pages has a decent Table of Contents feature, but doesn’t begin to compete with Word’s
Outline view).
In Word’s Navigation bar, you can see the “forest” surrounding the “trees” of what you are reading at all times, and you can even edit the headings right in the Navigation bar. So, if you are in the middle of a chapter and deeply into a set of Heading 3 level topics, and suddenly the manuscript starts alternating between Heading 2 and Heading 4 level topics, you know you are in trouble and can adjust immediately. You can also click any line in the Navigation bar to jump to the corresponding heading.
Alas, Pages has no such organizational navigation interface, Also, because Pages has neither a Back command after clicking a link nor any other sensible way to jump back and forth between two sections of a document, we are finding it challenging to get around in longer documents.
To simulate the Navigation bar in Pages, some of us have taken to displaying the View > Page Thumbnails bar at the left, expanded as large as possible (drag its right border). It gets large enough that you can read the text in its thumbnails. I like to open it to the table of contents pages, so I can see the “outline” there, and sometimes I open another copy of the manuscript in a separate document window so that I can more fully view the outline or a second portion of a manuscript.
Unfortunately, all of these workarounds pale in comparison to Word’s Navigation bar and, frankly, the quality of the link-based user navigation in the Take Control series has decreased slightly because of this, because it is so much more difficult for authors and editors to determine where a possible link might lead.
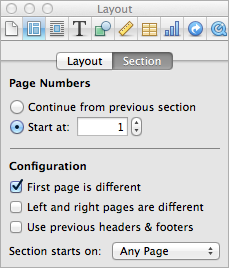
Find the Documentation — Another classic strategy for learning a program deeply is to read the manual or some other form of documentation. I have read the entire Pages manual, and I found it frustrating because, while it does document how Pages is supposed to operate, it doesn’t clarify which features that you might expect in a word processor are not present. (To be fair, very few programs document their shortcomings.) Also, I’ve found some features to be a bit dodgy, most notably section breaks and style modifications, and I can’t figure out if it’s me or a bug in Pages; the manual doesn’t provide examples or describe common use cases.
You can find the manual by choosing Pages > Help, but if you plan to refer to it often, I suggest downloading the PDF and storing it somewhere handy.
A useful resource for ebook publishers is a short document published by Apple called “ePub Best Practices for Pages,” which you can download from a link in the Apple support note “Creating ePub files with Pages”. The document mentions the handful of styles that you need to use in a Pages document slated for EPUB export and notes the all-important fact that graphics in such a document must be inline, not floating.
It took time to learn that the best way to place a figure-sized graphic as inline is to first create a paragraph formatted so that the “Line” is “At Least” a specified line height; the “At Least” setting allows the line height to increase to the height of the graphic (open the Inspector, click the T (for Text) button, click the Text button). Once you have the proper line height format set, press Command while you drag the image file in from the Finder.
Another useful resource is the Pages Apple Support Community, which I’ve visited several times to ask questions and to try to help out by answering a few. If you have Pages questions, this is a good place to ask.
Work with Great People — Although it was fairly easy to write this article, it was not easy to learn everything that I’ve mentioned in it. It would have been all the harder had I not been part of a small working group of smart and good-spirited people who could commiserate with my woes and sometimes point out options that I’d overlooked.
I could write a great deal more about the fine points of Pages and working with change tracking, about how I had to make a macro in order to insert a comment without the timestamp being pre-highlighted (such that when you start typing the timestamp disappears, unless the first key you press is the Right arrow key), about Pages versus Word templates, and more, but I have covered the main high (and low) points for now. If you have a Pages tip to share, please let us know in the comments.
TidBITS Watchlist: Notable Software Updates for 13 February 2012
Bookle 1.0.3 — Stairways Software has released Bookle 1.0.3, the recently debuted EPUB reader for the Mac that was developed in collaboration between TidBITS’s own Adam Engst and Peter Lewis of Stairways Software (see “Introducing Bookle, an EPUB Reader for Mac OS X,” 6 February 2012). This update fixes an issue where EPUB files could have “-Temporary” added to their display name as well as a bug that could cause the table of contents to disappear after resizing the window when using Mac OS X 10.6 Snow Leopard. Additionally, this release improves the discovery of display
names for older EPUB files. ($9.99 new from the Mac App Store, free update, 2.6 MB)
Read/post comments about Bookle 1.0.3.
Piezo 1.1.2 — Rogue Amoeba has released a minor update to their minimalist audio recording app Piezo, which fixes an issue that prevented the application from recording audio from Skype on the just-released Mac OS X 10.7.3. Piezo 1.1.2 also brings compatibility with recording audio from the Toktumi and MagicJack VoIP apps. The update is rounded out by an assortment of bug fixes and improvements. ($10 new, free update, 2.8 MB, release notes)
Read/post comments about Piezo 1.1.2.
Firmware Updates for iMac, MacBook Pro, and MacBook Air — Apple has released another batch of firmware updates similar in scope to the trio of updates from several weeks ago (see “Firmware Updates for Mac mini, MacBook, and 13-inch MacBook Pro,” 25 January 2012). The new iMac EFI Firmware Update 1.8 (mid 2010 models), MacBook Pro EFI Firmware Update 2.6 (early 2010 models), and MacBook Air EFI Firmware Update 2.3 (late 2010 models) updates, like the previous set, enable Lion
Recovery from an Internet connection (and all of them require Mac OS X 10.7.3 or later). Additionally, the MacBook Air update fixes an issue where the system could restart if the power button was pressed while waking from deep sleep. As with any firmware update, you should read the installation instructions carefully before installing. To ensure you get an update only if it’s necessary, we recommend relying on Software Update; if an update doesn’t appear for you, it’s not appropriate for your Mac. (Free, 3 MB)
Read/post comments about Firmware Updates for iMac, MacBook Pro, and MacBook Air.
Carbon Copy Cloner 3.4.4 — To celebrate the 10th anniversary of Carbon Copy Cloner, Bombich Software has released Carbon Copy Cloner 3.4.4 with a myriad of new features, tweaks, and fixes. The popular donationware disk cloning and backup utility now provides support for archiving and cloning the Lion Recovery HD partition, and it can now clone a Lion Installation disk image onto a physical volume. You can also configure scheduled tasks to wake or boot the system. The update also fixes bugs associated with remembering the last preset, scheduling tasks on the first of the current month, mounting a disk image under
uncommon permissions conditions, and many more. (Free update, 6.0 MB, release notes)
Read/post comments about Carbon Copy Cloner 3.4.4.
ChronoSync 4.3 and ChronoAgent 1.3 — Econ Technologies has released ChronoSync 4.3 and ChronoAgent 1.3, both major updates that feature extensive refinements to the link between the synchronization/backup application and its remote helper app. New features for ChronoSync include using SSL encryption when connecting to ChronoAgent 1.3, the capability to change the target folder/volume without losing state information from previous synchronizations, custom sync target names, and a function for restoring previously
synchronized files. In addition to gaining SSL support over multiple platforms, ChronoAgent has been updated to better handle multiple, simultaneous connections. Additionally, both titles are updated with Spanish, Portuguese, and Brazilian Portuguese localizations. Full release notes for ChronoSync and ChronoAgent are available. ($40 new for ChronoSync, $10 new for ChronoAgent; free updates; 29 MB, 8.1 MB)
Read/post comments about ChronoSync 4.3 and ChronoAgent 1.3.
ExtraBITS for 13 February 2012
This week we have some good stuff for you! Adam and his Bookle collaborator Peter Lewis joined Chuck Joiner of MacVoices to share the story behind their new EPUB reader for the Mac, Apple has announced special voluntary audits of Apple suppliers by the Fair Labor Association, our friend Dan Frakes at Macworld has finally figured out how to make a bootable Lion installer for new Macs, Instapaper developer Marco Arment blows the whistle on how apps are allowed free access to your iOS contact and calendar databases, and we learn that iTunes Match really is paying some royalties to copyright holders.
Learn More about Bookle’s Background on MacVoices — Peter Lewis of Stairways Software may be in Australia, but that didn’t stop Chuck Joiner from bringing him together with Adam Engst to talk about their joint release of the Bookle EPUB reader for the Mac. If you want to hear some of the background story about how Bookle came to be, what restrictions are placed on it by the Mac App Store, and how the large companies are using DRM these days, tune into this MacVoices podcast.
Fair Labor Association to Inspect Apple Suppliers — Following weeks of heated discussion over working conditions that included some protests, Apple announced that it has asked the Fair Labor Association (FLA) to begin special voluntary audits at the company’s final assembly suppliers, including Foxconn, Quanta, and Pegatron.
Action-Packed Instructions for Creating a Bootable Lion Install Drive — Dan Frakes at Macworld details the steps for creating a bootable installer disc or drive for Mac OS X 10.7 Lion, which is important especially for Macs that debuted after the release of Lion (as they don’t include a downloadable version of the installer). While nicely thorough and practical, it’s also notable for a hair-raising maneuver to avoid re-installing Mac OS X and zapping your Mac’s PRAM.
Does iOS Give Apps Too Much Access to Your Data? — Instapaper developer Marco Arment says iOS gives him “far too much access to [the data in the user’s] Address Book without forcing a user prompt.” TidBITS staffer Matt Neuburg has said much the same thing in his Programming iOS book: what sense does it make that an app has to pass through all those Core Location permission gateways in order to access your photos, yet can freely and without notice examine, copy, and delete the information in your Contacts and Calendar databases?
iTunes Match a (Small) Moneymaker for Copyright Holders — Subscribers to Apple’s iTunes Match service are sending copyright holders “magic money,” writes Jeff Price at the blog for the TuneCore online music distribution service. And while not an overwhelming amount ($10,000 in the first two months, spread out across 55,000 TuneCore artists), Price points out that it is more than the null sum that artists were previously receiving.