How to Use Catalina’s Continuity Sketch and Continuity Markup
After pushing out a quick update to Take Control of Notes to address major changes in iOS 13, iPadOS 13, and macOS 10.15 Catalina, I realized that there were a few little things I’d missed in my haste, including a couple of little-publicized Continuity additions to macOS 10.15 Catalina. Another free update to Take Control of Notes will be out soon, but in the meantime, I’d like to tell you how you can take advantage of these new Continuity features, which aren’t limited to Notes.
Continuity is Apple’s umbrella term for a wide variety of technologies that let you integrate or switch between your Apple devices without missing a beat. They include features like AirDrop, Apple Pay, Auto Unlock, Handoff, Instant Hotspot, and Sidecar (see “Catalina’s Sidecar Turns an iPad into a Second Mac Monitor,” 21 October 2019). Catalina adds a couple of new members to the Continuity family: Continuity Sketch and Continuity Markup, which let you draw sketches and mark up files on a device running iOS 13 and sync that data back to a Mac running Catalina.
Continuity Sketch
If you’re familiar with the Continuity Camera features introduced in macOS 10.14 Mojave (see “How to Take Photos and Scan Documents with Continuity Camera in Mojave,” 27 September 2018), Continuity Sketch works much the same way. However, instead of letting you take a picture or scan a document with an iOS device, it lets you use your iOS device as a sketchpad for your Mac.
The same apps that support Continuity Camera also support Continuity Sketch, such as the Finder, Mail, Messages, Notes, Pages, and TextEdit. Here’s how to use Continuity Sketch:
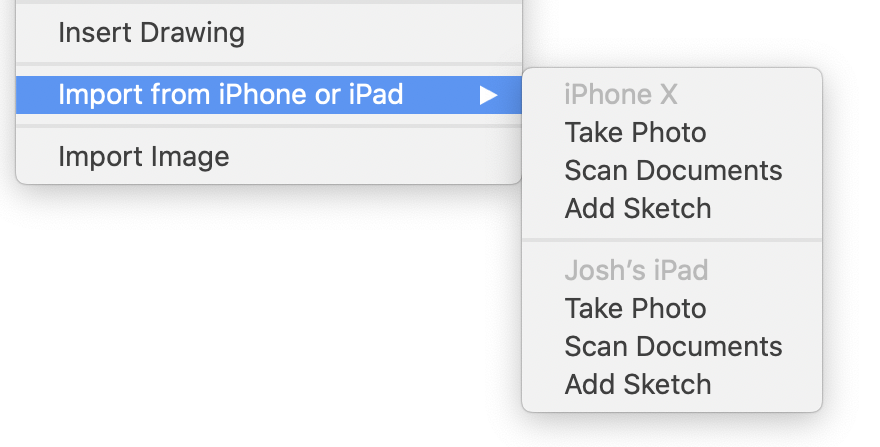
- Click File in the menu bar or Control-click. In Mail, you can Control-click in a compose window. In Messages, you can Control-click in the message field. In Finder, Control-click any blank area of the Desktop.
- Choose Import from iPhone or iPad > Add Sketch. If you have multiple devices available, the submenu will display multiple entries.
- Your iPhone or iPad should wake up to a sketch canvas. Draw your sketch using the onscreen tools (which I explain below).
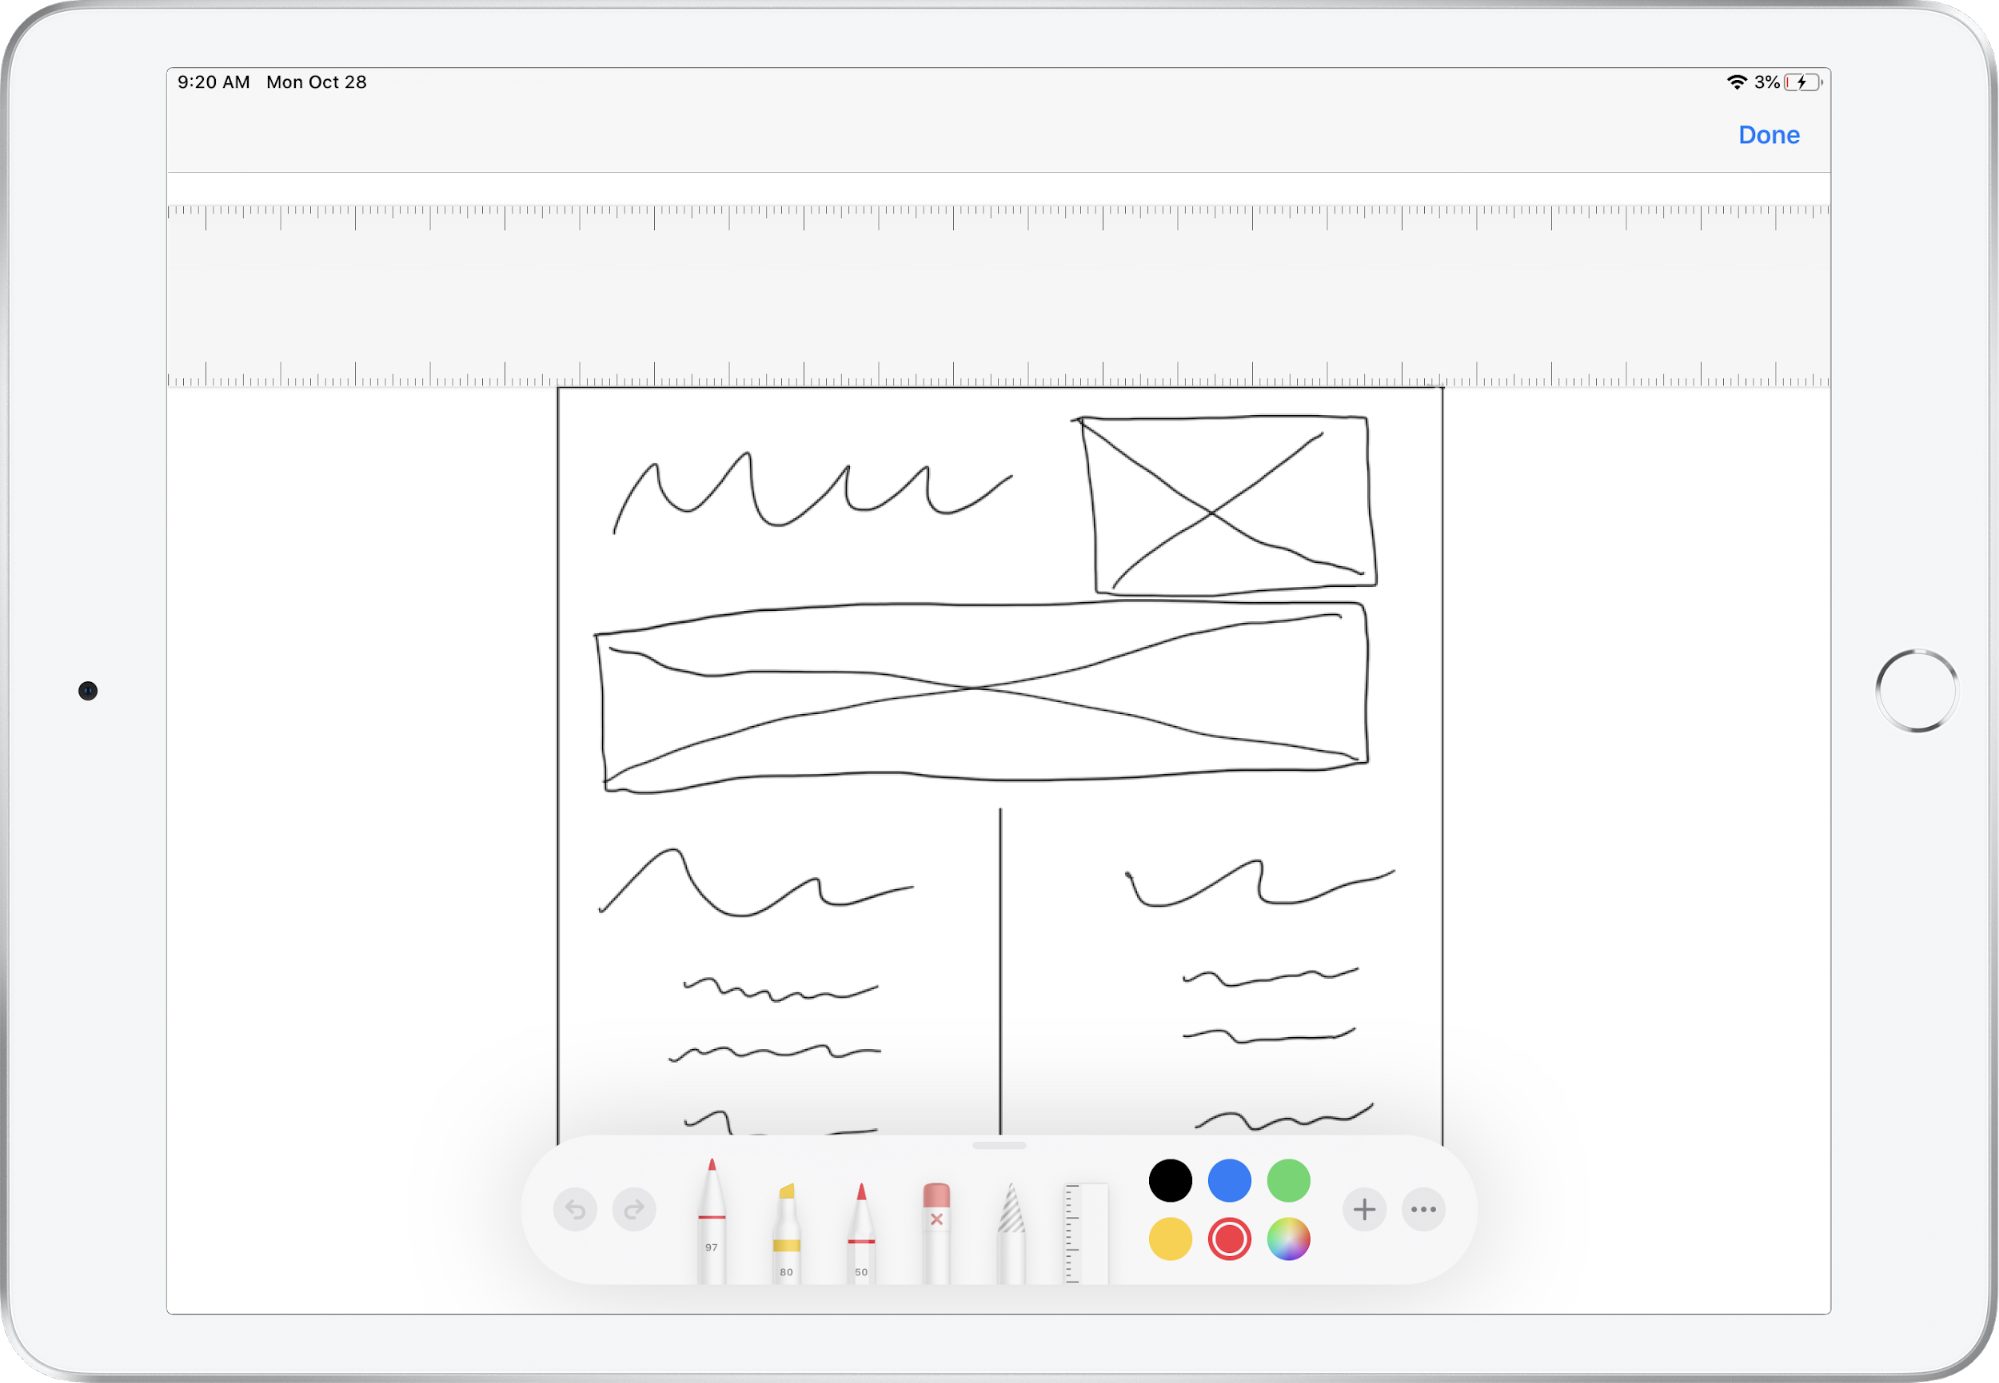
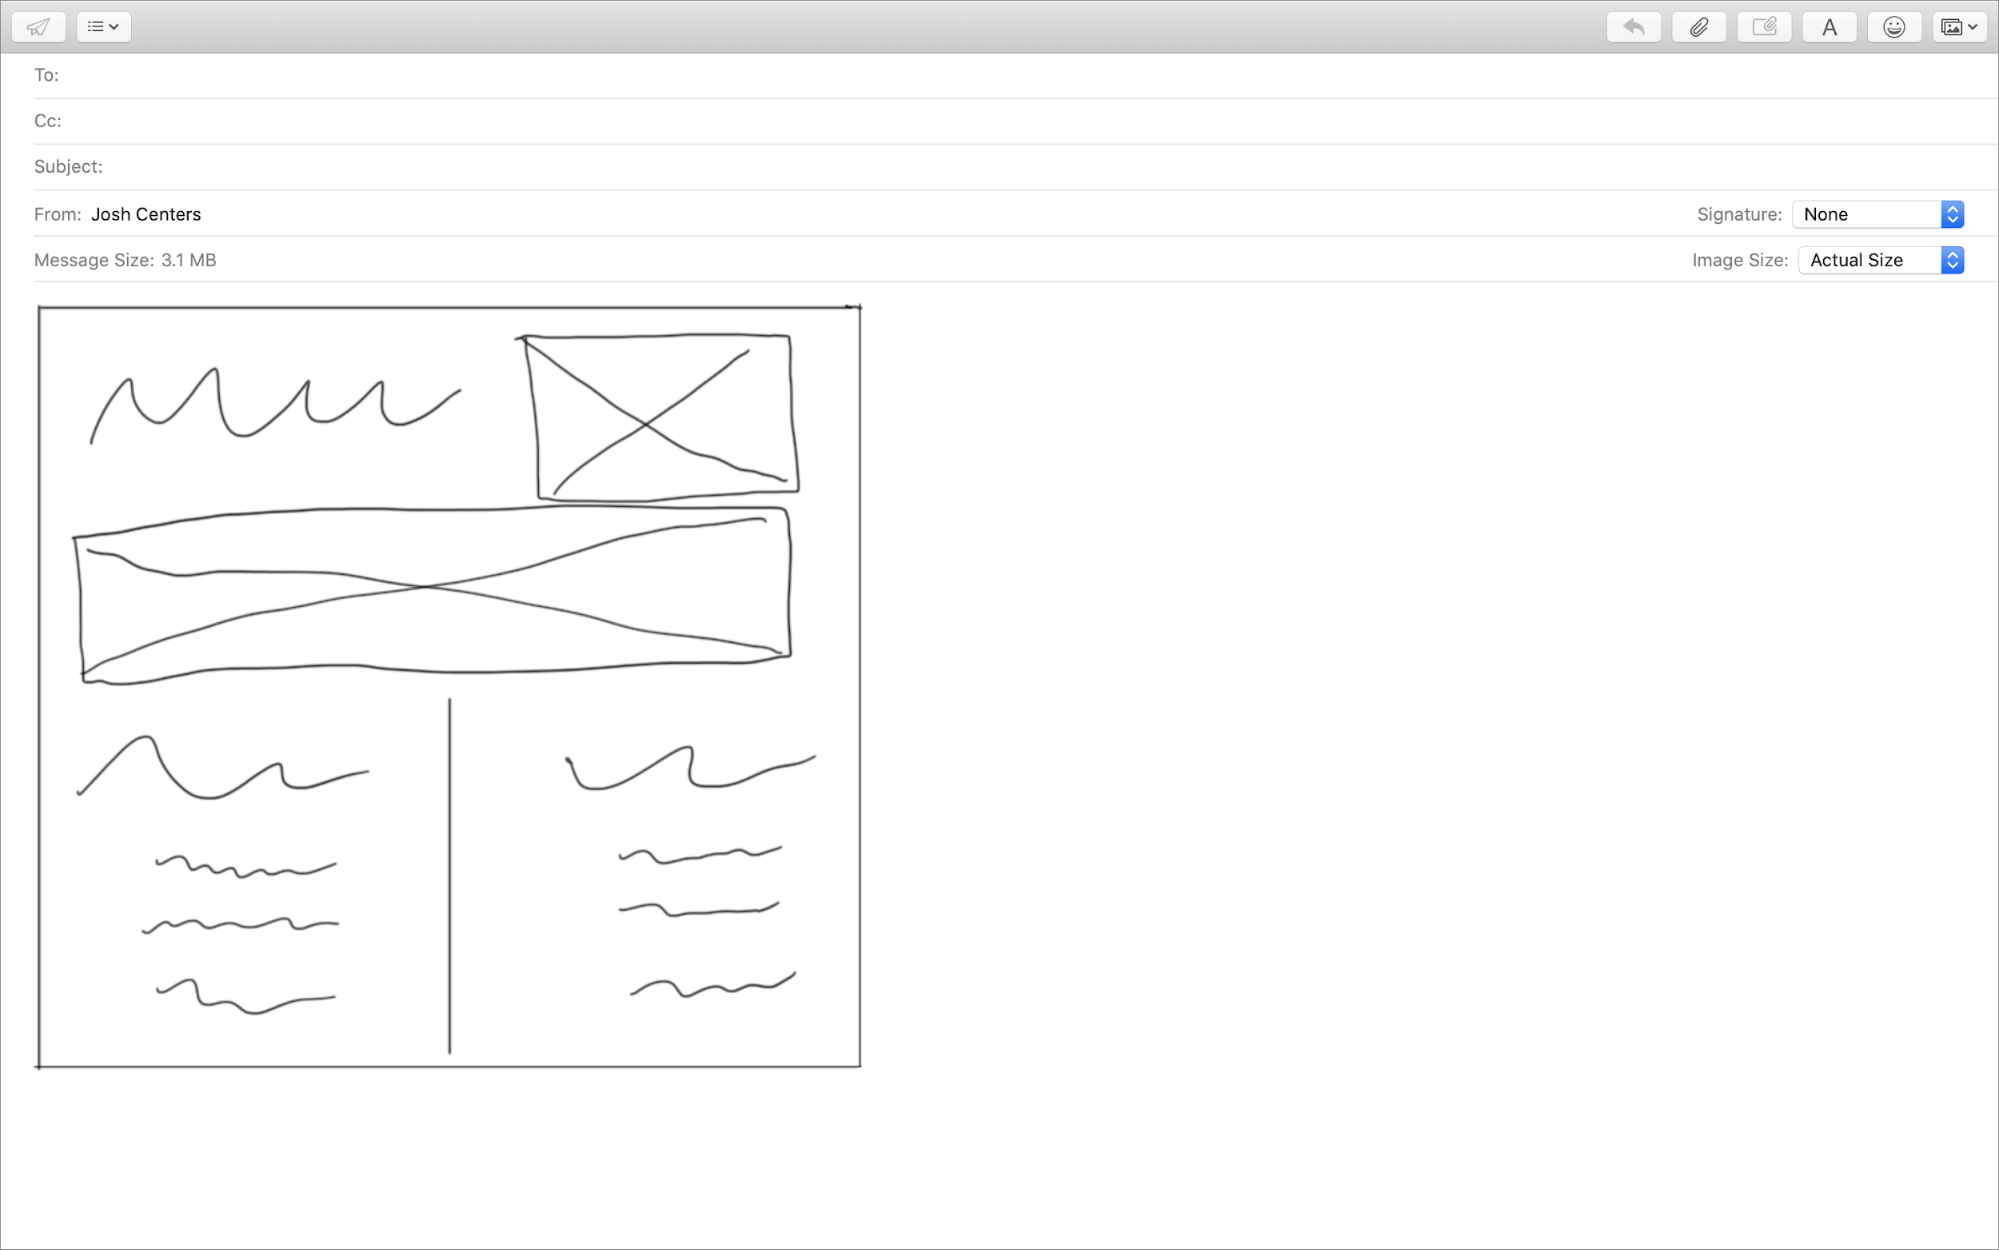
- When you’re finished, tap Done to send the sketch to your Mac and insert it in the app from which you called it.
Continuity Markup
Continuity Markup provides the same tools as Continuity Sketch, but it works differently. For one, it’s accessible only through Quick Look on the Mac. Also, unlike Continuity Sketch, where the sketch doesn’t appear until you tap Done on the iOS device, your scribbles on your iOS device show up in real-time on your Mac’s screen. Here’s how you use it:
- To activate Continuity Markup, first pull up an image or PDF document in Quick Look by selecting it in the Finder and pressing the Space bar.
- Click the Markup button in the Quick Look toolbar.

- In the markup toolbar, click the icon on the far right that looks like an iPad and Apple Pencil and choose your device from the pop-up menu.

- The chosen device will wake up, with the document or image in markup mode. Mark it up using the onscreen tools.
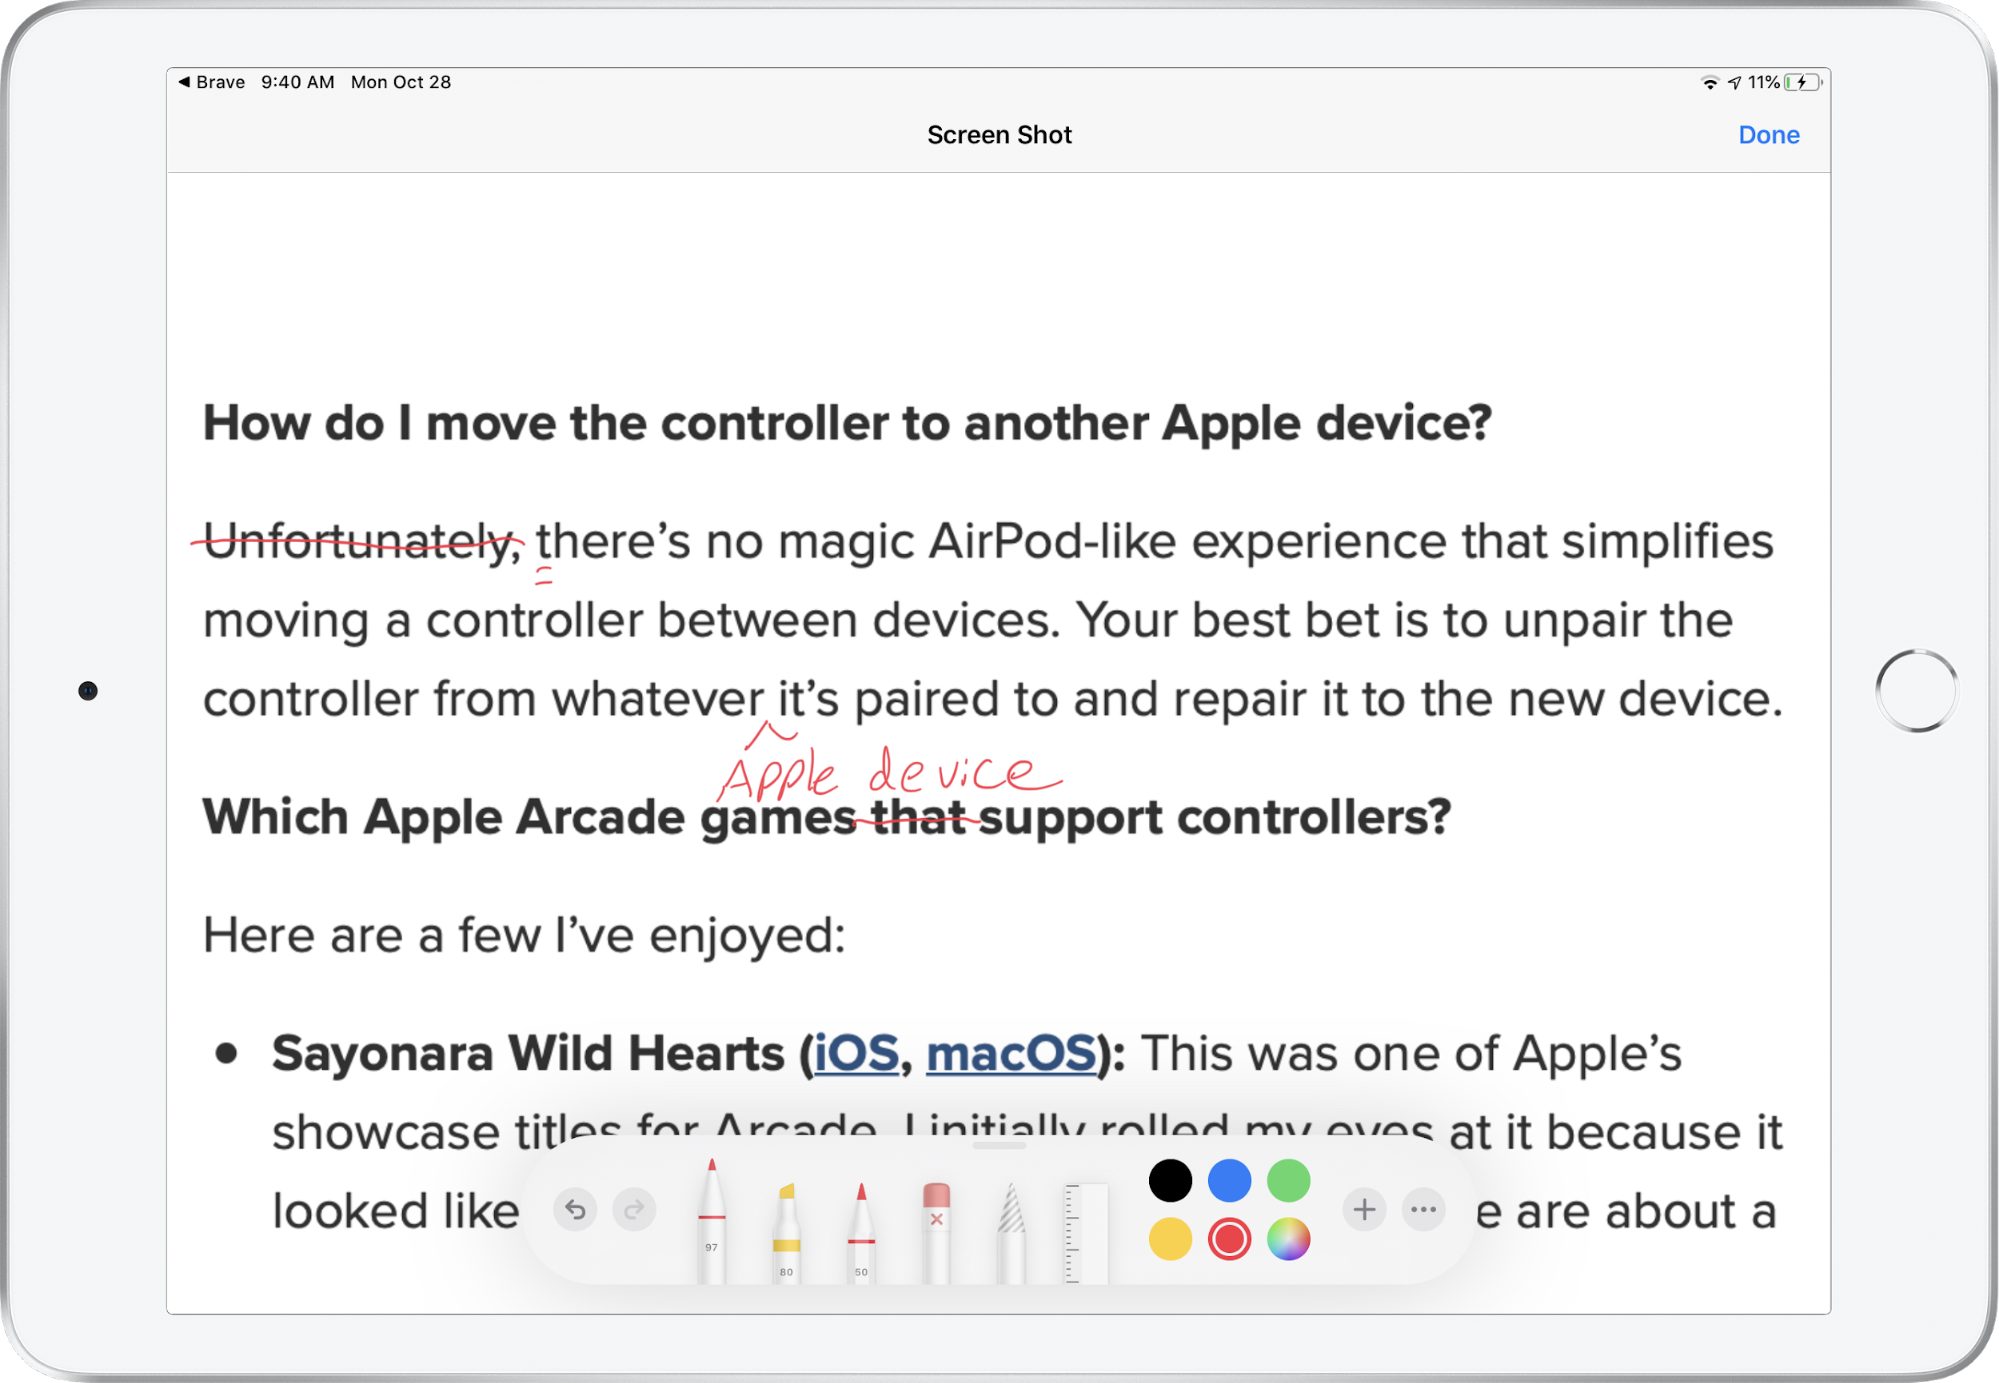
- When you’re finished marking up the image, tap Done to dismiss it from your iOS device.
- Back on the Mac, click Done in Quick Look to save your changes, or click Revert to undo them all.
Markup Tools
As noted, Continuity Sketch and Continuity Markup share the same set of tools on the iOS side. They appear in a palette at the bottom of the screen, and on an iPad, you can drag the palette to any of the four sides of the screen. And of course, if your iPad supports it, you can draw with an Apple Pencil.

Here are the tools, from left to right:
- Pen, Marker, Pencil: These three are the main tools you’ll use to draw on the screen, each with different thicknesses. Tap one of the tools while it’s selected to change its line style and weight or adjust its transparency.
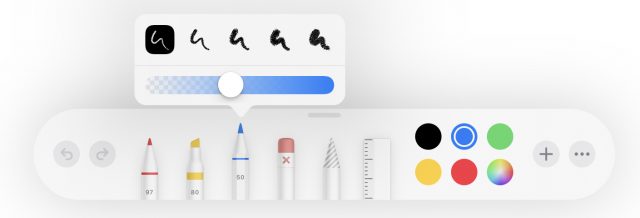
- Eraser: With this tool selected, tapping a drawing will erase it, which is called the Object Eraser. In iOS 13, you can switch to a pixel eraser, which works like a real eraser and lets you remove portions of the image, by tapping the Eraser tool again and then Pixel Eraser.
- Lasso: The lasso tool lets you draw around an object to select it. Once you’ve selected an object, you can drag it around the screen or tap it to see options to copy or delete it.
- Ruler: Tapping this tool displays a ruler, which you can move and rotate and then use to help draw straight lines at any angle by drawing along one side of the ruler. The line will snap to the edge of the ruler. Drag with one finger to move the ruler, and twist with two fingers to rotate it—it displays the angle while you’re rotating the ruler.
- More Tools: Sometimes you’ll see a plus icon in the palette. Tapping it reveals additional tools, which are extremely similar to Preview’s editing tools on the Mac:
- Text box: Tap this tool to insert a text box, which says Text by default. Tap the box and tap Edit to change the text inside the box. You can also use the Aa button in the palette to change the text style.
- Signature: If you’ve created a signature in Preview for signing digital documents, you can insert it here. Otherwise, you’re prompted to draw a new signature that will be inserted on the screen.
- Magnifier: This tool adds a circular loupe that magnifies whatever is under it. Drag the blue dot to adjust the size of the loupe and the green dot to change the level of magnification.
- Shapes: Tap these icons to insert the associated shape: rectangle, circle, speech balloon, or arrow.


I cover these tools and much, much more in Take Control of iOS 13 and iPadOS 13, Take Control of Notes, and Take Control of Preview, which I co-authored with Adam Engst.
Start the discussion in the TidBITS Discourse forum