Aerial Brings Apple TV Screen Savers to the Mac
One of the best features of the Apple TV is its Aerial screen saver. That’s not hyperbole—Apple always makes a big deal out of the new scenes it adds to tvOS, often promoting them as a marquee feature of major tvOS updates. If you have liked these screen savers on your TV, you can get them on your Mac, thanks to the free and open-source app Aerial.
I’m not sure how the development team gets away with it (Aerial is currently maintained by Guillaume Louel), but Aerial has been available for five years without interference from Apple. Which is a good thing!
Install Aerial
Full installation instructions are available on Aerial’s GitHub page, but they break down like this:
- Download the latest Aerial.saver.zip.
- Unzip Aerial.saver.zip if your browser hasn’t already done so.
- If it’s open, quit the System Preferences app.
- Double click Aerial.saver.
- Choose whether to install Aerial for yourself or for all users. The latter option requires your administrator password on install and every update and isn’t generally worthwhile.
After installation you’ll end up at System Preferences > Desktop & Screen Saver > Screen Saver. If necessary, select Aerial in the left-hand scrolling list. To configure its options, click the Screen Saver Options button.
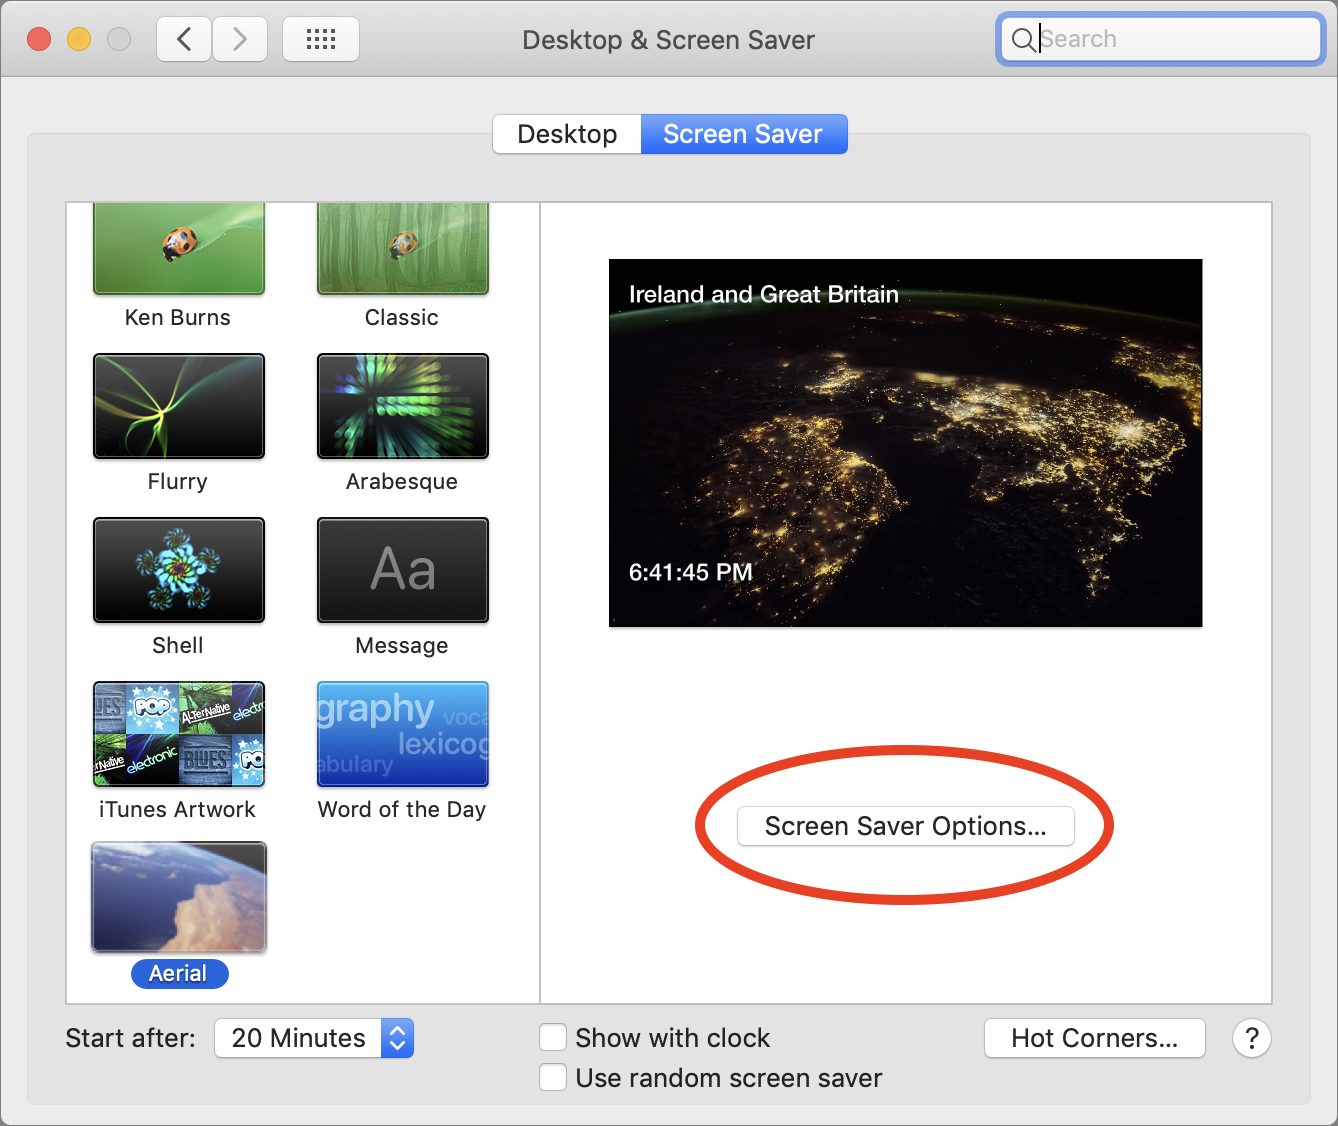
Aerial has a vast number of options. I’ll walk you through a few of the most important ones.
Configure Video Quality and Bandwidth Usage
Apple’s Aerial screen saver videos are beautiful but big, and by default, Aerial caches a new one from Apple every time the screen saver loads. If you have a bandwidth cap, you’re probably best using it on something else.
You can adjust Aerial’s Videos settings to make things look better, reduce bandwidth usage, and optimize CPU performance, but be warned that the number and specificity of the settings can get overwhelming fast.
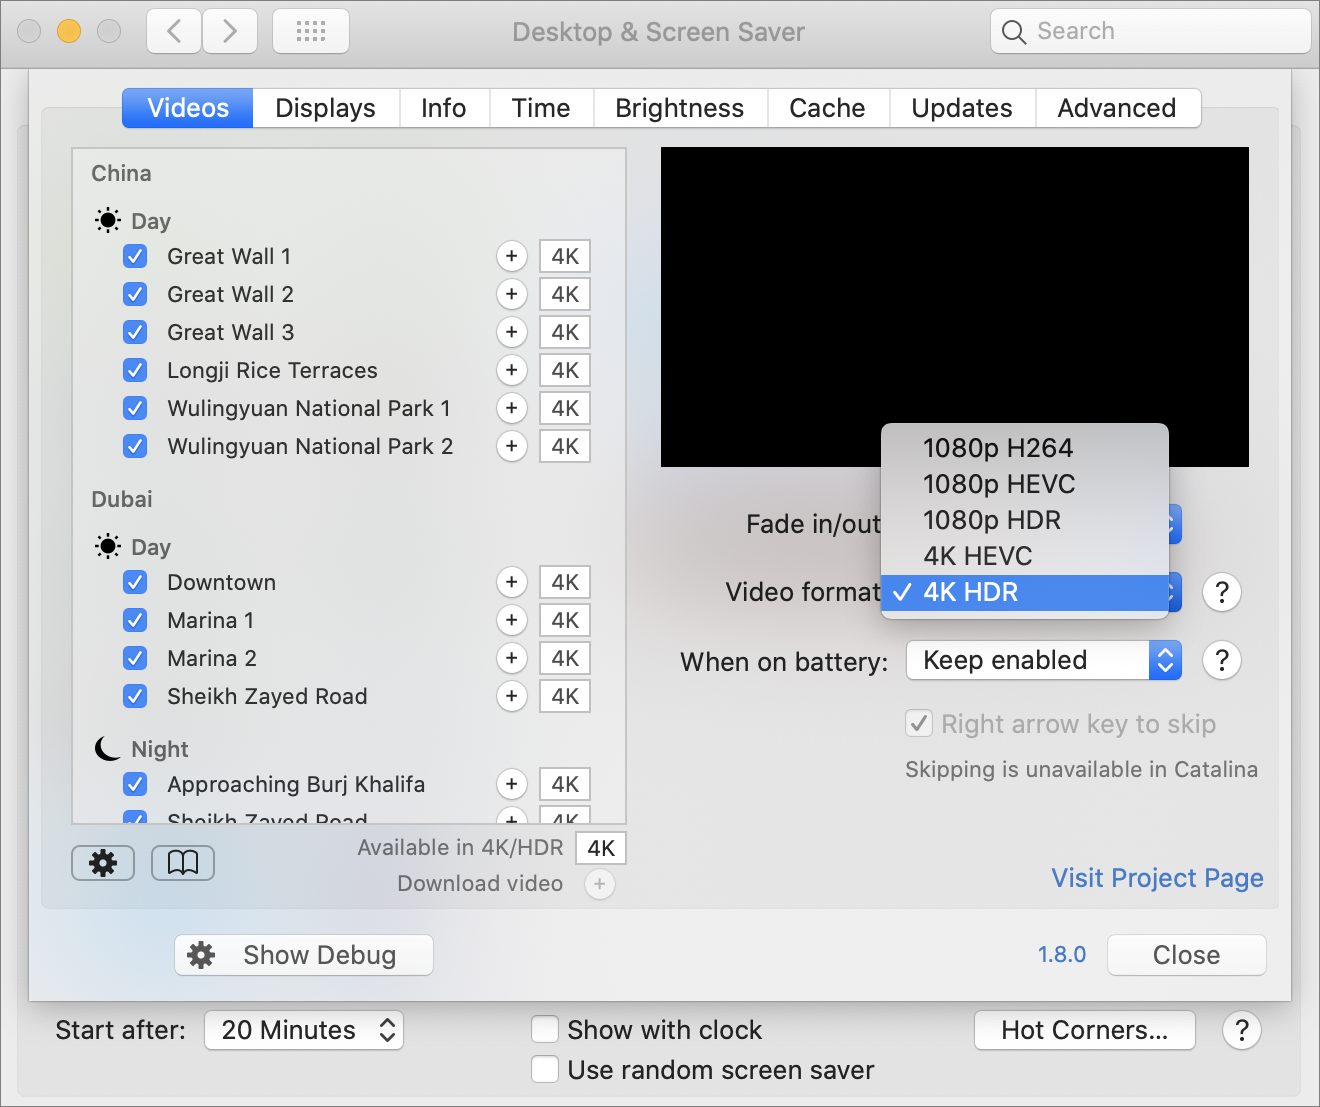
The main setting you want to look at here is in the Video Format pop-up menu. The default on my Macs was 1080p HEVC, which didn’t look as sharp as 4K resolution but also didn’t use as much bandwidth. This menu may have quite a few choices, so let’s break down what they all mean:
- 4K or 1080p: 4K resolution will look sharper, while 1080p will use less bandwidth.
- H264 or HEVC: These are encoding methods for video. H.264 is an older standard. HEVC is newer and allows for smaller video files with the same quality. If your Mac supports HEVC, go with that.
- HDR: If you’re running macOS 10.15 Catalina or later, your Mac can display video in HDR quality, which shows more colors but can look “weird.” I like it.
The best thing approach is to click the question mark button next to the menu, which tells you if your Mac supports H.264 and HEVC hardware decoding and provides information on all the various available formats. Then choose appropriately from the pop-up menu.
If you use a laptop, pay attention to the When On Battery pop-up menu. The default is Keep Enabled, but you can save battery by switching to Always Disable, which displays the Aerial screen savers when the MacBook is connected to a charger but switches to a dimmed, black screen when on battery. There’s also a setting that causes Aerial to disable itself when your battery life dips below 20%, which might be the most balanced choice. If you’re leaving your unplugged laptop alone with the screen open for more than a few minutes, you’re wasting precious battery life.
One way to save bandwidth is to cache just the videos you want. Select one on the left to see a preview. If you like it, click the plus button to download it. The checkboxes at the left let you enable and disable videos in the rotation—handy if there are some you don’t enjoy.
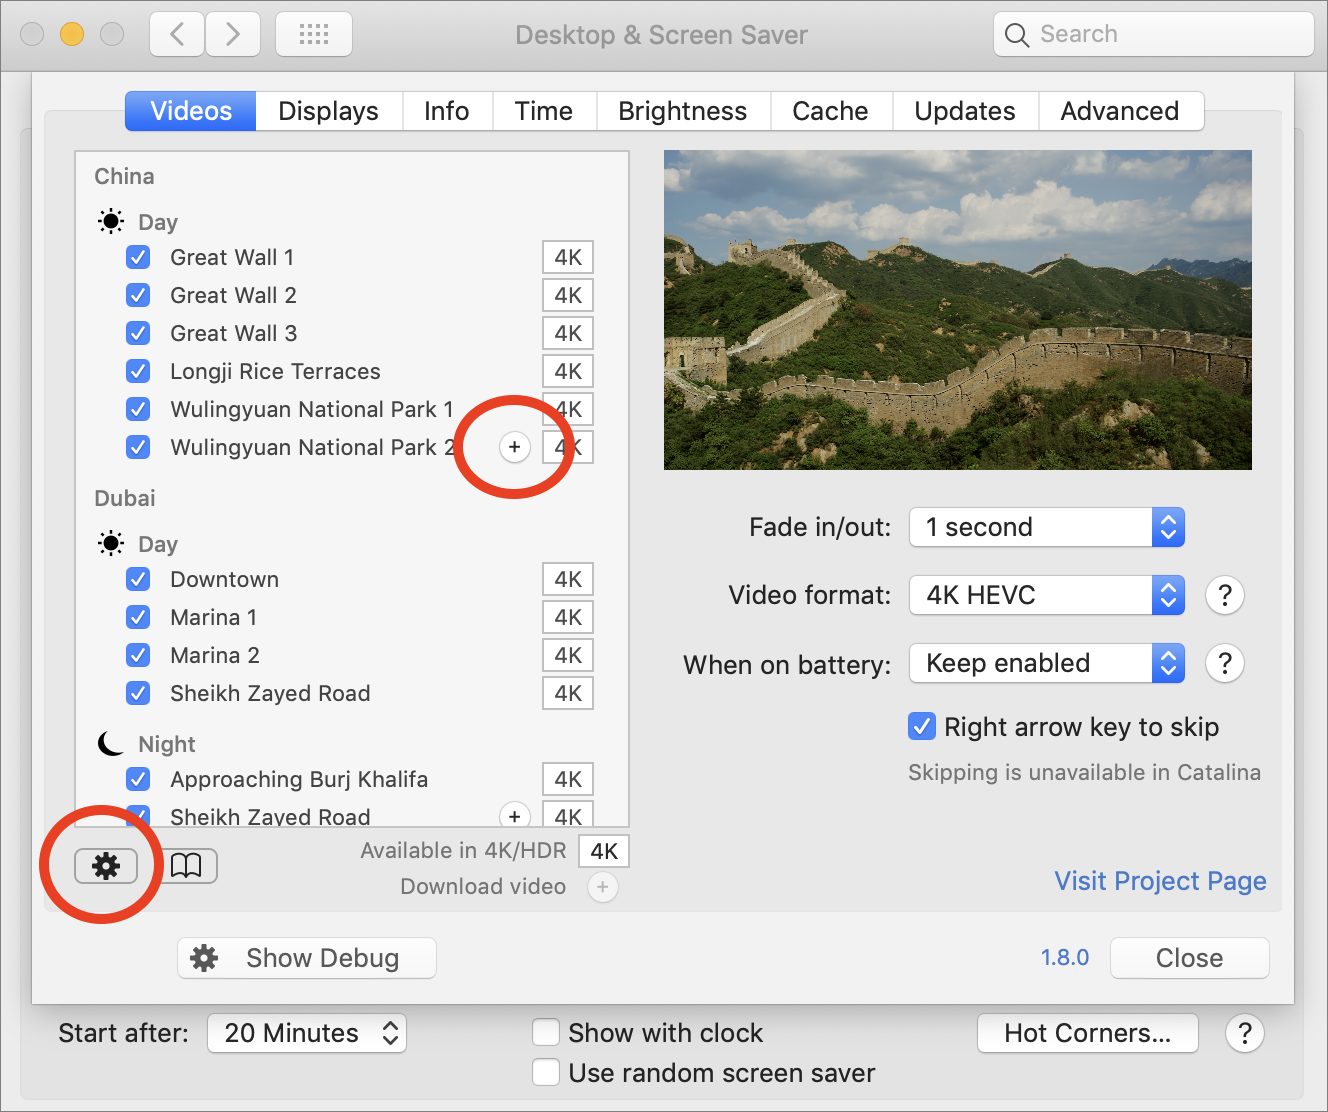
Here’s a tip: click the gear icon and choose Check Only Cached to play only the videos you’ve downloaded. If you want to remove a video from your local storage, Control-click it and choose Move To Trash.
By default, the Aerial screen saver randomly plays videos and caches each one. Over time, that can add up—I’m talking about gigabytes here. To manage Aerial’s local storage, go to the Cache screen, which lets you turn off automatic caching, download all the videos, and show the videos in the Finder so you can easily delete them.

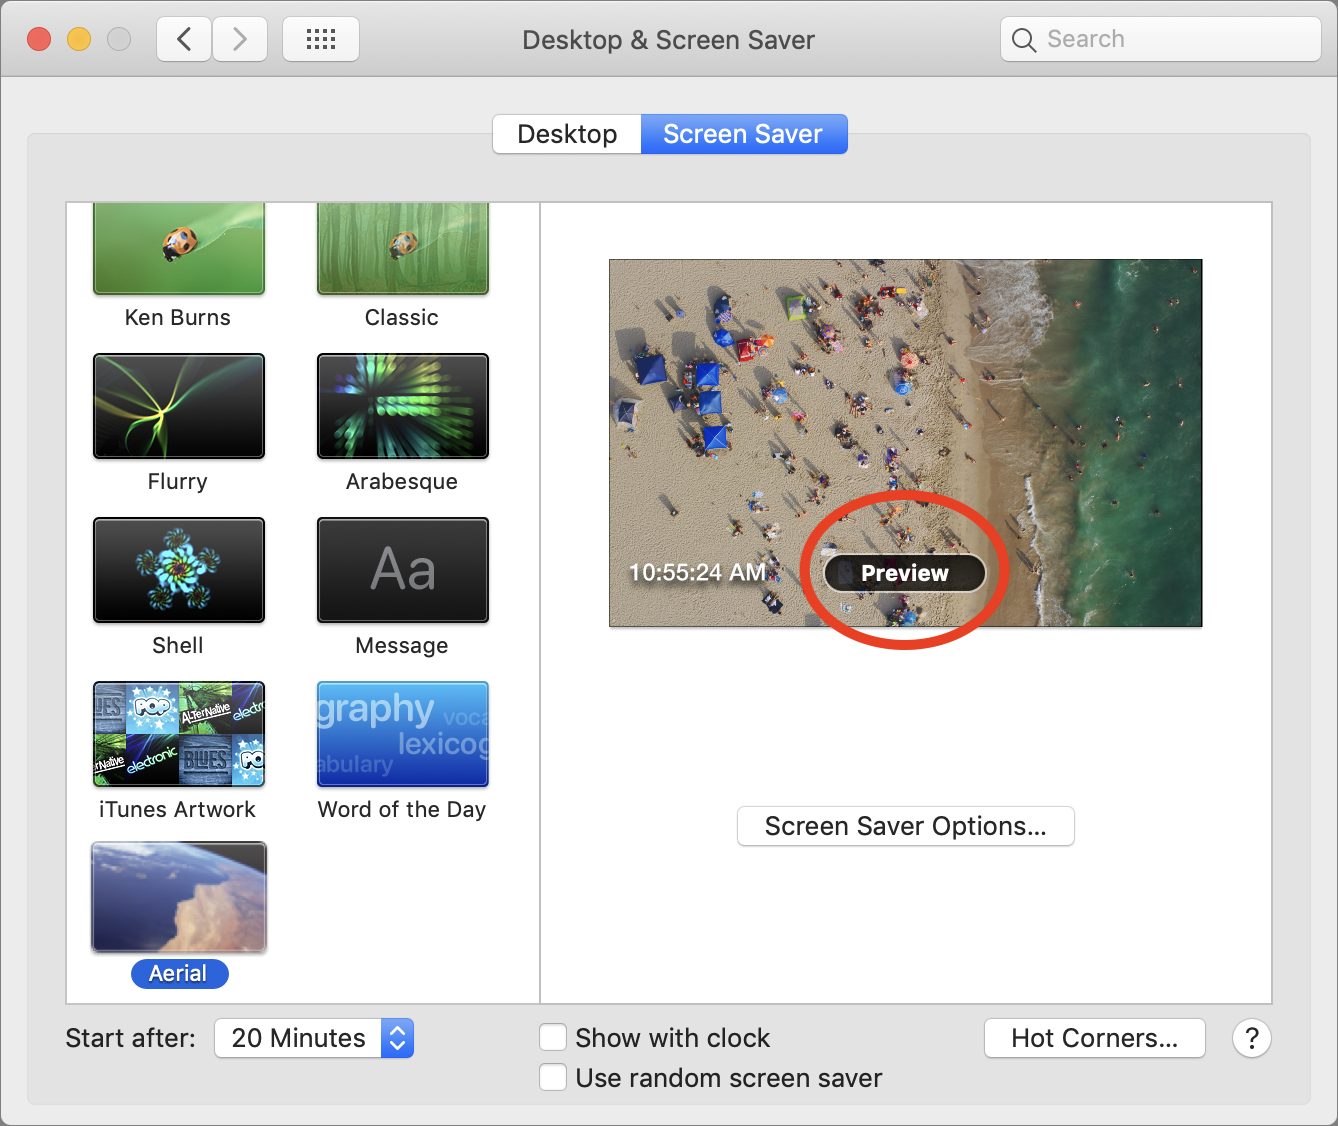
To preview the Aerial screen saver, return to System Preferences > Desktop & Screen Saver > Screen Saver, hover your mouse pointer over the preview thumbnail, and click the Preview button that appears.
Change Onscreen Info
The Aerial screen saver can show additional information on the screen while it’s playing Apple’s videos. By default, it shows the current time and the location of the video. You can configure what appears in the Info screen.
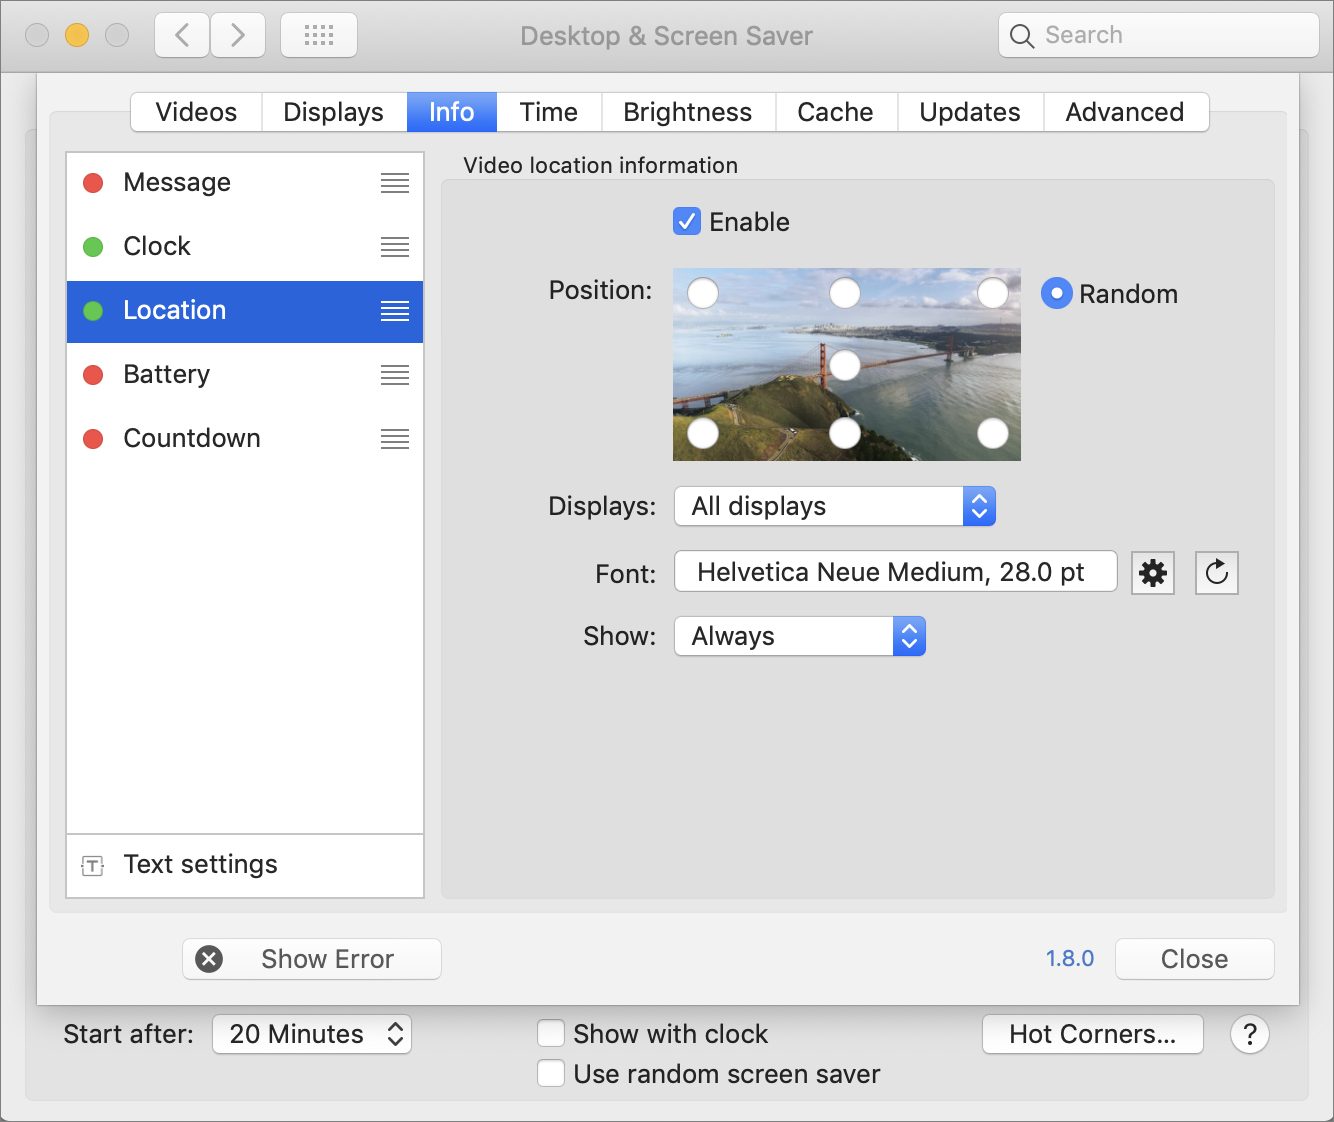
Aerial provides five onscreen widgets for you to configure: a custom message, the current time (Clock), the video location, battery level, and a countdown. The countdown option is unusual but possibly helpful: you could set it to count down to a specific time or date, like a meeting or a birthday.
Each widget offers its own options, but two are consistent: the Enable checkbox, which enables or disables that widget, and the position setting, which is a thumbnail image with radio buttons that let you pin the widget to different parts of the screen. The location widget also has a random option to put it in a random corner of the screen.
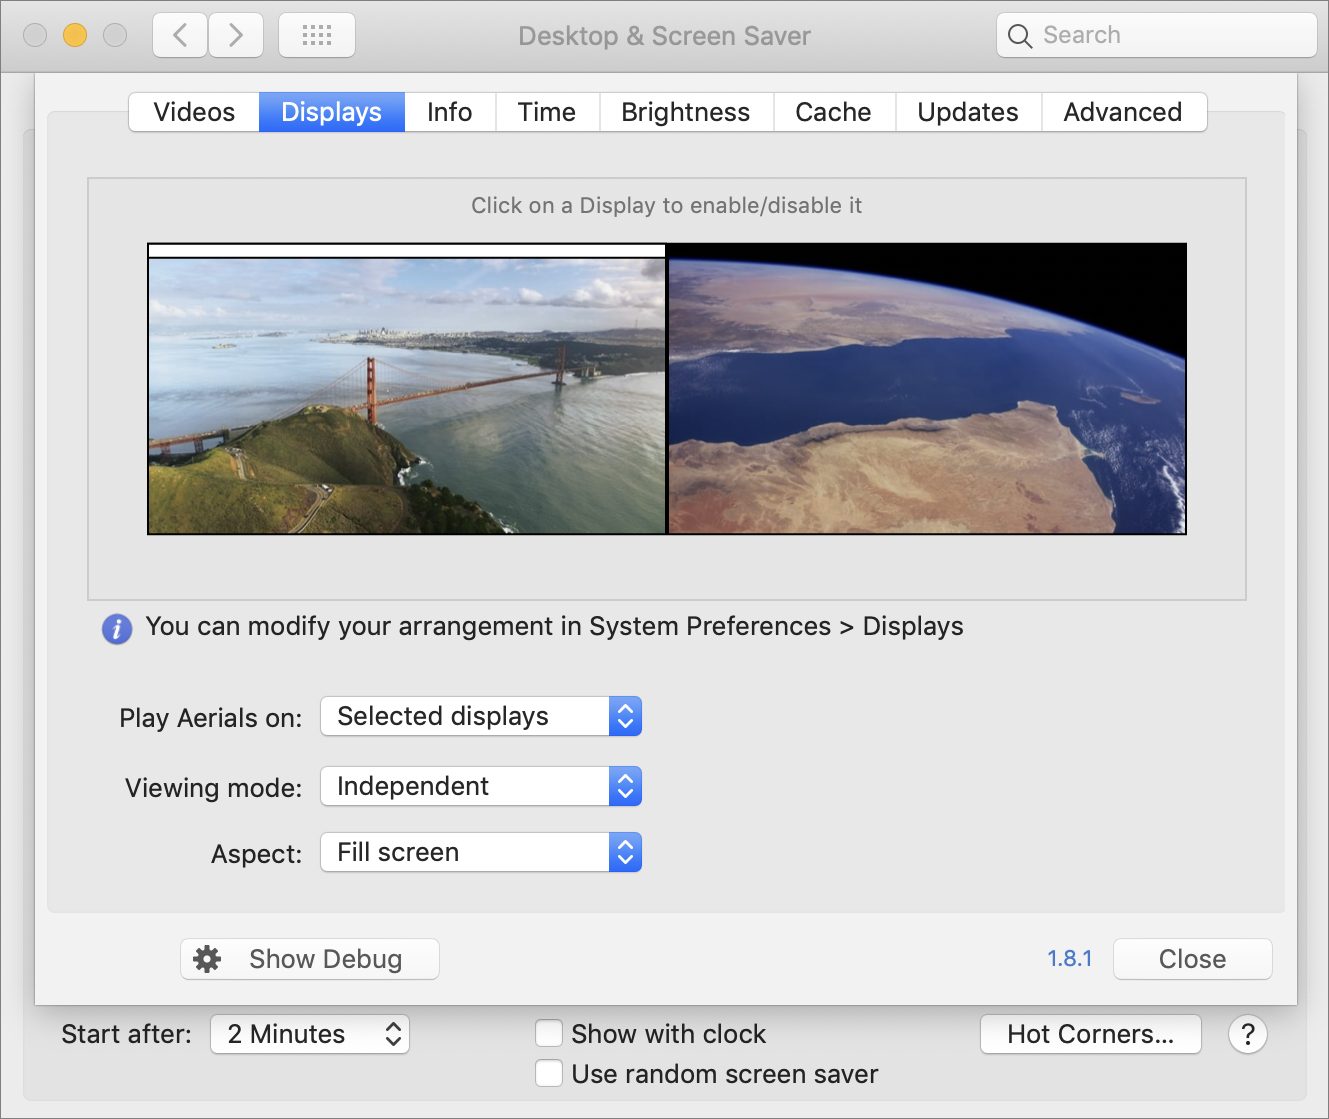
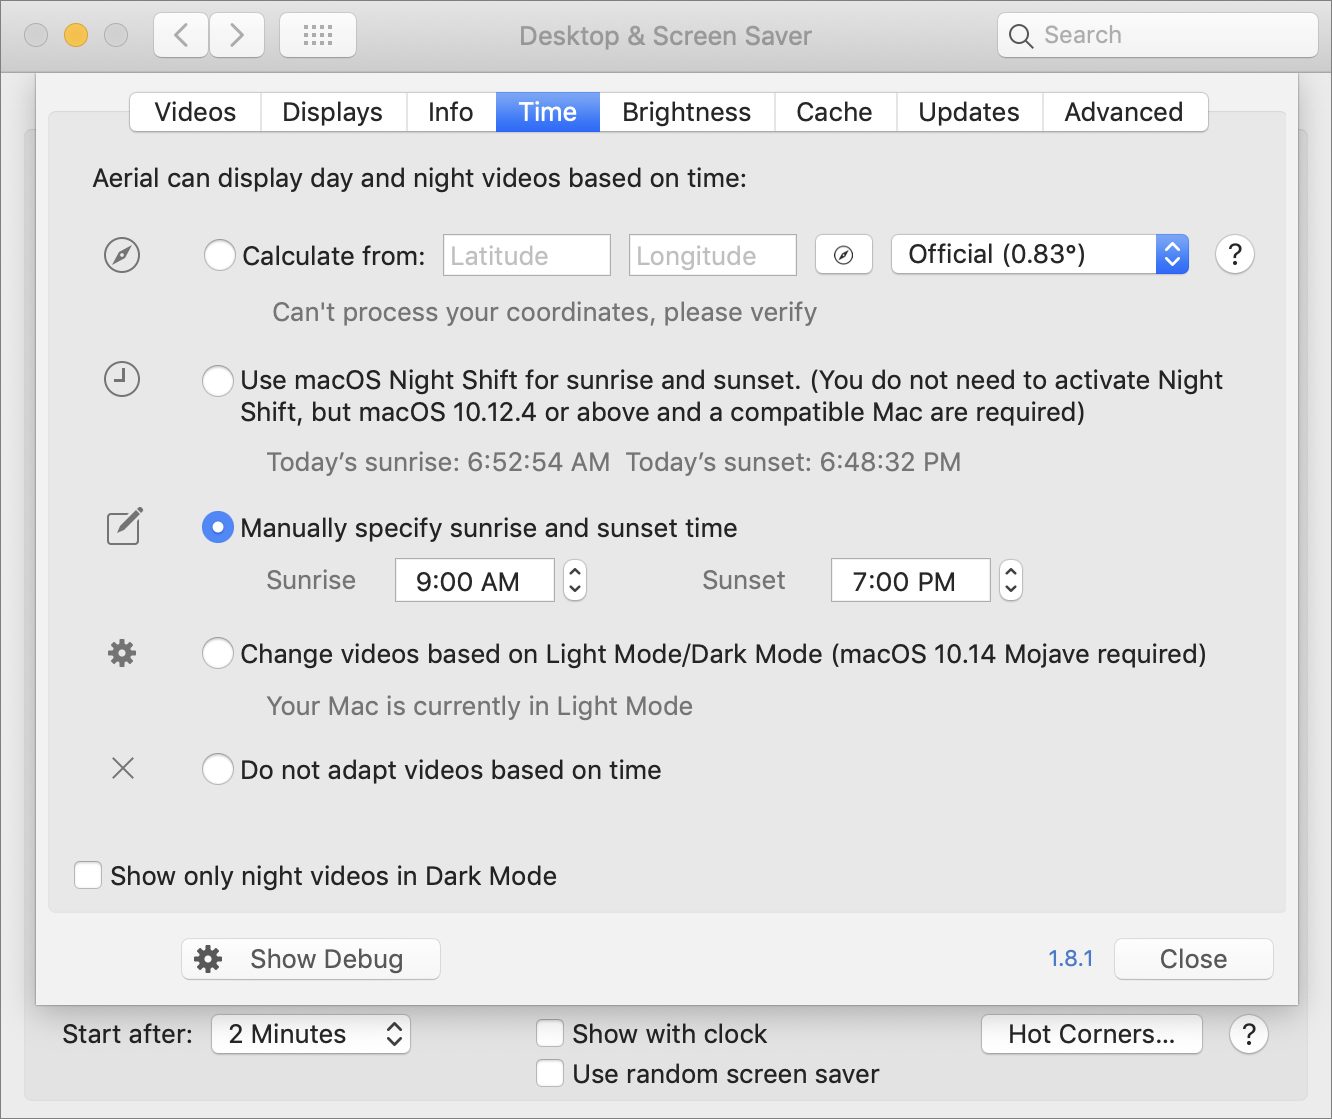
Other Settings
There are two additional settings in Aerial’s Options screens that may be worthwhile.
First, if you have two monitors, you can use the options in the Displays screen to play the videos on either or both screens. More interestingly, Aerial can play one video spanned across both screens (though it can get fuzzy), cloned (duplicated) on both screens, or mirrored (reflected) across both screens. Or you can play two videos, one on each screen.
Second, in the Time screen, you can tweak numerous options to change the videos displayed based on the time of day. You can be as specific as setting your precise latitude and longitude, but that’s overkill for most people. I recommend sticking with the default option to use Night Shift to set the time of day. Or, if you use Dark mode (but see “The Dark Side of Dark Mode,” 31 May 2019), there’s an option to change the videos based on whether you’re in Light mode or Dark mode, and a separate checkbox to show only night scenes when Dark Mode is enabled.
Feel free to poke around the other Options screens, but don’t get bogged down too much in Aerial’s settings. At the end of the day, it’s just a screen saver, if an awfully pretty one.
I’ve been using Aerial for a few weeks. It is gorgeous. Espcially since the savers are more varied now, including beautiful underwater scenes.
What a brilliant range of settings for the user interface.The help button giving info about the Mac’s video capabilities is also clever. A lot of work must have gone into developing these functions.
I wish the Apple TV had some of these options when displaying aerials.
I’d never been a big fan of screen savers until I discovered Aerial. It’s mesmerizing and I never get tired of watching it.
Hi Josh.
I’ve used Aerial for years. Love it. Really love it.
And your article helped me uncover a few features and settings I hadn’t noticed or that got added over the years. Thanks for that!
I always download and cache everything. I do it at 2K – 4K files are a bit too heavy for me to lug around town!
Take care, everyone.
Jeff
I loved the “Opus 'n Bill Brain Saver” from Delrina on my classic Macs. I wish there was a copy that runs on today’s Macs.