TidBITS#1382/21-Aug-2017
One of the best new features of iOS 11 will be the potentially life-saving Do Not Disturb While Driving — Josh Centers explains how it works. Also this week, Security Editor Rich Mogull helps us think about how facial recognition might replace Touch ID on the iPhone, and Marc Zeedar reviews the CZUR M3000 book scanner, which is designed to help you create digital versions of your print books. Notable software releases this week include CleanMyMac 3.8.6, Alfred 3.4.1, Mactracker 7.6.6, Bookends 12.8.3, and Microsoft Office 2016 15.37.
iOS 11 to Bring Do Not Disturb While Driving
Once you install iOS 11, which is available now in public beta form and will likely ship for everyone in September 2017, you may notice that your iPhone gets a lot quieter in the car. That’s due to a new feature in iOS 11 called Do Not Disturb While Driving that Apple enables by default.
In short, Do Not Disturb While Driving activates automatically when you’re driving a car, blocks notifications on your iPhone, and makes it so you can’t do much with your iPhone until you park.
Take a look at distracted driving statistics and it becomes obvious why Apple came up with this feature. The U.S. National Highway Traffic Safety Administration estimates that 660,000 drivers use cell phones while driving during the daytime. In 2015 alone, 391,000 people were injured and 3477 killed in distracted driving incidents. Given the iPhone’s 30 to 40 percent share of the smartphone market, it arguably bears some blame for over 100,000 injuries and 1000 deaths in just that year. That’s a far more tangible problem than many tempests in the tech industry press teapot.
When Apple first announced Do Not Disturb While Driving at WWDC (see “iOS 11 Gets Smarter in Small Ways,” 5 June 2017), I was a bit skeptical due to Apple’s spotty record with automotive features. CarPlay has yet to take off, and even when it’s available, it’s kind of a mess (see “CarPlay Offers Limited, Glitchy iPhone/Auto Integration,” 18 January 2016). In theory, Maps can automatically help you find your car in a parking lot, but that only works if you have a car with built-in Bluetooth — it doesn’t work with aftermarket devices.
To my surprise and delight, Do Not Disturb While Driving activated automatically during my first car trip with the iOS 11 beta on my iPhone 7 Plus. The feature relies either on a Bluetooth connection or the Doppler effect with Wi-Fi signals to detect motion.
You can change how the feature activates under Settings > Do Not Disturb > Activate. You can set it to Automatically (which enables Do Not Disturb While Driving when the iPhone detects motion), When Connected to Car Bluetooth, or Manually. If you and your spouse both have iPhones and often drive together, you may need to play with the settings to see what makes the most sense for the passenger.
To turn on Do Not Disturb While Driving manually, Apple provides an optional button in Control Center, though it’s not present by default. To add that button to Control Center, go to Settings > Control Center > Customize. (I’ll cover the new Control Center in detail in my upcoming “Take Control of iOS 11.”)
While Do Not Disturb While Driving is enabled, you can’t do much with your iPhone, but Siri still works. You’ll see only a single notification, informing you that the feature is on. To disable the feature, tap that notification and choose either “I’m Not Driving” or “Disable Do Not Disturb While Driving.” Alternatively, if you’re a passenger, you can press the Home button and tap “I’m Not Driving.” But that’s about it: once Do Not Disturb While Driving is on, not only will
your iPhone not receive notifications, you also can’t access the Home screen, Widget screen, Control Center, or camera.

However, if you start audio playback before starting your trip, you can still control that with the Lock screen media controls. Turn-by-turn directions will also work normally — Google Maps as audio-only directions, while Apple’s Maps app offers Lock screen visuals in addition to audio directions. But if you need to make any adjustments while driving, you’ll have to turn off Do Not Disturb While Driving.
If you use CarPlay, it will reportedly still work, though notifications will be blocked. None of my cars support CarPlay, so I can’t verify this.
If someone messages you while you’re driving, they will receive an automated reply that, by default, says:
I’m driving with Do Not Disturb While Driving turned on. I’ll see your message when I get where I’m going.
(I’m not receiving notifications. If this is urgent, reply “urgent” to send a notification through with your original message.)
You can change the first line of this message in Settings > Do Not Disturb > Auto-Reply. However, the second line cannot be changed.
As the second line says, if the other party replies with “urgent,” the original message will be forced through the cone of silence.
By default, Messages replies automatically only to favorite contacts (to add someone, navigate to their contact in Contacts or Phone, scroll down, and tap Add to Favorites), but you can change that in Settings > Do Not Disturb > Auto-Reply To.
This loophole seems to work only for iOS’s built-in Messages app — for both SMS and iMessage — but perhaps in the future, Apple will let developers integrate support for it in other messaging apps.
Overall, I’ve found that Do Not Disturb While Driving doesn’t interfere with my usual activities much. In fact, it has made driving more peaceful by sparing me from notifications that are almost never urgent — it’s not so much getting the notification that’s a problem as thinking about what it might require me to do. And since I can’t do anything about such notifications safely while driving, it’s totally fine to have them flow in only once I’ve arrived at my destination.
What’s most important, though, is that Do Not Disturb While Driving could reduce the number of injuries and fatalities on the road by helping both you and other drivers focus on the road. We’re looking forward to seeing if those horrible distracted driving statistics drop once iOS 11 becomes widespread.
Preparing for a Possible Apple “Face ID” Technology
While it seems as though we’ve had fingerprint sensors on our iPhones and iPads forever, Apple released Touch ID just four short years ago, forever changing our expectations for how we unlock our devices. (For more details about how fingerprint scanners work, see my article “Q&A about Fingerprint Scanning,” 10 September 2013.) Touch ID was a sneaky little innovation that improved security for everyday iPhone users with an option that was as easy to use as picking up your phone.
The real innovation with Touch ID wasn’t in adding a fingerprint reader to a smartphone — Apple was far from the first to do that — but in how Apple tied Touch ID to the iPhone’s hardware, keychain, and long passcodes. Touch ID doesn’t replace passcodes; it supplements them. In essence, your fingerprint “unlocks” your passcode, which in turn unlocks both your iPhone and the keychain that stores all your app passwords.
All this is managed and protected by special security hardware built into the Secure Enclave coprocessor that’s integrated into the A7 and later A-series chips to handle encryption and key management. Your fingerprint never leaves your device — heck, it can’t leave your device — and the fingerprint itself is never needed or used outside the Secure Enclave.
The result is that iOS users can have the security of a strong passcode with the convenience of no passcode at all. Yes, Apple does require users to enter their passcodes occasionally and under certain conditions, but overall, in day-to-day use, you don’t have to worry about entering six or more characters every time you want to unlock your iPhone to respond to a text message. The main downside of Touch ID is that it requires physical space on the front of the iPhone that could be used for screen real estate.
While it’s usually risky to comment on hypothetical Apple products, Apple recently, and undoubtedly accidentally, released the firmware for its upcoming HomePod smart speaker. Filled with references to other upcoming products and technologies, the firmware release makes it reasonably probable that Apple will release an updated iPhone that relies on facial recognition, rather than a Touch ID sensor.
Facial recognition is an entirely different kind of biometric technology that’s historically far more difficult to implement than a fingerprint reader. While fingers do get wet, dirty, or scratched, modern sensors rely on more than just the ridges and whorls, and devices like iPhones can store multiple fingerprints.
As anyone who has looked in a mirror in the morning can tell you, faces change throughout the day. We wear glasses, move into different lighting conditions, and some men don’t shave on a regular basis. Worse, in this age of selfies, there is no shortage of high-resolution photographs of our faces on the Internet, and many people have high-quality printers. Hackers recently defeated Samsung’s facial recognition system with a photo and a contact lens.
I have no idea how a potential “Face ID” might work, but I do know what I’m going to look for if Apple adds facial recognition to its iOS security arsenal. If we consider how Apple usually handles these transitions, we can make certain assumptions about what it might look like. The key is to evaluate equivalence, rather than exactness. We don’t care whether Face ID (we’ll roll with that name for now) works exactly like Touch ID — we just need it to be close enough, or even better in other ways.
Before you start panicking about a world in which someone can unlock your iPhone by holding up an iPad with a picture of you on screen (let’s be honest, that’s the first hack we’ll all try), let’s think through the problem and what to look for if Apple does indeed release Face ID.
Is Face ID as Secure as Touch ID? — The answer to that question is more than a simple yes or no. When I look at the security of Touch ID today, I can see three aspects to consider if Face ID appears:
- Does it cost as much to circumvent? Touch ID isn’t perfect — there are a variety of ways to create fake fingerprints that can fool it. The financial cost is not prohibitive for a serious attacker, but the attacks are time-consuming enough that the vast, vast majority of iPhone users don’t need to worry about them. I’m sure someone will come up with ways to fool Face ID, but if doing so requires taking photos from multiple angles, computing a 3D model, 3D printing the model, and accurately surfacing it with additional facial feature details, I’ll call that a win for Apple. It will make an awesome presentation at a hacking conference, though.
- Does it have an equivalent false positive rate? In security, the “false positive rate” is the number of times the system will accept a fingerprint (or face) as being the right one when it’s the wrong one. If you let 100 people in a room try to unlock your iPhone and one stranger’s fingerprint actually works, the false positive rate is 1 percent. From what I see, Touch ID’s false positive rate is low enough to be effectively zero in real-world use. As long as Face ID is about the same, we’ll be good to go.
-
Does it use a similarly secure hardware/software architecture? As noted above, one of the most important aspects of Touch ID is how it ties into the Secure Enclave. I would be shocked if Apple didn’t keep this model, but you should expect changes to support the different kind of processing and the multi-purpose nature of underlying hardware such as cameras. If Apple releases Face ID, my guess is that it will use some sort of dedicated processor tied to multiple sensors so its security is at least as good as that of Touch ID.
Is Face ID as Capable as Touch ID? — As I mentioned, the genius of Touch ID was that it enabled consumers to use a strong password with the same convenience as no password at all most of the time. This was one of the biggest differentiators between Touch ID and previous phone-based fingerprint approaches — the harmonization of the fingerprint with the passcode. In terms of ease of use, you should focus on four criteria:
- Is it as fast? The first version of Touch ID was pretty fast, taking a second or less. Today’s second version is so fast that you barely notice it most of the time. Face ID has to be close enough to the speed of Touch ID that the average user won’t notice a difference. If I need to hold my iPhone steady in front of my face while a little capture box pops up with a progress bar saying “Authenticating face…”, it will be a failure. But we all know that isn’t likely to happen.
-
Does it work in as many different situations (at night, while walking, etc.)? Touch ID is far from perfect. I work out regularly and, awesome athlete that I am, I sweat like the evil Moist from Dr. Horrible’s Sing-Along Blog, and Touch ID doesn’t work well with sweaty fingers. Face ID doesn’t need to work in exactly the same situations, but it must work in an equivalent number of real-world situations. For example, I use Touch ID to unlock my iPhone when it’s sitting on a table to pass off to one of the kids, and I use it while lying sideways in bed with my face mushed into a pillow. Face ID will probably
require me to pick the phone up and look at it. In exchange, I’ll probably be able to use it with wet hands in the kitchen. Tradeoffs are fine as long as they are insignificant, net neutral, or positive. Since the HomePod firmware indicates that the Face ID sensor may be infrared, it will likely work in the dark as well. -
Is it as reliable? The key phrase here is “false negative rate.” As I noted previously, the false positive rate represents the number of times a sensor accepts the wrong biometric as being valid. On the flip side, the false negative rate is the number of times the sensor rejects the correct biometric. Even second-generation Touch ID can be fiddly at times, as in my workout example above, and some people have real problems with Touch ID working reliably. Face ID will have to handle things like changing facial hair, lighting conditions, moving, and so on. This question ties into a number of situations where Face ID works, but instead asks “Is Face ID as reliable as Touch ID within its supported scenarios?”
This is one area where I could imagine some significant improvements over Touch ID. -
Does it offer an equivalent set of features? My wife and I trust each other and share access to all our devices. With Touch ID, we enroll each other’s fingerprints. Touch ID also supposedly improves over time. Ideally, Face ID will work similarly, allowing multiple enrollments and improving, rather than degrading, as time and gravity take their toll on our faces.
Determining Success — If Face ID becomes a reality, plenty of articles will focus on all the differences from Touch ID. Plenty of people will complain that it doesn’t work exactly the same. And plenty of security researchers will find ways to circumvent it. But what really matters is whether Face ID hits the same goal, which is to:
Allow a user to use a strong password with the convenience of no password at all, most of the time.
Face ID doesn’t need to be the same as Touch ID — it just needs to work reasonably equivalently in real-world use. I won’t bet on Face ID appearing in a future iPhone, but I will bet that if it does, Apple will make sure it’s just as good as Touch ID overall. In the event that it ships, I think Face ID will be as hard or harder to fool, will tie into the Secure Enclave, will be extremely fast, and will work in most of the real-world situations that have stymied previous attempts at smartphone-based facial recognition.
CZUR M3000 Is an Inexpensive, Reliable Book Scanner
I was a bookworm when I was a kid, reading almost a book a day. I lived overseas, and English books were hard to come by, so I devoured any I could find. Though this was long before I knew anything about computers, I remember having a fantasy of somehow having every book in existence available to me via some device.
Today that dream is approaching reality. We have the tech, but we’re bogged down by intellectual property rights. Millions of books are not available in digital form and might never be, if lawyers have their way. I find this frustrating, as I vastly prefer reading my books digitally. Digital books are lighter and easier to read, have flat pages instead of curved, can have consistent lighting, are adjustable, can be marked up and highlighted without interfering with readability, and can have extensive notes added. Plus, I can carry thousands of them on my iPad.
In fact, I prefer digital books so much that, a few years ago, I took the radical step of donating 90 percent of my printed books to local libraries. I freed up ten 72-inch bookcases — basically a whole room of new space! I realized I hadn’t read any of my printed books in five years, since the iPad appeared. I knew I wouldn’t, either. When I wanted to reread a book I owned (such as “The Hobbit,” prior to the first movie coming out), I just rebought it in digital form.
I saved a few of my favorite printed books, and I still have roughly a thousand books left. But my long-term goal was to figure out how to digitize them.
First Attempts — The first thing I tried a few years ago was scanning books with a flatbed scanner. This actually worked well, especially with some software I wrote to split the two-page scans apart. I brought all the images into Adobe Acrobat Pro which merged them into a single PDF and did OCR on the text so everything was searchable.
The problem was that the scanning process was slow — about 30 seconds per page, plus time for me to flip to the next page, position the book correctly, and start the next scan. It typically took me close to 2 hours to do a book, and it was tedious and left me physically sore from staying in the same position for so long. And that was before all the additional processing I had to do.
Searching the Internet for other solutions, I learned that book scanners were insanely expensive. At the high end were professional machines used by libraries that cost $100,000 or more. At the low end were hacked-together devices of questionable reliability that would still cost me thousands of dollars.
The optimal solution may have been a simple sheetfed scanner that apparently does a great job — if you’re willing to chop the spine off your book to turn it into individual sheets, which I was not.
Later, I experimented with my own hacks, trying to rig up a way to use a digital camera to take snapshots of books.
The problem wasn’t the camera, however. It was the books themselves. Perfect-bound books aren’t designed to stay flat, and the nature of them is that as you flip through the book, the numbers of pages on the right and left sides change, resulting in an uneven height. Without some way to press the pages flat, you end up with all sorts of distortion from the curved and uneven pages.
I gave up.
Enter CZUR — Recently, I was on Amazon and something I saw reminded me of my abandoned search for an affordable, serviceable book scanner. Not expecting much, I typed in “book scanner” and, to my surprise, a few are now available, and the price has dropped radically.
At the low-end are overhead scanners for under $100. These don’t include much in the way of software or support — most aren’t Mac-compatible — and they aren’t much better than rigging up your own camera. Your camera is probably far higher quality, too.
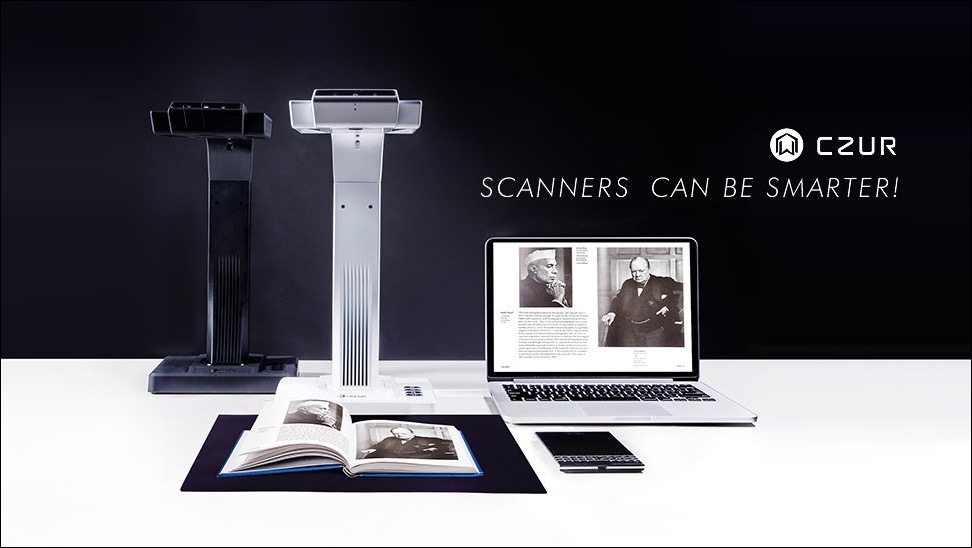
Then I ran across the CZUR M3000 Professional Book Scanner, which was apparently an Indiegogo project and now is a shipping product. The CZUR isn’t cheap at $399, but it’s inexpensive compared with professional solutions. My philosophy is that if I can scan 400 books with it, I’m basically paying a dollar per book, which is far cheaper than I could rebuy them for, even if they were all available digitally. Even scanning just 100 books would probably pay for the scanner, though, of course, that doesn’t include my time.
The CZUR is made by a Chinese startup company and is a weird mix of high- and low-end. For instance, the packaging is so elaborate that it’s overkill — it makes Apple’s packaging seem pedestrian. Even the USB cord is packed in a tiny labeled box which fits into a slot in another box. But other parts seem primitive. Its software is quirky, to say the least. But the good news? It works.
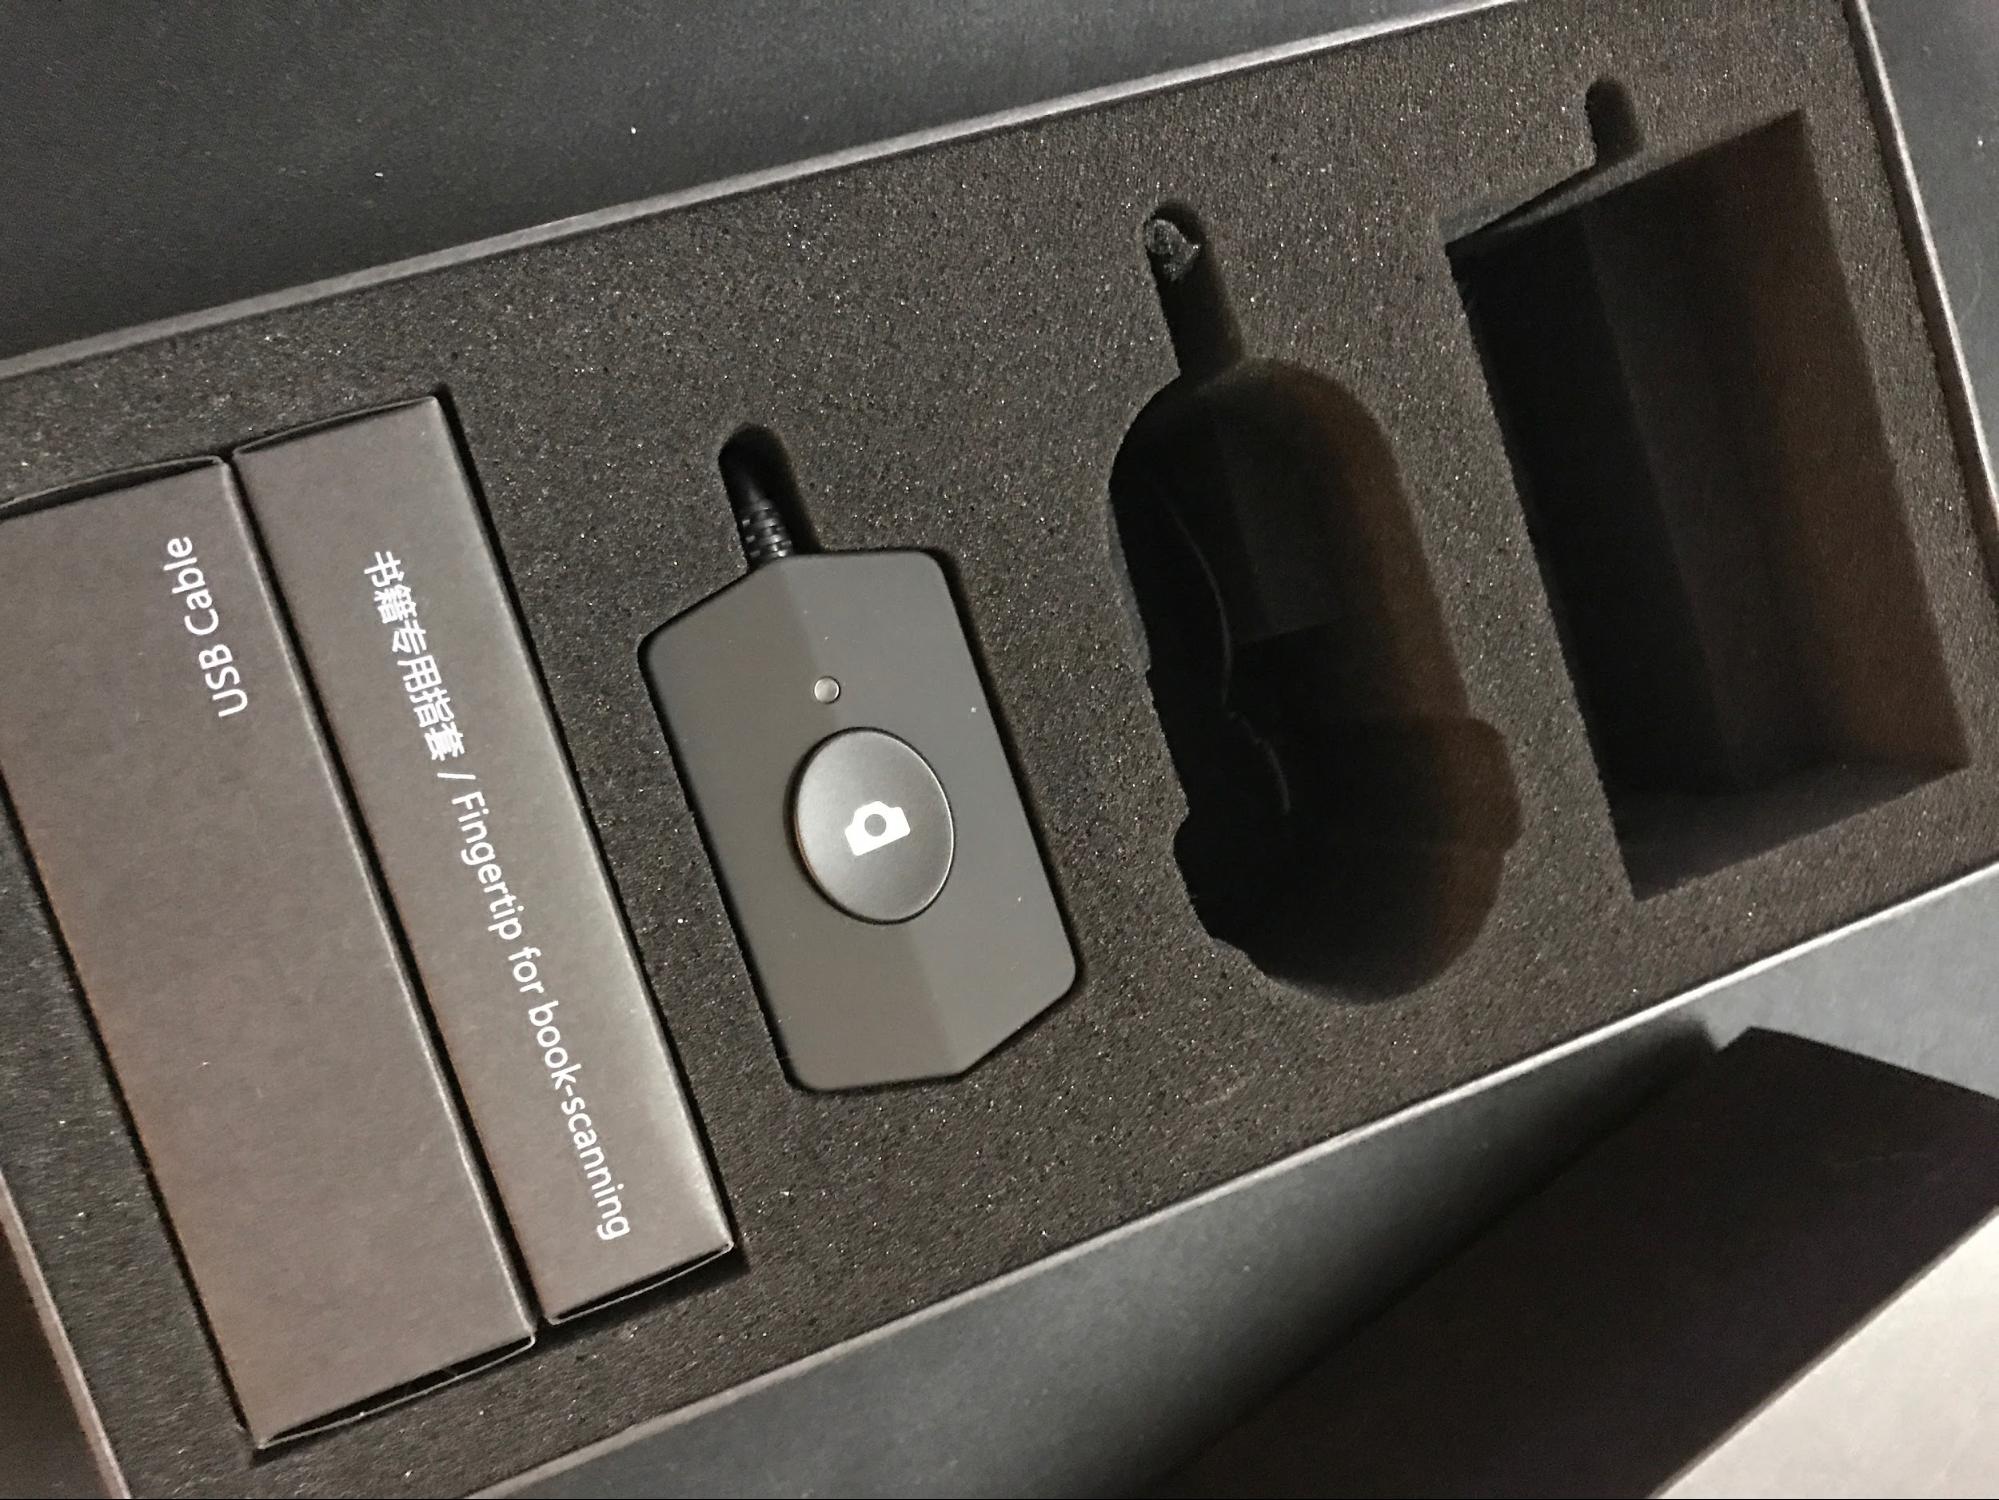
Hardware-wise, the CZUR is a simple overhead scanner. It has built-in LED lights to illuminate the subject, along with a high-quality 16-megapixel Sony camera. (It includes some extra LED lights powered by built-in rechargeable batteries, but I haven’t been able to figure out why they’re useful.) There’s also a black rubber scanning mat that provides necessary contrast, and two sets of weird-looking yellow thumb covers, which you need to use while holding the book pages open so the CZUR Scanner app can identify and erase the
thumbs.
Most importantly, the box includes two cabled buttons: one for your hand and one that’s a foot pedal (you can connect only one at a time, though). The latter is awesome for scanning pages quickly while your hands hold the book open.
Hardware you can’t see includes a microphone (the scanner listens to sounds that the mobile app makes to transmit your Wi-Fi password during setup) and lasers that the CZUR uses to detect the curvature of each page of your book.
The CZUR supports Wi-Fi for wireless scanning to the CZUR cloud (you get a 10 GB account for free), but the setup is so convoluted and the software so limited that you’ll only want to connect it via USB to a computer.
One example of the cloud mess: the CZUR Cloud iPhone app wouldn’t let me set up a new cloud account because one of the fields was “verification” and I didn’t know what value to put there. I finally went to the Web site to set up the account there, where I was shown a CAPTCHA to enter — that turned out to be the “verification” — it was never displayed in the mobile app!
Another problem with CZUR Cloud is that there’s no easy way to delete a scan. You can log into your cloud account on the CZUR Web site and delete scans from there, except that there’s a terrible bug: it deletes the thumbnails you don’t have selected instead of the other way around. After that bad experience, I decided to forgo all the cloud features.
Scanning a Book — I won’t bore you with my trials and errors; let’s just say the CZUR Scanner software requires some adjustment. The documentation is barely in English, and sometimes it makes no sense at all. Here’s a sample:
Nothing except scanning material should be in the “the preview area”, or will interference algorithm and affect the scanning effect. Such as “hand” USB button ’line’ ’mobile phone’ and ’pen’ etc.
As you can see, this is understandable, but it has taken a simple instruction (“put only items to be scanned in the scanning area”) and made it nearly inscrutable. I suppose it’s good that there are so few instructions!
CZUR Scanner’s interface is non-standard. Dialogs all use Confirm buttons instead of OK, and they’re reversed so Cancel is on the right, and there’s no default so you can’t just press Return. The app doesn’t even have a Quit menu command! To quit the software, you click the main window’s close button.
I initially couldn’t get CZUR Scanner to work at all: I got a black window in scan mode. Working from a hint in an Amazon review that said the software worked in Sierra, I upgraded my Mac from OS X 10.11 El Capitan to macOS 10.12 Sierra, after which CZUR Scanner started working. After some initial experiments that gave mediocre results, I finally tried scanning a book for real… and everything worked surprisingly well.
I have since scanned several books, and the process is straightforward. With the scanner turned on, you launch CZUR Scanner and enter scan mode. There, you configure the kind of scan (color, grayscale, or black-and-white) and post-processing needed (a flat item, a book spread, manual setup, or none).
The post-processing is where most of the magic happens, especially for books, as that’s where CZUR Scanner splits facing-page scans into individual pages, flattens curved pages, and so on. Supposedly, you can change the post-processing mode later, but I found things don’t work right — for instance, spreads are not split into separate pages — unless you choose the correct mode prior to scanning.
I originally assumed that black-and-white was best for books since the image files would be smaller, but later experiments showed me that grayscale is better and produces smaller files. Don’t ask me why — I assume it’s a bug.
With CZUR Scanner configured, you go to the scanner and put the fingertip covers on your thumbs. Open the book to the first spread, hold it open with your thumbs, and press the foot pedal to snap a picture. CZUR claims the process takes less than 1.5 seconds. The actual picture taking might happen that quickly, but the additional step of the red laser beams flashing onto the book to detect the curves of the pages takes more time. But it is fast — just a few seconds per spread.
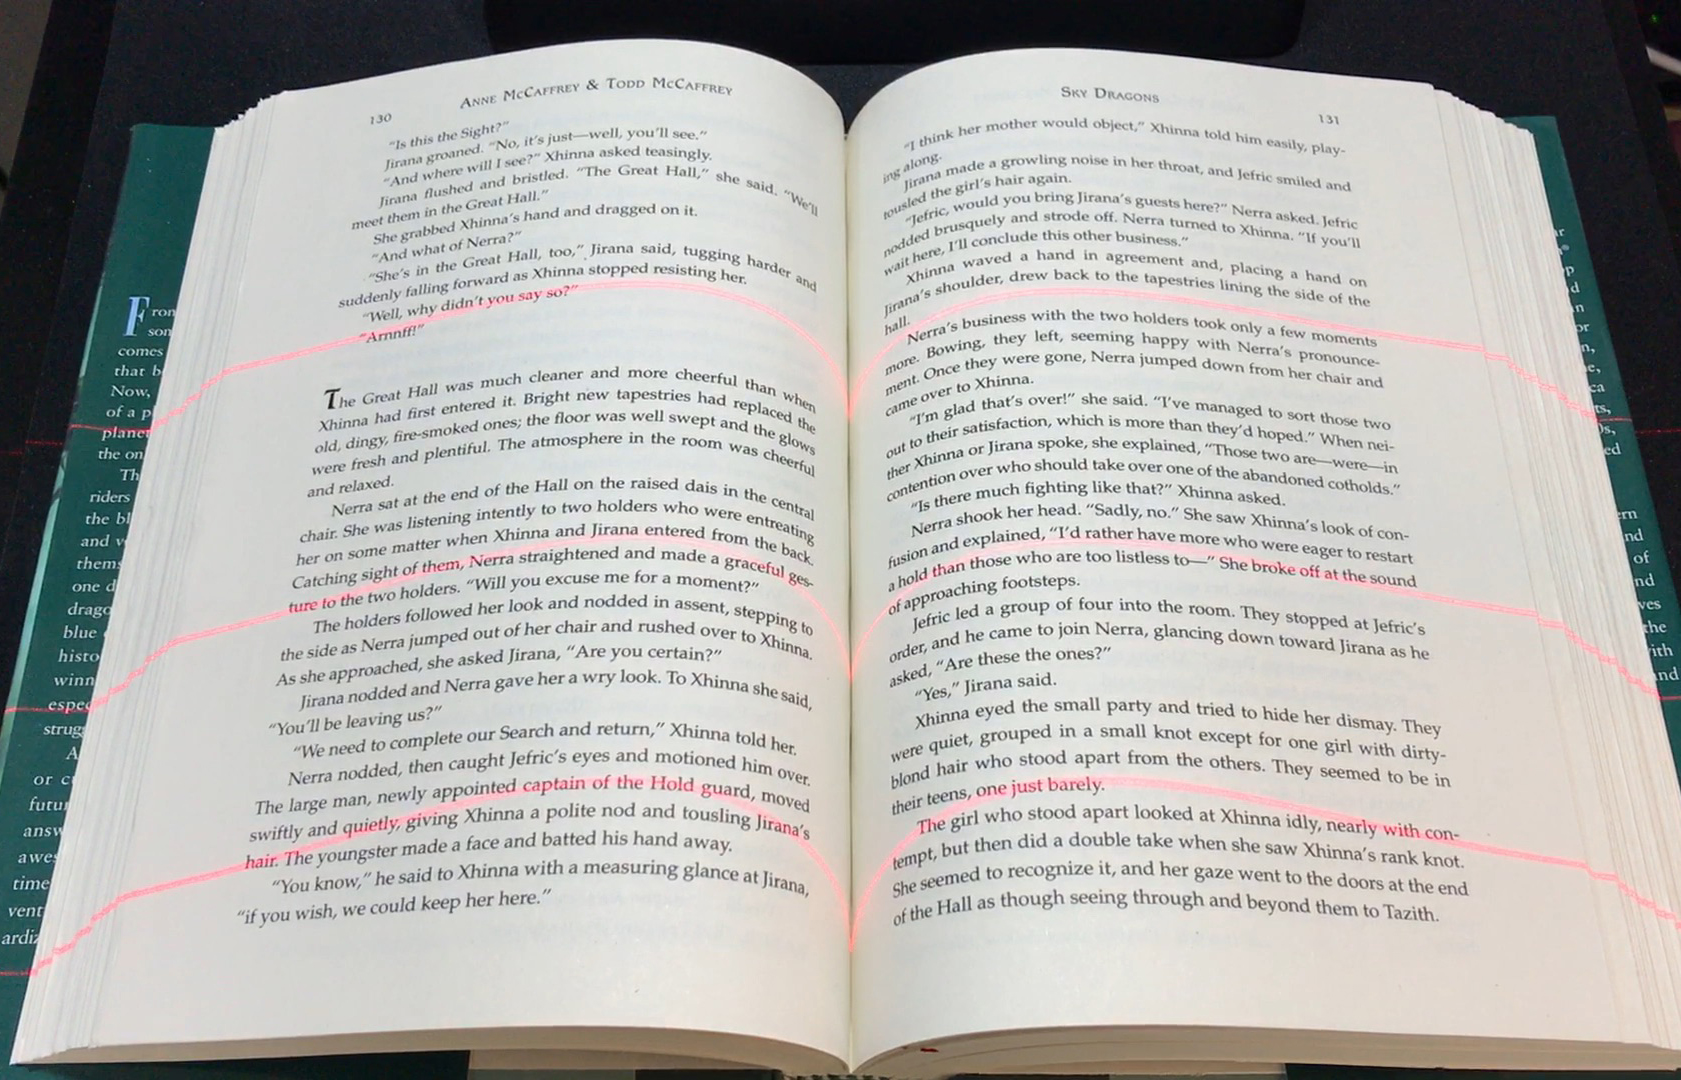
Once the laser beams disappear, turn the page, hold the book open with a thumb on either side, and press the foot pedal again. Repeat that until you get to the end of the book.
The process may sound tedious, but since it’s so quick, you don’t have time to get bored. When I did my flatbed scans, the process was so slow that I often got distracted playing a game on my iPhone or reading on my iPad.
One disadvantage of scanning a whole book at once is that you don’t know until you’re finished if you’re doing anything wrong. (It reminds me of the old days of film cameras, when you’d experiment with your camera’s settings and days later, when the film was developed, you couldn’t remember what you’d done to achieve a particular effect.)
You can, however, stop or pause during the scanning of a book. Since the CZUR Scanner app is performing most of the adjustments, it doesn’t matter if your book is in exactly the same position as before, so resuming where you left off is easy. When you’re getting started, if a scan feels like it might not have been good, stop and check the images before you continue. That way you can learn what does and doesn’t work.
In theory, scanning a whole book could take less than 15 minutes, depending on its length, but my first tries were slower. Scanning an old 150-page paperback took me nearly 30 minutes, with a few problems. Later I scanned a modern hardcover book that went smoothly — at 356 pages it took me 25 minutes. Later efforts have come closer to that 15-minute mark, but 20 minutes per book seems about the norm, plus a few minutes if you need to redo some pages.
Once you’re finished scanning, you can close the scan window on your Mac. Note that you don’t click the standard macOS window close button, but a special tiny “x” that appears under the title bar.

This takes you back to CZUR Scanner’s main window where you can look at your scans, which show up as a list of numbered image files on the right.
CZUR Scanner has a batch mode that lets you apply global fixes to groups of images, which is handy. You can rotate, crop, change contrast, adjust color, delete images, and even replace pages. If you replace a page, CZUR Scanner takes you back to scan mode and, once you’ve rescanned the page satisfactorily, it intelligently replaces the page you indicated, even if it was just one page of a two-page spread.
Unfortunately, I found that page scans tend to vary a lot in size and positioning, which makes batch cropping useless. For instance, some pages are slightly rotated while others have different margins. If the scans were more uniform, you could, for instance, crop all the images to cut out things like headers and footers that you may not want in the OCRed text.
A video on the CZUR Web site shows an additional “manual adjustment” screen that, as far as I can tell, is not available in the Mac version of CZUR Scanner. Some of those tweaks look helpful, such as adjusting the shape of the scan and manually setting the divide between pages. Hopefully, those enhancements will appear in an update soon.
Ideally, however, you won’t need to do any editing. My first book required some rescans, as did my second, but my third was fine on the first try. (Proof that practice helps! A later book did have more issues, but I was going faster and the book was an older copy that didn’t cooperate as well.)
What sort of problems might you run into while scanning?
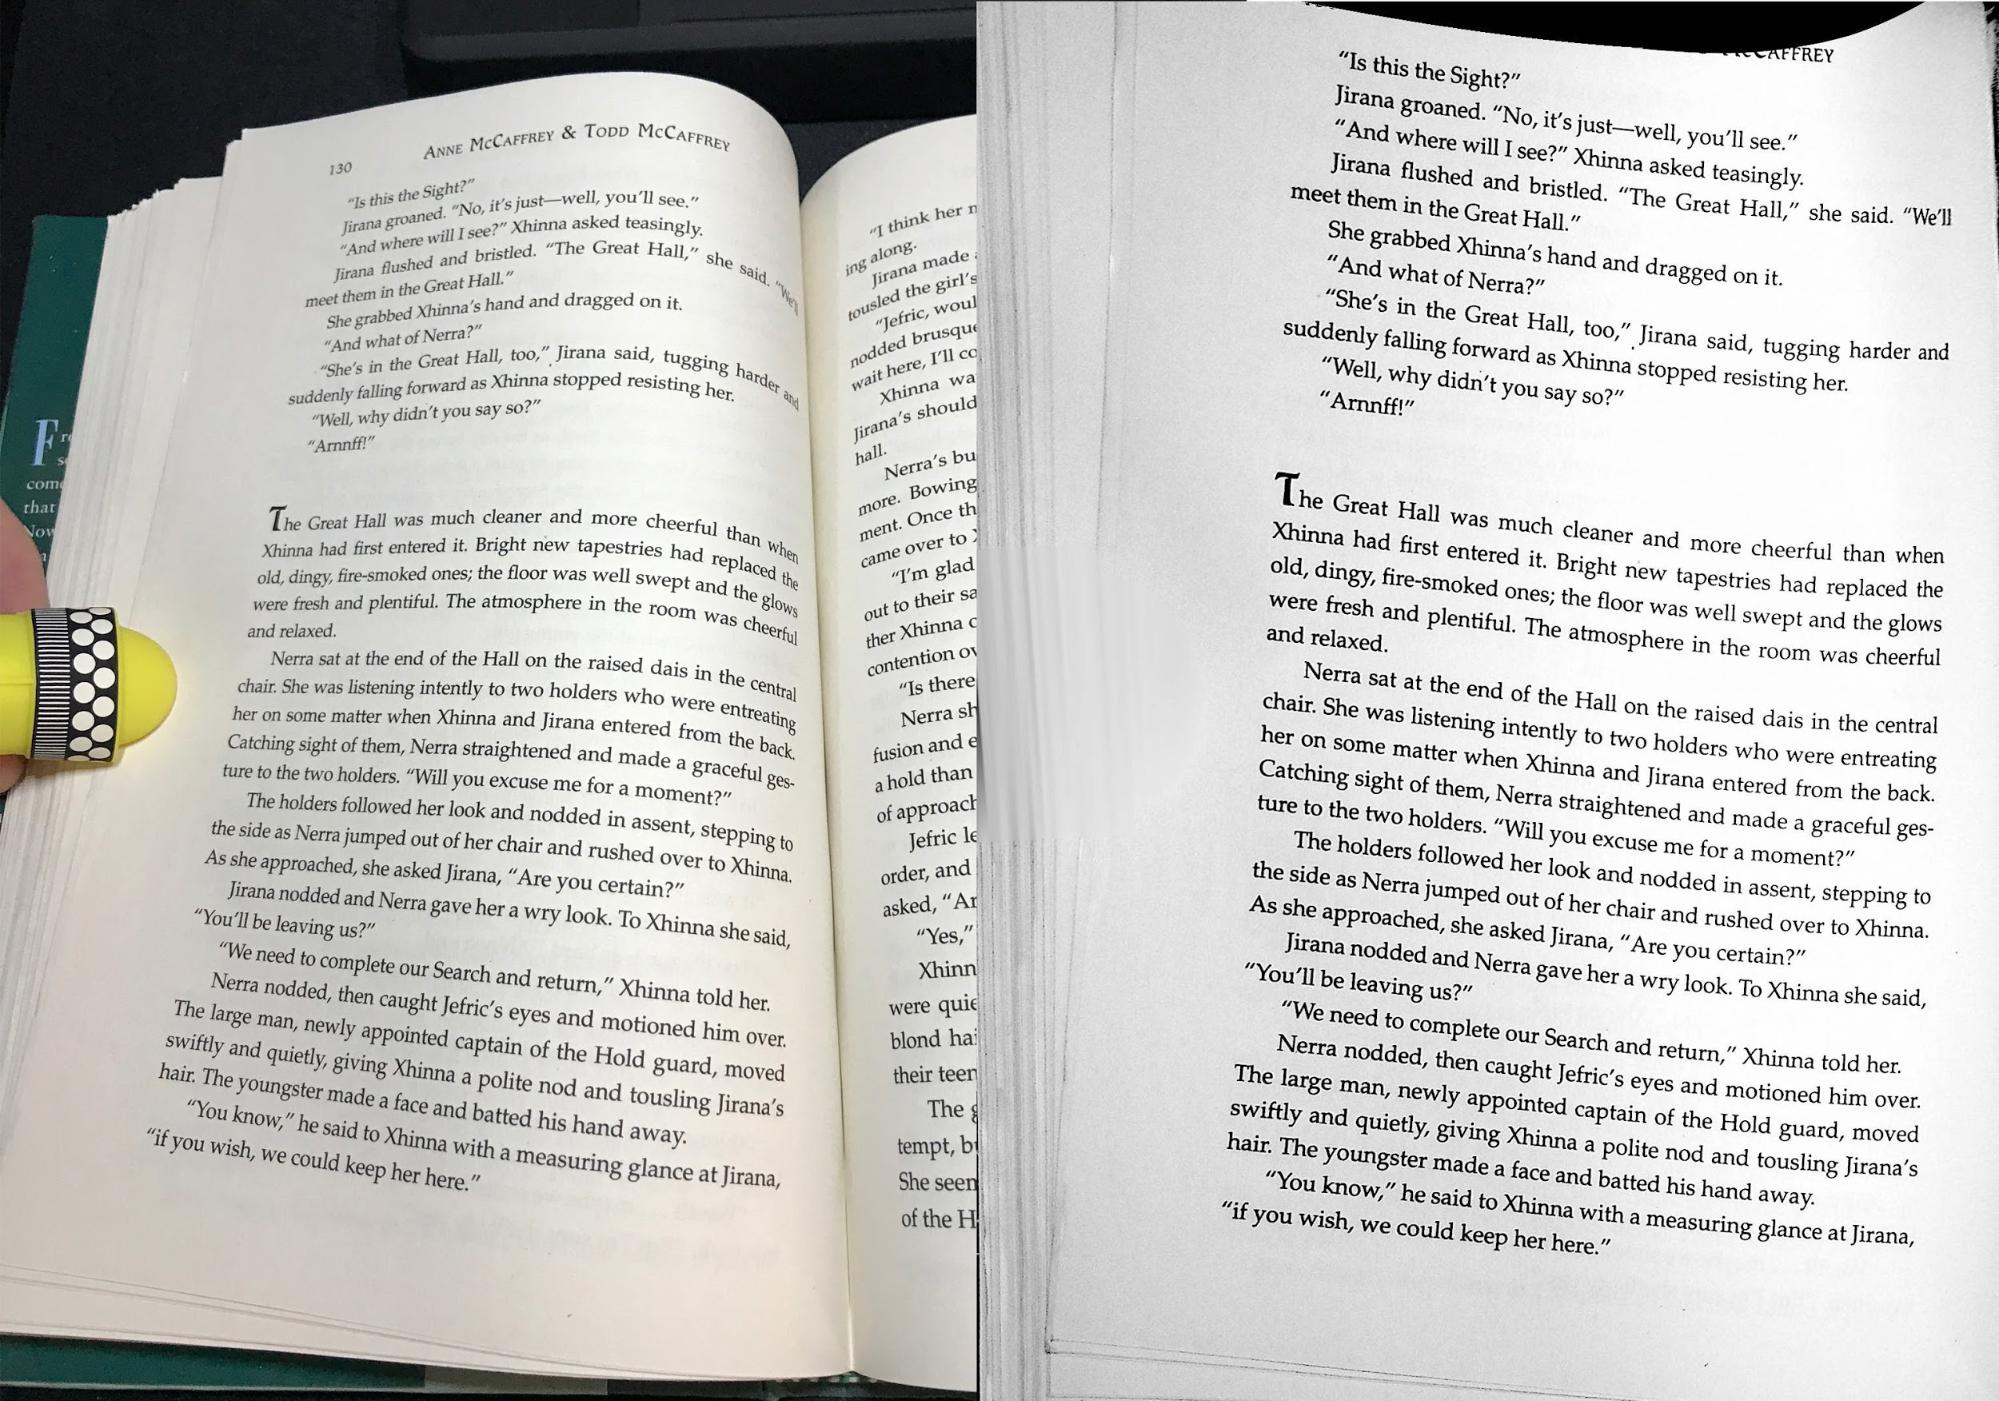
- While the flattening of curved pages works surprisingly well, it isn’t perfect. The same goes for the thumb removal and rotation of pages. I’ve noticed inconsistencies in how these features work. In every book I’ve done, some pages are slightly crooked or poorly cropped, sometimes a thumb isn’t completely removed, occasionally there’s visual warping, and often extra side material is included. In general, these are minor visual oddities and don’t interfere with the OCR or the readability of the book, but they do mean the scans aren’t perfect. For my purposes, this is fine, but if you want flawless scans, the CZUR isn’t going to cut it.
- Some books have small margins, so your thumbs appear in the scan. CZUR Scanner seems to erase a bit too much when removing your thumbs, so even if your thumb is a few millimeters from the text, some of the text might be obscured.
-
Some books are very springy and don’t want to stay open. Combined with small margins where you have little room to grip the pages, this can make the scanning process take longer as you fight with the pages. This is usually a problem only at the beginning and end of books, and I find flipping through a book to crack the spine before scanning helps, especially with paperbacks.
-
You have to be careful not to force a page flat with the pressure of your thumb. Instead, let the page curve naturally, and let CZUR Scanner flatten it. When you force a page, it crinkles and distorts, and the scan ends up quite warped.
-
Be sure to use the included thumb covers. Though they feel weird and make the scanning process awkward, CZUR Scanner uses them to know where the edges of the book are. Without them, it may include your hands and arms in the scan, and you’ll have to crop those pages manually.
-
In facing-page mode, CZUR Scanner does not like blank pages. If one side of the page is blank, it won’t crop and rotate the other page correctly — it’ll be twisted at a weird angle with text cropped off. The simplest solution that I found is just to put a mark on the blank page. This fools CZUR Scanner into thinking there’s something there, after which it works correctly. If you don’t want to mark up the book, you could put a marked Post-It on the blank page instead.
-
Because of the built-in overhead LED lights, glossy items have a lot of glare. I had read about this, thinking it didn’t apply to me, but the covers of even my 1960s paperbacks have a surprising amount of reflectivity. I initially considered just scanning the covers with my flatbed, or taking a photo with my iPhone, but then I realized that I could just move the book away from the center of the scanning area where the lights were focused. (For covers, I do a manual scan in the scan settings.) I had no problems inside the books, but be aware that scanning glossy paper is a big problem. I don’t think the CZUR would work well for magazines, for instance. I did scan one glossy book and while the results were readable, it had
washed-out spots and many of the photos were muddy.
When you’re done editing, click the checkbox button to select all the images on the sidebar and then go to the Export tab and choose Searchable PDF. CZUR Scanner will perform OCR as it exports the scans as a single file. It may take 5 or 10 minutes, depending on the speed of your Mac, but you don’t have to stand there and watch it.
At this point, you’re essentially done! The resulting PDF may be quite large — my 356-page book is 86 MB — because it includes both image and text layers. (That was in black-and-white mode, which seems to be larger than grayscale. I later did a 162-page book in grayscale that was only 22 MB.)
It shouldn’t be a surprise that creating a PDF means that you’re stuck with the original layout and formatting. You may be able to zoom in, depending on your reading device, but you can’t reflow text or change anything.
Since there is a text layer, you can search the book, which is awesome — though OCR errors and scanning quirks may foil some searches. For instance, I searched for a phrase I knew was in the book, but Preview said there was no such text. It turned out the word was hyphenated at the end of a line and my search didn’t include a hyphen.
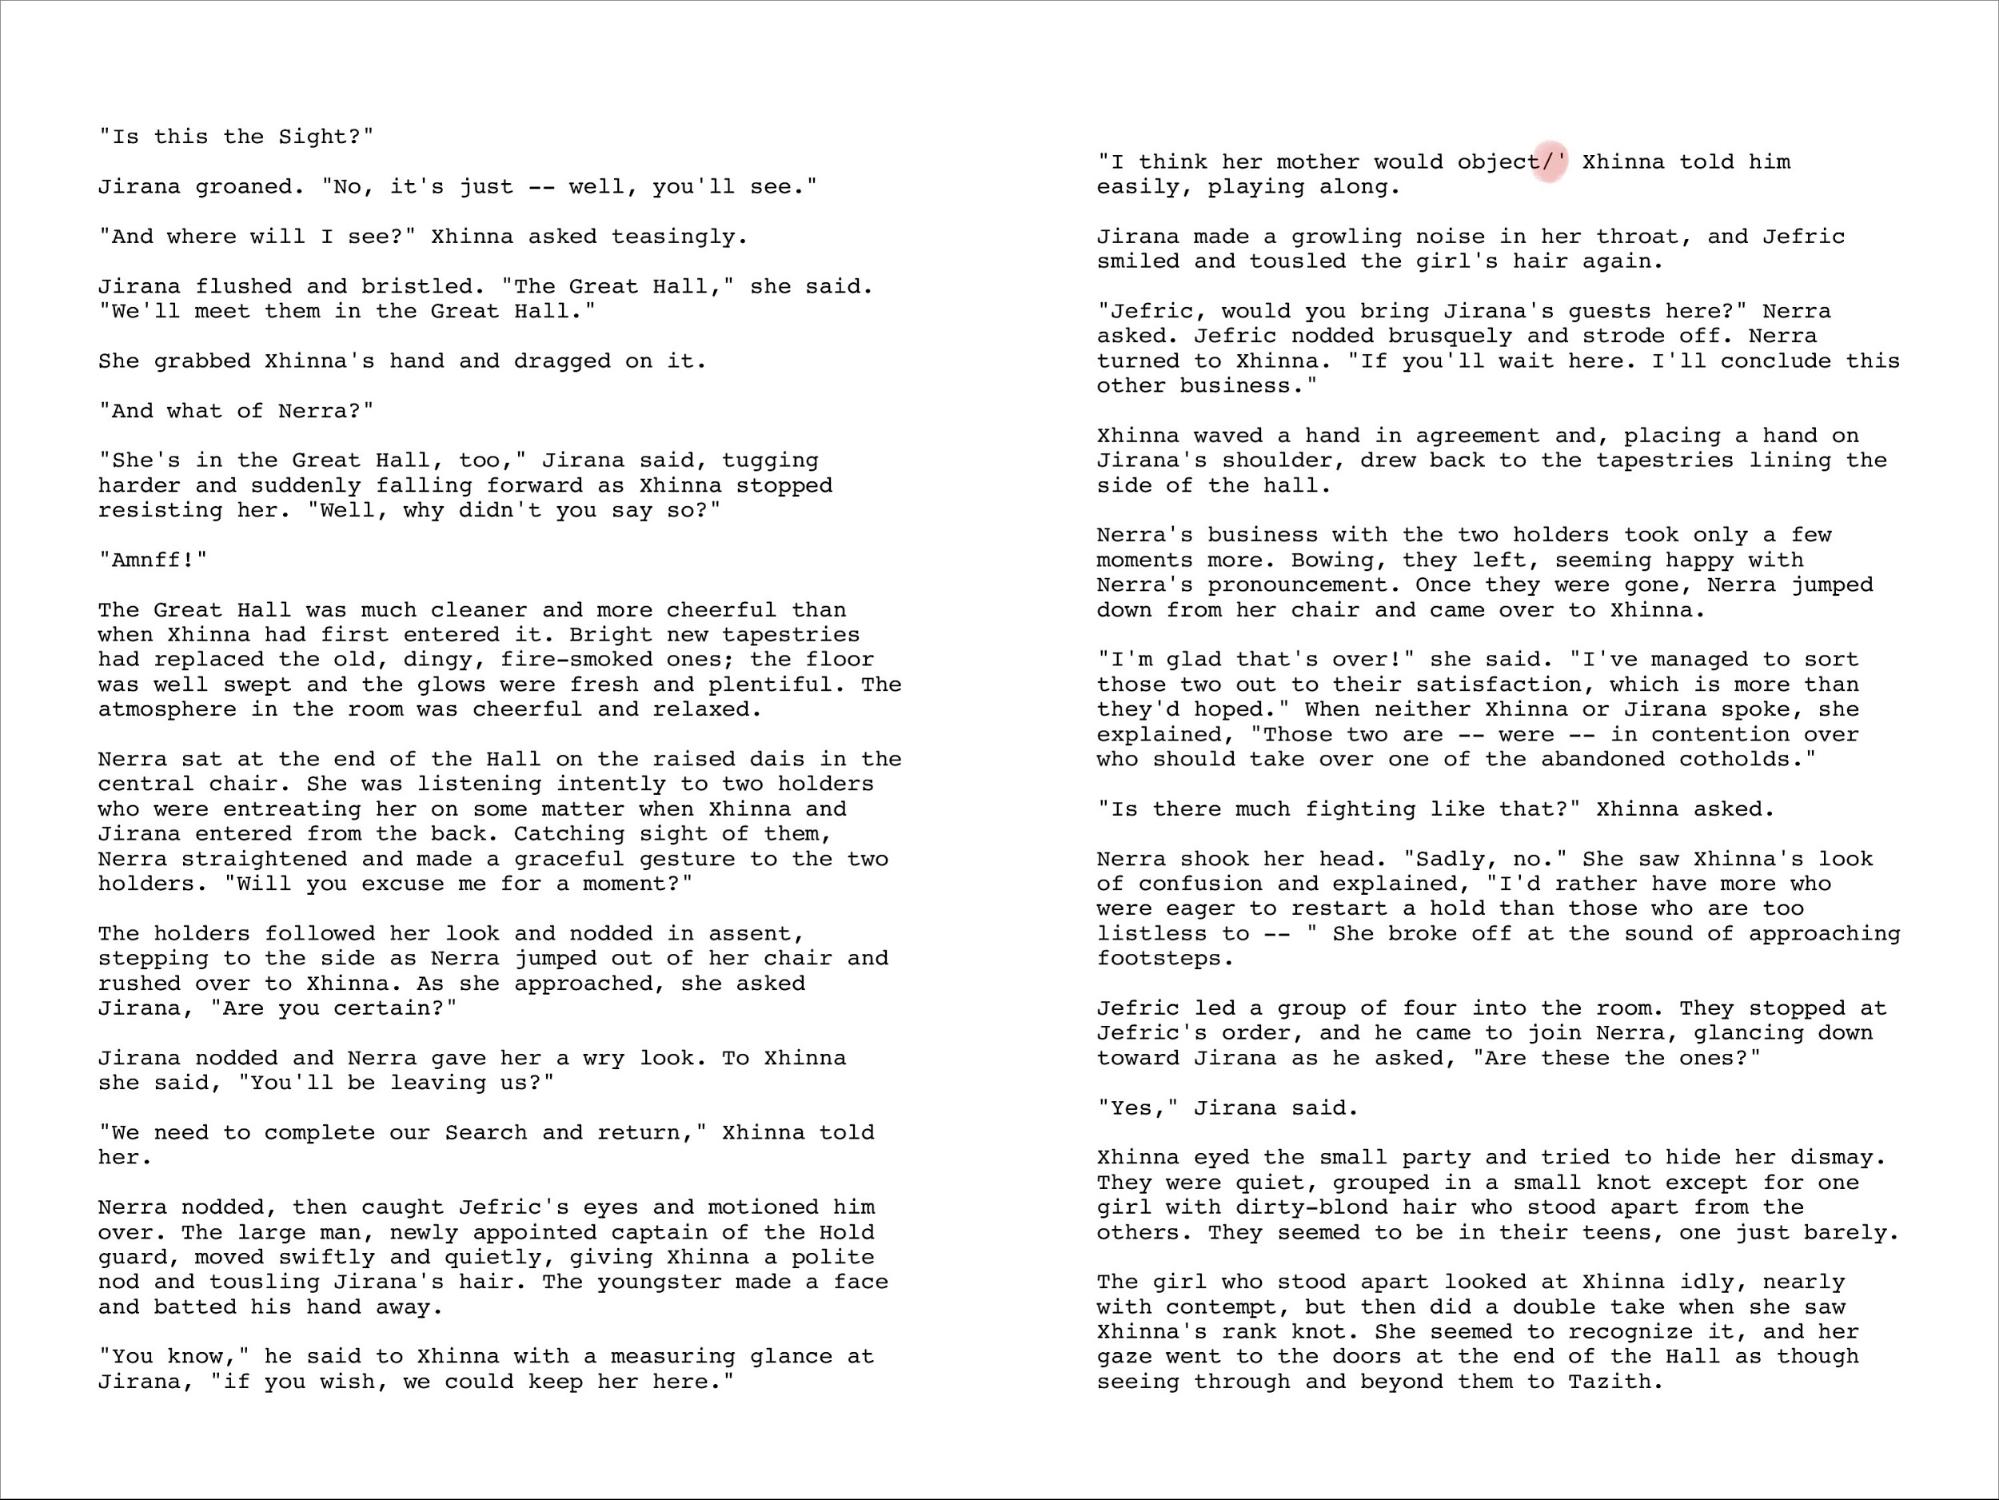
Working with OCR Text — I did some testing on the raw text and was fairly impressed. CZUR Scanner uses the ABBYY FineReader OCR engine, which is better than Adobe’s. Since CZUR Scanner produces standard image files, you’re free to do the OCR with another program if you want. Either way, expect lots of errors. It took me several hours to clean up a whole book, even though I used regular expression pattern matching to find common mistakes.
Part of the problem is that the text includes things like headers and footers (which show up in the middle of other text), CZUR Scanner can’t always figure out when paragraphs end (so paragraphs merge into one), and it doesn’t handle hyphenated words at the end of lines very well (they show up with spaces instead of a hyphen, so “hatch-ing” becomes “hatch ing”).
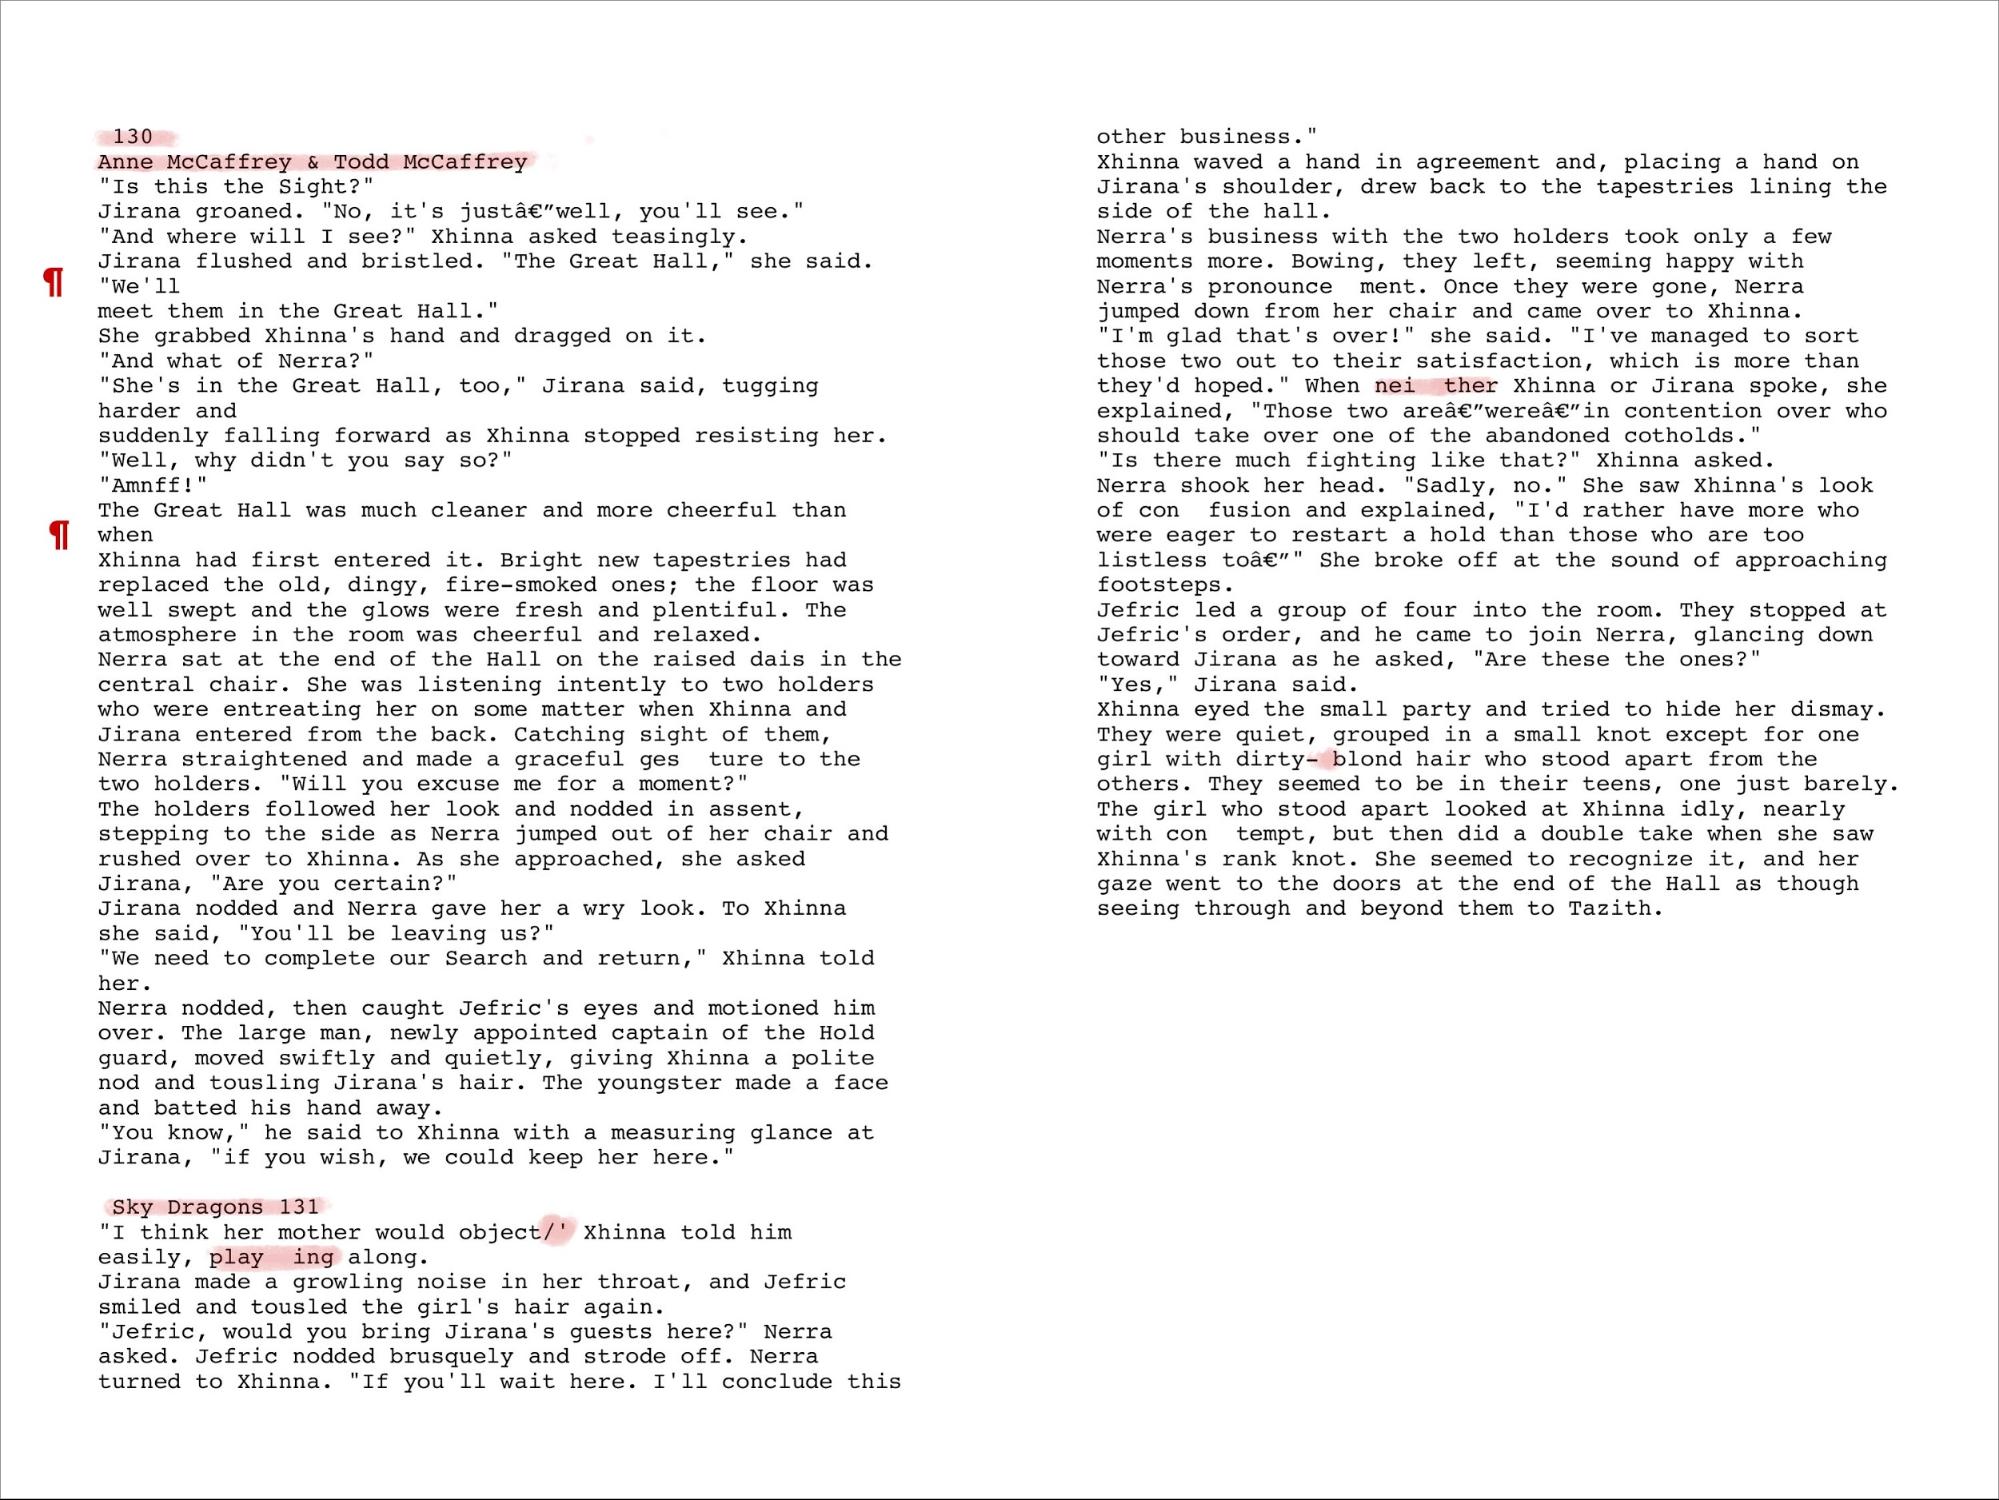
Books are also all over the place in terms of formatting and the way chapter numbers and titles appear, so you’ll have to fix those by hand. One book I scanned put fancy graphics behind the chapter titles, so each title came in with a few garbage characters.
I’ve written a little find/replace script that fixes about 75 percent of typical errors, and in one easy book — a hardback with generous margins and good typography — I addressed the rest of the major errors and formatting in about 10 minutes.
Note that this is “personal use” quality and is far from flawless. To get it perfect would require reading every line and running it through a spelling checker. You’d also have to manually apply any special text formatting, such as bold or italics. I may have to tweak my script for different books, but so far it’s showing real promise for my needs.
Also note that I’m primarily focusing on scanning fiction, which has minimal formatting. When you scan pages with poems, equations, figures, tables, or multiple columns, expect the result to have more problems. I scanned some spreads from a couple of cookbooks, just to see how well CZUR Scanner works with fractions and more complicated formatting. These are raw scans, completely unedited, and I extracted the text so you can see how well the OCR performed.
The advantage of having the OCR text to work with is that I can convert it to PDF myself, choosing my own font and text size and layout. The result is far more readable than a photograph of a printed page. And that 86 MB book is now just 1.2 MB!
<
p class=”inflow_image”>
Another huge benefit of plain text is you can convert it to other formats, such as EPUB and Mobi. You’ll want to do that if you prefer reading on an iPhone (EPUB) or Kindle (Mobi), as they don’t usually well work with PDFs.
While raw text is great, creating it does require more effort, and if the OCR has trouble with a run of text, you don’t have the original scan layer in the PDF to refer back to.
Is CZUR Worth It? — Only you can answer that question. Since nearly all books are copyrighted, you can’t use the CZUR to digitize books for resale, so you can’t make money with it.
I believe digitizing books that I own for my personal use is entirely legitimate, but technically speaking, I probably shouldn’t sell the physical copies. Even giving them away is a gray area if I retain the scans, though I’m comfortable with that.
Since I’m a writer and publisher by profession, I respect copyrights, so I don’t condone the distribution of scanned books (unless their copyrights have expired, but that’s an awfully long time these days).
So we’re left with just personal use. Is it worth spending even an hour digitizing a book you may never read again? How you answer that question depends on the book, what sort of a reader you are, and how much time you have. The CZUR is easy enough to use you could scan a few books in the evening while you watch TV.
That’s what I’ll do, and I will probably bother to convert the raw text on only a few of my very favorite books, or books with horribly small printing that I want to make more readable. Most books I’ll just leave as images.
But remember, there are other benefits to a digital library: being able to search a book’s text is amazing, and it could be vital if you’re a writer or researcher. Being able to carry your home library with you while traveling could be wonderful. Having digital access to books that aren’t available digitally is also a huge win if you’re a fan of digital reading. Many businesses could also use the CZUR for digitizing old catalogs, legal proceedings, and similar tomes that have some historical value but take up a lot of space.
If you don’t already have a flatbed scanner, you can use the CZUR for other kinds of scanning, and it’s especially useful for oversized or three-dimensional items. It’s also much faster than a flatbed, though you’d need to be doing a lot of scanning for that to be a significant factor. Unfortunately, I don’t think those other uses justify the CZUR’s price. Its real purpose is scanning books, and if that doesn’t appeal to you, you aren’t in its target market.
The CZUR scanner certainly isn’t for everyone, but if you have a lot of printed books that you’d love to have in digital form, and you’re willing to put up with a learning curve and some fiddly software, it does work well.
TidBITS Watchlist: Notable Software Updates for 21 August 2017
CleanMyMac 3.8.6 — MacPaw has released CleanMyMac 3.8.6, improving compatibility with 1Password and LaunchBar and ensuring that Dropbox’s cache is correctly ignored when added to the ignore list. The all-purpose cleaning and maintenance app now correctly updates free space in the CleanMyMac 3 menu, makes sure to recalculate the cleaned size on cleanup completion screens, fixes a bug that changed the application size to zero within the Uninstaller if selected via the context menu, and resolves an issue where SIP (System Integrity Protection) locations were not ignored by the macOS Localizations cleanup. ($39.95 new or included
in the $9.99-per-month Setapp subscription service, free update, 10.9+)
Read/post comments about CleanMyMac 3.8.6.
Alfred 3.4.1 — Running with Crayons has issued Alfred 3.4.1, which prevents incompatible workflows (those that contain an older version of a third-party Alfred Workflow library) from loading in macOS 10.12.4 Sierra and later. The keyboard-driven launcher also updates the JSON output script format with new features, updates the snippet database cache correctly when snippet triggers are duplicated, enables the Snippet Trigger feature to be connected to input objects, and fixes the Screen Saver system command in 10.13 High Sierra. (Free for basic functionality, £17 for Powerpack, 2.7
MB, release notes, 10.9+)
Read/post comments about Alfred 3.4.1.
Mactracker 7.6.6 — Ian Page has released Mactracker 7.6.6 with detailed information about major Apple hardware updates from the past couple of months, including the iMac and all MacBook flavors (see”Apple Beefs Up iMac and MacBook Lines, Teases the iMac Pro,” 6 June 2017), as well as the iPad Pro (see “Apple’s 10.5-inch iPad Pro Aims for the Sweet Spot,” 10 August 2017). It also covers the most recent updates to Apple operating systems (see “Apple Releases macOS 10.12.6, iOS 10.3.3,
watchOS 3.2.3, and tvOS 10.2.2,” 19 July 2017). (Free from the Mactracker Web site or the Mac App Store, 91.8 MB, release notes, 10.7+)
Read/post comments about Mactracker 7.6.6.
Bookends 12.8.3 — Sonny Software has issued Bookends 12.8.3, updating the reference management tool to work with the upcoming release of Mellel 4. The release also displays a warning if you try to batch-import too many PDFs from the JSTOR digital library (to prevent you from seeming like a Web robot), improves URL detection in references retrieved from Google Scholar, fixes a bug in Autofill From Internet that could result in an SQL error, resolves an issue that could cause an extra square annotation to
be added to a PDF when adding a note, and fixes a bug that prevented you from retrieving file names in the attachments field via Apple events. ($59.99 new with a 25 percent discount for TidBITS members, free update, 37.4 MB, release notes, 10.7+)
Read/post comments about Bookends 12.8.3.
Microsoft Office 2016 15.37 — Microsoft has issued version 15.37 of its Office 2016 application suite, adding the Advanced Threat Protection (ATP) feature to Word, Excel, and PowerPoint. When you click a Web link in these apps, the ATP safe links service inspects it to see if it’s malicious and then either allows access to the link or redirects you to a warning page instead of the original target URL. (This is much like the Google Safe Browsing technology that Google Chrome, Safari, Firefox, and Opera all use to check pages for potential threats.) Word also adds the new Researcher feature (find it on the Reference tab), which helps you find topics and incorporate reliable sources and content for research papers. ($149.99 for one-time purchase, free update through Microsoft AutoUpdate, release notes, 10.10+)
Read/post comments about Microsoft Office 2016 15.37.
ExtraBITS for 21 August 2017
In ExtraBITS this week, Apple CEO Tim Cook commented on the violent demonstrations that took place in Charlottesville, Apple is investing heavily in video content, and a botched firmware update has disabled many LockState smart locks.
Apple CEO Tim Cook Speaks Out about Charlottesville — In an email to all Apple employees, CEO Tim Cook decried the “tragic and repulsive” events in Charlottesville, saying “We must not witness or permit such hate and bigotry in our country, and we must be unequivocal about it. This is not about the left or the right, conservative or liberal. It is about human decency and morality.” He also announced that Apple would be making $1 million donations to the Southern Poverty Law Center and the Anti-Defamation League. As someone who grew up in the South
and once confronted the Ku Klux Klan during a cross burning, Cook finds events like these deeply troubling, but he closed with, “These have been dark days, but I remain as optimistic as ever that the future is bright. Apple can and will play an important role in bringing about positive change.”
Apple Reportedly Spending $1 Billion on Video Content — Variety reports that Apple has budgeted $1 billion to spend on 10 TV shows. That may sound like a lot of money, but in the next year, Netflix is expected to spend $7 billion on original content, Amazon $4.5 billion, and HBO $2 billion. Hopefully, Apple can produce something more compelling than “Planet of the Apps” and “Carpool Karaoke.”
Botched Firmware Update Bricks Smart Locks — Home automation can be great, but it’s not without downsides, as owners of the LockState RemoteLock 6i have discovered. An errant software update rendered the remote control aspects of their locks inoperable, although the locks can still be unlocked with a key. Airbnb hosts are particularly affected because RemoteLock locks can be integrated directly with Airbnb to manage and monitor Airbnb properties remotely. The worst part? To fix the problem, users must ship their locks to LockState to
replace the firmware, which takes 5 to 7 days, or LockState can send a replacement lock, which will take 14 to 18 days. Either way, owners of these locks must physically remove them to address this digital problem.