TidBITS#1348/05-Dec-2016
TidBITS has covered Apple and the Mac for over 26 years, and if you appreciate our content, we need your support. Apart from a couple of sponsors, TidBITS readers like you pay for the articles in every issue of TidBITS. This week, Andy Affleck explains how to block the iCloud calendar spam that affected so many Apple users over the Thanksgiving holiday. Josh Centers shows you how to watch Netflix content offline on your iOS devices and how to use Amazon’s Package X-Ray feature to sort out holiday gifts. TidBITS reader Mike Matthews joins us to demonstrate the Carpool-Kids service, which simplifies managing carpools for busy families. Finally, Jeff Porten warns about problems copying large quantities of data across external USB drives connected to the new MacBook Pro. If you find these articles useful, please become a TidBITS member to help keep them coming! Notable software releases this week include DEVONthink/DEVONnote 2.9.8, Live Home 3D 3.1, Mailplane 3.6.8, 1Password 6.5.2, Fantastical 2.3.1, and Typinator 7.0.
Become a TidBITS Member to Keep the Content Coming
Over the past 26 years, you’ve been able to depend on us to publish TidBITS regularly: 1348 weeks so far. Whether that means you scan the issue in your email on Monday night or follow along as we post on our Web site throughout the week, you’ve probably read hundreds or even thousands of TidBITS articles. As 2017 approaches, we need your help to keep that content coming. Huge thanks to our current TidBITS members, and if you’re in that group, watch your email for renewal reminders.

For the rest of you, we’re a mom-and-pop company, with no deep corporate pockets behind us, so when you join 2700 other TidBITS members, you’ll make it possible for us to publish useful articles that:
- Explain core Mac technologies, as we did in 2016 with our macOS Hidden Treasures and Power of Preview series, plus standalone articles that, for example, taught you how to manage and sync your user spelling dictionary
- Help you protect your digital life, which we did last year with discussions of Optimized Storage, migrating to a new Mac, and counterfeit Apple accessories on Amazon, plus why you might not be getting OS X security data and how to restrict your cell carrier’s use of your personal info
-
Provide detailed coverage of Apple’s significant hardware and software releases, such as 2016’s 9.7-inch iPad Pro, iPhone SE, macOS 10.12 Sierra, iOS 10, watchOS 3, tvOS 10, iPhone 7, Apple Watch Series 2, and Touch Bar-equipped MacBook Pros
-
Describe what’s new in updates to key Mac apps in the TidBITS Watchlist
-
Untangle topics that Apple pretends are simple, as we did most recently with articles on Thunderbolt 3/USB-C and HomeKit
-
Stand up for the Mac as Apple focuses ever more attention on iOS
When you join the TidBITS membership program, we’ll also provide a slate of additional perks, including:
- An ad-free version of our Web site
- A 30% discount on every order of Take Control books
- Discounts worth nearly $800 on over 75 Mac apps
- Pre-release serialized Take Control books
- A full-text RSS feed (non-members get a summary-only feed)
- The option to receive articles in email as soon as they go live
- The ability to post longer article comments, with live URLs
- Recognition of your membership with a custom apple icon when commenting
You can choose among five different levels of annual support: $20, $50, $100, $250, and $1000. Each level defaults to a manual renewal, but if you don’t want to fuss with the cart each year, an automatic renewal option is available. The membership perks are the same at each level, with one exception: the $1000 Angel level is a lifetime membership that includes a fine dinner with Tonya and me if you’re in Ithaca or we’re in your city. We’ve had the distinct pleasure of meeting a few of our Angel-level supporters in person, most recently at the MacTech Conference a few weeks ago.
If you wish, we’ll acknowledge your membership on the site in the TidBITS Members list and with an apple icon next to your comments. You can control your acknowledgment status, name, and URL on the Account Info page. That page also lists your membership status and expiration date, and if our system ever stops email delivery due to an overenthusiastic spam filter or a flaky ISP, you can restart delivery with a single click there. Remember that should email delivery ever fail, you can get our system to resend back issues — see “Resend TidBITS Issues to Yourself” (8 March 2013).
If you’ve found TidBITS valuable over the years you’ve been reading it for free, or have received personal tech support from one of our contributors simply because you asked, please become a TidBITS member to help us continue. You’ll have our undying gratitude, and more importantly, you can rest assured that every article you read was made possible in some small part by your generosity. Thank you!
How to Stop iCloud Calendar Spam
A new and pernicious kind of spam has crawled from the ooze to take advantage of an iCloud feature. By default, if someone sends you an event invitation, iCloud automatically inserts it into your calendar and prompts you to accept or decline the invitation within the Calendar app on your Mac or iOS device. This is a nice feature when you’re receiving actual invitations to meetings or outings with friends.
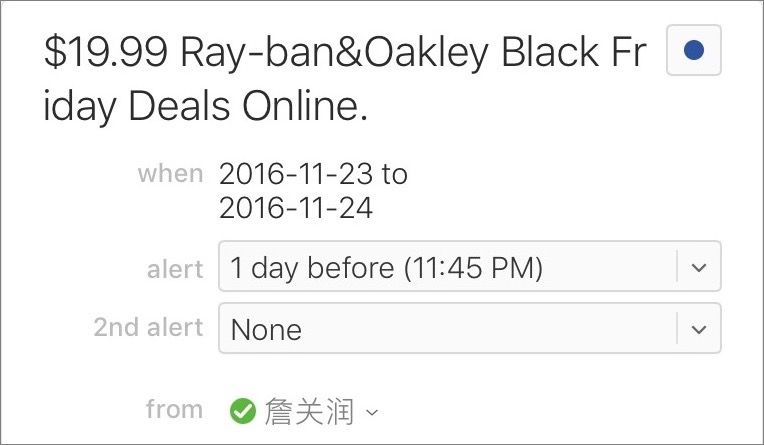
Unfortunately, spammers have discovered that they can use it to send you ads in the form of invitations. Right before Thanksgiving, I received a pair of ads that were all-day events advertising a sale on sunglasses. These events had alerts set, and they appeared on all of my devices (home Mac, work Mac, iPhone, iPad, and Apple Watch).
Needless to say, I wasn’t happy about this and went to remove these events from my calendar. Unfortunately, if you attempt to remove an event, either by deleting it or by selecting it and choosing Edit > Cut, Calendar informs you that removing the event will cause a notification to be sent to the event organizer.

That seems like a bad idea. The general assumption is that you never want to respond to a spammer because doing so could lead to receiving even more spam. I don’t know if this is actually true; it seems unlikely that modern spammers would bother to collect and use such data. Regardless, it feels wrong to acknowledge such spam in any way.
In order to remove the event without sending a notification back to the spammer, you need to follow a few steps that you might not think of on your own:
- In Calendar on your Mac, create a new calendar by choosing File > New Calendar > On My Mac. You don’t even have to name it — “Untitled” works just fine.
- Drag the spam events to the new Untitled calendar in Calendar’s sidebar.
-
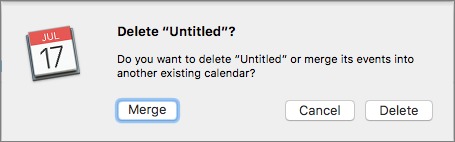
Control-click the Untitled calendar and choose Delete. Calendar asks if you want to delete it or merge it with another calendar. Click Delete.
Obviously, this method for dealing with calendar spam is annoying, and not the sort of thing you would want to do regularly. Luckily, you can keep such spam off your calendar by disabling the feature that adds event invitations to your calendar automatically. Once you do this, you’ll receive event invitations via email, and you can accept or reject them from there.
To change the invitation notification setting, follow these steps on the iCloud Web site:
- Log in to your account and click Calendar.
-
Click the gear in the bottom left and choose Preferences.
-
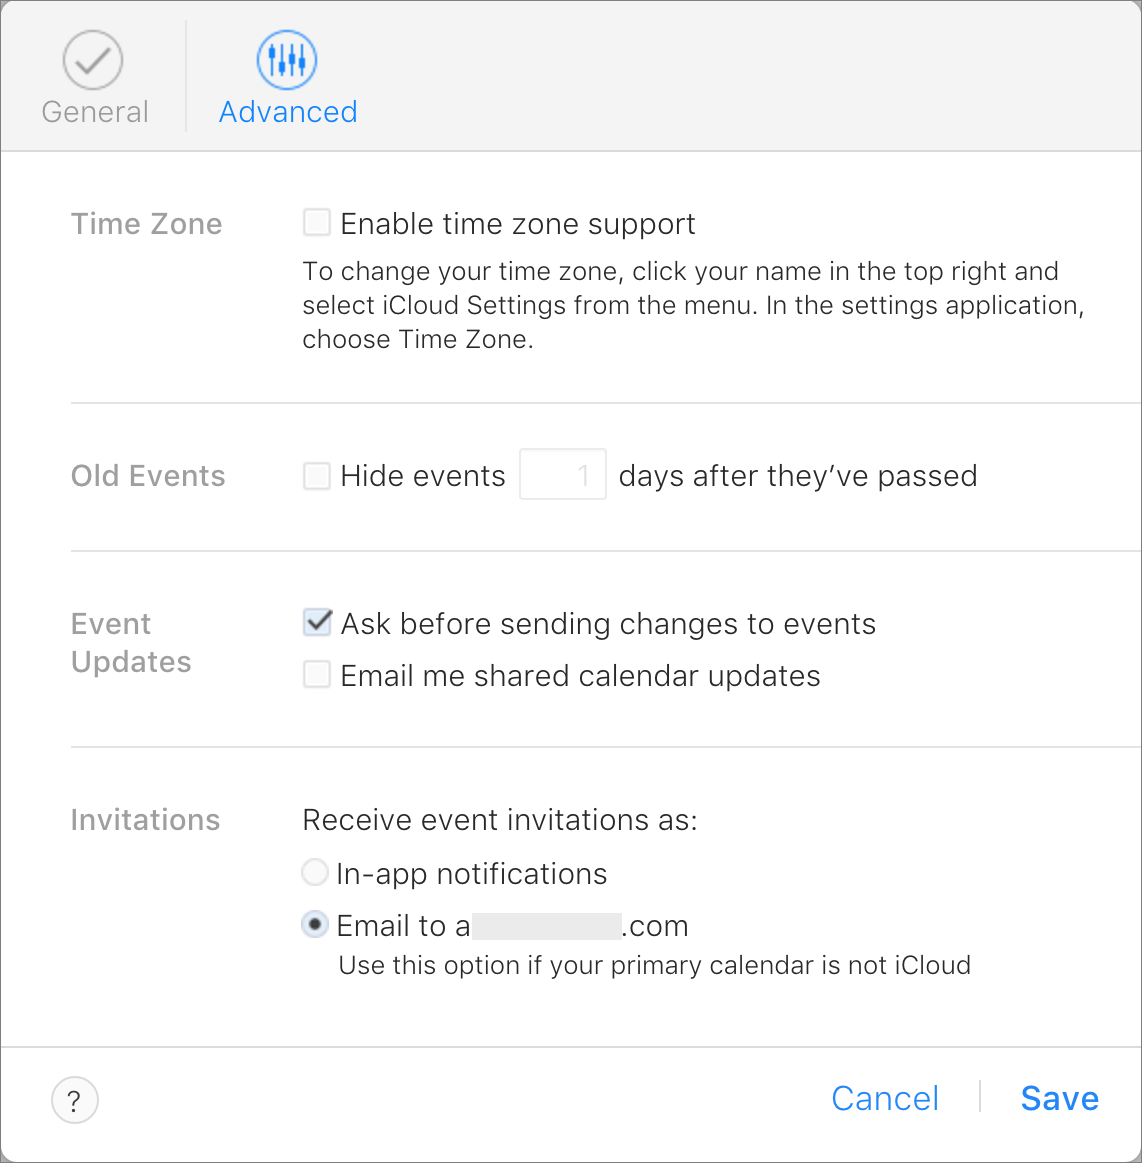
Click the Advanced tab, and under Invitations at the bottom, select the Email to yourEmailAddress radio button.
On the plus side, making this change may mean that your email spam filter will catch future spammy event invitations, so you may never see them again. However, if you also get legitimate event invitations, your spam filter might erroneously identify them as spam too, so pay attention when you might be receiving a meeting invitation.
It’s up to Apple to solve this problem for real. The first step would be to allow the user to delete a calendar invitation without notifying the sender. In the real world, you’re allowed to ignore an invitation, and the virtual world should honor that as well. Slightly more complex would be a setting to receive event invitations only from people in your contacts list. Between these two options, most users should be able to eliminate calendar spam or at least make it easily deleted.
After initial publication of this article, Apple made a statement to iMore:
We are sorry that some of our users are receiving spam calendar invitations. We are actively working to address this issue by identifying and blocking suspicious senders and spam in the invites being sent.
We can hope Apple puts an end to this problem, but if not, you can use the techniques in this article to protect yourself from calendar spam.
Netflix Introduces Offline Viewing for iOS
Version 9.0 of the Netflix app for iOS brings a much-desired feature: the capability to download content for offline viewing. If you haven’t yet used Netflix on your iOS device, you can download the latest version from the App Store; if you have a previous version, make sure to get the update.
Offline viewing has been available with Amazon Prime Video for years, and it’s handy for road trips, air travel, and for those who are often stuck without high-speed Internet access.
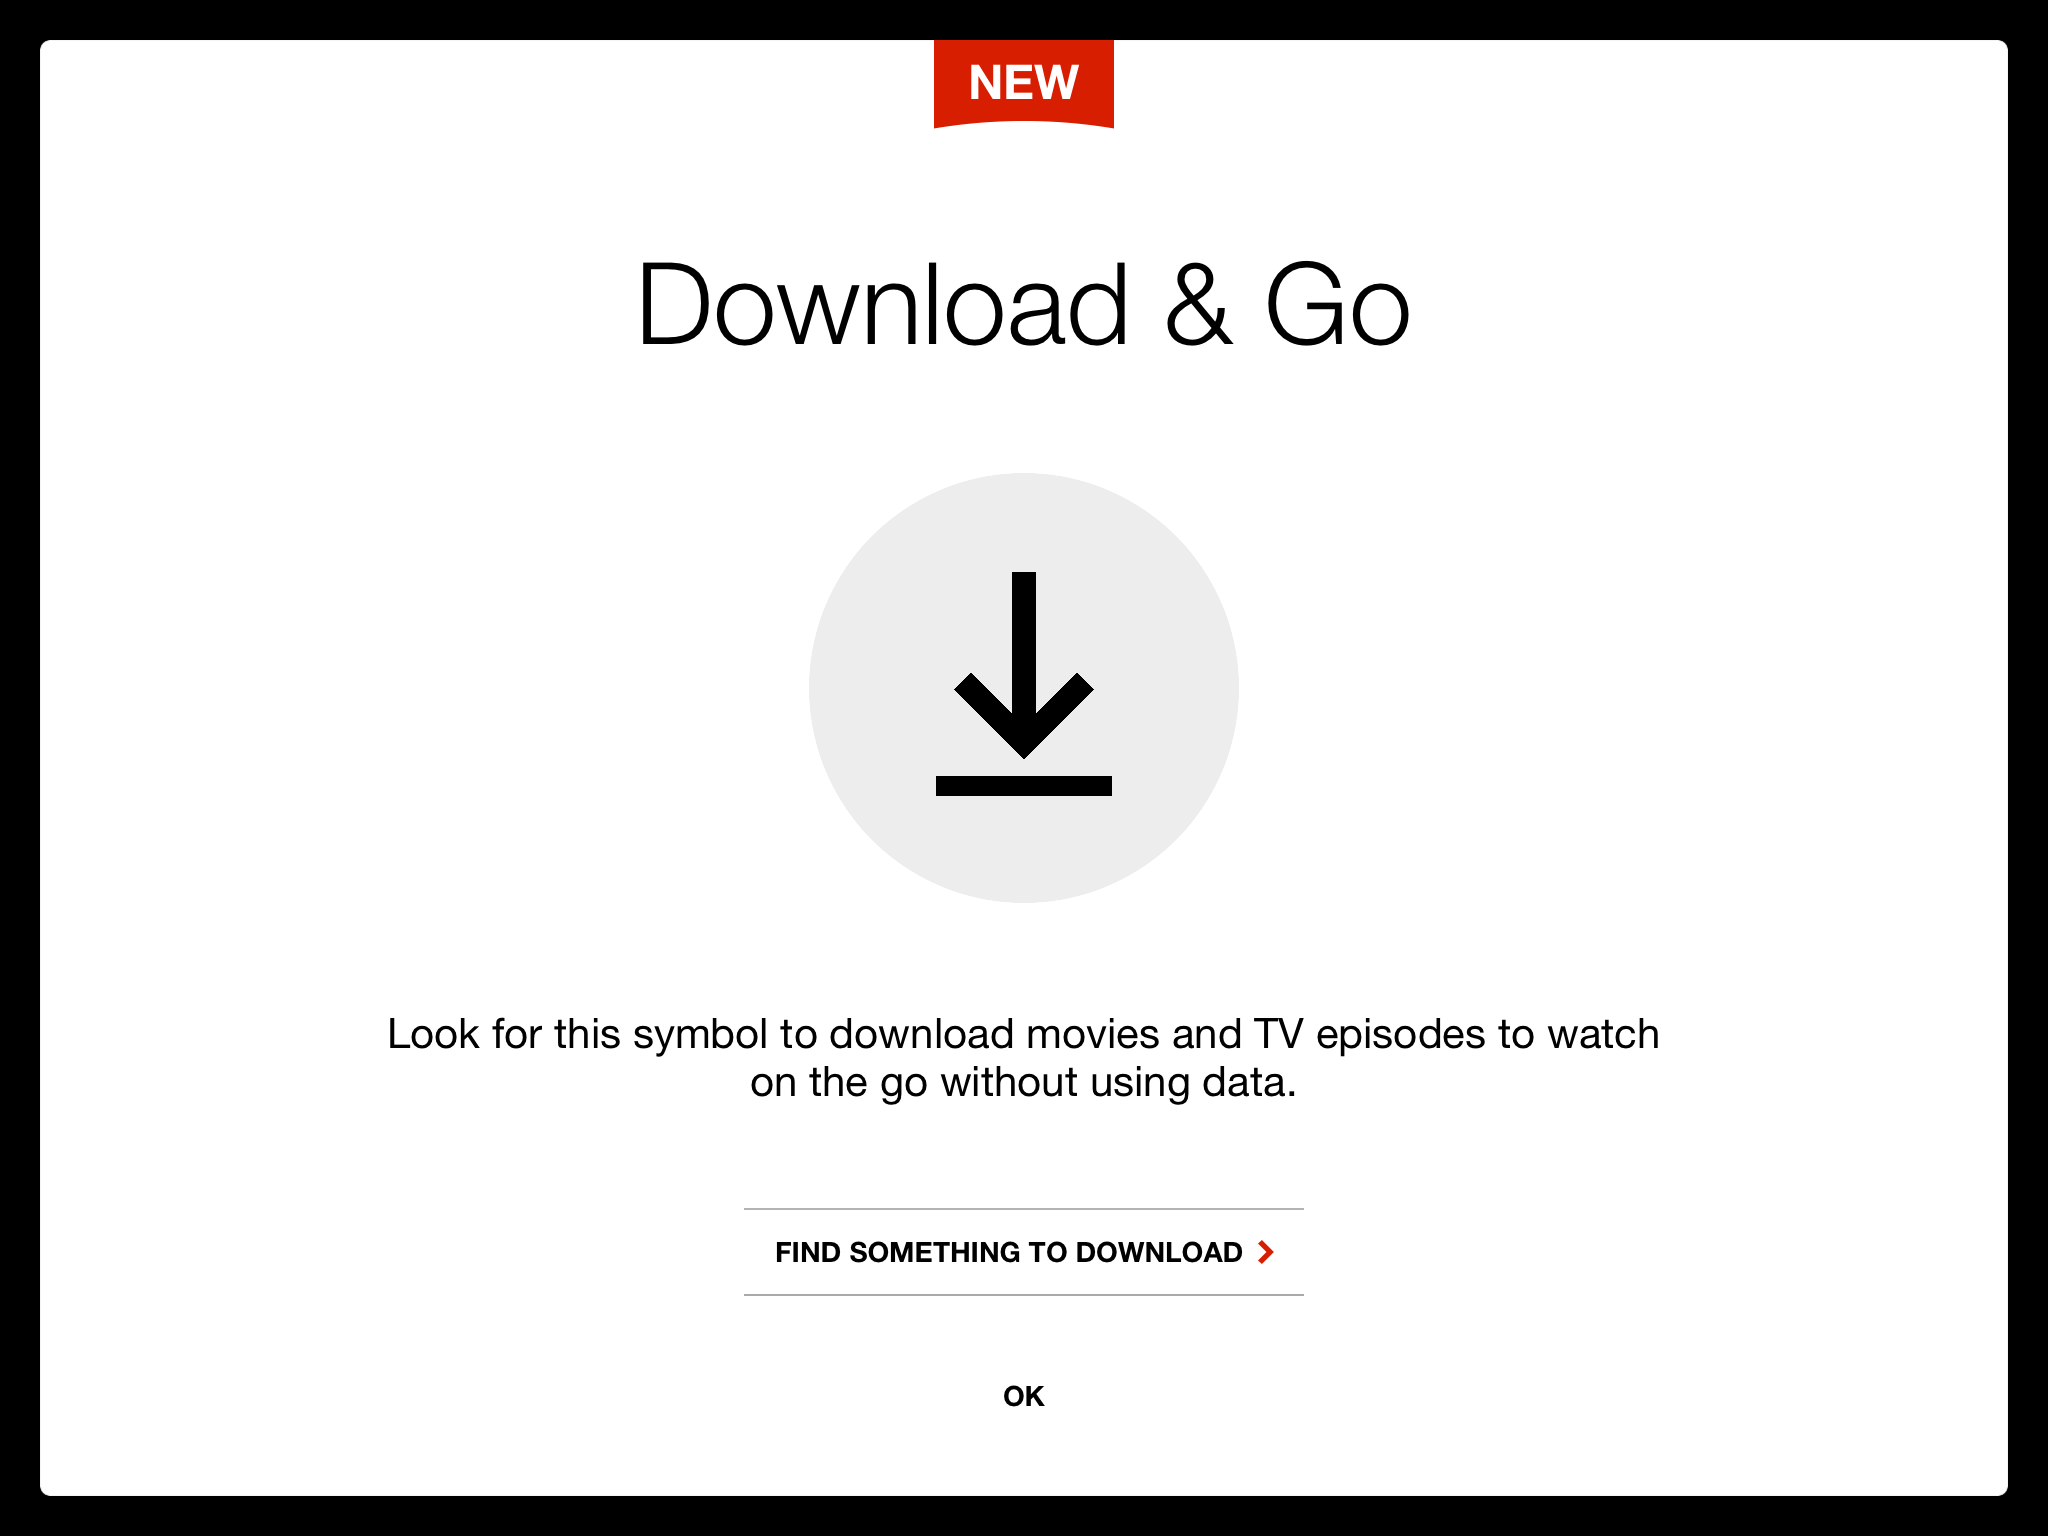
When you first launch Netflix 9.0, you’re taken to a screen telling you about the new feature, with the option to go to the Available for Download screen to see content you can download.
To access the Available for Download screen at any time, tap the “hamburger” button and choose Available for Download. Not every item on Netflix is available for download, but in my testing, most things were.
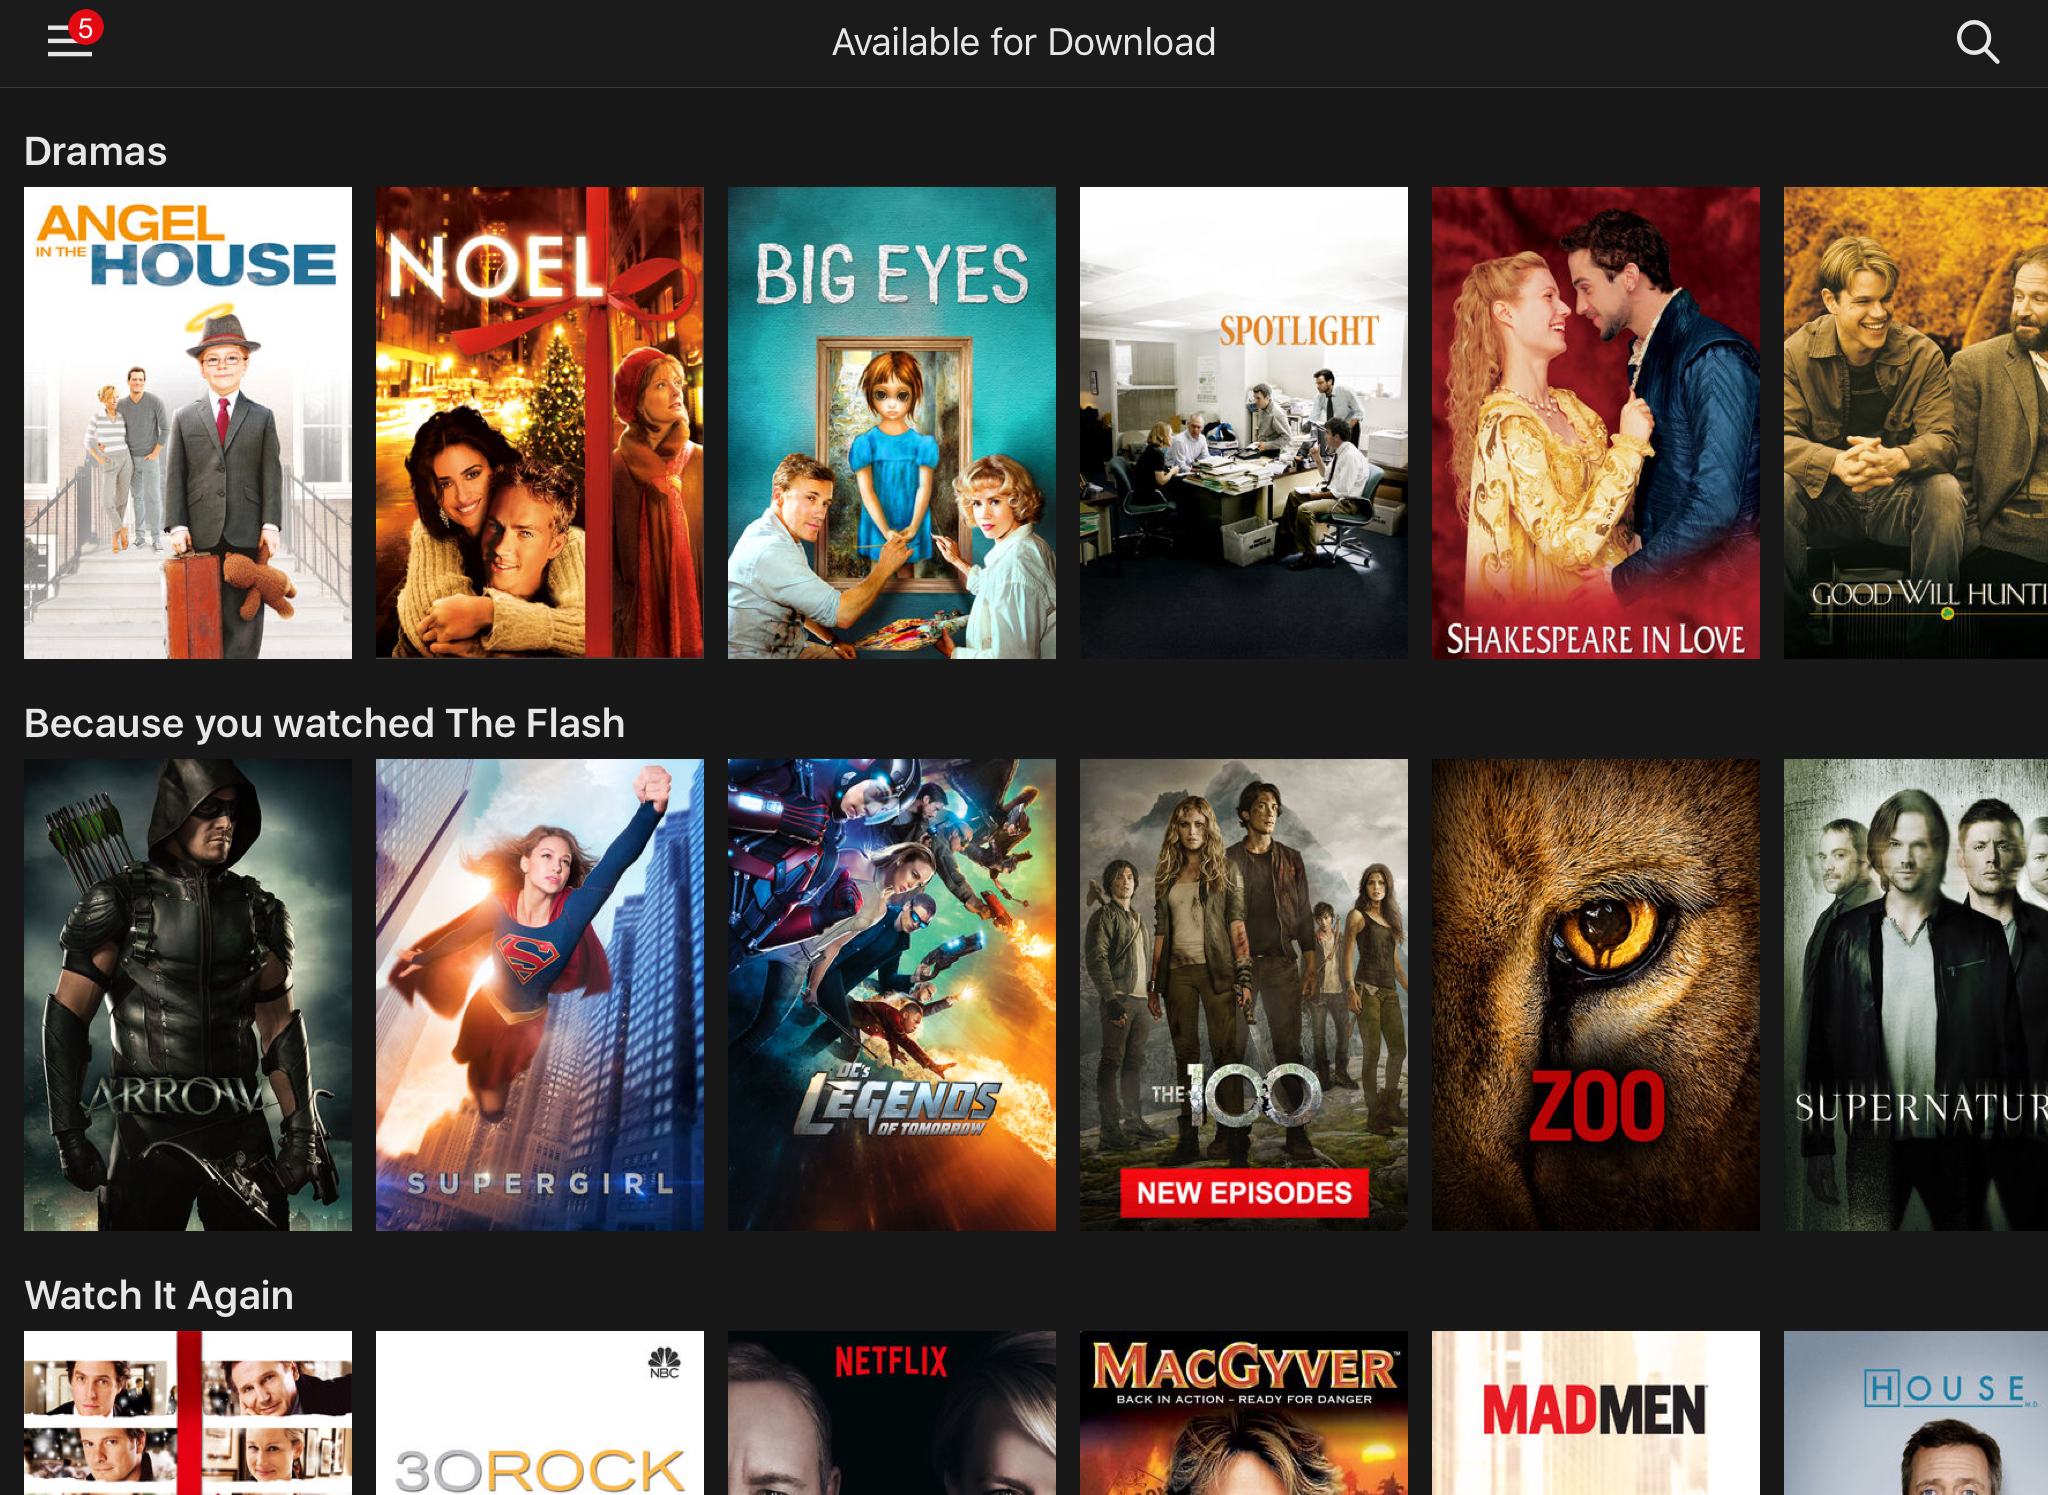
To download a movie or TV show, tap a program listing and then tap the arrow next to the movie or episode.

While the show is downloading, the arrow becomes a stop button, which you can tap to cancel the download. Once a show has downloaded, the stop button becomes an icon resembling a phone with a checkmark, which you can tap to delete the download.

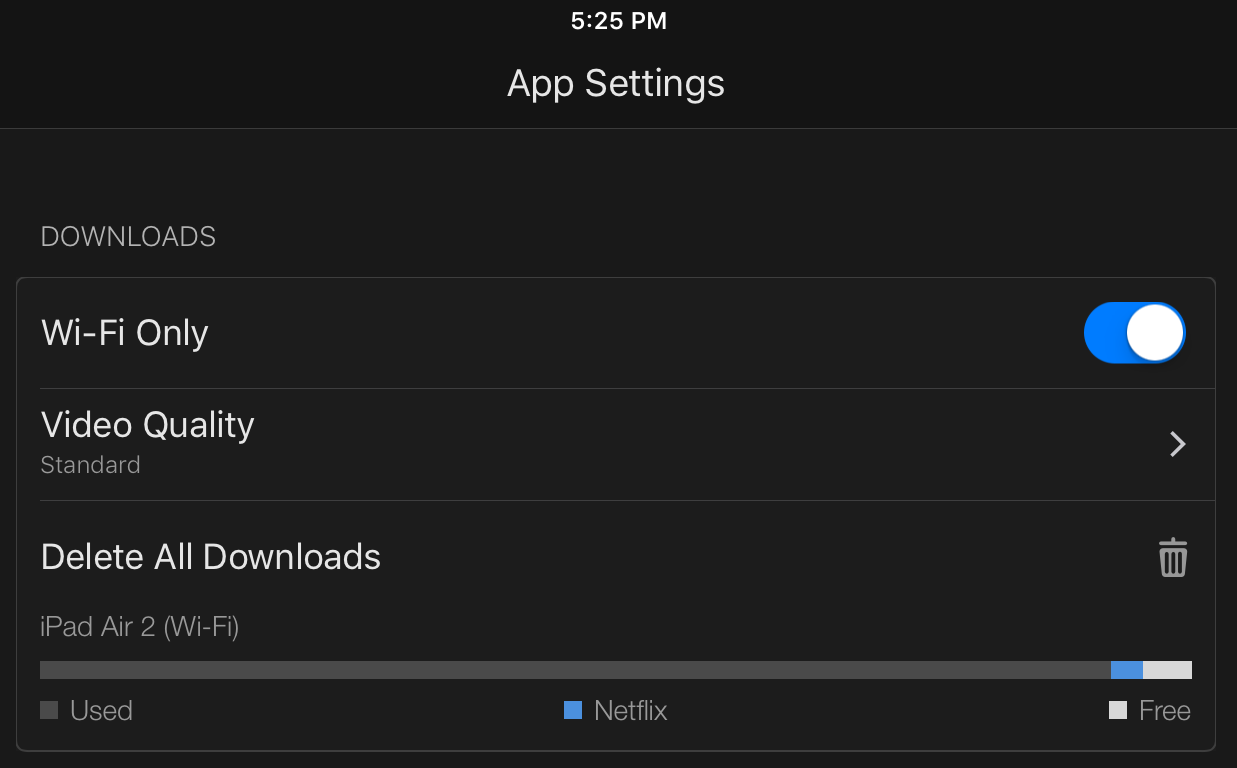
To manage your downloads, tap the hamburger button and choose My Downloads. On the My Downloads screen, you can see what you’ve downloaded and how much space it occupies. You can also play videos from here, or delete the downloads individually.
Finally, if your device is filling up, Netflix makes it easy to free up storage space quickly. From the hamburger menu, tap App Settings to see the option to Delete All Downloads.
Amazon’s Package X-Ray Lets You Peek Inside Boxes
In this modern world, it’s all too common to be inundated with nondescript cardboard boxes arriving from Amazon in the weeks leading up to the holiday gift-giving season. Typically, I cut the boxes open, see what’s inside, and seal them back up before wrapping and labeling them. But Amazon has introduced a brilliant new feature to the Amazon iOS app: Package X-Ray, which lets you peek inside unopened packages from the company. Unfortunately, it only works in the United States for now.
To use it, open the Amazon app (make sure you’re logged in), tap the camera icon, and then quickly tap Package X-Ray. By default, the camera tries to identify objects and search for them on Amazon; it does this quickly, so you may have to swipe down on those search results to switch to Package X-Ray.
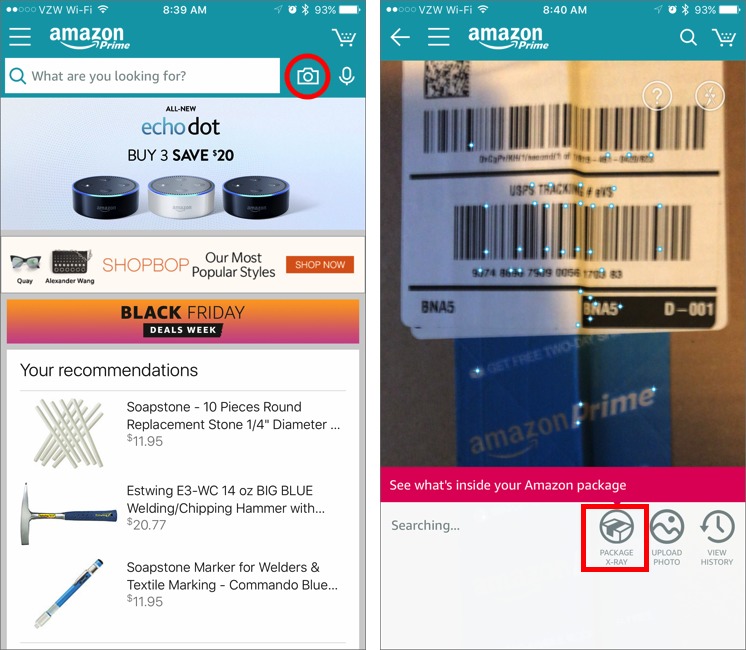
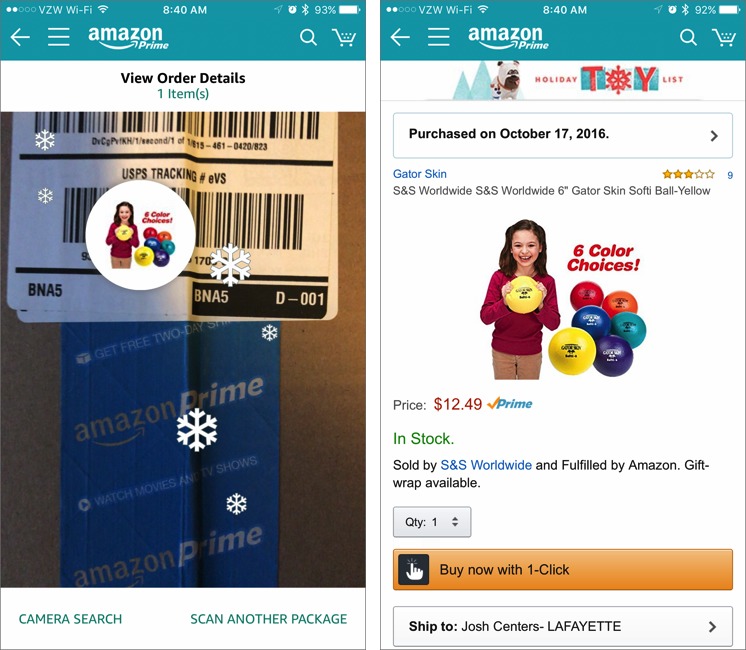
Once you’re in Package X-Ray mode, scan the shipping label on an unopened Amazon box, and a bubble should appear showing a thumbnail of the item inside. If the package contains multiple items, you’ll see a bubble for each. Tap a bubble to go to the product listing.
There are a few small caveats. First, Package X-Ray won’t work if you’ve split the shipping label by opening the package, even if you press it back together — but if it’s already open, you don’t need the feature anyway.
Second, Package X-Ray works only with packages tied to your Amazon account, so no curious children, spouses, or delivery people can spy on what you’ve bought. That also means you won’t be able to identify what’s in boxes sent to you — even when that would be entirely appropriate — by relatives who are shipping gifts directly to your address in advance of their holiday visits.
Those who do a lot of gift shopping on Amazon may find Package X-Ray helpful. Whether or not you would wrap an unopened box like me, it’s still handy to be able to peek inside an otherwise unidentifiable box without having to open it first.
Carpool-Kids Takes the Hassle out of Carpools
We’re well into the school year, and for those of us with school-aged kids, that means constant driving. Happily, the street I live on has the three things that all carpools need: cars, kids going to the same school, and willing drivers. Our neighbors have a daughter in our daughter’s class, and we have four parents with four cars. All we needed was a way to coordinate it all so we’re not drowning in email threads to plan every event.
Enter Carpool-Kids, a free iOS app that includes both iPhone and iPad versions. In addition, all your carpool data syncs through the Carpool-Kids Web site, which means your non-Apple friends can participate using a Web browser. In fact, after a bit of trial and error on our part, we found that it’s best to use a Web browser to set up your carpool because one key feature described below is not available in the iOS app.
Cranking the Carpool — Use your Web browser to go to carpool-kids.com, click the Sign Up button, and set up your account. A Basic account is free and lets you create or join one carpool. You can upgrade at any time to a Pro account, which gives you access to as many carpools as you want for $4.99 per year.
After logging in for the first time, you should be on the Profile screen, but if you’re not, click the Profile tab, and then, for each of your kids:
- In the My Kids area, click the blue + button or “No Kids — Add One Now.”
- Enter your kid’s name, and click Save Kid.

Now, add other drivers:
- Click the Friends tab.
- Enter the email address of another driver.
- Click Invite Friend.
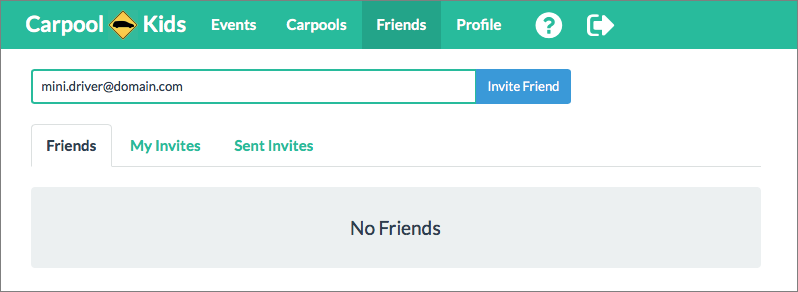
After you invite other drivers, they’ll follow the same routine: log in to the Carpool-Kids Web site and set up an account. When a friend creates an account and accepts your invitation to join the carpool as a driver, they and their kids will appear in the Friends tab.
With all the people in place, it’s time to give the kids somewhere to go and someone to get them there.
Hitting the Road — Carpool-Kids revolves around Events, which specify drop-off times, drivers, passengers, locations, and pickup times. A Carpool acts as a template for these Events, which saves you data entry time. You can create only one Carpool with a free account.
Click the Carpools tab and create your first carpool:
- Click Create New Carpool.
- Enter a Carpool Name, like “Middle School”.
- Enter a Location Default, like “East Middle School”.
- Enter an Event Name Default (how about, um, “School”).
- Click Save Carpool.
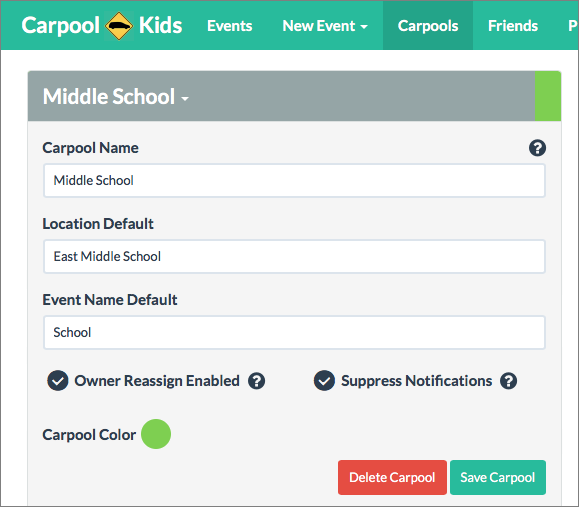
Make sure to select Owner Reassign Enabled, which gives you, as the owner, the ability to reassign driving duties. This capability can come in handy if a carpool needs someone to schedule drivers for all events. Also select Suppress Notifications. While you’re setting up the carpool and its events, you will keep your friends happy if they don’t receive a notification for every little change you make during the setup process. Once your carpool is ready to go, deselect that checkbox to let the notifications flow freely.
In the Drivers section, click the + button to add your friends as drivers. In the Riders section, click the + button to add kids (both yours and those of other drivers) to the carpool.
Here is why it’s best to use the Carpool-Kids Web site when you set up your carpool. When you click the name of a kid to add them to the carpool, be sure to click the button that adds the kid to the Carpool & Events.
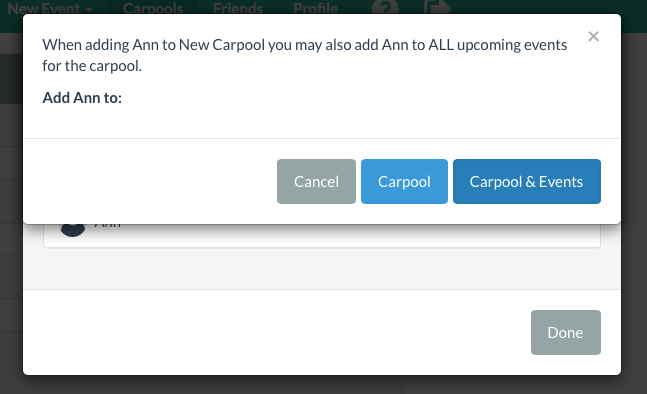
The iOS app lacks this option. If a kid will be in the carpool on a regular basis, it will be easier to add them to every one of the carpool’s events automatically — again, you can do this only via a Web browser — and then delete that kid from an event if need be.
Another tip: In your carpool, if you have a spouse or partner who will also serve as a driver, then only one of you has to add kids to your profile because you can use the Friend Links option to share a kid between accounts. To do so, go to the Profile tab, and under My Kids, click the drop-down menu for the kid and choose Friend Links.
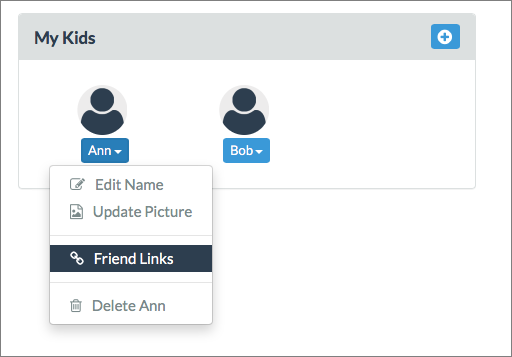
Then click the name of the friend you want to link to your kid, and, in the drop-down menu that appears, to link your kid to your friend.
The best use of this feature is when you and your spouse have separate Carpool-Kids accounts, but you want to share the same kid. Linking your kid helps keep your kid’s schedule straight.
The final part of the setup process involves creating events, which are the actual carpool entries. Here’s how to make a new event:
- Click the New Event tab.
-
Click the name of your carpool to create a new event for that carpool. Your default destination and event name will be filled out for you.
-
Add a date and choose whether this is a one-time only event or a repeating event.
-
For both the To and From legs of the event, enter a time and optionally assign a driver. If you know a kid will not be riding during all or part of this event, click the icon for that kid to dim it.
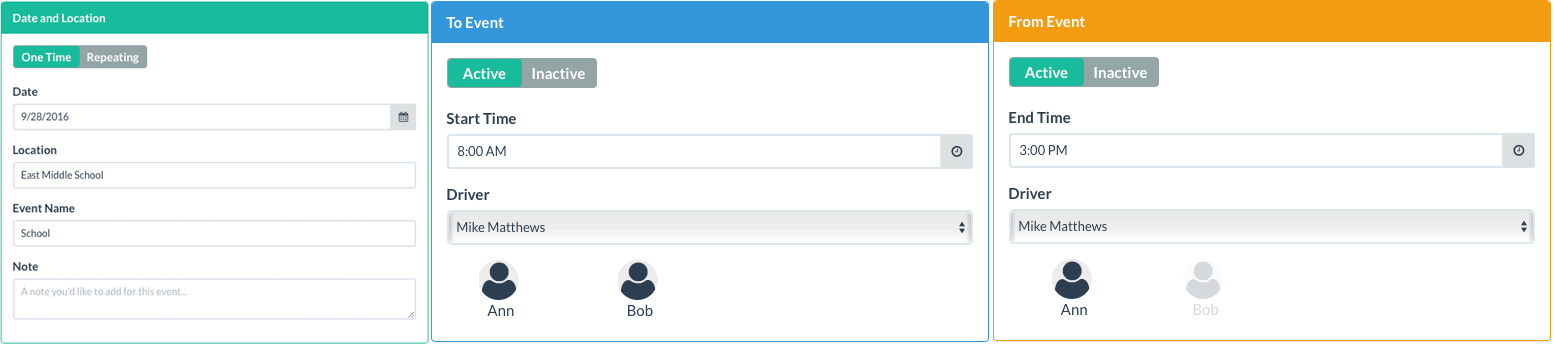
What about the Active/Inactive buttons? If you know an event will be one-way from the destination, then make the To leg of the event inactive by clicking its Inactive button. Similarly, if an event will be one-way to the destination, then make the From leg inactive by clicking its Inactive button. Making an event one-way can be done only at this point, when you’re creating it.
Here’s an example. You want to set up a carpool for driving kids to school, but they will take the bus home from school. The To section of the event will be active, but the From section will be inactive since the kids will be riding the bus instead of carpooling.
-
When you’re done, click Create Event.
Create as many events as you need. For example, if your kids’ school hours are the same from Monday through Thursday, create a repeating event for those four days. If they are released from school early on Fridays, make a repeating event just for Friday with the earlier pickup time.
You can delete and edit existing events in the Events tab.
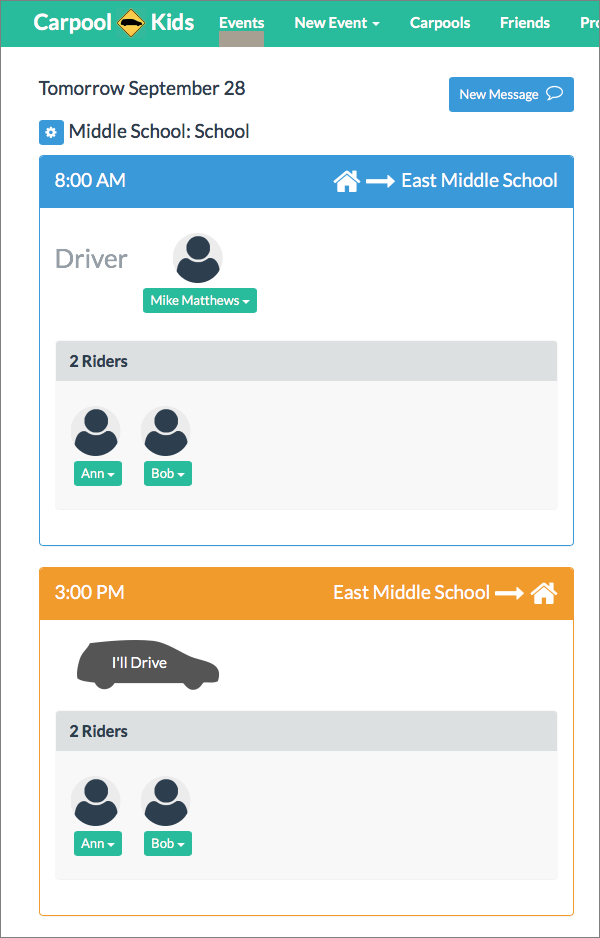
Road Map — The Events tab shows all of your carpool’s events in either a list or calendar view. You can use the filter button to see only one carpool’s events or just the events for which you are the driver.
In the Events view you can add yourself as a driver, using either the Web interface or the iOS app:
- Click or tap in the summary of the event to see its details.
-
If no driver has been assigned, click or tap the I’ll Drive button to volunteer. If a driver has been assigned but you want to swap, you can ask to take over driving duty in the following ways:
- On the Carpool-Kids Web site, click the driver’s name and in the drop-down menu that appears, click Request This Drive.
-
In iOS, swipe from right to left across the driver’s name to send a drive request.
You can add a short note to the driver before sending your request. The recipient receives an email and a notification in the iOS app. With a click or tap of a button, the scheduled driver can then swap the requester in as the new driver.
Here are some other things you can do:
- Click or tap the name of a rider to reveal a way to remove the rider from a leg of the event. That’s helpful if a kid gets sick and won’t be going to the school concert.
-
Click the gear icon in the Web interface to attach a message to the event, edit the event, duplicate it, or delete it. In the iOS app, buttons at the bottom of the event details screen accomplish the same tasks. Any time messages are created or changes occur, Carpool-Kids generates push notifications.
Details, Details — Now that you’ve created the carpool, it’s time for the finishing touches.
As the carpool owner, you should go back to the carpool settings and turn off Suppress Notifications. On the other side of the equation, all drivers should revisit their Profile settings (by clicking the Profile tab in the Web browser or the gear icon in the iOS app) and turn on the notifications they want to receive.
Everyone involved in the carpool can check the Events list for at least a month in advance to see who is driving when. But drivers should consider subscribing to the carpool calendar and their own driving calendar, both of which were generated automatically when you set up the carpool.
The driving calendar is particularly helpful; it creates a new calendar in the Calendar app on your Mac or iOS device that updates automatically, showing you the days that you are scheduled to drive. It’s best to do this on your Mac and save the subscribed calendar to your iCloud account. Doing so automatically makes it available in your iCloud account on your iOS devices. (On the Web, click Profile > Calendars; on iOS, tap Settings > Calendar Subscriptions.)
Upgrading to the Pro version of Carpool-Kids lets you see stats for each carpool showing how often each person has been the driver in the past and is scheduled to drive in the future. In the Events section of the Carpool-Kids Web site, just click the Stats button; in the iOS app, tap the pie-chart icon at the bottom of the Events screen. If you like to make sure people are reminded to do their fair share of the driving (or, put another way, if you like a little guilt with your carpool), this feature is worth the subscription fee.
Where the Rubber Meets the Road — Carpool-Kids has been rock solid for us in the few months we’ve been using it. The subscription calendars and notification system work well for keeping everyone in the loop — we haven’t forgotten a child or missed an event yet.
There are some differences between the capabilities of the Web site and the app — most prominently, the Carpool & Events button that is accessible only on the Web site when adding kids to a carpool. It would also be nice if the iOS app were Touch ID-enabled, which would enable parents to sign out of the app in order to protect information about their kids and locations and yet be able to sign back in easily with a fingerprint rather than a password.
But these are minor bumps in the road. The Carpool-Kids app is bright, clean, and simple to use. If you’re in a carpool, and check it out and save yourself the headaches involved with a lot of back-and-forth email or text messaging.
Some 2016 MacBook Pros Suffering USB Drive Problems
If you’re using or considering buying one of the new MacBook Pro models with the Touch Bar (see “New MacBook Pros Add Context-sensitive Touch Bar,” 27 October 2016), be aware that some people are seeing their machines shut down repeatedly and unexpectedly. The problem might be with external hard drives connected via Thunderbolt 3’s USB-C ports, which is, of course, the only way to connect them.
I began researching this after I was unable to copy a large number of files from one external USB drive to another using my new MacBook Pro. The copy was going to take a long time regardless, but when I came back to check on its status, my laptop was powered off and I had to start it up again manually. Restarting the copy additional times resulted in similar shutdowns.
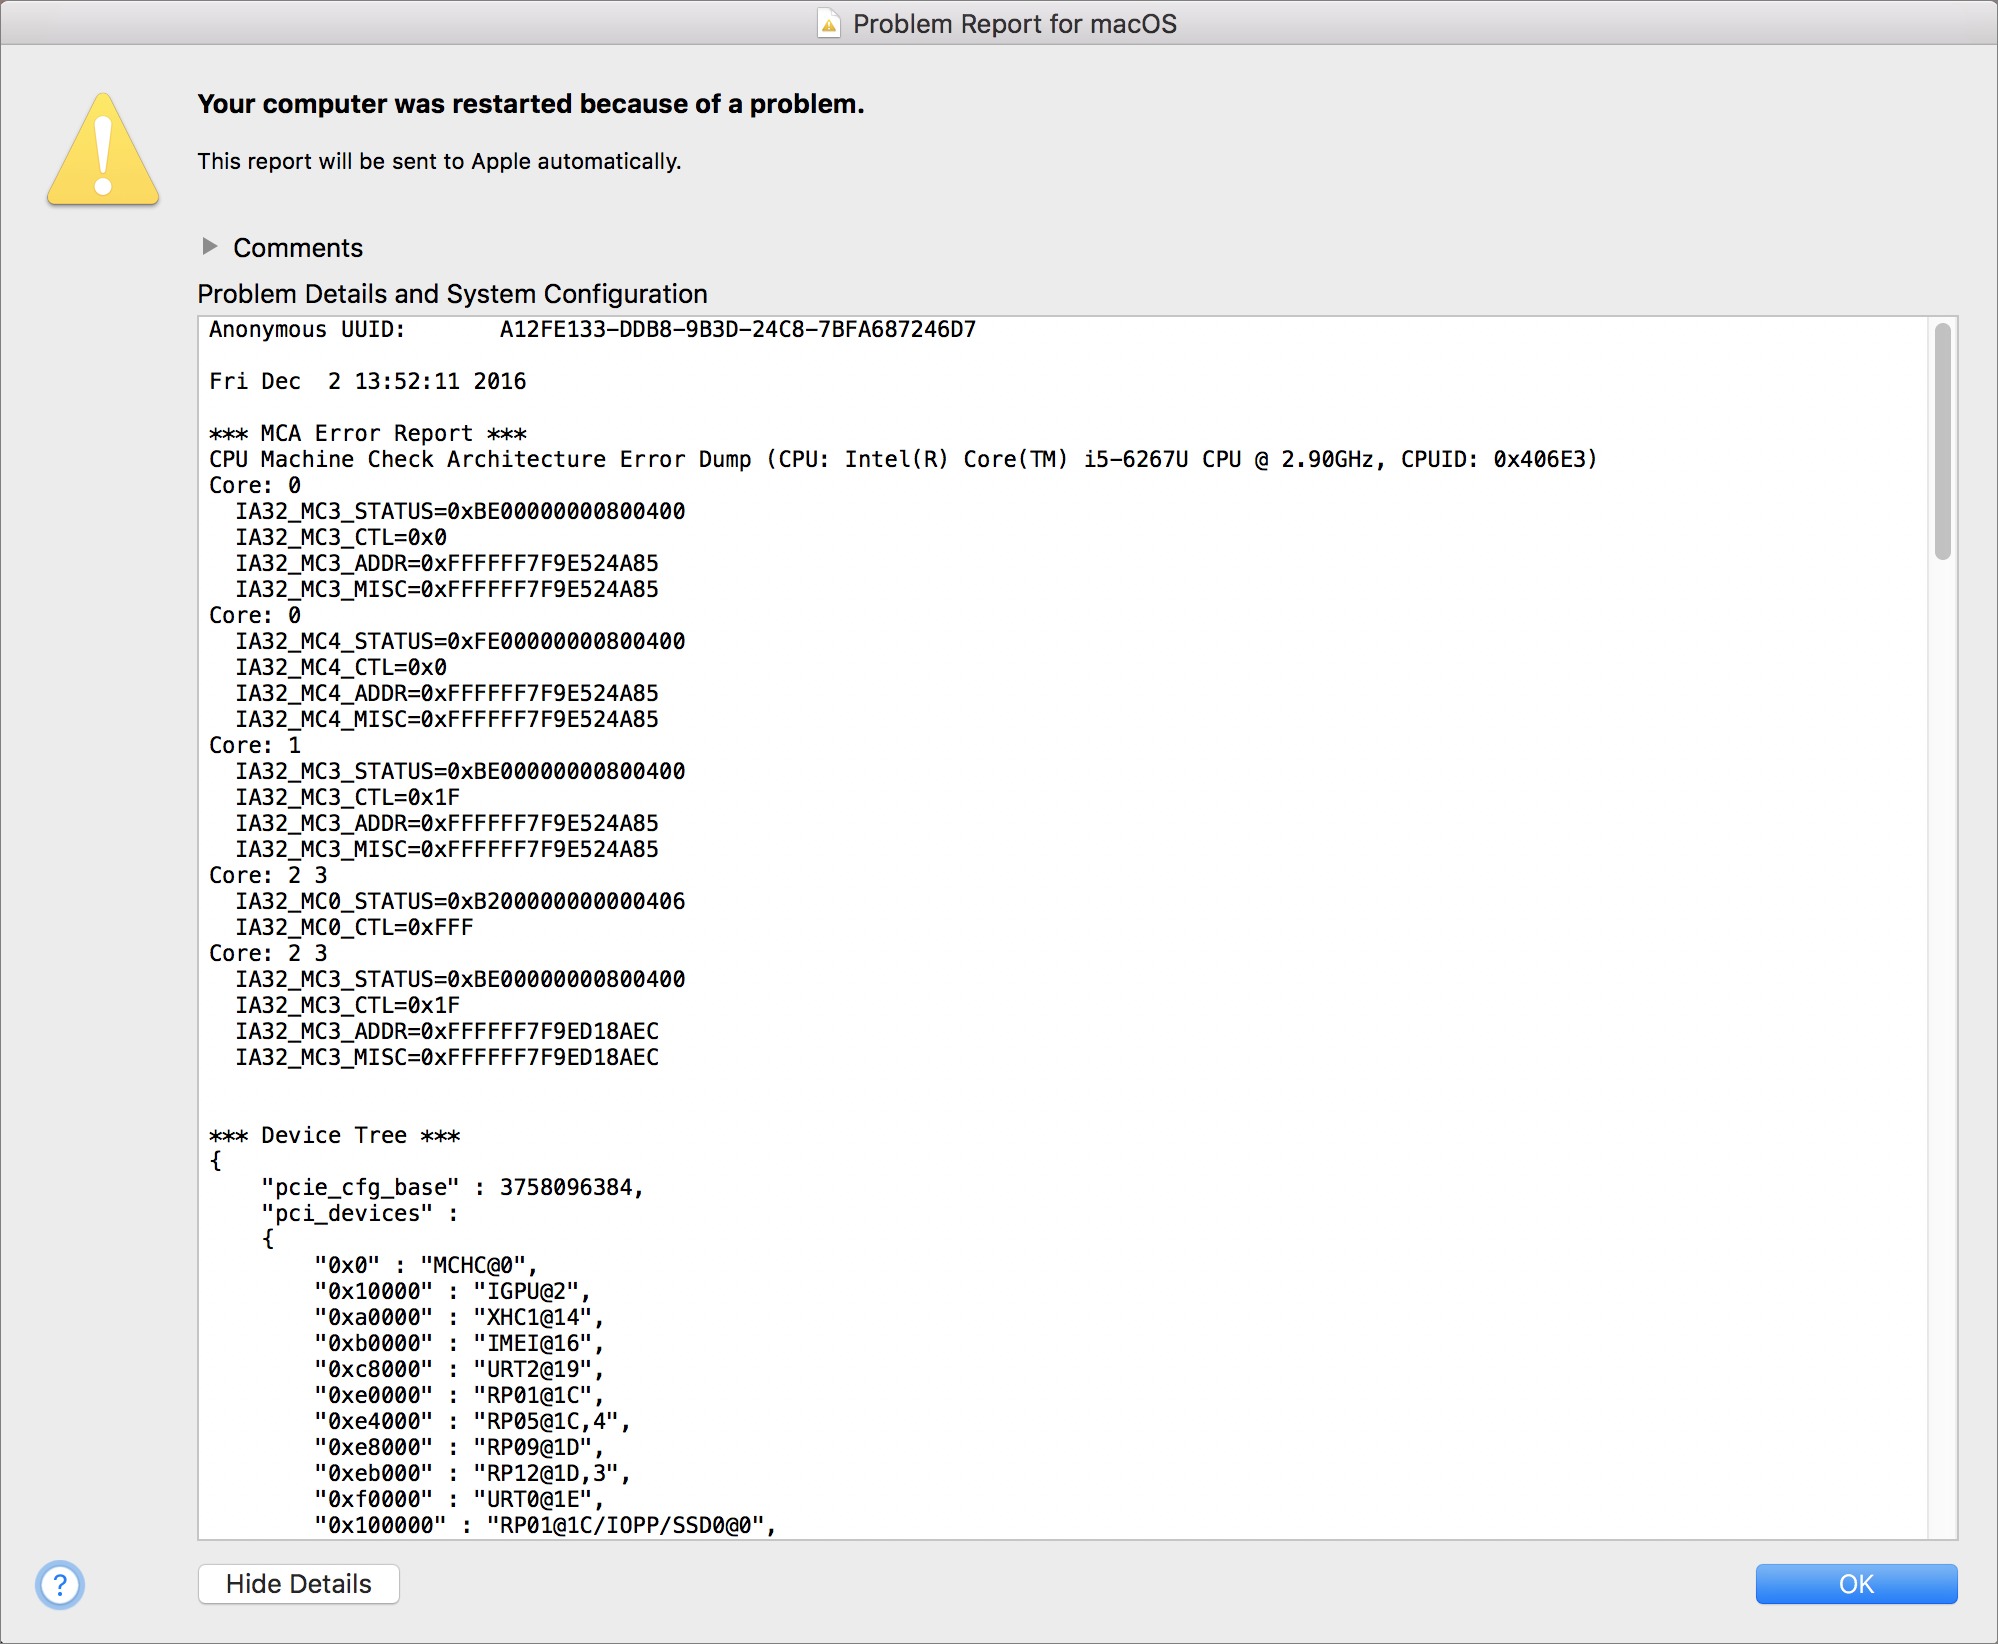
In my case, I was presented with an error message telling me about the shutdown, with the messages “CPU Machine Check Architecture Error Dump” and “CATERR detected! No MCA data found” in the highly technical error report that automatically gets sent to Apple. Long-time TidBITS contributor Jeff Carlson had similar problems, but he saw different error messages in Console, seemingly related to I/O errors. I now can get the same error message repeatedly when trying to do any large copy from one external drive to another, using either Apple’s USB-C to USB Adapter or an adapter from Aukey. However, I’ve had no problems copying from my internal SSD to a single
external drive, and likewise was able to migrate from that drive when I set up the MacBook Pro.
In my testing, my system appears to be stable when a single external drive is connected to one Thunderbolt 3 port or when multiple drives are connected to a powered USB hub that plugged into a single port. But I eventually get a crash whenever I have multiple drives connected to multiple ports directly on the MacBook Pro. The issue appears to be related to whole drives; most of my drives have multiple partitions, which doesn’t seem to matter.
If your MacBook Pro is experiencing shutdowns when you’re not deliberately copying anything, the culprit might be Time Machine doing background backups to an external USB hard drive. A MacRumors forum discussion is the only place I’ve been able to find people complaining about this issue with the error messages I received, but they report that Time Machine is a particularly reliable method of triggering this problem. I was unable to complete a Time Machine backup during normal usage, but it finished fine overnight using the single-drive setup. Other people in the forum, however, are reportedly having problems with single
drives and even individual files.
Unfortunately, there’s nothing to say about a fix right now. AppleCare is not aware of this problem as a general issue — implying that it is likely restricted to a small subset of all the 2016 MacBook Pros — so if you’re running into this problem, you should set up a service call and let Apple know you’re affected.
It’s unknown if Apple could solve this problem with a software fix, or if it’s a hardware problem that would require replacement. I ran some tests with my external drives at my local Apple Store and was unable to replicate the crashes I saw at home. However, my crashes all came while using backup utilities, which I couldn’t test at the Apple Store; I used the Finder there with my external drives. But even after I managed to get my MacBook Pro replaced by my reseller, the problem persisted on my replacement machine.
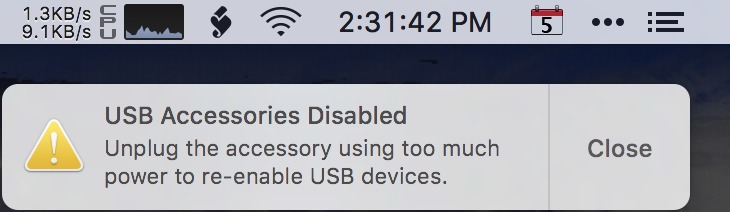
The Apple Geniuses speculated that it might be related to USB power draw, and suggested that a future firmware update may be needed. This theory is supported by the fact that, on my replacement MacBook Pro, plugging in my Nexus 5X generates a “USB Accessories Disabled” error notification due to too much power draw, but still reports a 500 mA draw. When I reseat the cable in the same port, I get the same power draw without an error; if I try a different port, the error appears again.
If you already have several drives attached and everything is fine, you might not experience this problem at all. But if you’ve already had crashes:
- If you’re using Time Machine, be careful to attach drives only to one port on your MacBook Pro, or turn off Time Machine while you’re using multiple ports. Wireless network copying seems to be unaffected, so Time Machine over a Wi-Fi network should work, but some people reported issues with Ethernet adapters connected to a Thunderbolt 3 port.
- Be judicious when setting up large copies between two external disks, as the amount of data transferred appears to be part of the problem.
-
Eject and disconnect your USB drives when you’re not actively using them.
If those precautions prevent you from making a decent backup and you’re not already using one, consider adding an online backup service (see “Backing Up Your Mac: A Joe On Tech Guide” for recommendations). It will likely take time to make an initial backup, but it’s worth getting started with an offsite backup anyway.
TidBITS Watchlist: Notable Software Updates for 5 December 2016
DEVONthink/DEVONnote 2.9.8 — DEVONtechnologies has updated all three editions of DEVONthink (Personal, Pro, and Pro Office) and DEVONnote to version 2.9.8, adding .fountain to the list of known plain text extensions and improving handling of graphics card switching on MacBook laptops with a discrete graphics card. All DEVONthink editions now enable you to specify whether you want to open Markdown documents in edit or preview mode by default, get a revamped Media preferences pane, improve scanning of multiple pages, reduce flickering while
moving or resizing PDF annotations (in macOS 10.12.2 Sierra or later), fix a bug where the PDF sidebar did not support reordering and dropping, and fix a crash related to Dropbox. Global smart groups in DEVONthink Pro and Pro Office editions now support manually updating indexed items. (All updates are free. DEVONthink Pro Office, $149.95 new, release notes; DEVONthink Professional, $79.95 new, release notes; DEVONthink Personal, $49.95 new, release notes; DEVONnote, $24.95 new, release notes; 25 percent discount for TidBITS members on all editions of DEVONthink and DEVONnote. 10.9+)
Read/post comments about DEVONthink/DEVONnote 2.9.8.
Live Home 3D 3.1 — BeLight Software has released Live Home 3D 3.1, adding the capability to export to 360° Video, Stereo 3D Video, and Stereo 3D 360° Video, all of which that can be viewed in virtual reality (VR) devices like Google Cardboard and Daydream (see “On the iPhone, Virtual Reality Is Unofficially Real,” 17 June 2016). The home design software also adds support for the Touch Bar on the new MacBook Pro, fixes some issues with auto image representations, adds support for SketchUp 2017 models, brings a new way of marking room area on a floor plan, and
enables you to share videos to Vimeo. The Pro edition (offering more tools and output options, and available for $69.99) includes the same changes and adds the capability to arrange furniture in the 2D Elevation View. ($29.99 new, free update, 278 MB, release notes, 10.9+)
Read/post comments about Live Home 3D 3.1.
Mailplane 3.6.8 — Uncomplex has released Mailplane 3.6.8, adding the option to use the active tab as the Default Sender and enabling you to block Google Calendar alerts, which is handy if you already are getting notifications from Apple’s Calendar app. The Gmail-specific email client also adds Copy Email Address for mailto: links to the contextual menu, refines the Go To menu for Google Inbox by adding Snoozed and Done menu items, and updates WebKit to the same version used by Safari 10.0.1. ($24.95 new, free update, 21.3 MB, release notes, 10.10+)
Read/post comments about Mailplane 3.6.8.
1Password 6.5.2 — AgileBits has released 1Password 6.5.2, a bug fix release for the password management utility. It resolves a problem that prevented the app from showing different account details after switching tabs in the Preferences window, fixes a bug where Touch ID on the new MacBook Pro could fail after updating your Master Password, and sorts out an issue that could cause 1Password to crash when viewing the Preferences window. ($64.99 new from AgileBits and the Mac App Store with a 25 percent discount for TidBITS members when purchased from AgileBits, free update, 44.3 MB, release notes, 10.10+)
Read/post comments about 1Password 6.5.2.
Fantastical 2.3.1 — Flexibits has released Fantastical 2.3.1 with added Touch Bar support for the new MacBook Pro. The popular calendar app also introduces an Add Detected Invitees option (Command-Control-Option-I) that enables you to automatically add invitees detected in a sentence. Other changes include an option to complete a Reminder when clicking and holding on the Snooze button of a Reminder notification, a fix for an issue with dragging reminders without a due date from the Reminders section, and the elimination of a visual glitch in the Graphite theme when running in macOS 10.12 Sierra. ($49.99 new from Flexibits
and the Mac App Store, free update, 12.8 MB, release notes, 10.11+)
Read/post comments about Fantastical 2.3.1.
Typinator 7.0 — Ergonis has released Typinator 7.0, a major upgrade for the text-expansion tool that enables you to create interactive forms with pop-up fields, checkboxes, combo boxes, and more. The new release also introduces Publish & Subscribe, enabling you to share automatically updated abbreviation sets with other Typinator users. Typinator 7.0 also reduces memory requirements, adds a new technique for keystroke markers that can simulate arbitrary key combinations, updates the predefined AutoCorrection sets (which are now provided as subscription sets so they’re automatically updated), improves the
reliability of clipboard-based expansions for certain target applications, and improves import from TextExpander. (€24.99 new with a 25 percent discount for TidBITS members, €12.49 upgrade, free update for purchases after 1 January 2016, 8.5 MB, release notes, 10.6.8+)
Read/post comments about Typinator 7.0.