#1429: Group FaceTime delayed, System Preferences window secrets, iOS Safari tip, Sinemia and other alternatives to MoviePass
In breaking news, Apple has delayed the promised Group FaceTime feature in iOS 12 and macOS 10.14 Mojave until “later this fall.” If you’ve ever needed to load the desktop version of a mobile Web site on your iPhone or disable your content blocker to get a page to work properly, Adam Engst’s TipBITS article will help. Sharon Zardetto takes a deep dive into the System Preferences window, sharing tips for arranging the preference panes alphabetically, opening them more quickly, and even hiding unused panes. Finally, Jeff Porten explores the movie subscription service Sinemia and other alternatives to the troubled MoviePass. Notable Mac app releases this week include Panorama X 10.1, Fission 2.4.3, and Farrago 1.2.1.
Ship or Slip: Apple Delays Group FaceTime until “Later This Fall”
Developer Guilherme Rambo has noticed that Apple has delayed Group FaceTime until “later this fall.” At WWDC, Apple promoted the feature as part of macOS 10.14 Mojave and iOS 12, saying that FaceTime conversations would be able to support up to 32 participants. Frankly, we’re not surprised. In testing of the current betas with TidBITS and Take Control authors, Group FaceTime was nowhere near ready for primetime.

It is of course better to avoid shipping a half-baked feature, but Apple seems to be having more trouble meeting its ship dates in the last few years. Four recent examples:
- HomePod: At its Worldwide Developers Conference in June 2017, Apple said the HomePod smart speaker would ship in December 2017. It slipped until February 2018, missing the holiday shopping season.
- AirPlay 2: Also at that WWDC, Apple promoted the wireless audio technology AirPlay 2 as a major feature of macOS 10.13 High Sierra and iOS 11. Those operating systems shipped in September 2017 without AirPlay 2, which didn’t see the light of day until iOS 11.4 in May 2018 and macOS 10.13.6 in July 2018.
- Messages in iCloud: Once again at that WWDC, Apple announced Messages in iCloud, which stores conversations in iCloud rather than on individual devices. As with AirPlay 2, Messages in iCloud didn’t appear until late May 2018 in iOS 11.4 and macOS 10.13.5.
- AirPower: At its iPhone unveiling in September 2017, Apple announced the AirPower wireless charging mat, which will use the Qi wireless charging standard to juice up the iPhone X, iPhone 8, iPhone 8 Plus, Apple Watch Series 3, and AirPods in a special charging case. It still hasn’t shipped.
At some point, we’re going to have to take Apple’s pronouncements about new features with the proverbial grain of salt. We’ll see if Group FaceTime actually ships “later this fall” or slips into a 2019 release.
TipBITS: How to Load Desktop Web Sites and Pages Without Content Blockers in iOS
Generally speaking, when you’re browsing the Web in Safari on an iPhone or iPad, mobile Web sites and content blockers are good things. Mobile Web sites reformat site content so it’s more readable and navigable on a small screen and content blockers remove ads that can make the reading experience painful.
However, neither is perfect. To make Web sites display well on an iPhone, Web designers sometimes hide content or even remove functionality, reasoning that it’s too difficult to provide a usable interface in such a small space. Most of the time, that’s a good call. But it’s not impossible that you would run across a mobile site that has lost content or capabilities that you know exist in the desktop version of the site. Or the mobile site may simply be coded badly. The solution is to switch to the desktop version of the site, if possible.
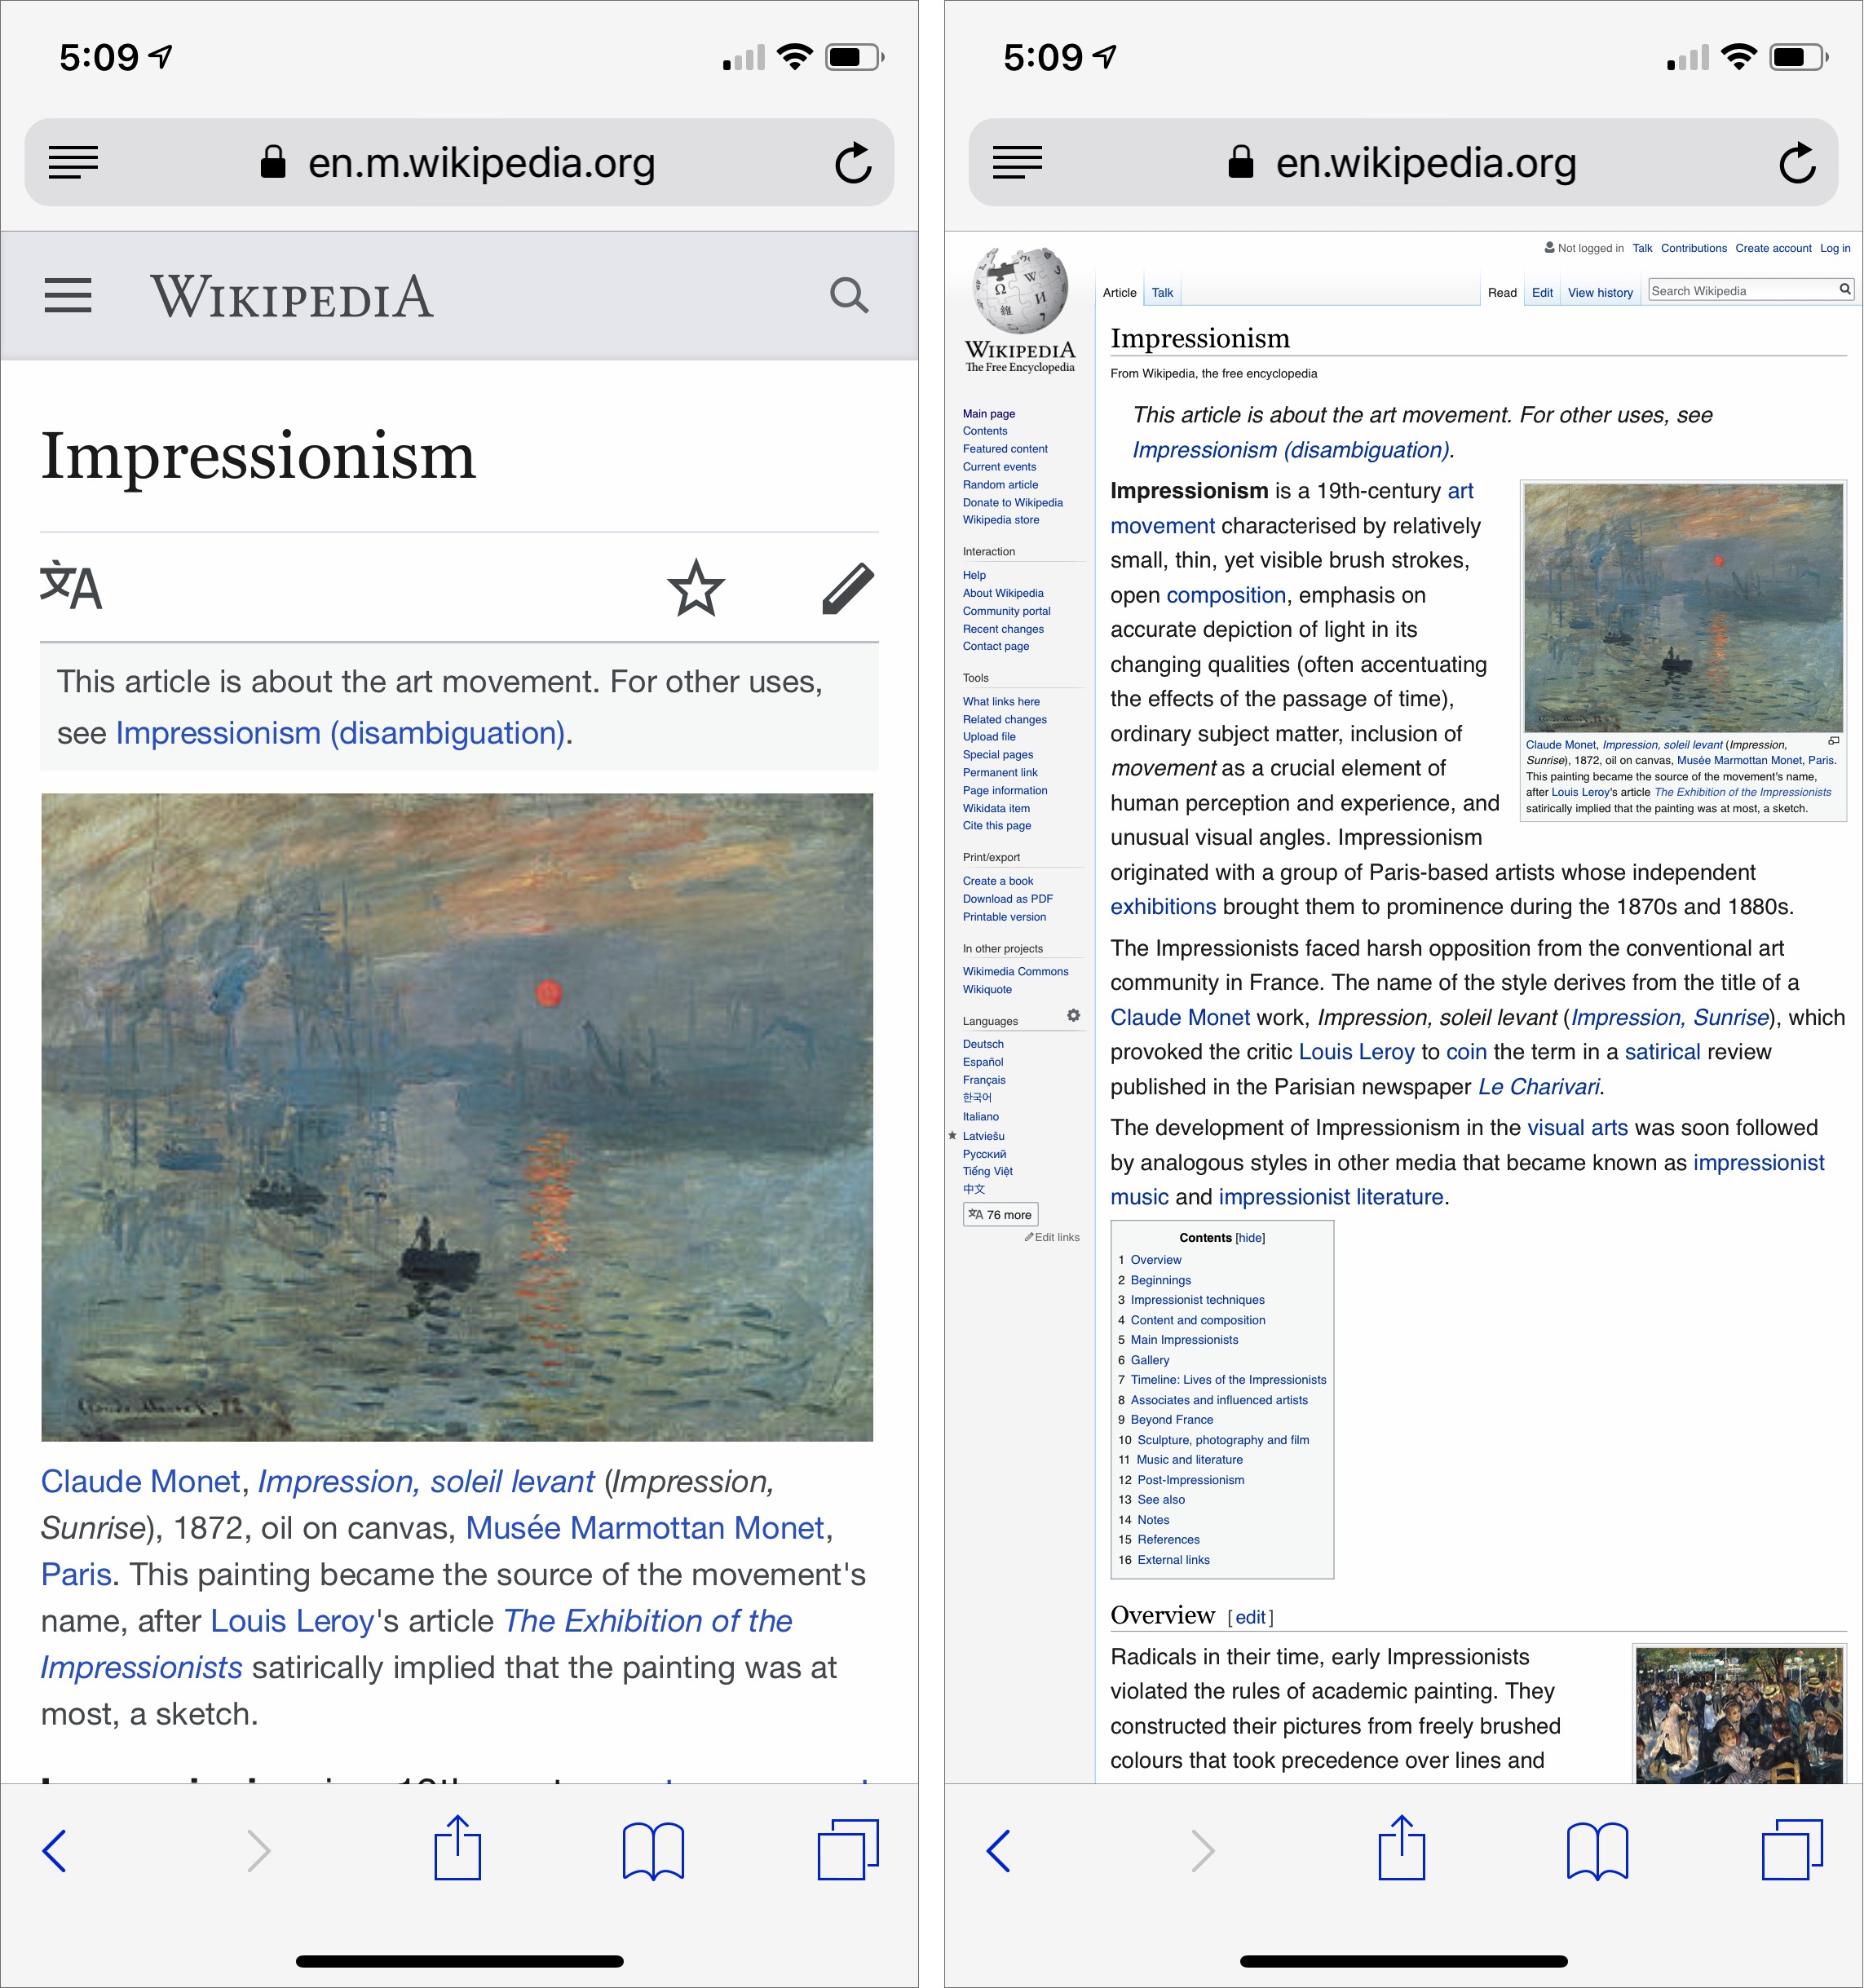
Similarly, content blockers usually work as advertised, eliminating ads, trackers, and other bits of Web technology. Those things can slow performance, detract from the reading experience, and impinge on your privacy. Sometimes, however, content blockers can render a site non-functional or even incomprehensible by blocking third-party services necessary for the site to display or work correctly. Disabling the content blocker will solve the problem, but it’s a lot of work to do that for a single site and then turn it back on.
Apple’s engineers anticipated both of these problems in iOS and provided a pair of useful options that appear when you press and hold the reload button: Request Desktop Site and Reload Without Content Blockers.
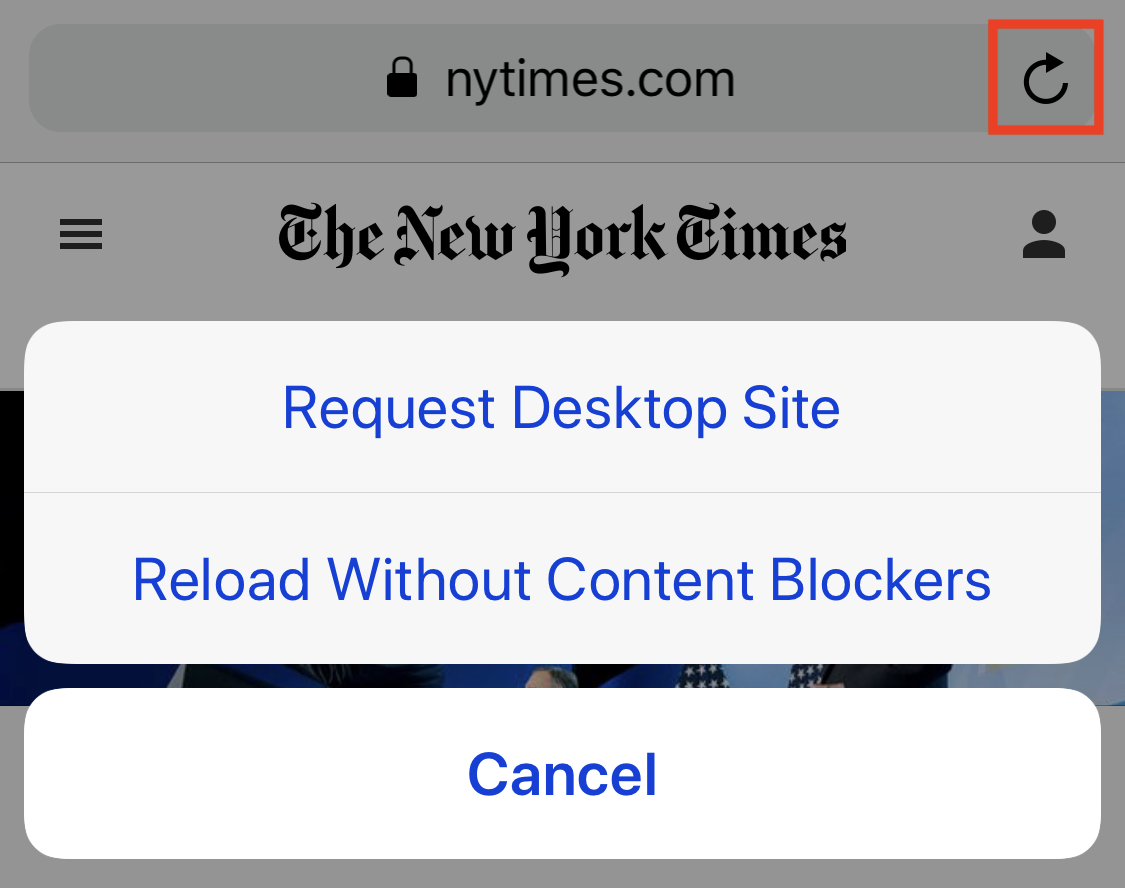
Both attempt to do what their names say, although the results may not be what you want:
- Many sites won’t show the desktop site regardless, in some cases because the mobile site is responsive, and is just resizing itself to the smaller screen size dynamically.
- Safari may maintain access to the desktop site as you browse the site, or it may not.
- Even if Safari disables content blockers for the subsequent page load, ads or other blocked content may not be causing the display or functionality problem you’re trying to solve.
Even if neither option is necessarily always satisfying, it’s good to know they exist and may help you use a site that isn’t working as expected on your iPhone or iPad.
macOS Hidden Treasures: Secrets of the System Preferences Window
System Preferences is easy to use: open it, click here, click there—whoops, not there, over here instead… wait, where is that setting? My point is: System Preferences could be easier to use. And it is, once you know the details.
You don’t, for instance, need 30-plus items displayed when you use only a dozen of them regularly. You don’t always have to start with the full window, click a preference pane, and then click a tab to get where you want to be. And that Search field is more useful than you might expect.
Open System Preferences and Preference Panes
To open System Preferences, you can choose Apple > System Preferences or click its icon on the Dock. (System Preferences isn’t on your Dock? See the tip at the end of this article.) Or, use a keyboard shortcut to open it, as described below.
You can jump directly to a specific pane without first opening System Preferences itself, although the first two options here are limited to only a handful of panes:
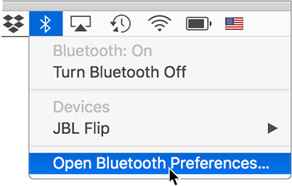
- If the item has a status menu on the menu bar, choose Open Preferences from its menu.
- If an item has a dedicated function key—as do volume control and screen brightness, for instance—press Option and the function key to go to its preference pane. This trick also works with the Touch Bar.
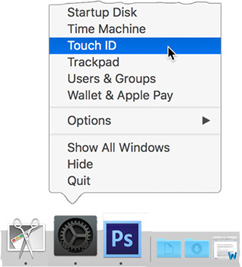
- If the System Preferences icon is in your Dock, press (click-and-hold, rather than just click) it, and choose the pane you want from the menu.
- Put an icon for a specific pane in your Dock; clicking it opens System Preferences to that pane. (A tip at the end of this article explains how.)
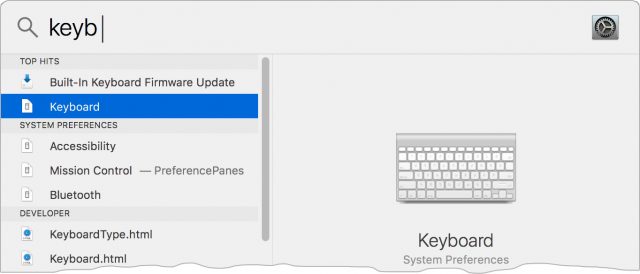
- Use Spotlight to jump directly to specific panes using only the keyboard. Command-Space bar is the system default for opening Spotlight, and typing the name of a pane—usually just the first few letters—gives you a list of options, including the preference pane. The first hit in the list is always highlighted, indicating that pressing Return will open it. I used this method for years, and often still do (I blame muscle memory), but it’s much quicker to use the next method.
- Okay, this isn’t exactly “directly” to a pane, but it’s so quick, it might as well be. Set up a keyboard shortcut to open System Preferences, and create shortcuts in System Preferences for the panes you use the most. The two keyboard shortcuts can get you to a pane in about two seconds. (I describe how to set these up later in this article.)

Open Panes from Within System Preferences
Once the System Preferences window is open, displaying its collection of icons, there are many ways to open a specific preference pane:
- Click its icon.
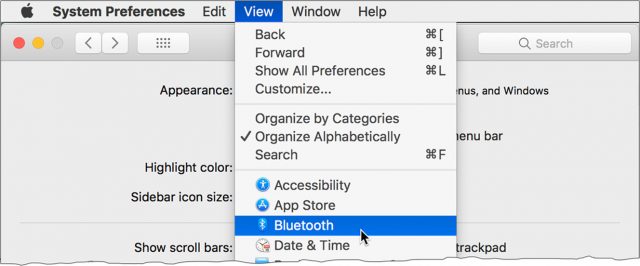
- Choose it from the View menu.
- Choose it from the Show All
 button’s menu: press—that is, click and hold—the button for a list of panes.
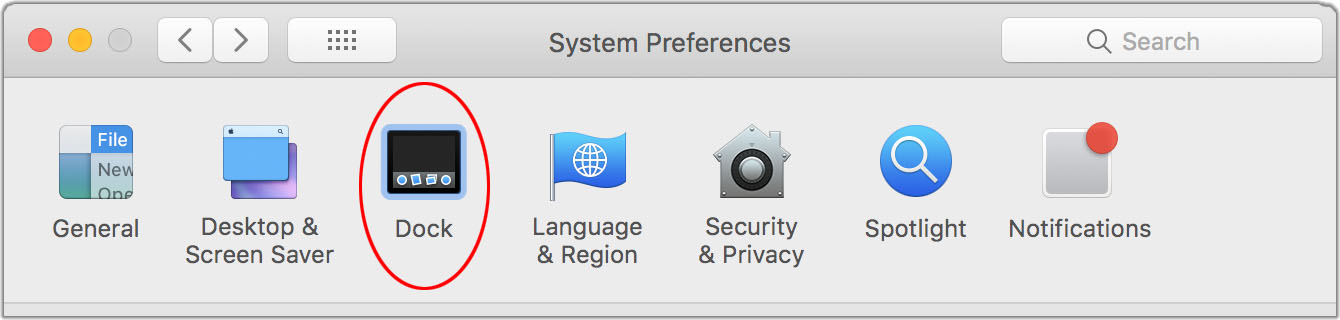
- When the Search field is inactive (the magnifying glass and Search label are grayed-out and centered in the field), type one or more letters to specify a target pane; a quick animation outlines it in blue (as with the Dock icon shown below), and pressing the Space bar opens it.


- Assign keyboard shortcuts to items in the View menu that you open frequently—and to System Preferences itself—as described next. (The shortcuts show up in the Show All button’s menu, too.)
To return from a preference pane to the icon array, you can:
- Click the Show All button.
- Choose View > Show All Preferences (Command-L).
- Use the Back button on the menu bar, or choose View > Back (Command-[ ). Use the Forward button or View > Forward (Command-]) to head in the other direction when you’ve been tweaking more than one setting. These buttons and commands can take you through a history of where you’ve been in System Preferences.
No matter how you move around, if you return to a multi-tab pane, the tab you worked in previously will remain selected as long as System Preferences remains open.
Set Up Keyboard Shortcuts
You can skip menu selections and/or multiple clicks to get where you need to go in System Preferences: set up a keyboard shortcut to open System Preferences, and then others within System Preferences to take you to the pane you want. Two quick key combos get you there in about two seconds, and you can move quickly from one pane to another if you have more than one thing to adjust.
For System Preferences itself:
- Go to System Preferences > Keyboard and click Shortcuts.
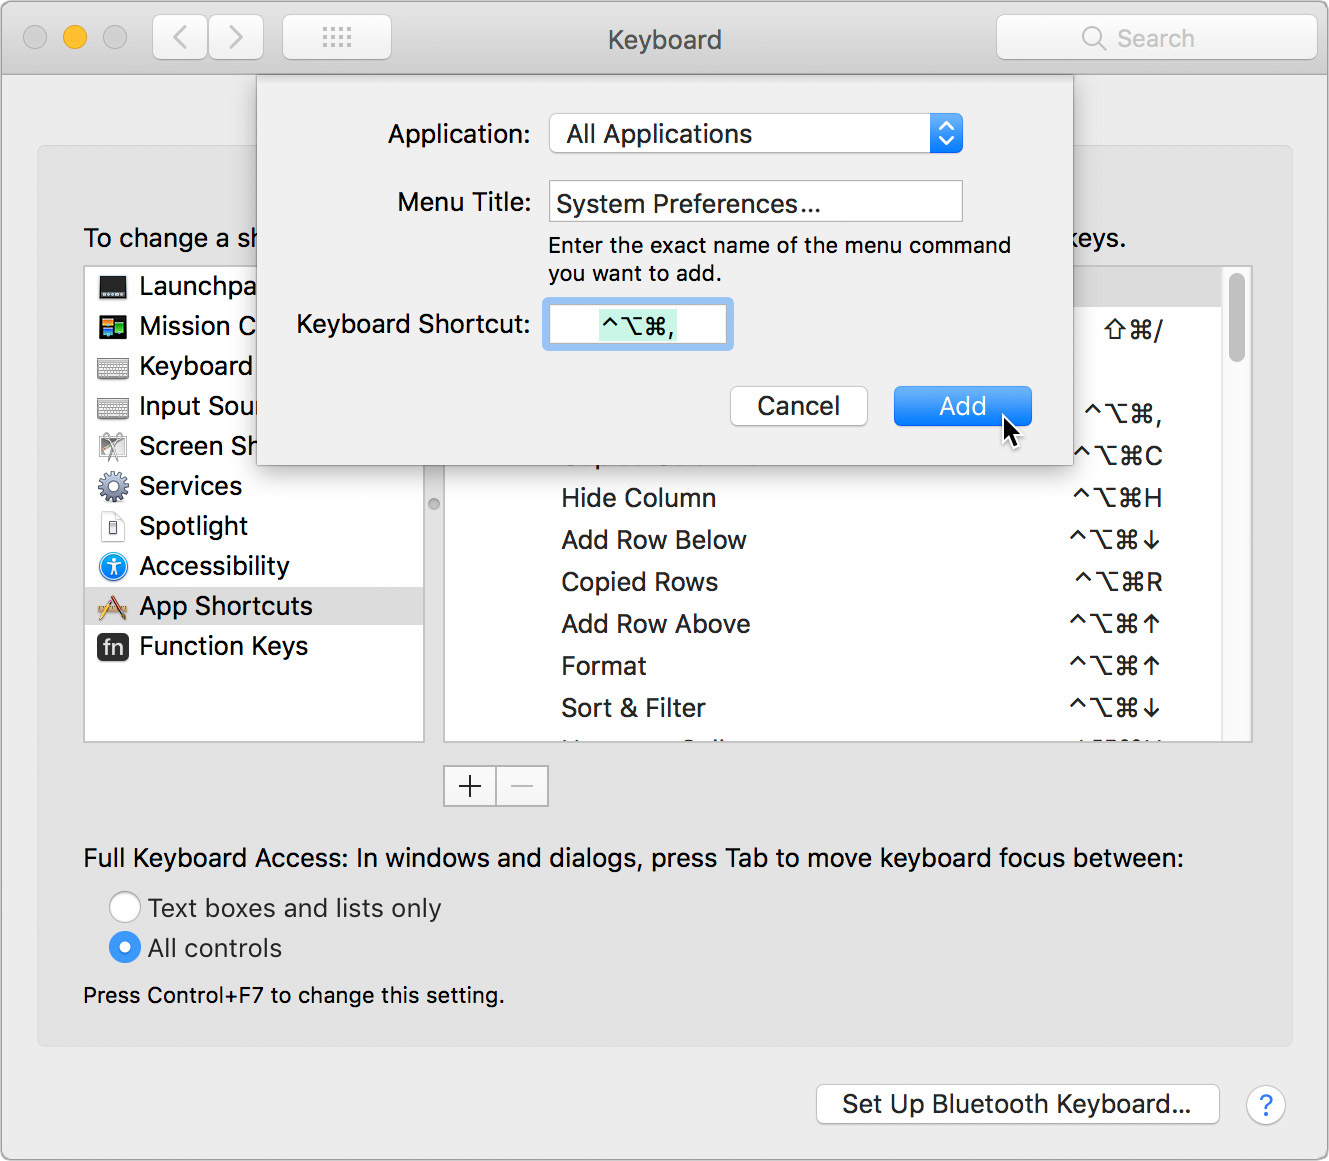
- Select App Shortcuts in the category list on the left, and click All Applications in the list on the right—you want this available no matter where you’re working.
Click the + button under the app list and typeSystem Preferences…in the Menu Title field. You can type three periods instead of the ellipsis character that you get with Option-colon. - Click in the Keyboard Shortcut field and press your key combination. I use Command-Option-Control-comma because the three modifier keys are easy to press together and unlikely to conflict with any app shortcut, and Command-comma is used in almost all apps to trigger the Preferences command.

To set up a keyboard shortcut for a specific pane—one that works within System Preferences:
- In System Preferences, go to Keyboard > Shortcuts and click App Shortcuts in the category list on the left.
- Click the + button beneath the list of apps, and choose System Preferences from the pop-up menu. (Embedded little tip: Jump to the System Preferences item in this incredibly long menu by clicking it to open it and then typing
syto select it, or pressing its keyboard shortcut if you’ve created one.) - In the Menu Title field, type the name of the pane for which you want to make a shortcut. The name must be exact, so
Date and Timewill not work for the Date & Time preference pane. You can double-check the name by looking in the View menu (since you’re in System Preferences while you’re doing this). - Enter the shortcut you want for the pane. Since System Preferences has no keyboard shortcuts of its own, you’ll be able to use single-letter shortcuts for your most-used panes: Command-K for Keyboard, Command-T for Trackpad, and Command-S for Sound, for instance.
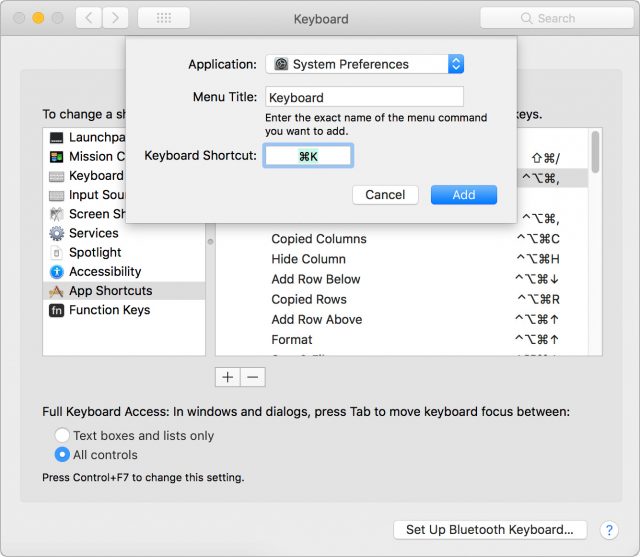

To use these shortcuts in tandem, you would press Command-Control-Option-comma to open System Preferences and then Command-K to open the Keyboard preference pane.
These keyboard shortcuts even open hidden preference panes, described ahead.
Use the Search Field
Using the View menu or the menu from the Show All button is great when you know where to find the feature you need, but what about items that are less obvious? Where do you change your default browser, for instance? You haven’t used Spaces in a while… wait, there’s no preference pane for that? Nor for dictation, which you’ve been meaning to try….
While the Search field may seem redundant, or just relatively useless for going to a pane, it’s great for going directly to a tab, or finding where a setting lives when you’re not sure where to look, and even if you’re not sure of the correct term.
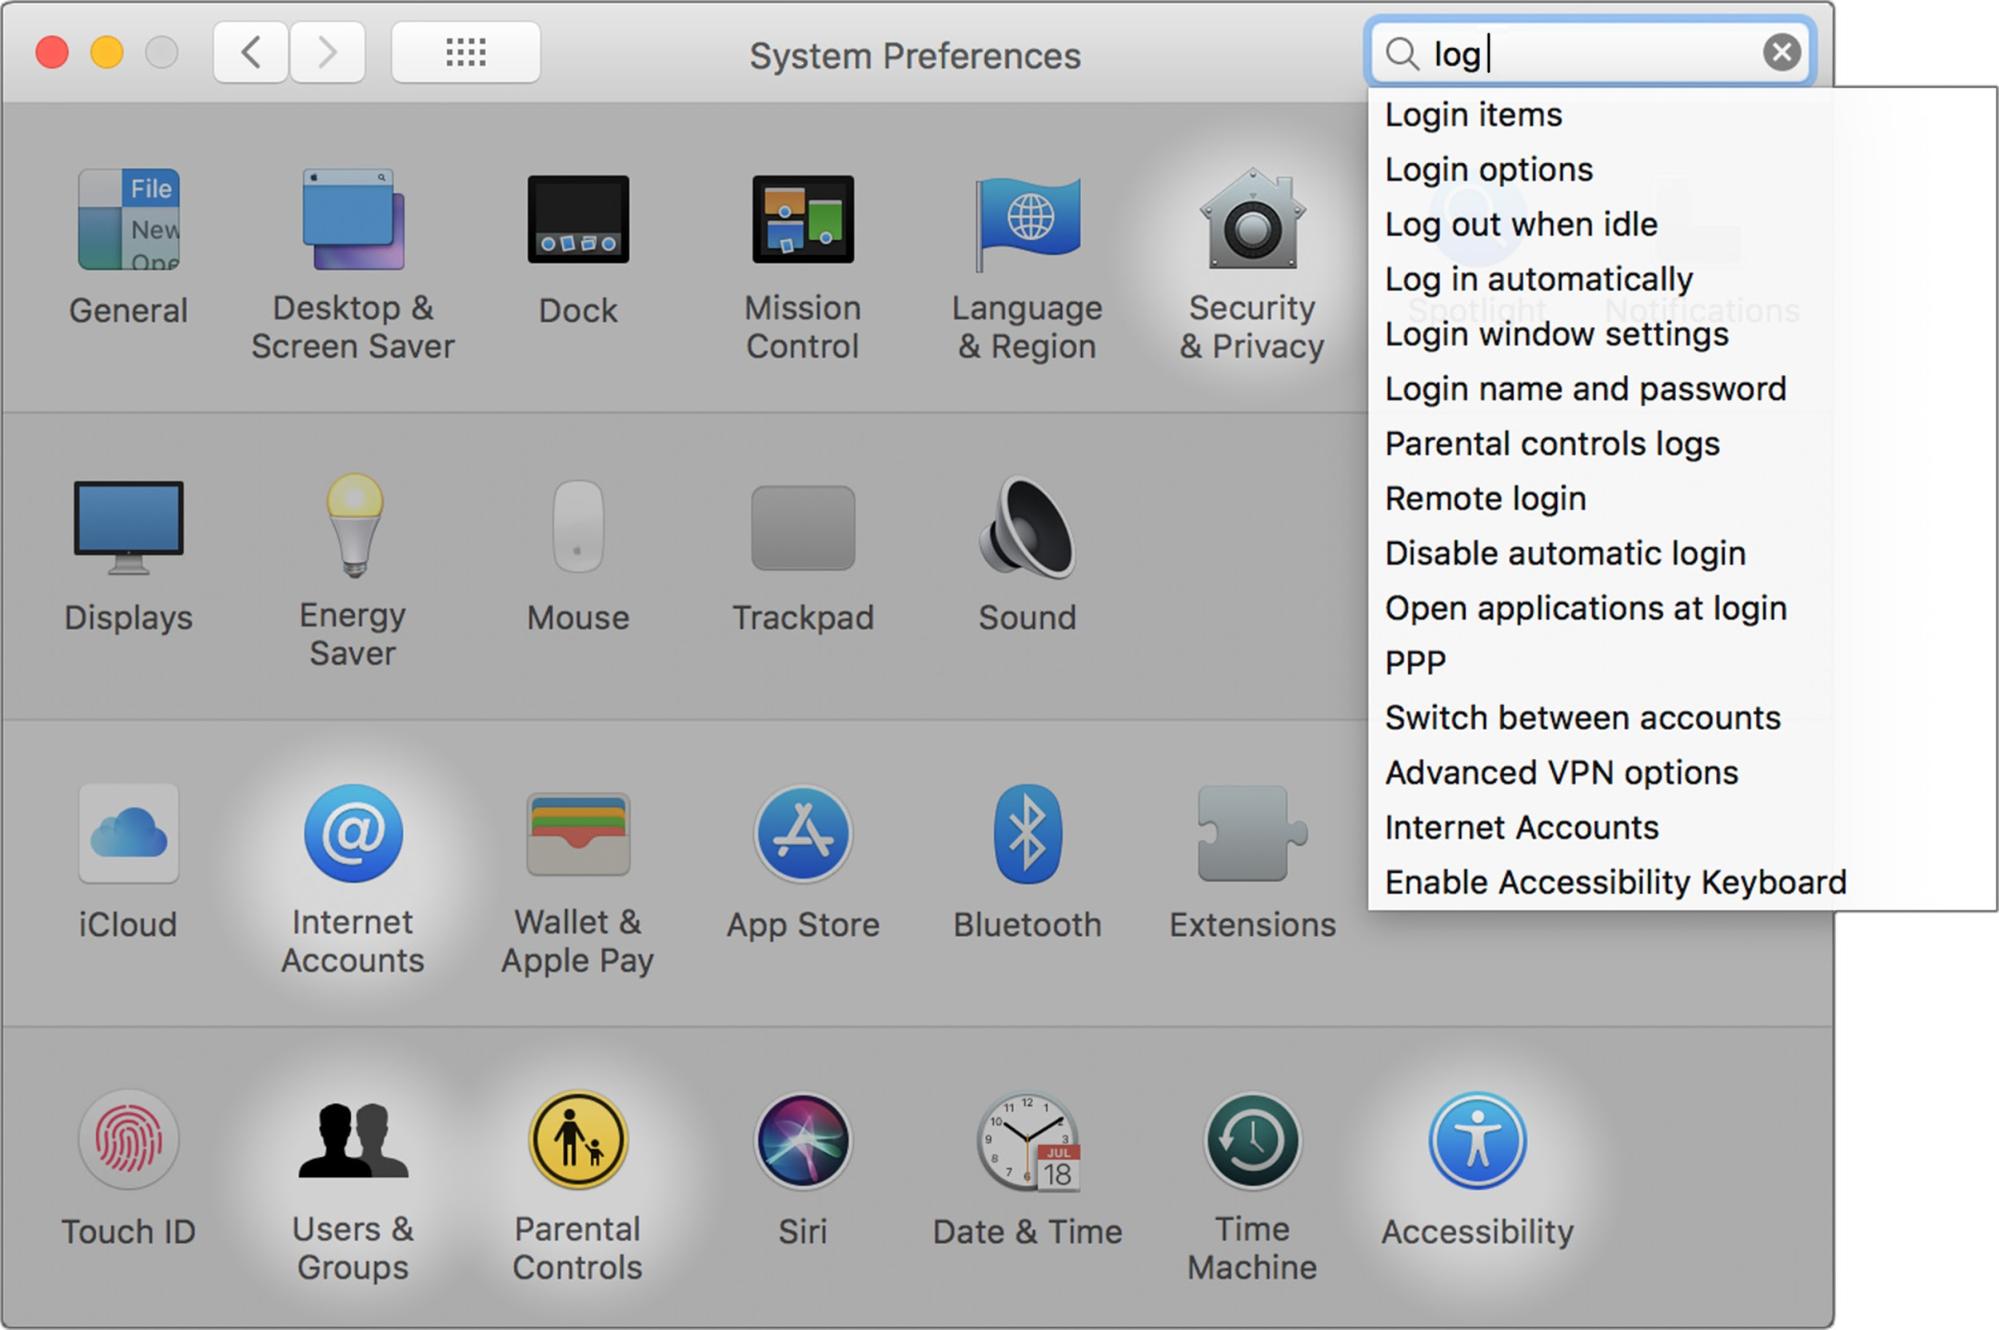
So, using login or even log in as a search term can get you directly to the Login Items tab of the Users & Groups pane. The icon used to identify you and other account owners at startup… what’s that called? It doesn’t matter: type picture and you can select from User Picture, Desktop picture, and Screen saver. Search for wallpaper, and you get Desktop picture.
As you type, a drop-down menu lists candidates, all of whose panes are spotlighted in the window. (If you’ve hidden seldom-used panes to cut down on clutter—that’s covered next—they still appear in the Search field’s menu of suggestions.) You can jump to the related pane by clicking its icon or by clicking an item in the menu; you’ll be sent directly to the appropriate tab in the pane.
 Note that once the Search field is active, it stubbornly insists on staying that way as long as System Preferences is open, no matter what you do from then on, and even if you delete the search term. (Which means you can’t simply type to select a displayed icon, as described earlier.) You can deactivate it by clicking its Cancel button or pressing Esc, but neither of those works unless there’s something typed in the field because an empty, active field doesn’t provide a Cancel button or respond to Esc.
Streamline the Preferences Window
The System Preferences View menu provides two organizational choices: Organize Alphabetically and Organize by Category. Experts agree that the alphabetical approach is by far the better of the two (the experts polled being Adam Engst and me.)
But how many System Preferences panes do you use on a regular basis, rather than in set-it-and-forget-it mode? How many do you never use (perhaps Mouse on your laptop, or maybe Parental Controls), or need only once in a blue moon, such as Startup Disk? If you want more convenient access to the panes you actually use, you can reduce the clutter by hiding seldom-used panes:
- Choose View > Customize. Every icon starts with a checked checkbox, indicating it shows in the window.
- Click icons to uncheck those you want to hide; if you change your mind, click the icon again. (You don’t have to click the icon’s checkbox—clicking the icon itself is enough.)
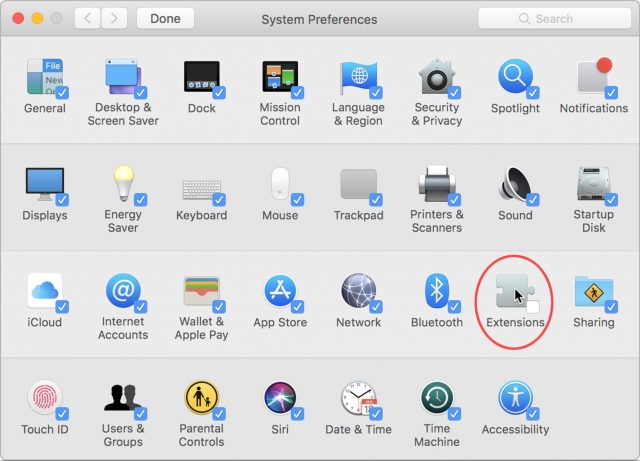
- Click the Done button in the toolbar. The unchecked items disappear.
You can still easily access a hidden pane if you need it: choose it from the View menu, use the Search field, or trigger it with a keyboard shortcut that you’ve set up. The only catch is that a hidden pane isn’t listed in the Show All button’s menu except for the duration of the current System Preferences session.
Note that neither the View > Show All Preferences command nor a click of the Show All button unhides out-of-sight icons. The purpose of Show All is to get you back from a specific preference pane to the window view that displays all the available icons.
Here’s what my System Preferences window looks like—it would have even fewer icons, but the window has a fixed width, so I filled an entire row.
Quick Tips
Here are a few more useful tips:
- Dock or un-dock System Preferences: System Preferences is displayed in the Dock by default. To remove it, press (click-and-hold) the icon for a pop-up menu, and uncheck Keep in Dock from the Options submenu. It’s still there? That’s because you have System Preferences open, and all open apps show in the Dock.
Your System Preferences icon isn’t available in the Dock unless it’s open? Drag its icon from your Applications folder to the left side (or top, if you have it showing vertically) of the Dock.
- Add panes to the Dock: If you need to use certain preference panes frequently, add them to your Dock for quick access. You’ll find them in
/System/Library/PreferencePanes. Since they’re essentially documents, drag them to the right side (or the bottom) of the Dock. The screenshot here shows the System Preferences icon on the “app” side of the Dock and icons for the Keyboard, Notifications, Mouse, and Sound panes on the “document” side.

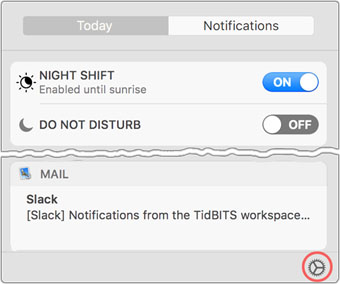
- Notifications shortcut: There’s a special shortcut from the Notifications sidebar to the Notifications preference pane: click the little gear icon at the bottom of the panel.

- Third-party pane placement: Non-Apple preference panes are interspersed with the others in an alphabetized System Preferences window but appear in their own row at the bottom of the window when it’s viewed by categories.
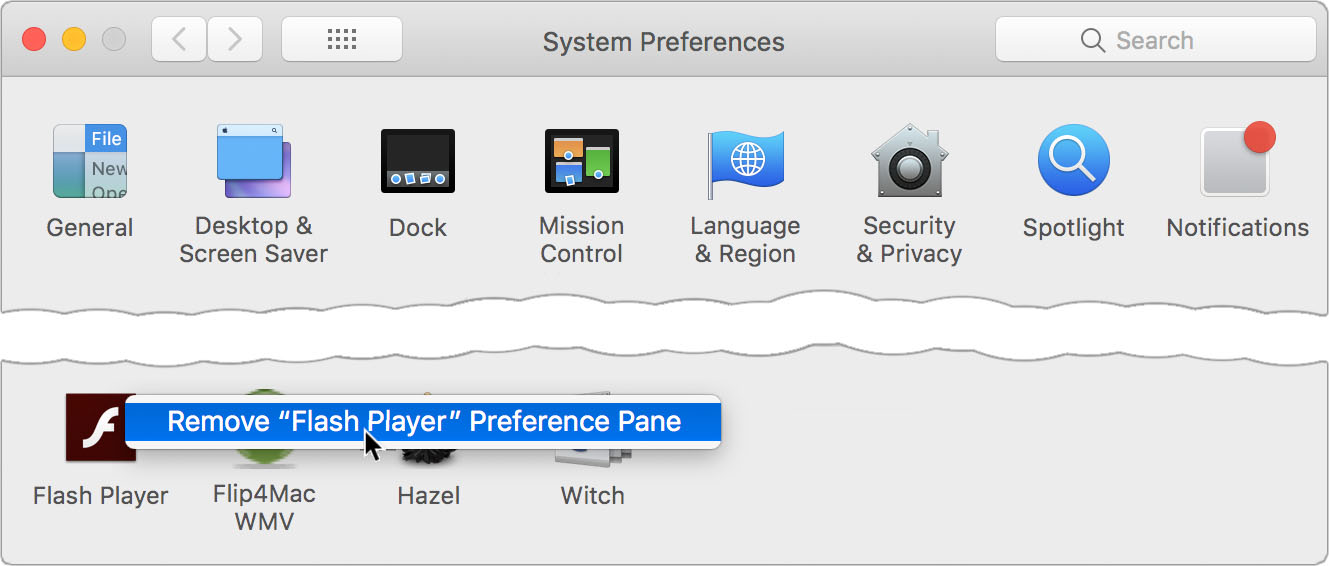
- Delete a third-party pane: Third-party preference panes live in
~/Library/PreferencePanes. That’s your user Library folder—Apple’s preference panes are stored in the System Library folder. The user Library folder is hidden by default, but you can easily access it in the Finder by pressing Option while opening the Go menu and then choosing Library. To delete a pane that has outlived its usefulness, however, you don’t have to access the folder. Instead, Control-click its icon in System Preferences and choose Remove.

Exploring Sinemia and Other Movie Subscription Service Alternatives to MoviePass
When MoviePass launched, the deal seemed too good to be true: for a fixed monthly fee you could see a movie in a theater every day. As it turned out, MoviePass was too good to be true. Subscribers found that out the hard way when they arrived at theaters and couldn’t watch their movies because the company temporarily ran out of money. Now it’s possible that the company may be purchased by a venture capital fund run by college students.
How could such a ridiculous thing happen? When you go to a movie using a third-party movie subscription service like MoviePass, that company pays the full ticket price to the theater. Under MoviePass’s original model, the company could have been on the hook for over $500 per month for every subscriber watching movies daily—an amount far too high to absorb by signing up members who seldom use the service. Instead, the goal is to profit from market power and data mining.
These movie subscription services can collect all sorts of data about movie-watching patterns that are currently closely held by theater chains. They can sell you cheap movies for the same reason a membership-based grocery store can sell you a $6 box of cereal for $3: because plenty of companies will pay for the associated data. This data could extend to what you do outside the theater. On some services, you have to turn location sharing on to check in at the show, so you’re unlikely to notice if the app also tracks where you eat dinner. Theater chains with subscription options, such as AMC Stubs A-List, are less likely to sell your data but can profit nicely off of your more frequent purchases of popcorn and keg-sized Cokes.
I’m a movie buff who doesn’t go to theaters nearly as often as I’d like, so MoviePass was always attractive. But it was also ludicrous—despite being single, self-employed, and in near-complete control of my schedule, there’s no way I’d use it more than four or five times a month. On the other hand, since I’m perfectly happy watching movies at home, when I go to a theater I want 3D, IMAX, or other audiovisual features I don’t get elsewhere. MoviePass allowed only 2D standard showings, so upon learning that competitor Sinemia offered fewer movies, but with fancier formats and at an only slightly higher price, I signed up.
Comparing Movie Subscription Plans
All movie subscriptions work the same way: for a monthly fee, you get to see some number of movies each month. But the four services I compared vary widely in their cost and features, and they have also regularly changed what they offer. Sinemia’s plans changed twice in the three weeks between my purchase of the service and the publication of this story, and MoviePass has changed its entire model eleven times in the last seven years. At press time, here’s what’s currently on offer:
- MoviePass is infamous for its “a movie a day” model. Right now, you can sign up for a $7.99 plan for three movies per month, or a $9.99 plan for one movie per day—but on 15 August 2018, it changes to $9.99 for three movies and no unlimited option. MoviePass has the most restrictions on what you can see: no 3D, IMAX, or otherwise enhanced movies, and some theaters don’t participate in MoviePass’s program.
- Sinemia was the first to offer a wider range of movie formats, but only lets you see between one and three movies a month, depending on your plan. $3.99 gets you one 2D movie a month; at $14.99 (the plan I purchased), you can see three movies in nearly any format. Sinemia says it supports every “major” movie theater, without defining what that means. Family plans are available for multiple people under a single account; despite other plan changes, these have been priced at a straight multiple of a single subscription during my review.
- AMC Stubs A-List is currently the first-class ticket compared to everyone else’s coach class: for $19.99 a month, you can see three movies per week, in any format, and it includes AMC’s Stubs Premium plan (normally $15 per year) that provides benefits like popcorn discounts and a concessions fast lane. As you may guess, it’s usable only at AMC theaters—which might be great for you, but would add a $15 ridesharing travel charge to any movie I watch.
- Cinemark Movie Club is the entry-level program. For $8.99 per month, you can see one 2D movie and get concessions discounts. Other formats incur an extra charge. You can also buy additional tickets for $8.99 each, but Cinemark’s support site is ambiguous about the restrictions (i.e., whether you can buy as many additional tickets for a showing as you like, or see as many movies as you like). Unlike the other plans, Cinemark credits roll over from month to month, but only if you continue subscribing. Since a rollover means you’re not using the plan at all, this somewhat locks in the people most likely to cancel.
None of these plans include higher-priced “special event” movies, such as Metropolitan Opera live simulcasts or Fantom Events showings, which include concerts and classic movies not normally in theaters; most recently I’ve seen Star Trek II: The Wrath of Khan and the theatrical re-release of a 1966 Doctor Who series.
How you go about watching a movie on a subscription plan varies by service, but the basics boil down to this:
- Pick out a movie you want to see at a supported theater, and note the showtime you prefer.
- Purchase the ticket using an app, which in some cases requires going through a ticketing service outside the app. You can purchase tickets in advance—but since most people do that for first-run showings that might sell out, it’s notable that MoviePass sometimes restricts those showings. If you buy your tickets onsite before the show, you might have a plastic card that you can pay with, but you still have to activate the card in the app for that showing.
- There may be additional steps at the theater: Sinemia requires you to check in with your phone between 30 minutes before and after the beginning of the show. (People checking in 30 minutes after will surely be beloved by their seatmates.)
- Otherwise, the experience is the same as usual: you pick up a ticket at the counter, you buy your barrel of popcorn, and you go see the movie.
It’s more convoluted than paying cash, but not particularly hard, right? In theory, yes. In practice, the difficulty increases.
My Experience with Sinemia
Both MoviePass and Sinemia are deeply disruptive services. Theater owners are happy to get more people in seats and in concession lines—where they make most of their profits—but the National Association of Theater Owners has an ongoing Cold War detente with Hollywood, with both marking off strictly defined turf. Third-party services tread on the territory of both sides by deciding who pays how much, and for what. So, while both Hollywood and the theater owners are happy to sell tickets at full price, neither of them wants any subscription service to gain too much power.
In other words, there’s very little incentive for anyone to play nicely with each other. This translates to annoying inconveniences for moviegoers using outside subscription services. Here’s what I experienced with Sinemia.
When I signed up a few weeks ago, the only way to get the $14.99 per month price was to pay for a year in advance. A week later, I noted that the $14.99 price was available on a month-to-month basis, but you had to pay a $20 “initiation fee,” and there was no annual plan option. It’s now two weeks later, and Sinemia’s Web site offers only annual plans again. The site automatically enters a promo code with any purchase, which has changed every time, so perhaps if you have a different code than the one that’s prominently available, you can get still get the deal you want.
Immediately after subscribing, I encountered my first unexpected charge. (I had read the marketing material, but not all the fine print.) I wanted to see a movie immediately with my new subscription—in fact, I had to see 3 movies in 31 days or lose them, and the welcome email I received said the clock was already ticking. The company initially said it could take a few weeks to receive my plastic payment card—it’s now saying “up to two months due to high demand.” Unmentioned was the fact that “processing” my account for online purchases would also take a week or two, but I could “expedite” it for a $10 charge.
That was my first experience with movie subscription game theory. When I signed up for the account, I had already decided to see a movie that evening. My options were:
- Wait for the Sinemia account to be “processed,” pay $12 cash to the theater for a ticket to see for a movie the same day, and maybe have to see three more movies on my plan in the remaining weeks left in the month.
- Pay the $10 surcharge and start using the plan.
I paid. Part of me admires the Machiavellian genius of this upcharge—who buys a plan and doesn’t intend to use it immediately?—but only a small part.
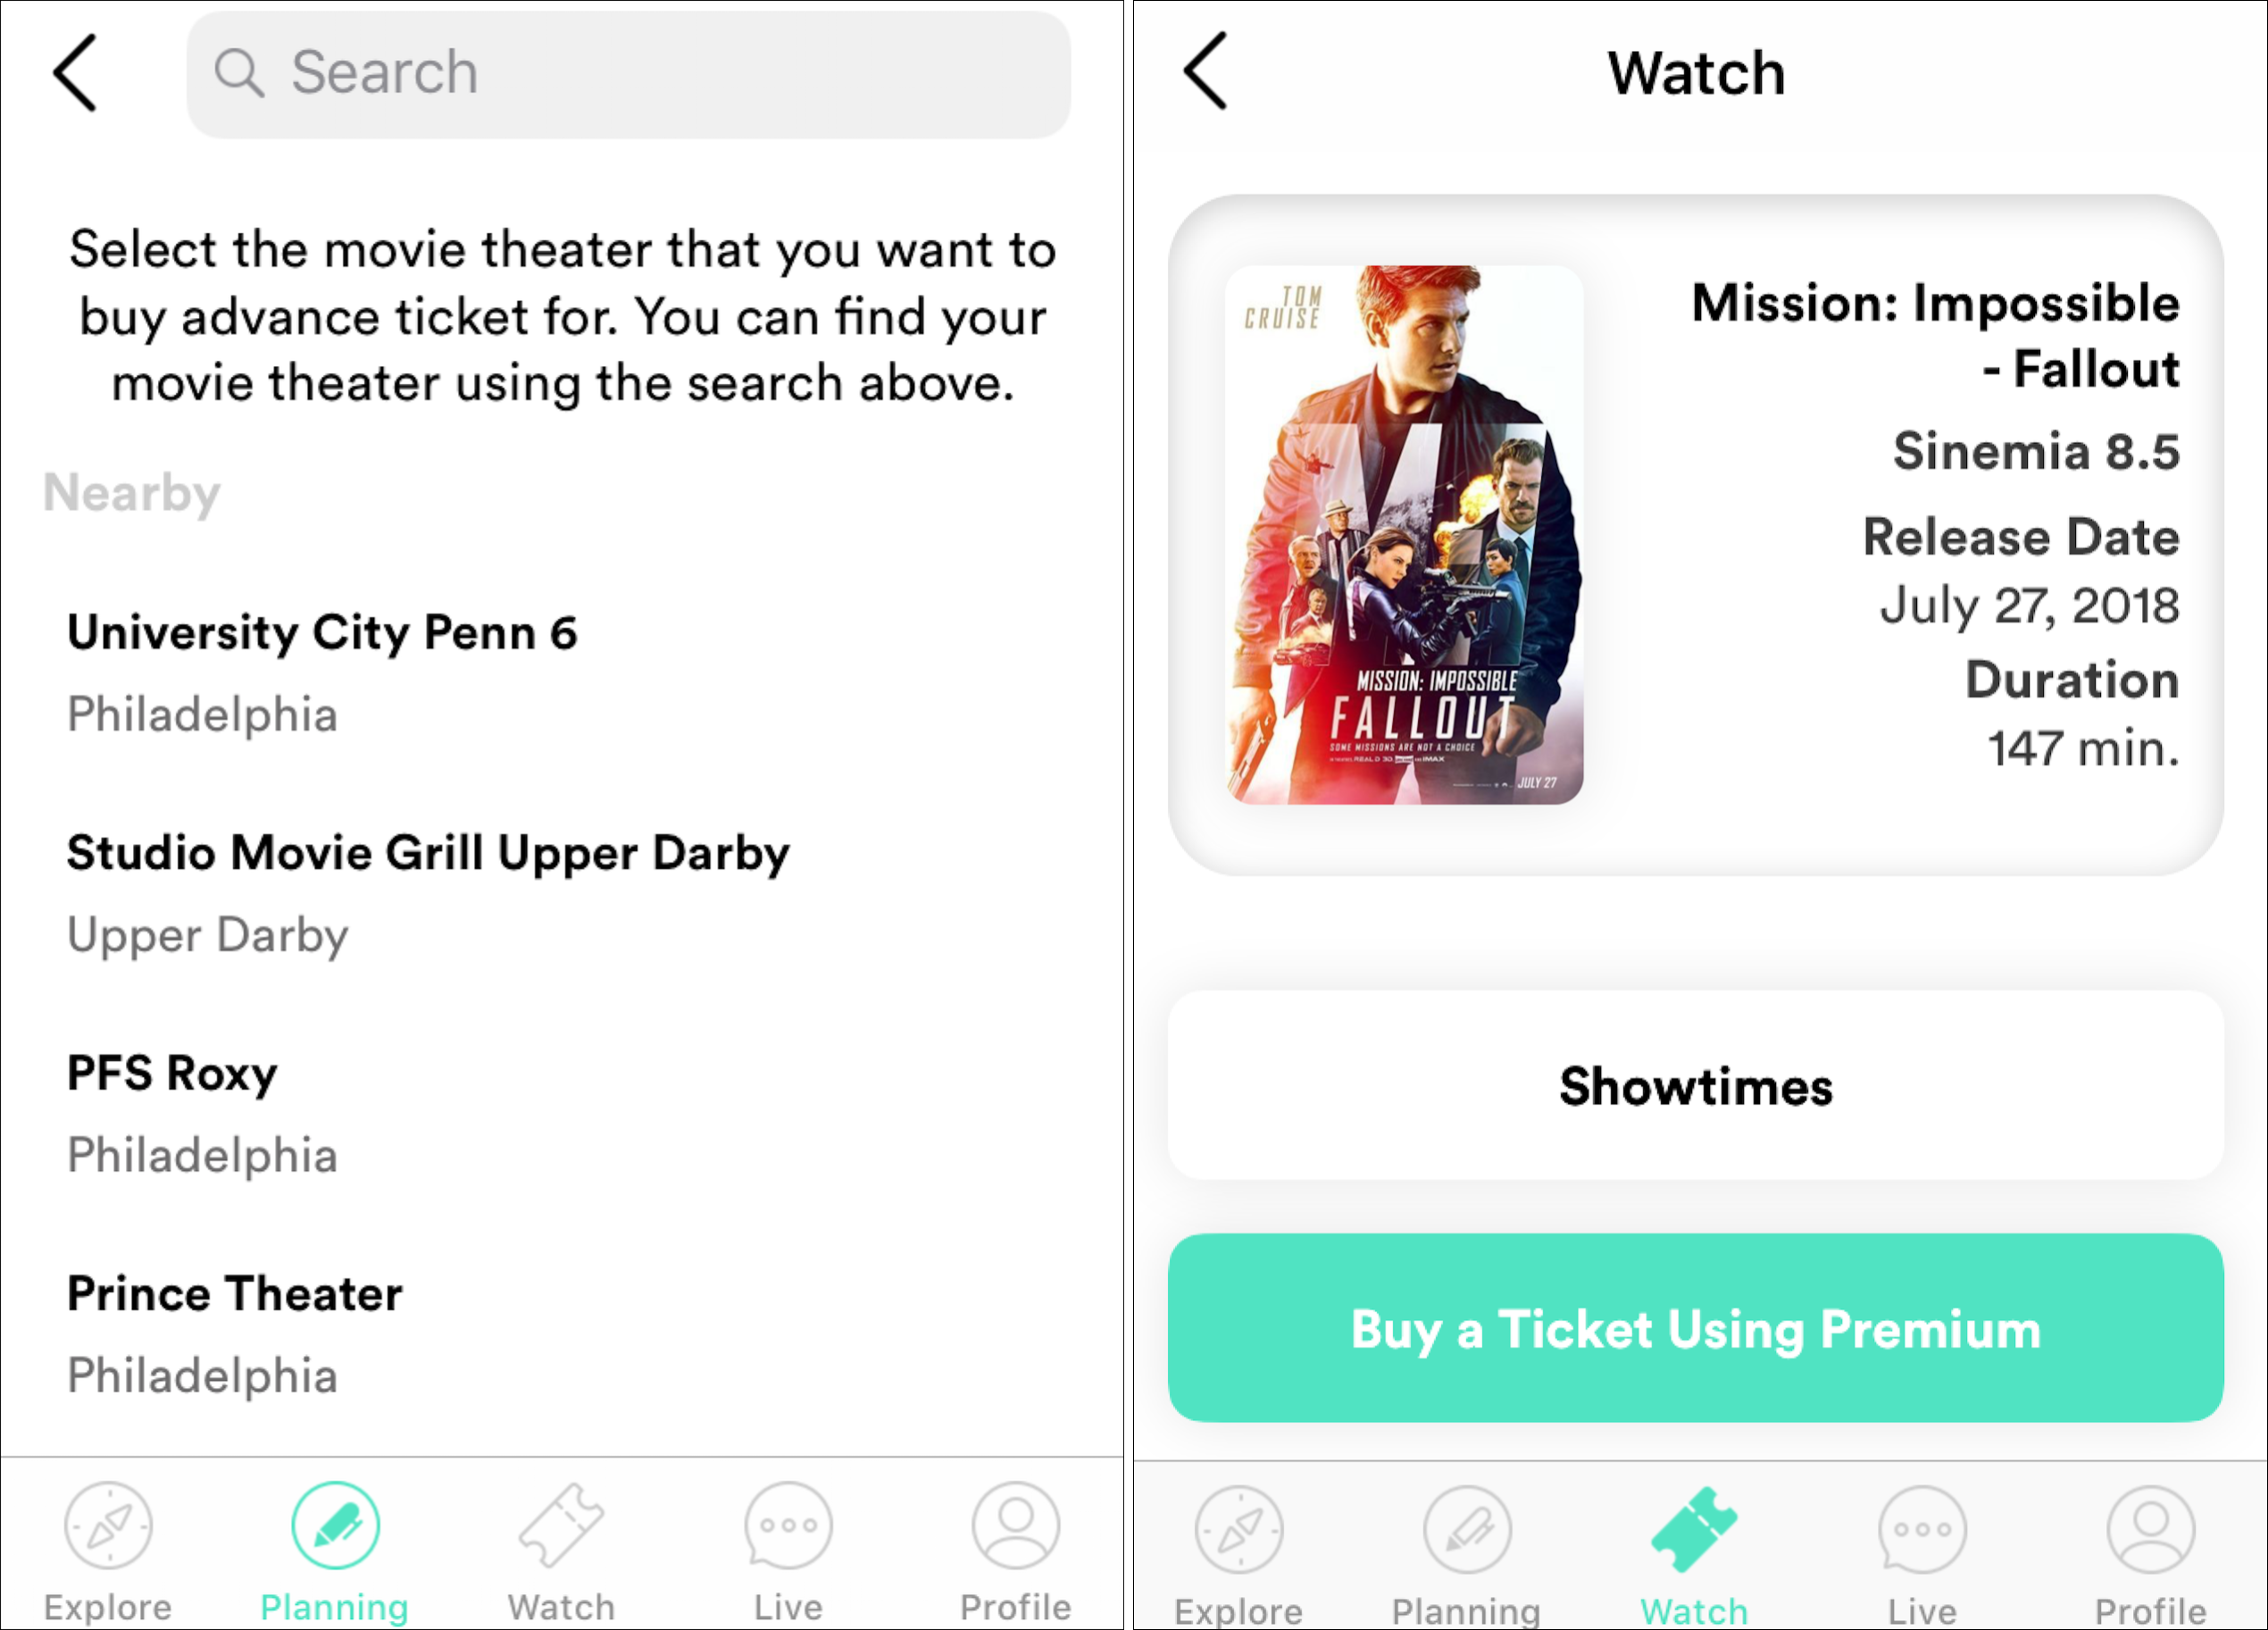
Paying up activated my Sinemia app for ticket purchases immediately, so I went looking for a movie. The app shows the standard view of movie posters that you can tap to get to previews and capsule descriptions, but if you want to watch previews on your iPad and buy tickets on your iPhone, you’re out of luck: you can only switch devices three times before the app is permanently locked to a device. This is obviously to deter account sharing, but it’s highly annoying. I prefer to pick out my films using a combination of Apple Trailers and Rotten Tomatoes before I open the Sinemia app, which makes that section of that app useless.

Here’s where things get confusing. If you want to use your plan to get a ticket in advance before you arrive at the theater, you need to order it from the Planning screen. But if you’re near the theater, you need to get it from the Watch screen. Start in the wrong place, and you’ll go through all the steps of choosing a ticket, only to be told at the end that you have to start over on the other screen.
Next, you select the actual movie you want to see in the Sinemia app. After that, the app tells you that you must switch to a separate ticketing site, like Fandango, to buy the ticket. That screen says you can only use particular ticketing sites, but the last option is “Other,” making things that much more confusing. (I haven’t used a site other than Fandango, so I can’t speak to which ticketing sites work and which don’t.)
So you switch to that site and start the process of buying the ticket and picking out the theater and showtime. (In some cases, this requires more than one site. I prefer closed-captioned movies, and closed-captioning support is not always indicated on Fandango.) Then you switch back to the Sinemia app to tell it which theater you’re going to, presented in a list ordered by distance from your location. For some reason, you then have to manually enter the date and time of the show, which you’d think could also be selected from a list once the app knows which theater you’ve chosen.
When it comes time to make payment on the external site, the Sinemia app provides you with a one-time debit card number to use. (This never covers “convenience” fees; those are passed along to the same payment method you used to purchase your Sinemia subscription.) A mind-boggling annoyance occurs when it’s time to enter the debit card number on the ticketing site. The number is presented in a nice big font that you can’t copy and paste! You have to switch back and forth as many times as it takes to type in a random 16-digit number, plus the expiration date and ZIP code. This problem will go away for onsite purchases after I receive my plastic payment card, but even then it won’t help for advance ticketing.
You have your ticket, but you’re not done yet. When you get to the theater, you have to check in with the Sinemia app to prove you’re there. The app is supposed to give you a notification to this effect, but I never received one. And it’s supposed to check you in automatically when you buy a ticket at the theater, which also didn’t happen. Instead, I received a notification during the movie when my phone was silenced, and when I contacted customer support about a different matter, I received a brusque email asking me why I failed to check in. This email threatens that I must check in “in order to continue enjoying my subscription,” which is a harsh message to receive from customer support.
The different matter I had to ask about was that the first advance ticket I purchased through Fandango vanished—my only record of it was my bank charge for the convenience fee. That could have been Sinemia or Fandango’s fault. Sinemia offers no in-app live help, despite a useless button that says Live Help. Instead, you send email to Sinemia support, and in my experience, you get a reply several days later. Happily, it had all ended well before then. When I re-purchased that ticket via Fandango with Sinemia while standing at the counter, it appeared in the theater’s ticketing system instantly, and I got to see the movie. Only one ticket was counted against my monthly total.
The two steps that seem to make in-app ticketing the smoothest are:
- Buy your tickets at the theater instead of in advance.
- Always sign into an account you set up with the ticketing site, like Fandango, so there’s a record of your purchase you can reference. If you purchase without signing in, you’re supposed to get an email with a confirmation number, but I didn’t notice that I hadn’t received one.
Once I get my plastic payment card, I probably won’t purchase in advance again unless I’m worried about a sold-out show. That assumes the card doesn’t come with its own difficulties.
This all sounds unnecessarily complicated, and it is. But I’m happier with my purchase than I sound. For $190, I’ve bought myself a year’s worth of entertainment and head-gamed myself such that I’ll likely get my money’s worth. I would have taken the monthly option if I’d had one—but that’s less of a gift to my future self. However, there’s one major downside of prepaying: if Sinemia goes out of business soon, I’ve watched some very expensive films.
The ongoing game theory of my Sinemia subscription is weird. I saw two movies in the first week, and now have one left for the rest of the month. But the second movie was on my theater’s half-price day, which is only $1 more than the $5 I’ve already paid. Do I “save” a movie and risk it expiring? Or use the movies I’ve paid for and pay extra later for any additional ones—maybe also schedule those for the half-price days? I’m glad to commit myself to some entertainment to save some money, but using Sinemia requires a lot more planning than I prefer for my free time.
Recommendations
For casual moviegoers, I’m giving Sinemia a cautious recommendation if you don’t think you’ll mind jumping through the hoops I’ve described. If I see three top-price showings per month in my area, I’ll get over $50 worth of movies for $15, and I’ll be getting theater features I can’t get at home.
But I live in a major metro area. If you don’t, and your local theaters are either cheaper or not on the Sinemia service—which you can look up on the company’s Web site before purchase—it’s not worth the effort.
I’m concerned but not worried about Sinemia ceasing to exist before my annual plan expires. A review of the business press about the company indicates it’s well-funded, and its business model has never been as insane as the ones at MoviePass.
If you have a good AMC theater nearby, AMC Stubs A-List is almost a no-brainer upgrade. You get up to a dozen movies if you can go three times each week, and the extra $5 per month is negligible compared to the overall cost of going out for the evening. (I am given to understand that babysitters now charge more than I was paid in 1986.) Since AMC comes with concession discounts, they can make it an even better deal if you so indulge.
As for MoviePass: under other circumstances—such as being unemployed and having no friends—I’d be tempted to take advantage of the window that closes on August 15th, buy a one-month subscription, and binge-watch 30 movies. But on MoviePass’s new plan—assuming the company doesn’t switch it back to unlimited again—Sinemia is currently superior in every way. The only reason I’d recommend MoviePass over Sinemia is if your local cineplex accepts MoviePass but not Sinemia. Even then, the MoviePass support site is extremely vague about future blackouts for newly released films, whether premium movie formats will be supported, or if there are even more random restrictions buried in the fine print. There was once a time when MoviePass was a great deal—and people who bought annual subscriptions less than a year ago can keep it for a bit longer—but that ship has sailed.
Considering how often plans from all these services have changed recently, you should check out each one before you make a purchase decision. That said, while I’m comfortable going with an annual lock-in with Sinemia, I wouldn’t recommend doing so for MoviePass until it establishes a track record of better reliability. I suspect that the plans run by the chains will be more stable, but I also believe that they would shut down the minute they didn’t need to compete with third-party services anymore, should that come to pass.


