#1577: iPhone 12/12 Pro repair program, fix corrupted Chrome extensions, iCloud Mail custom domains, Chipolo AirTag alternative, 10-digit dialing changes
This issue of TidBITS is a grab bag of topics large and small. If you have an iPhone 12 or iPhone 12 Pro suffering from a lack of sound during calls, Apple will fix it for free. In other Apple-related troubleshooting news, we’ve resolved the issue that caused some iCloud Mail users to miss recent TidBITS issues. The new 988 suicide prevention number in the US means many people will soon need to use full ten-digit numbers when making calls—Adam Engst explains how you can quickly find old seven-digit phone numbers in your iPhone contacts. Confused by a Chrome extension disappearing? Adam also tells you how to identify and fix corrupted Chrome extensions. Wrapping up the issue, Glenn Fleishman reviews the Chipolo ONE Spot item tracker, which uses Apple’s Find My network, and Josh Centers shares instructions for setting up a custom domain with the beta of iCloud Mail. Notable Mac app releases this week include Little Snitch 5.3 and Zoom 5.7.6. ![]()
![]()
Apple Opens Repair Program for iPhone 12 and iPhone 12 Pro Call Sound Failures
If your iPhone 12 or iPhone 12 Pro emits no sound from the receiver when making or receiving calls, you’re in luck. (Relatively speaking, anyway.) Apple has opened a repair program for what it says is a “very small percentage” of those devices experiencing such an issue and will fix affected iPhones for free.
Affected units were manufactured between October 2020 and April 2021, but there’s no need to look up a specific serial number to check eligibility; just contact Apple Support if you’re experiencing the problem. You can also make an appointment at an Apple Retail Store if there’s an open one nearby or contact an Apple Authorized Service Provider. The repair program doesn’t apply to the iPhone 12 mini and the iPhone 12 Pro Max, which presumably don’t include whatever substandard component is failing.
The repair program is valid for up to 2 years after purchase, and the program doesn’t otherwise extend your iPhone’s warranty. Also, if your iPhone has any other damage, you may have to pay to repair that before Apple will fix the sound issue.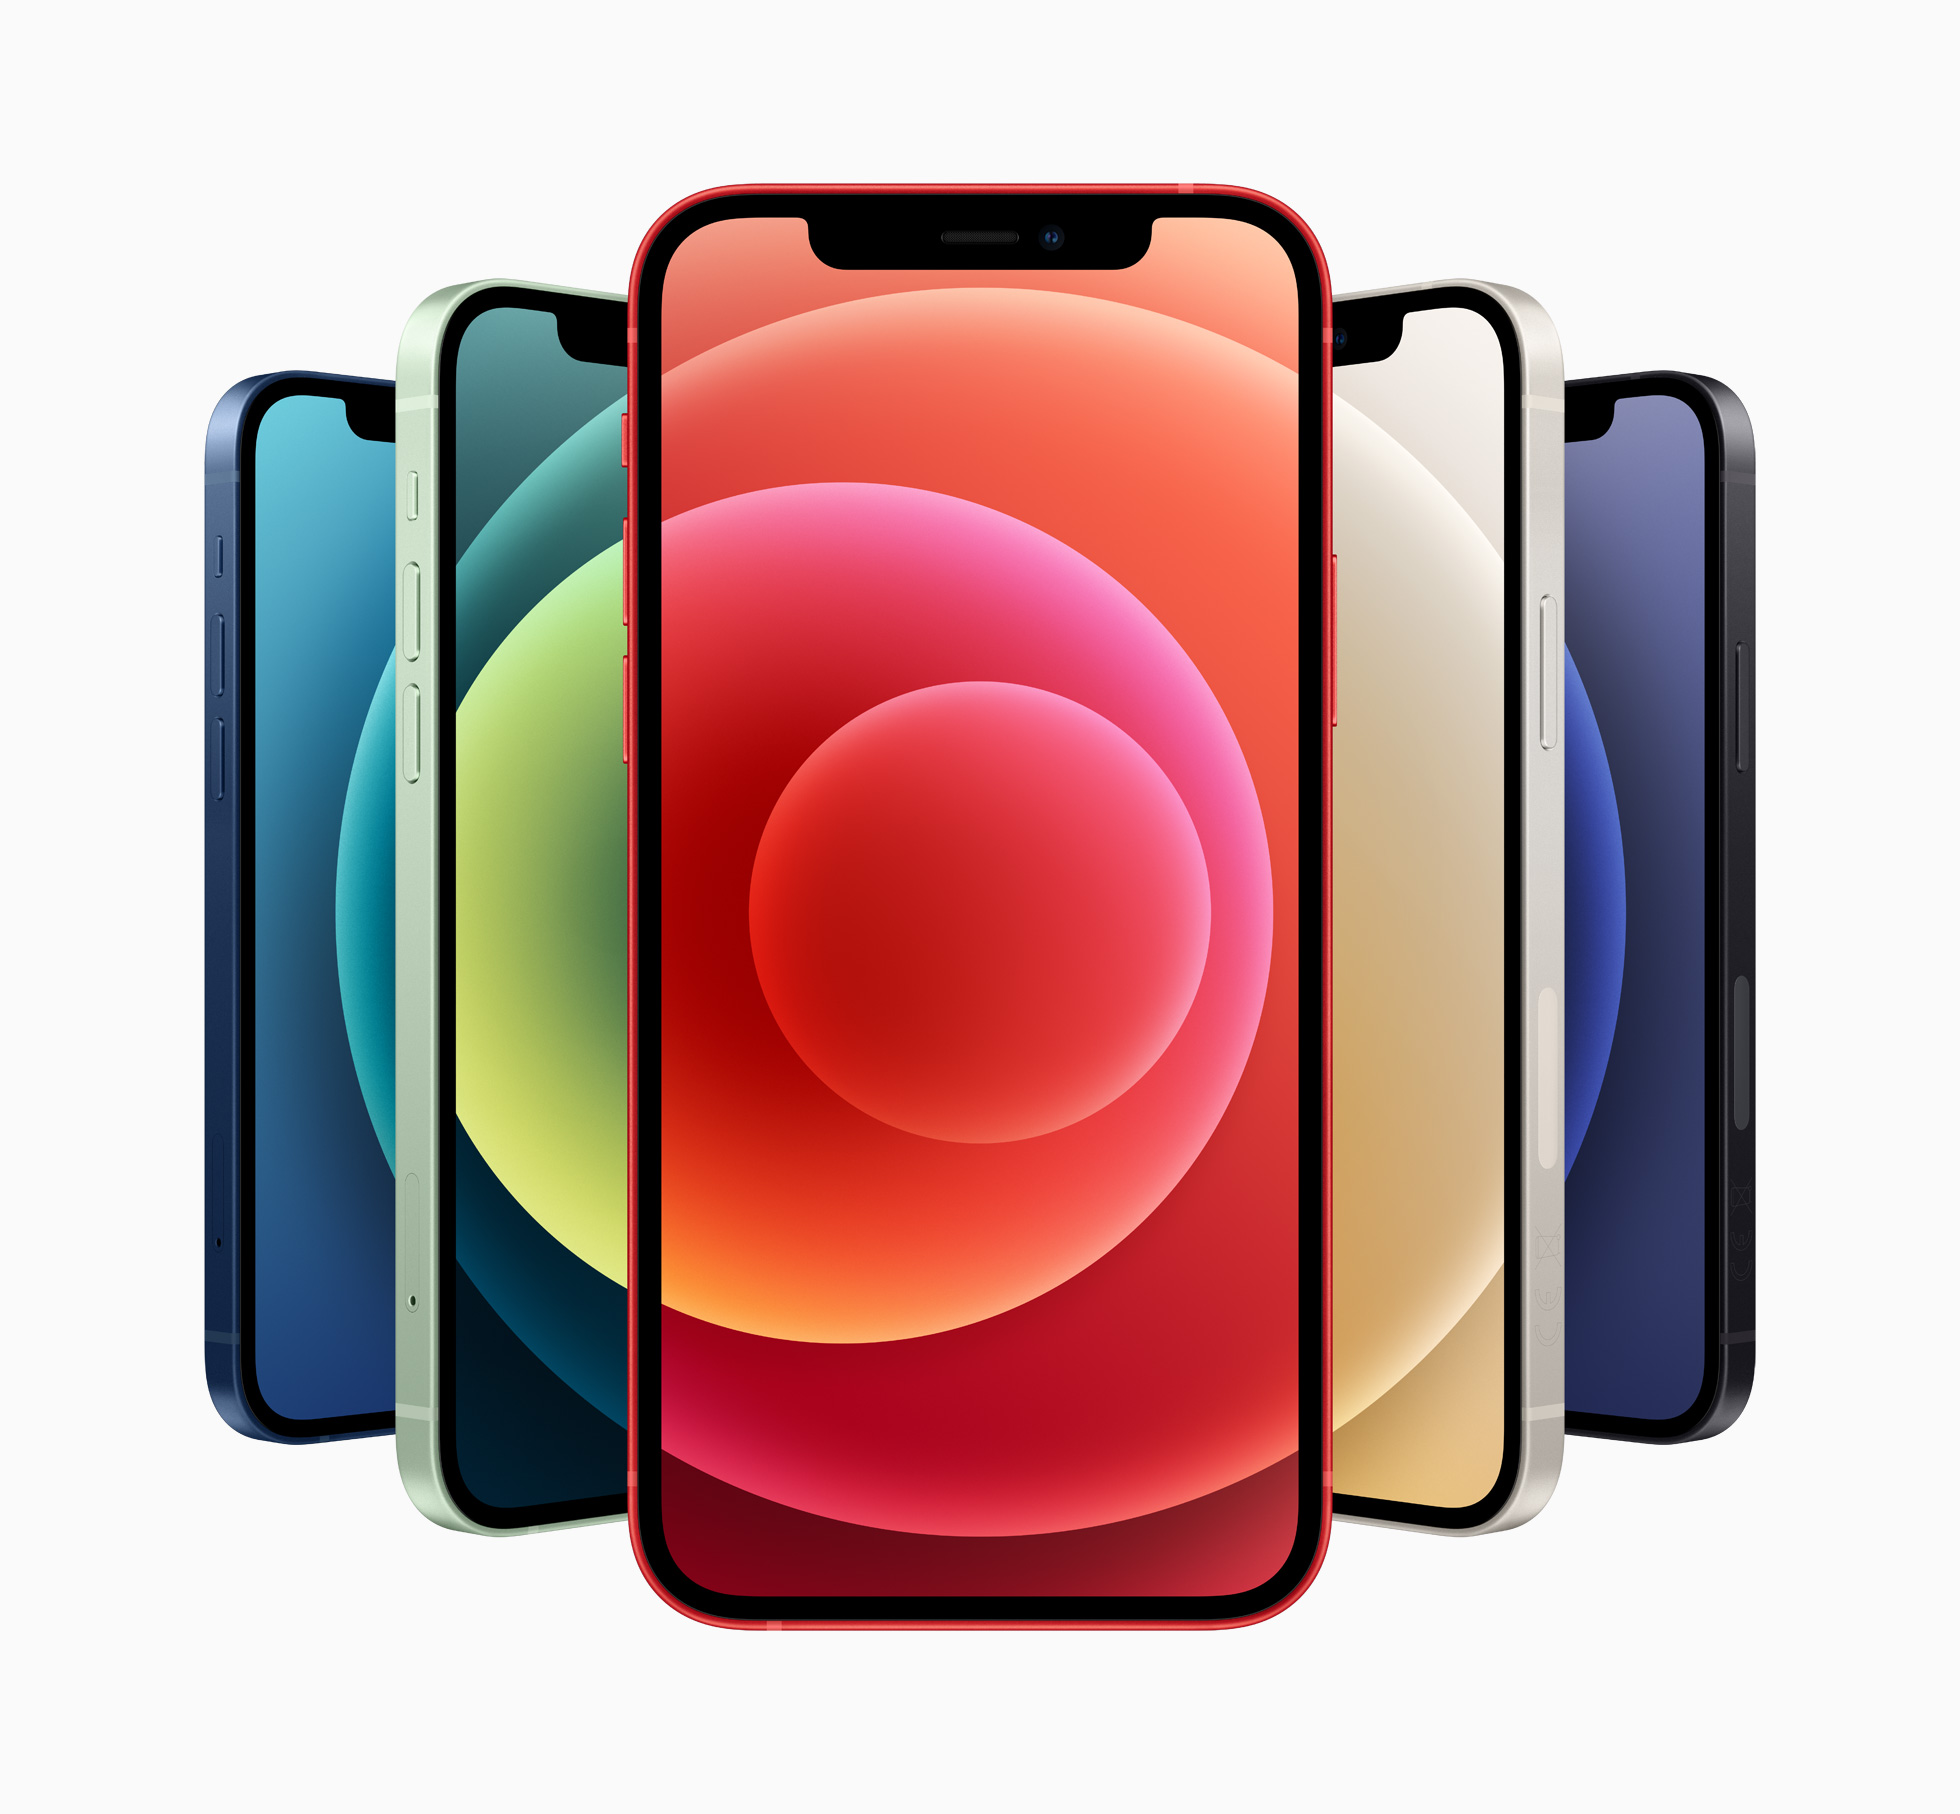
Resetting Recent iCloud Bouncing Subscribers
Three weeks ago, starting with TidBITS #1574, Apple’s iCloud Mail servers decided that there was something about the TidBITS issues they didn’t like and started rejecting issues with this error:
SMTP Errors: 554 5.7.1 [CS01] Message rejected due to local policy. Please visit https://support.apple.com/en-us/HT204137
It took our support expert Lauri Reinhardt a little while to piece together questions from subscribers and her own tests. Once she had assembled a coherent picture of what was going on, I reported the problem to iCloud Mail support. Two days later, the iCloud Mail team told me that they had made appropriate changes to resolve the delivery problems. My tests confirmed that, but there was more to do.
The problem was that Sendy, our mailing list management software, had marked over 300 iCloud users as bouncing. (That may seem like a lot, but we have well over 5000 iCloud subscribers all told. I can’t explain why such a small percentage bounced.) I have reset all the affected icloud/me/mac.com addresses, so in theory, everyone who failed to receive the last issue or three should get TidBITS #1577 on 30 August 2021.
I say “in theory” because there are two other variables. First, if you subscribe from a custom email address that forwards to iCloud and doesn’t receive this week’s issue, you may still be affected; contact Lauri for help.
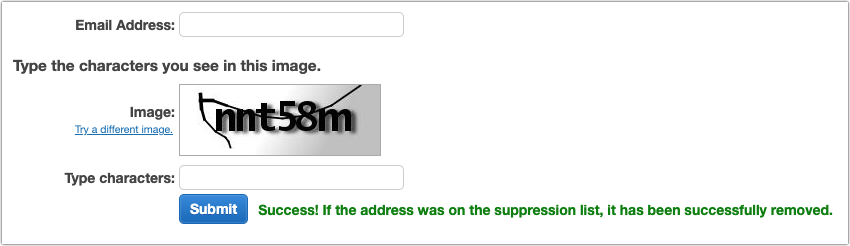
Second, Sendy gives us an interface for funneling messages to the Amazon Simple Email Service for the actual delivery. Amazon SES maintains a global suppression list that prevents email from going out to an address that has recorded a hard bounce for any Amazon SES user. We can remove addresses from Amazon SES’s global suppression list when we know they’re good and have fixed whatever problem was causing the bounces. But we have to do that one address at a time, with an image CAPTCHA, and there’s no way to query the list or even know if a removed address was on the list—all that Amazon SES tells us is that the address was removed if it was on the list. Doing that one by one with over 300 addresses would be a royal pain.
Amazon’s user guide says that Amazon SES automatically removes addresses from the global suppression list, increasing the amount of time an address stays on the list after each bounce. The longest an address will remain on the list is 14 days, and since TidBITS subscribers wouldn’t have bounced more than three times, I’m hoping Amazon SES has already removed all those addresses. If not, it should happen before TidBITS#1578 comes out on 6 September 2021.
With any luck, then, this situation will go away either this week or next. Our apologies for any confusion it may have caused—it’s yet another example of how systemic anti-social behavior by some (spammers) causes ongoing headaches for the rest of us.
New Three-Digit 988 Crisis Line Number Requires Expanded Ten-Digit Local Call Dialing
In many parts of the US, it has long been possible to make local calls with just the seven-digit phone number; the three-digit area code was implicit for calls between numbers using the same area code. Last year, however, the Federal Communications Commission decided to establish 988 as an easy-to-remember three-digit phone number for Americans to use to reach the National Suicide Prevention Lifeline in times of crisis. That hotline is currently accessible at 1-800-273-TALK (8255), and the 988 number will go into effect on 16 July 2022.
Since some areas that use seven-digit dialing also use 988 as the first three digits of the number, the FCC is requiring all carriers to implement ten-digit dialing in those areas, with 24 October 2021 as a cutoff date. T-Mobile recently alerted its customers to this change, providing a list of area codes by state that will lose access to seven-digit dialing in October. If you’re in one of those area codes, you need to update stored seven-digit phone numbers to include the area code; calls placed with seven-digit numbers may not complete, and you’ll hear a recording explaining why.
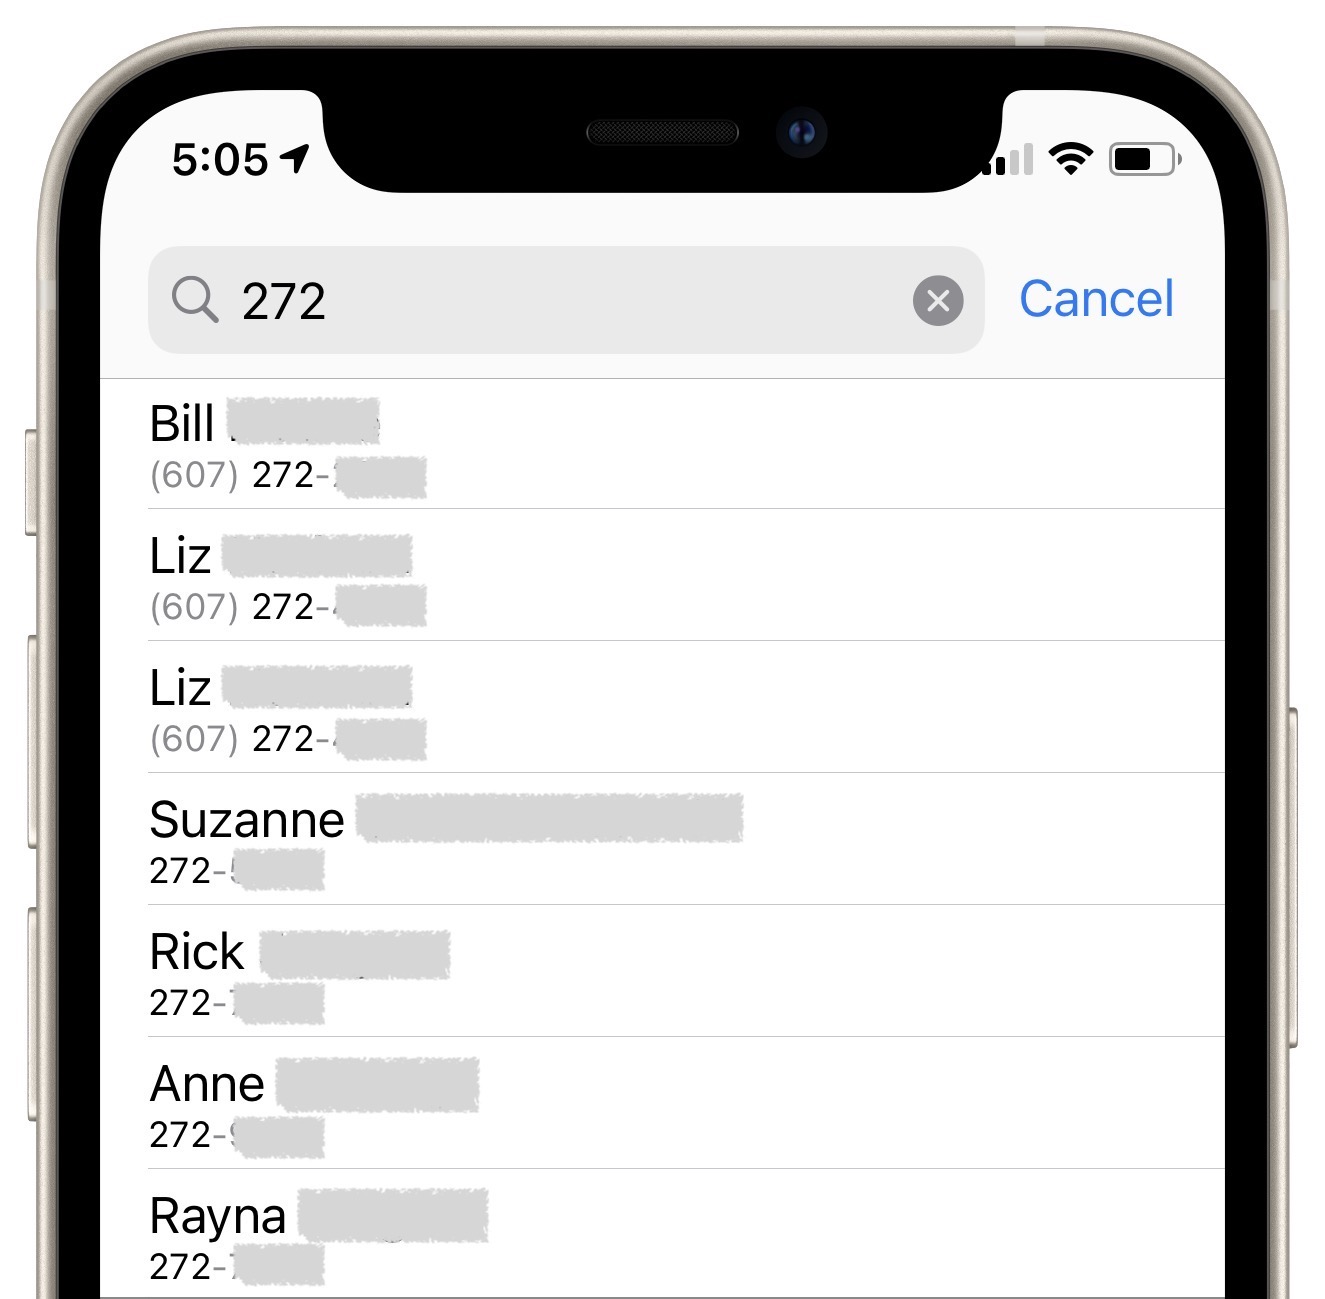 Luckily, Apple makes it easy to find offending phone numbers in the Contacts app on the iPhone and iPad. Just search for the three-digit exchanges that are commonplace in your area to see which contacts lack the area code. After you tap a contact with a too-short phone number, the only hard part is remembering to tap Edit instead of the phone number (which immediately calls the person).
Perhaps an enterprising community member can whip up something in Shortcuts that will add an area code to all seven-digit numbers.
Chrome Extensions Disappearing? Click Repair
I use the LastPass password manager partly because of its long-standing integration with Google Chrome and other Chromium-based browsers like my current favorite, Brave. Several times over the past year, however, LastPass would inexplicably disappear from login fields and the Brave pinned extension bar. Since it prevented me from logging in to sites, I noticed quickly.
As soon as I looked at Brave’s extension page, the solution was both obvious and easy. In the LastPass box, a warning noted, “This extension may have been corrupted.” and there was a red Repair button. Clicking it displayed a Repair dialog, and clicking Repair Extension in that dialog reinstalled the extension and brought LastPass back to life.

The first time this happened, Brave claimed that several other extensions were also corrupted, and running through the two-click repair process fixed them too. From what I’ve been able to glean online, “corruption” merely means that one or more of the extension’s files have changed unexpectedly. That’s undoubtedly a security feature—a browser shouldn’t run code that the user hasn’t approved in some way.
As to what could cause an extension’s files to change, I don’t know—I’ve seen GitHub discussions suggesting there could be bugs in the browser or in the extension, but nothing definitive. None of the discussions are current, which indicates that any such bugs have long been fixed. And yes, I’ve scanned my system for malware, so I’m reasonably sure there’s nothing evil working in the background.
Regardless, the moral of the story is that if any of your extensions disappear or stop working in a Chromium browser like Google Chrome, Brave, Microsoft Edge, or Opera, choose Window > Extensions and see if they have Repair buttons. If so, you know what to do. If the problem recurs immediately, there’s something else going on, and I’d recommend uninstalling and reinstalling the extension to see if that clears things up more effectively.
Chipolo Ahoy! The ONE Spot Find My Network Tracker Arrives
The Chipolo ONE Spot has become the first shipping third-party tracking device that uses Apple’s Find My network. The Find My network relays a compatible device’s regularly refreshed encrypted ID via Bluetooth through every nearby iPhone, iPad, and Mac that hasn’t opted out. These relays add location data, enabling a tracker’s owner to find a device with a pinpointed location, just like Apple’s own tracker, the AirTag. (See “Apple’s AirTag Promises to Help You Find Your Keys,” 20 April 2021.)
The ONE Spot works nearly identically to the AirTag; it even costs about the same. Apple offers AirTags with free shipping at $29 for one and $99 for a four-pack; engraving is optional and free. The Chipolo ONE Spot costs $28 for one and currently $90 for a four-pack; shipping is free for an order of $50 or more.
Because of Apple’s rules regarding participation in the Find My network, the same anti-tracking strategies apply to Chipolo’s products as to Apple’s:
- If a ONE Spot is moving with someone whose device would relay its signal and the owner of the ONE Spot isn’t nearby for a period of time, the owner receives an alert. (See “When You’re Told an AirTag Is Moving with You,” 4 June 2021.)
- If a ONE Spot isn’t near the owner for an extended period of time, currently set by Apple to a random interval between 8 and 24 hours, it will play a sound. (See “13 AirTag Tracking Scenarios,” 15 May 2021.)
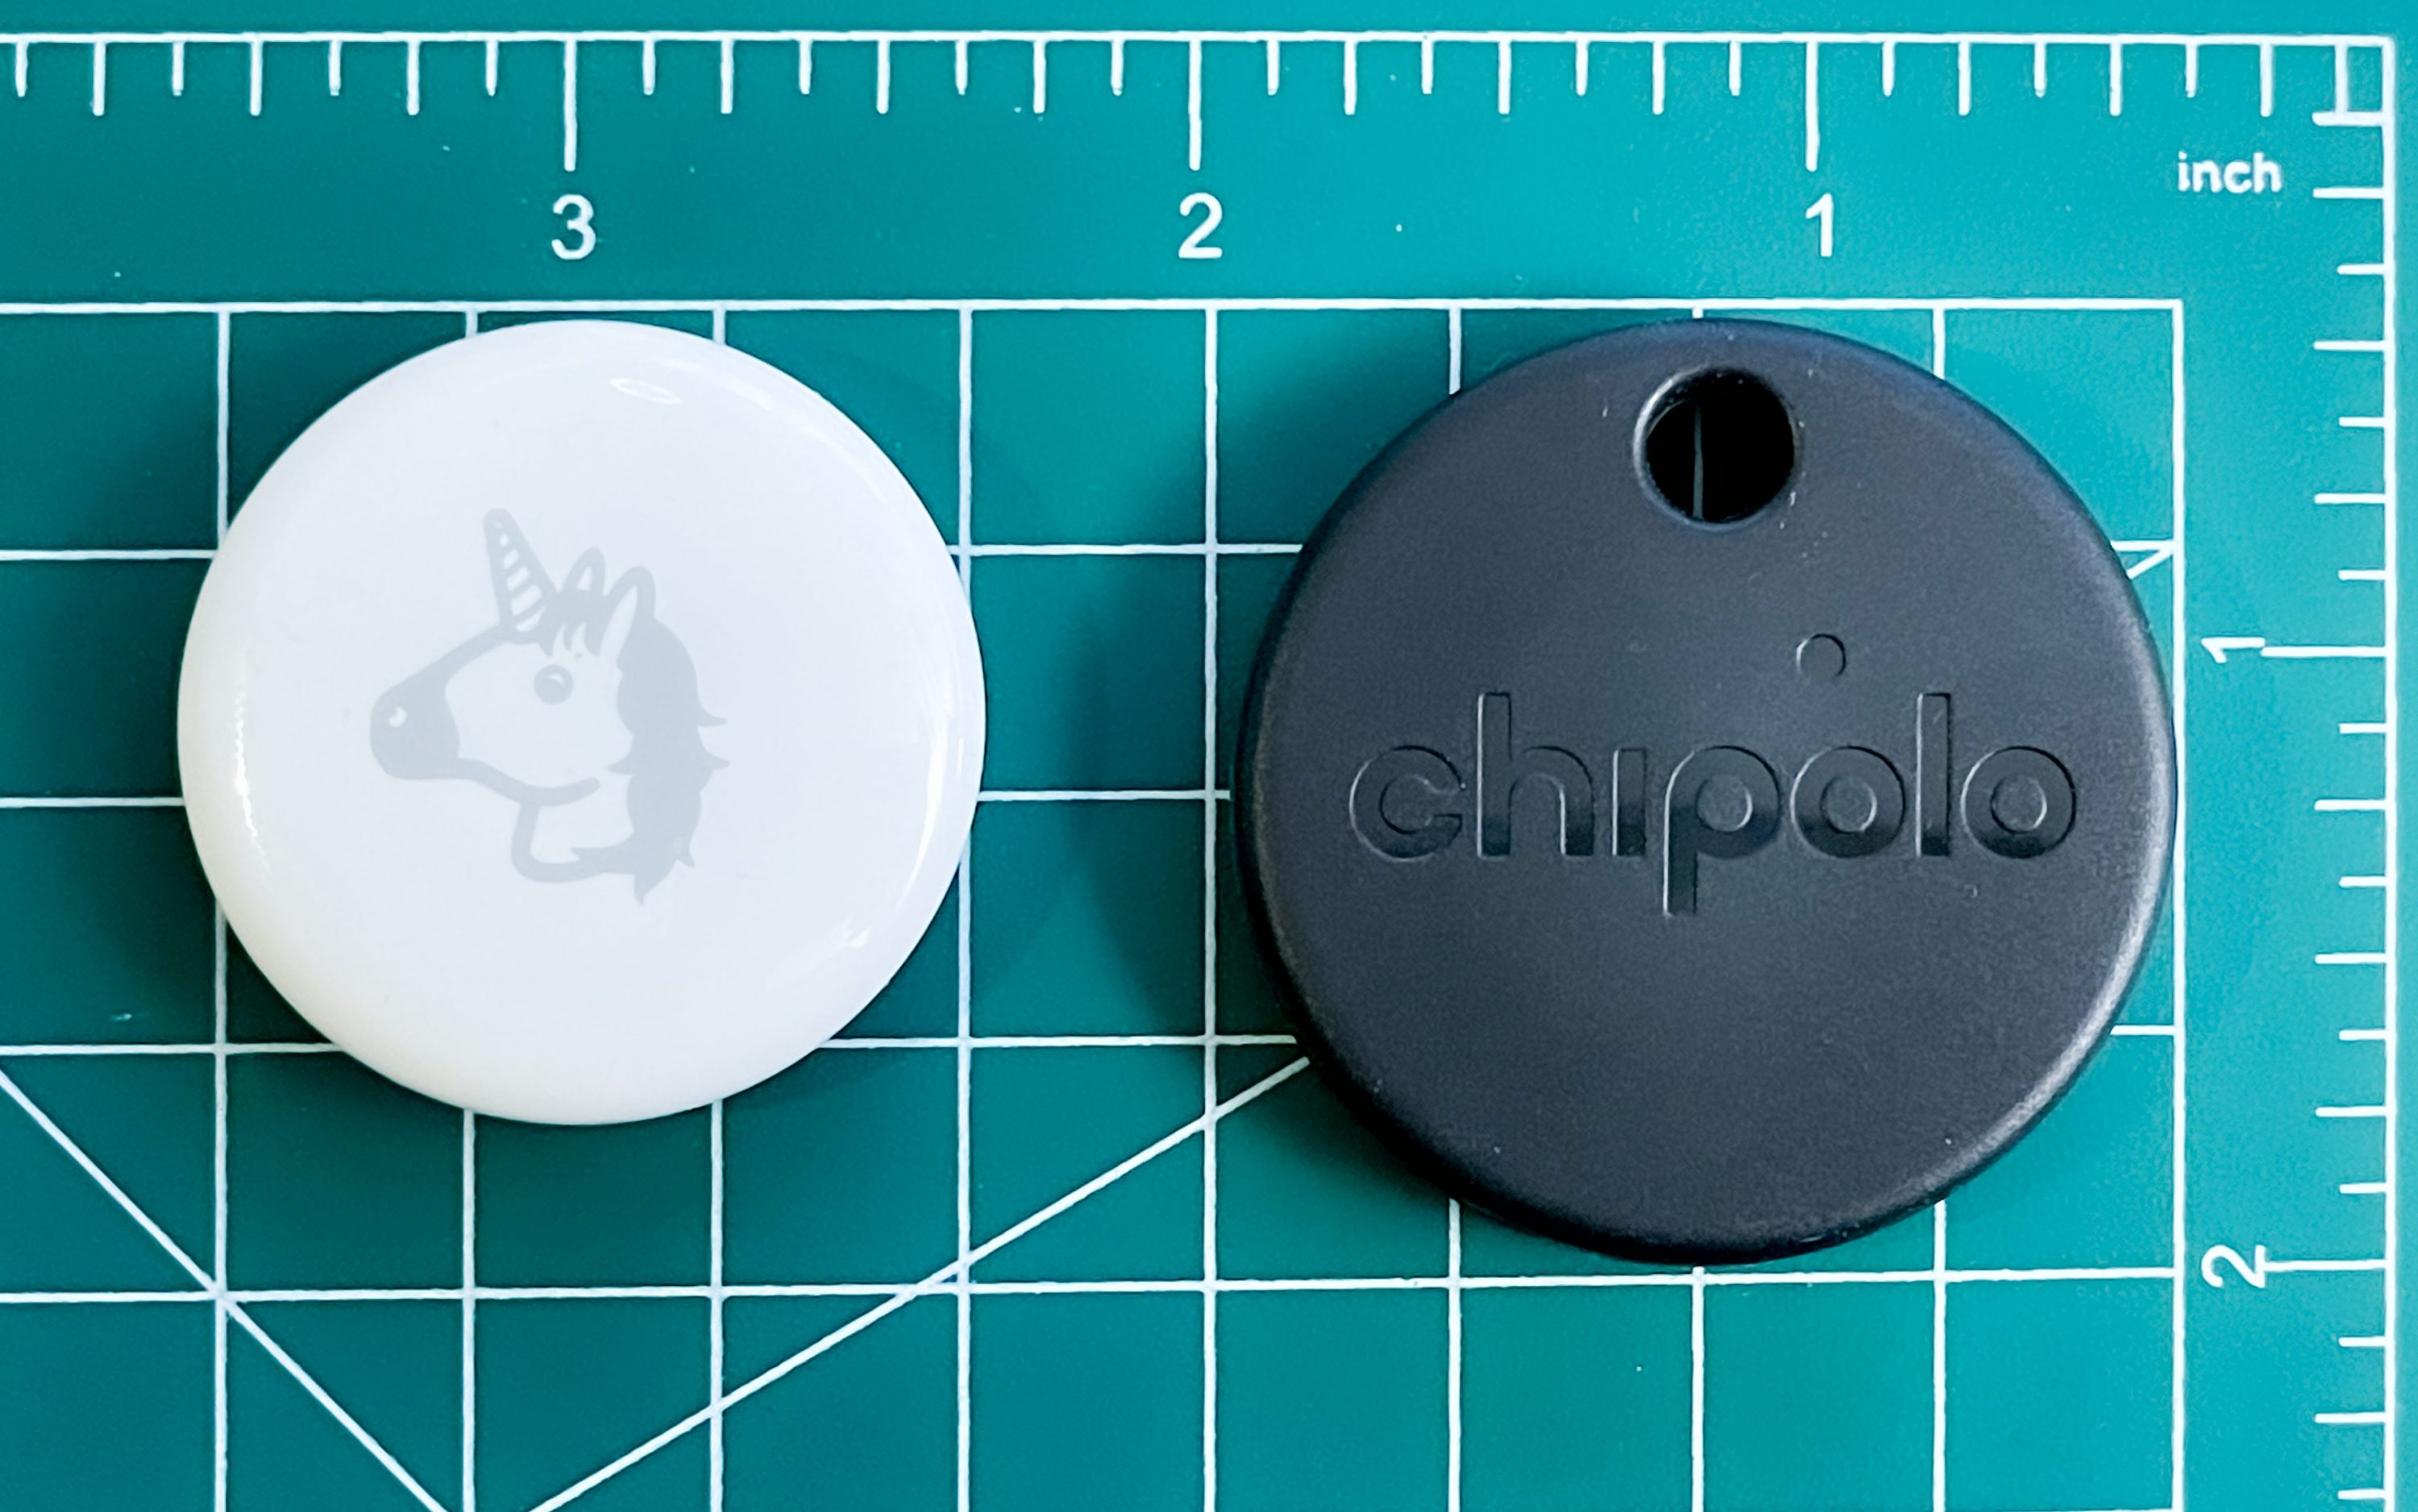
The ONE Spot is 1.5 inches (37 mm) in diameter and .25 inches (5 mm) thick. It has an integral button you compress as part of the pairing process in the Find My app on an iPhone or iPad. An AirTag is 1.25 inches (30 mm) in diameter and the thickness at its widest point is also .25 inches. The ONE Spot requires iOS 14.3 or iPadOS 14.3 or later.
As similar as the ONE Spot is to the AirTag, there are a few significant differences:
- Precision: The ONE Spot includes only Bluetooth connectivity. It lacks the ultrawideband (UWB) radio built into AirTags that enables precision short-range finding within about 30 feet (10 m) that’s useful within a house, car, or other space. The lack of UWB support makes the ONE Spot useful for finding objects vaguely nearby or at a distance. It also makes the price tag harder to justify, given that it costs nearly the same as an AirTag. Perhaps that’s not surprising—Chipolo doesn’t have Apple’s massive economies of scale—but it makes a consumer purchasing decision more difficult.
- Loudness: Holy smokes, this thing is loud. Chipolo says it produces a sound that may be as loud as 120 decibels. That’s in the chainsaw/aircraft takeoff range. An AirTag is much quieter. Chipolo says it doesn’t need UWB because “Ultra-wideband technology is used for precision finding at close distances, which the Chipolo ONE Spot already covers with a very loud ring.”
- Key-ring hole: Chipolo included a nifty hole in the ONE Spot so you can thread it onto a key ring. That may improve the ONE Spot’s price comparison, given that you’ll need to buy an accessory to attach an AirTag to a key ring.
- Materials and robustness: While an AirTag is a durable combination of metal and a coated hard plastic, the ONE Spot is entirely uncoated plastic. It has a nice finish, but I expect it to mar easily and not survive the same kinds of crunches an AirTag would.
- Different ID method for finders: While Apple’s AirTags rely on NFC to allow any device with a reader—including iPhones and Android phones—to pull up a Web page associated with a found AirTag, Chipolo’s reliance on Bluetooth forces a more complicated approach. The finder of a ONE Spot must launch Find My on an iPhone, iPad, or iPod touch; tap the Items button; and then tap Identify Found Item. Apple appears to require Bluetooth-only ID for all third-party items; we’ll see if that remains true. [Bullet added 2021-09-06.]
Beyond those differences, the ONE Spot also channels Henry Ford, letting you pick whatever color you want, as long as it’s black. Oddly, Chipolo’s non-Find My devices come in a few different colors.
Why buy a ONE Spot over an AirTag? If you’d prefer to buy non-Apple gear, want a built-in key-ring hole, or want a tracker that produces a truly astonishing sound when marked as lost, the ONE Spot is your device.
How to Set Up Custom Email Domains with iCloud Mail
Apple is now testing an iCloud Mail feature that power users have requested for years: custom email domains. What does that mean? Most people use free email services like iCloud Mail and Gmail, where all email addresses use a pre-specified domain. For instance, if you use iCloud Mail, your address will be something like [email protected] (or [email protected] or even [email protected] if you’re old-school cool). Likewise, if you use a free Gmail account, your address is along the lines of [email protected].
However, if you own a custom domain name, like tidbits.com or joshcenters.com, many email services let you use that domain for your email address. That offers a few advantages:
- It enables you to customize your email address.
- It looks more professional—you’re not just one of hundreds of millions of iCloud users.
- You can migrate your email address to any other email service provider that supports custom domains.
Things to Know Before You Move Your Email Address
You can now test custom domain support on the iCloud beta site. However, there are important caveats:
- Do not move your primary email domain to iCloud Mail yet, since the feature is still in beta. (There are other reasons to not rely on iCloud Mail as your main email service that I’ll outline below.)
- You can send outgoing email from a custom email address only with the betas of macOS 12 Monterey, iOS 15, and iPadOS 15, not from currently shipping versions of Apple’s operating systems.
- You can’t move just one address at a domain to iCloud Mail. It’s all or nothing. For instance, we couldn’t move [email protected] to iCloud and leave [email protected] behind.
- You can only set up a custom email domain for an iCloud account that has an iCloud email address associated with it. (For historical reasons, Adam Engst’s primary Apple ID is [email protected], has no associated iCloud email address, and wouldn’t allow him to manage custom domains.)
- You must be a subscriber to iCloud+, Apple’s new name for iCloud paid plans. If you already pay for iCloud storage, you’re automatically in.
- You must be able to receive email at your custom email address before you set it up at iCloud because Apple needs to send it a confirmation message. I explain how to get around that catch-22 below.
- Apple does not currently provide any tools to transfer existing email messages from another email provider to your iCloud account. Macworld UK explains how to use the Mail app on the Mac to move messages from Gmail to iCloud, which should work for any email account set up in Mail. Although the article’s steps look reasonable, we haven’t tested them with thousands of messages, so proceed at your own risk and be sure to verify that messages have transferred correctly.
- You can set up five unique domain names with an iCloud Mail account, but each person can have only three unique addresses per domain, all of which deliver to that person’s iCloud inbox. Services like FastMail offer many more, though you have to pay for additional users. In short, iCloud Mail is still only a solution for individuals and families, not for organizations.
I personally don’t depend on iCloud Mail for anything other than testing. The lack of custom domain support was one reason, but I don’t see myself switching even now. iCloud Mail lacks many of the advanced options of other email providers and has been known to silently filter messages, with no way to recover the messages or even know they were sent.
However, there are some good reasons to use iCloud Mail, especially if you’ve bought into the Apple ecosystem:
- Easy integration and fast device setup. All you have to do is log in to your iCloud account to send and receive email.
- Push notifications for email messages that notify you immediately when you receive a message. (Fastmail is the only third-party service I know that offers this for Apple devices.)
- Economical use of paid iCloud storage space.
How to Buy a Domain
Apple doesn’t sell domains, so you’ll have to buy one from a domain registrar before setting up a custom email address. Entire books have been written about domain purchasing and management, but the process is relatively simple. Here are some registrars that we at TidBITS have used successfully:
I currently host my domains with Epik because of the company’s strong civil liberties stances and outstanding 24/7 support. However, if you’re new to domain registration, I would steer you toward Hover. It’s the most user-friendly registrar I’ve used, complete with excellent telephone support. If you start with one domain registrar and want to switch to another, you can transfer your domains at any time, though you usually have to pay for an extra year when you do so.
Once you own a domain, be sure to renew it every year or pay for a multi-year registration. Set yourself a reminder to renew it at least a few weeks before it expires. When the renewal day comes up, make sure your payment information is up to date. I once nearly lost my joshcenters.com domain due to a payment snafu with Hover. Domain squatters often scoop up lapsed domains and try to resell them back to their owners at exorbitant prices.
You must have a valid email address at your domain to set it up with iCloud Mail because Apple sends a confirmation message to that address. If you’re setting up a new email address, it’s a bit of a catch-22, but don’t worry, most registrars let you create a free forwarding address that will do the job. Just remember to do it before you start configuring your domain in iCloud Mail.
Below is a screenshot of me setting up a forwarding address for one of my Epik domains. I set it up so [email protected] forwards any email it received to my main email address. That enabled me to receive Apple’s confirmation message.
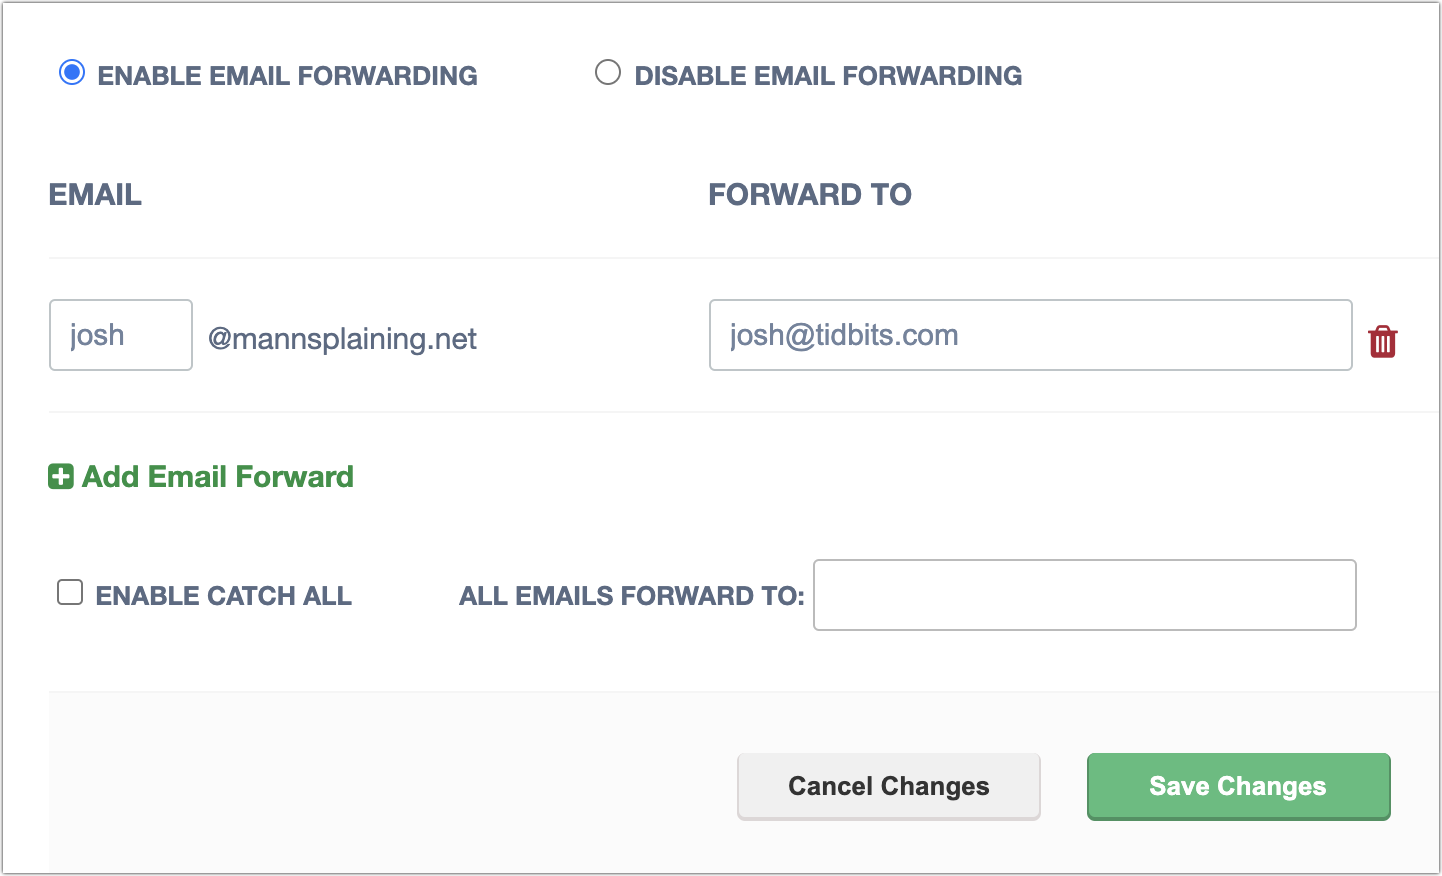
(I bought mannsplaining.net when my friend Sonya Mann and I were thinking of starting a podcast called Mannsplaining. Sadly, we both later realized we had nowhere near enough time to host a podcast, and I haven’t used the domain for anything since.)
Setting Up a Custom Domain with iCloud Mail
With all the caveats out of the way, let’s look at the process of setting up your custom domain to work with iCloud Mail:
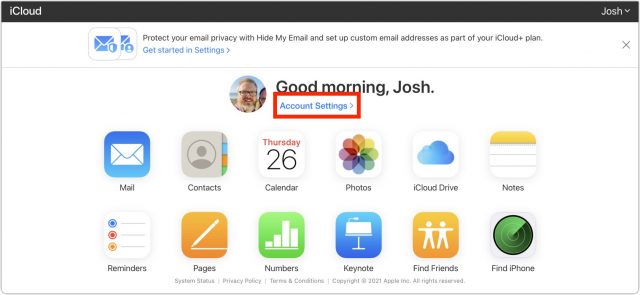
- In Safari, visit beta.icloud.com and enter your login credentials. Note that the iCloud beta works only with the latest versions of Safari, Firefox, Google Chrome, and Microsoft Edge. Annoyingly, that list doesn’t include Brave.
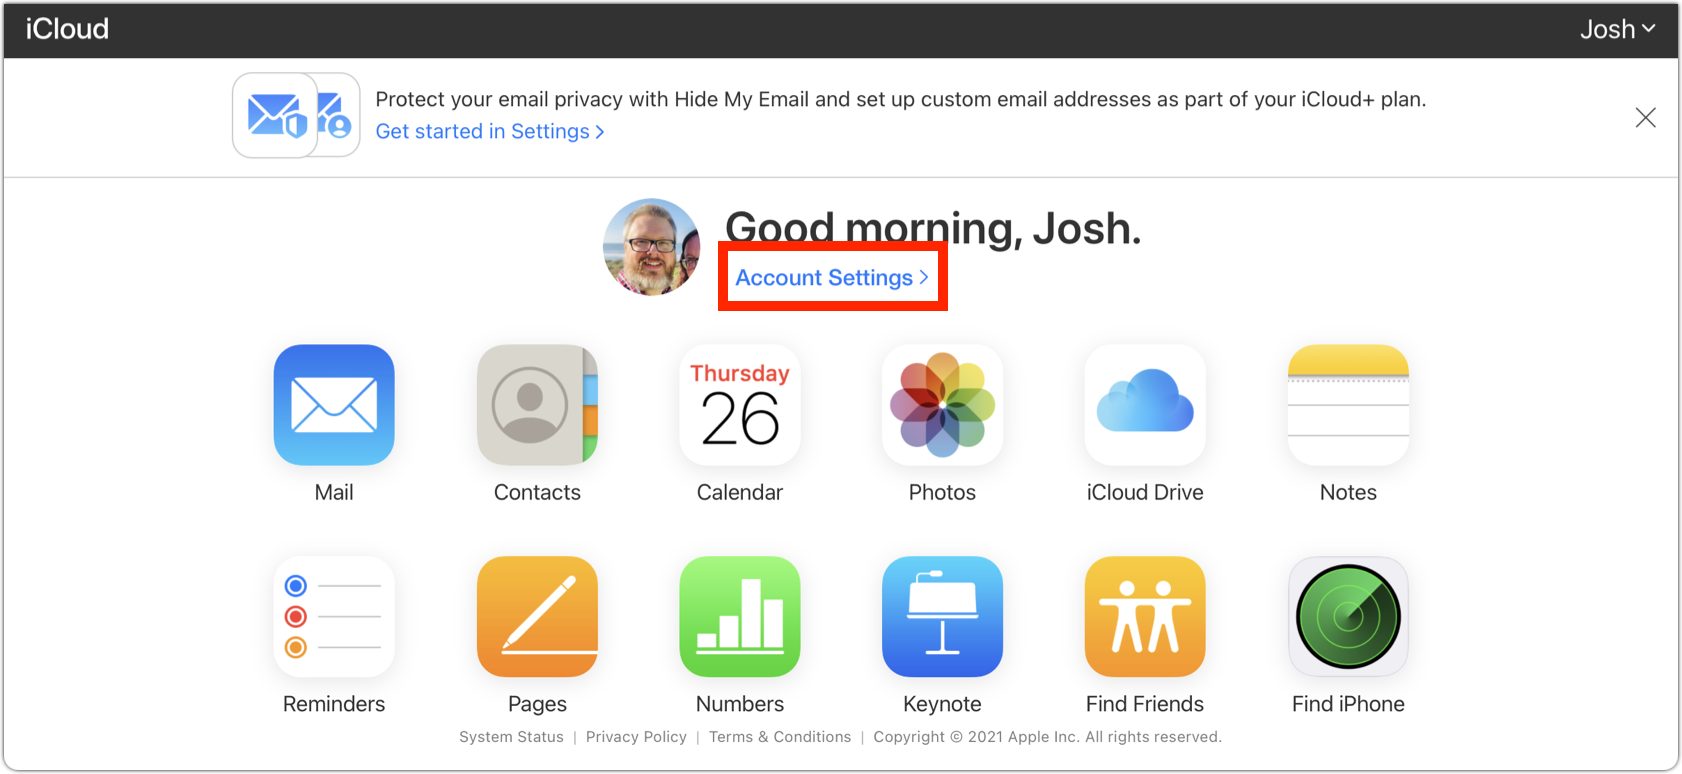
- Click Account Settings.
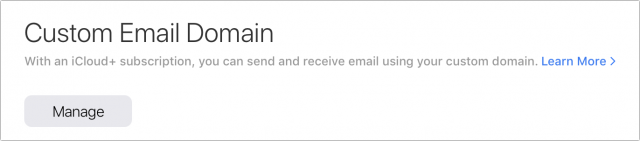
- Scroll down to Custom Email Domain and click Manage.
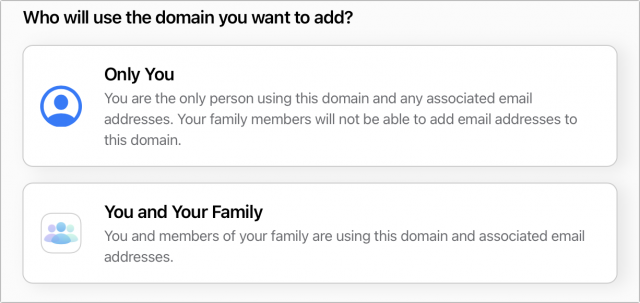
- Choose whether you want to use the domain for only a personal address or for your family. Only You is probably the safe choice for now.
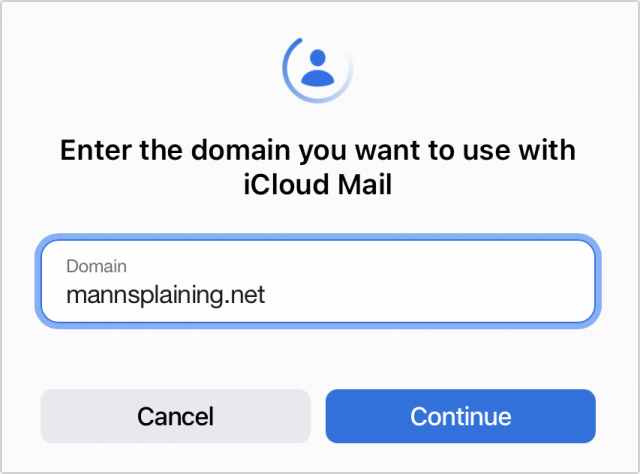
- Enter your domain and click Continue. After doing this, you receive an email to your iCloud address with additional instructions, though the iCloud website will continue guiding you through the process.
- Enter all the email addresses you want to associate with your domain. You can add more later, but you may miss messages sent to those addresses in the meantime. Click the + icon to add more. Remember, you can add only three email addresses.

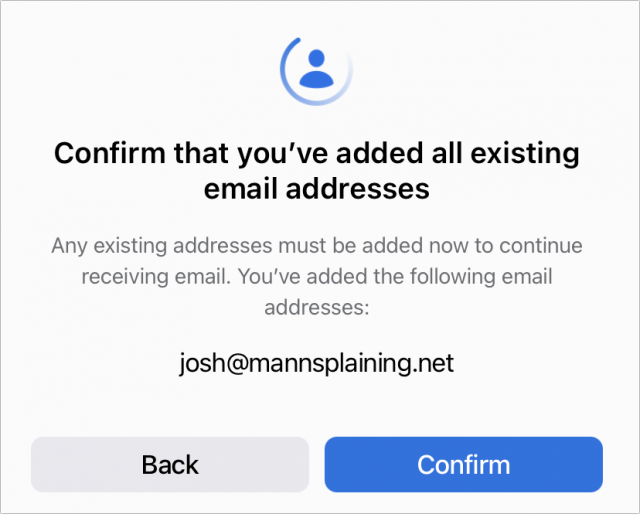
- Click Add Email Address. You are asked to confirm that you’ve added all of your email addresses. Click Confirm once you’re sure. Don’t fret, because email will not be redirected until you change your registrar’s settings.


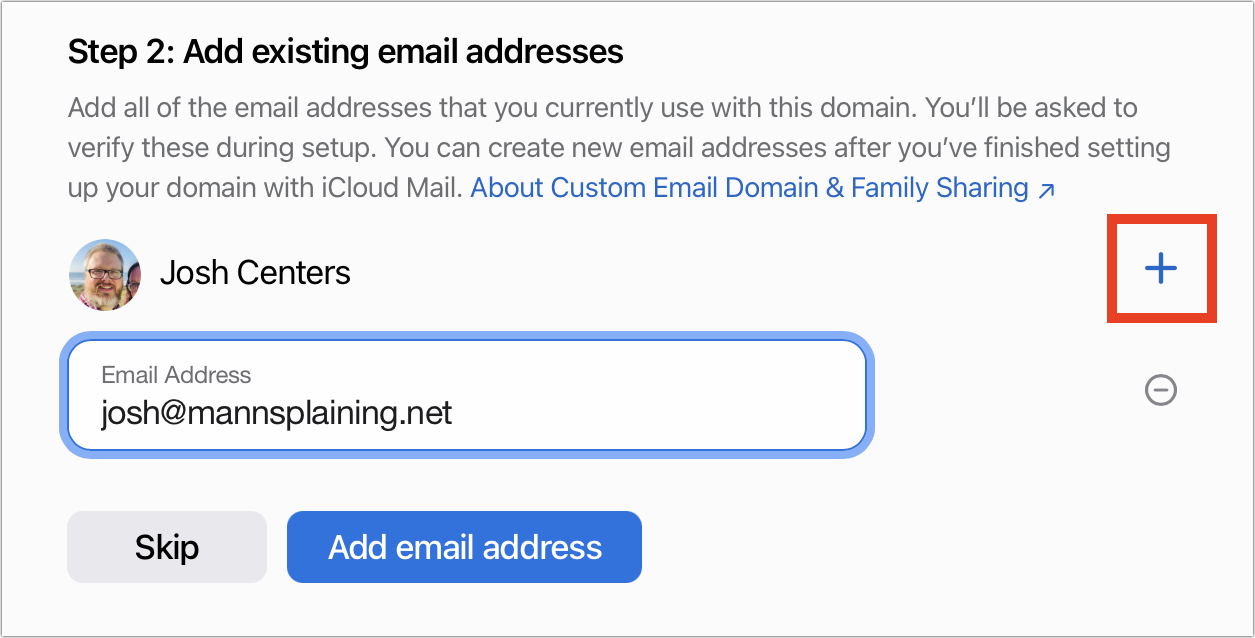

If you forgot to set up an active email address before starting (raises hand), you can click Resend Verification Emails on this screen to send them again.
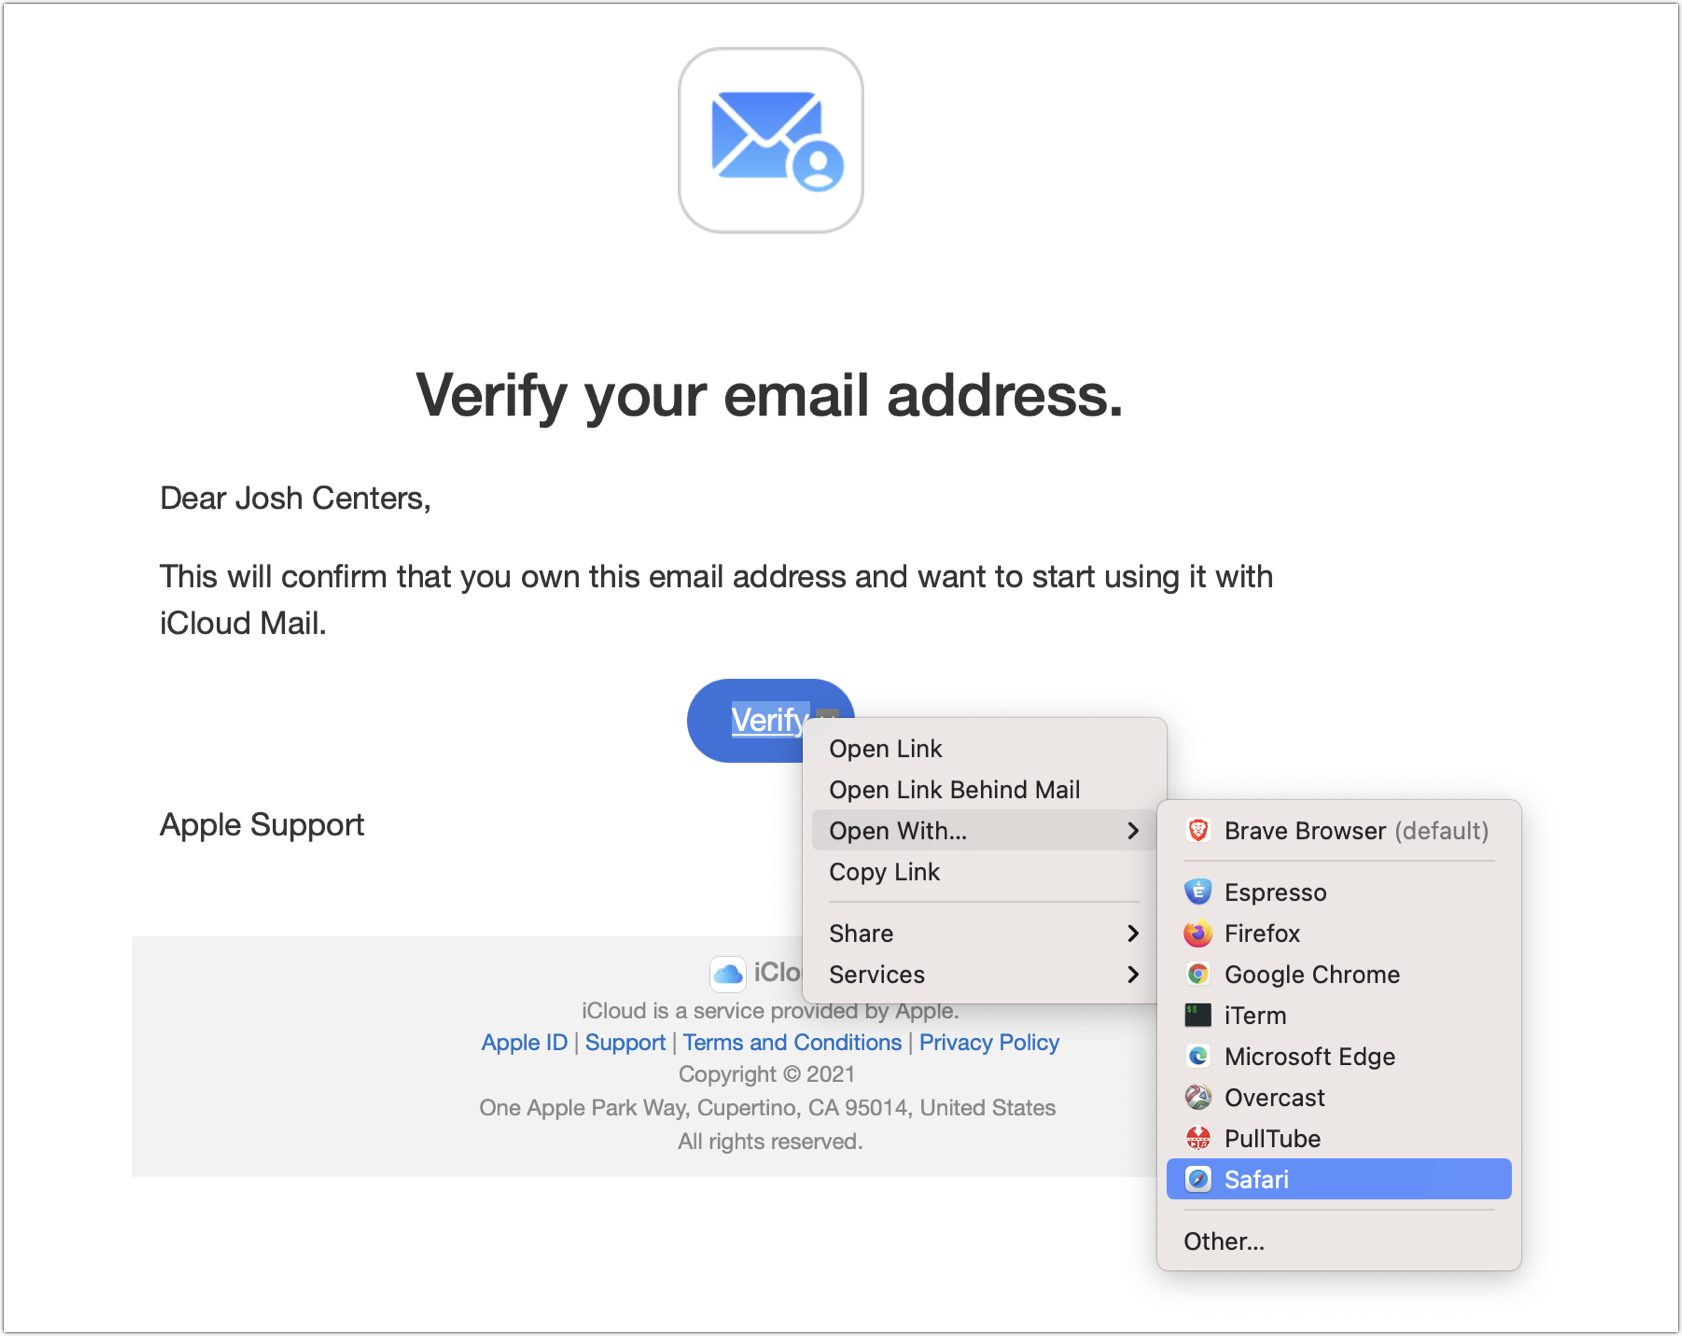
Keep an eye on your email inbox for the verification email from Apple. Once you receive it, open it and click Verify. If your default browser isn’t supported by the iCloud Beta, you can Control-Click the Verify button in Mail and choose Open With > Safari or another installed browser. In other email clients, you should be able to Control-click Verify, copy the URL, and paste it into your browser.
You should see a message on the iCloud website saying your address has been verified. Click OK.
Update Domain Registrar Settings
Here’s where things get tricky—you might need help from your domain registrar. You need to set up the appropriate DNS records with your registrar, and how you do that varies by registrar. If you contact your registrar’s support and provide the details, they may be able to set up the records for you or at least point you to the necessary instructions.
In the simplest possible terms, DNS records are instructions for how DNS servers should handle requests for a domain. DNS stands for Domain Name System, and the collection of interconnected DNS servers is what makes it possible to visit a domain like tidbits.com instead of a numeric IP address.
To see the records you need, check your iCloud inbox for an email titled “Finish setting up your custom domain,” but don’t follow that email’s instructions!
Here’s what Apple provides you:
- Two TXT records that hold information that prevents email spoofing
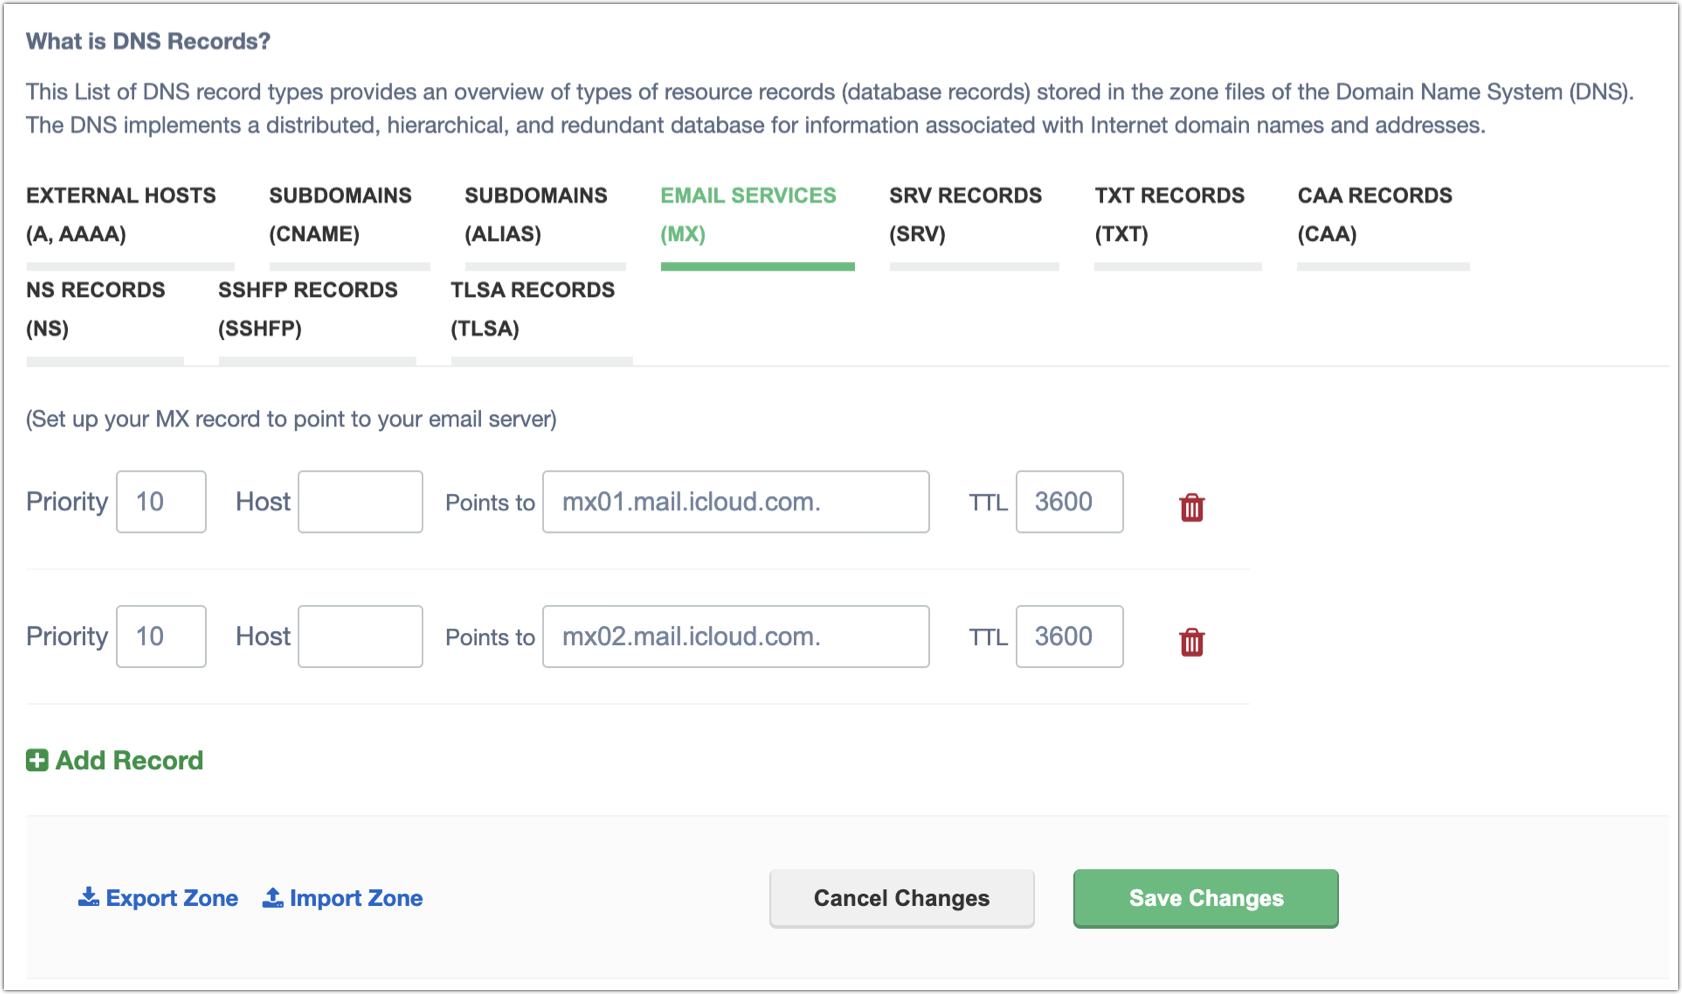
- One MX record that specifies where email sent to your domain should be delivered
- One CNAME record that points traffic from one domain to another
You must correctly enter all of these DNS records for your domain at your registrar’s site. If you miss any or make any mistakes, email from your domain may be automatically rejected or flagged by spam filters.
If you use your domain for services other than email, these records should not interfere with those services as long as you don’t replace existing entries. However, if you set up email forwarding with your registrar or already use your domain with another email provider, you will want to delete the corresponding DNS entries for that provider. (Record the deleted information in Notes or the like, just in case you want to switch back.) I assume that if you’ve already set up a custom email domain in the past, you have some idea of what you’re doing. Otherwise, I recommend contacting your registrar’s support.
Reconfiguring DNS records gave me the most trouble because the instructions in Apple’s email are wrong! Until Apple fixes its email, refer to Apple’s support document, which gives the proper instructions in the correct order. You will need to refer back to Apple’s email for step 5, because it has your unique Personal TXT entry.
Your registrar will likely look different, but as you can see in the screenshot below, on Epik, I was able to leave all the Host fields blank. But with the sig1.dkim.[example.com].at.icloudmailadmin.com. CNAME entry, make sure you replace [example.com] with your domain name or the final step will fail.
Once you’ve correctly entered all your DNS records at your registrar, return to iCloud settings and click Finish Set Up. You’re asked to verify that you’ve updated your DNS records before clicking Confirm.
If you just updated the records with your registrar, you may see a DKIM error when you click Confirm on the iCloud page. There are a couple of things to know:
- DNS records can take a while to propagate throughout the system, anywhere from a few minutes to a full day.
- DKIM is an email authentication scheme that tries to reduce spam. Without a valid DKIM record, your outgoing emails will likely all be flagged as spam.
In my case, I received the error because I didn’t replace [example.com] in the CNAME record. Oops! Once I corrected that, it worked instantly.
Finally, you need to specify which address you want to use as your default outgoing email address.
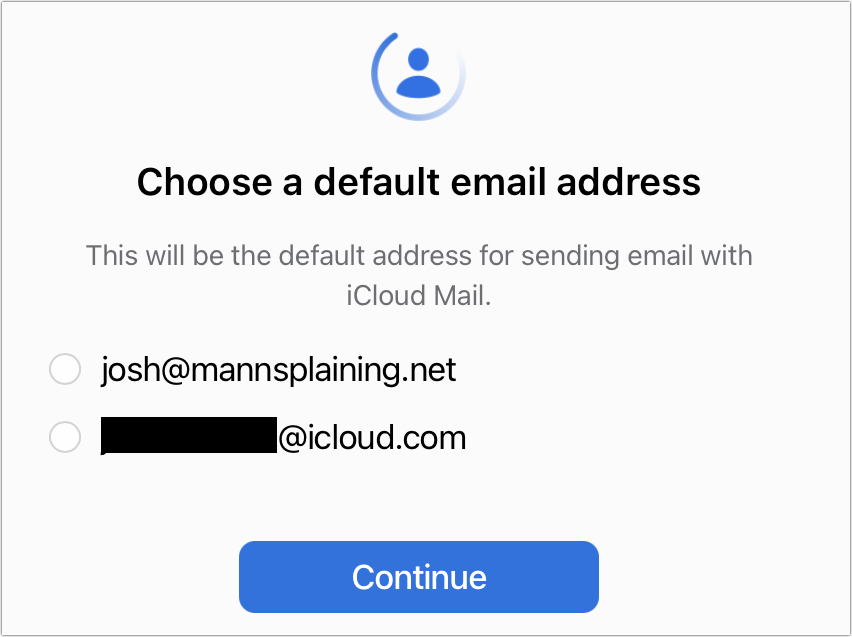
You’ll know it works if you receive a confirmation email from iCloud. Your other devices will also ask if you want to use the new email address for iMessage and FaceTime.

Using Your New iCloud Address
Here’s what you need to know:
- Your existing icloud.com, me.com, and mac.com email addresses work as they always have.
- You can send outgoing email from one of the above addresses or from the new one you set up.
- Any email sent to your custom email address should arrive in your iCloud inbox.
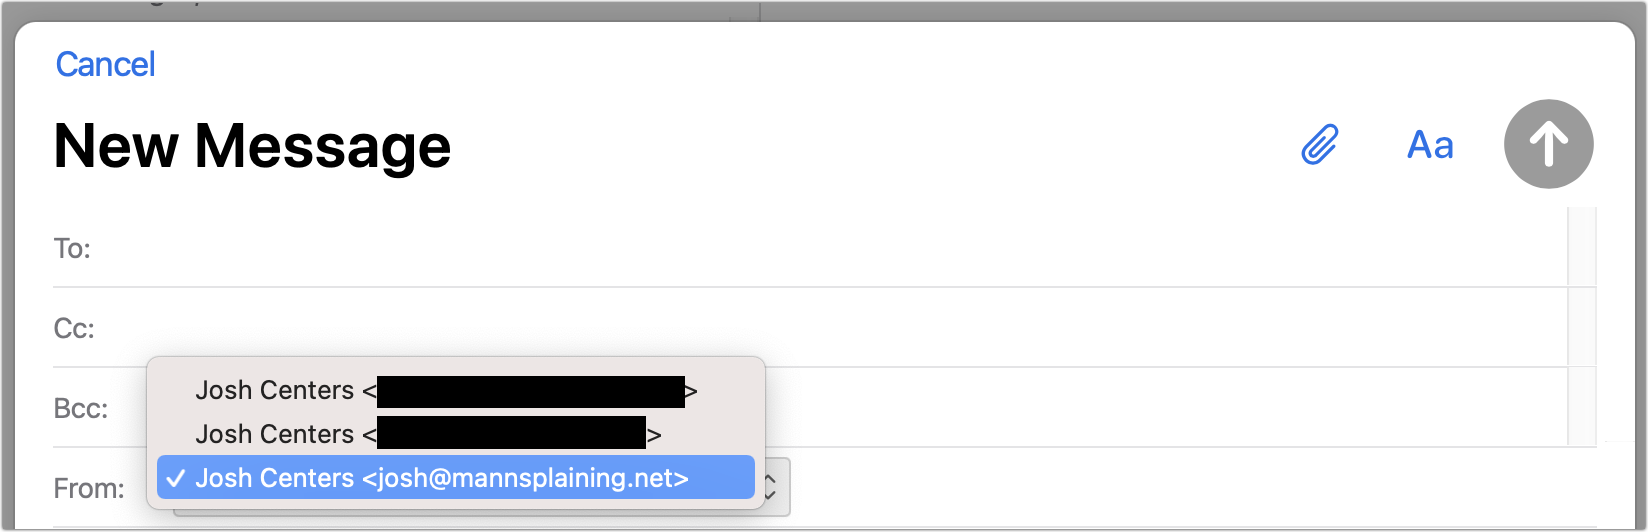
To choose a different outgoing email address when composing a message, click or tap the address to the right of the From field in Mail. In Mail on the iCloud beta website, your new address shows up instantly. In the iOS 15 beta, it took a few minutes to show up. However, it won’t show up at all in the non-beta iCloud Mail or in any of Apple’s currently shipping operating systems.
Proceed with Caution
It’s great that Apple has finally added support for custom domains to iCloud Mail, but I strongly encourage you to restrict your usage to testing. Beyond the fact that you can only send email from one of the betas of Apple’s upcoming operating system releases, I just can’t recommend that you trust mission-critical email to a beta service. After Apple promotes the feature out of beta, lots of people will start using it, and we’ll get a sense of how reliable it is.