#1431: Steve Jobs’s daughter’s new book, Apple abandons Back to My Mac, restoring from Backblaze, how to buy a NAS
Lisa Brennan-Jobs’s memoir about her famous father is due out next week, but there’s early coverage that might tell you if you want to read it. Back to My Mac users will need to look for alternatives in macOS 10.14 Mojave—Glenn Fleishman explains. If you use or are investigating Backblaze as the CrashPlan for Home shutoff date nears, Josh Centers has instructions on how to restore files from Backblaze. And for those who are considering buying a NAS (network-attached storage) device, perhaps to replace a Mac mini, Jeff Carlson explains what to look for in an excerpt from Take Control of Your Digital Storage. Notable Mac app releases this week include Tweetbot 3.1, Aeon Timeline 2.3.10, EagleFiler 1.8.4, Lightroom Classic CC 7.5, and Parallels Desktop 14.0.
“Small Fry” Offers the Opportunity to Think Differently about Steve Jobs
This isn’t a book review. Small Fry, the memoir penned by Lisa Brennan-Jobs, Steve Jobs’s firstborn and much-neglected daughter, isn’t out until 4 September 2018. But Vanity Fair has already published an excerpt, and the New York Times now has a lengthy article based on interviews with Brennan-Jobs. Early on, it says:
On the eve of publication, what Ms. Brennan-Jobs wants readers to know is this: Steve Jobs rejected his daughter for years, but that daughter has absolved him. Triumphantly, she loves him, and she wants the book’s scenes of their roller skating and laughing together to be as viral as the scenes of him telling her she will inherit nothing.
Ms. Brennan-Jobs’s forgiveness is one thing. What’s tricky is that she wants the reader to forgive Mr. Jobs, too. And she knows that could be a problem.
It could be a problem because Jobs comes off at best as a jerk and at worst as a truly damaged human being. Neither of those is at odds with the Steve Jobs revered—sometimes with cause, sometimes undeservedly so—by Apple enthusiasts for his marketing acumen and technical foresight.
But his relationship with his daughter adds color and perspective to an overall picture of Jobs that is often monochromatic in its focus. And it’s impossible to ignore the fact that this book’s revelations come at a time when powerful people are being brought down by past disgraceful behavior. Should we think differently about Steve Jobs after hearing Lisa Brennan-Jobs’s side of the story?
Read the excerpt, read the article, read the book, and make up your own mind.
Apple Abandoning Back to My Mac in Mojave
Back to My Mac won’t be part of macOS 10.14 Mojave. On 9 August 2018, Apple announced that fact in a support note and offered limited and incomplete alternatives. The technology, which enabled screen and file sharing between two Macs even when they weren’t on the same network, first appeared in 2007 in Mac OS X 10.5 Leopard.
Back to My Mac provided a way to connect one Mac to another over the Internet without any special network setup or router configuration. It let you, when traveling, connect back to a Mac on your local area network (LAN) just as though you were on the same LAN. Every Mac logged into the same iCloud account appeared in the Finder sidebar under Shared. Apple later added remote configuration of AirPort base stations to Back to My Mac through AirPort Utility.
Back to My Mac first used .Mac, then MobileMe, and finally iCloud as a central coordination point to set up an encrypted tunnel between two Macs, sort of like a very private VPN (virtual private network). Generally, it supported only file and screen sharing, and those services had to be enabled on the shared Mac. With some tinkering, you could sometimes get other types of connections to work, too, like FTP and SSH.
I found Back to My Mac such an exciting proposition back then—and so complicated to get working just right with different routers and network setups—that I wrote a nearly 100-page book for the Take Control series just about Back to My Mac. (And a separate one about screen sharing!)
Back to My Mac worked reliably only in certain networking configurations. It couldn’t punch through a “Double NAT,” a situation in which you have two layers of network devices assigning local IP addresses (see “Punching a Hole for Back to My Mac,” 17 November 2007). This can happen if you have an ISP-provided broadband modem that offers some networking capabilities, and you also want to attach your own Wi-Fi gateway with your own settings. Other remote-access software can overcome that difficulty.
The need for Back to My Mac is no longer as great as it was when Apple introduced it. Before Back to My Mac, you had to know how to obtain and configure server and client remote control software, which may have used the industry standard VNC, for remote access. (Apple’s Screen Sharing service is a modified version of VNC, in fact, and supports standard VNC for backward, but highly insecure, compatibility.)
Nowadays, you have a number of options for specific forms of remote access, many of which work across multiple desktop platforms. However, most are quite expensive or require a monthly subscription.
Alternatives to Back to My Mac
First, some good news: the loss of Back to My Mac doesn’t affect macOS’s built-in screen sharing, which you can still use over your LAN or invoke via Messages.
If you need remote screen and file access only for personal or non-commercial purposes, the cross-platform TeamViewer is the best option (there are many others). It’s provided on an honor-system basis at no cost for those who aren’t using it for work. Otherwise, it starts at $588 per year for a single user to access any number of computers, with only one session active at a time.
The Sweet Setup recommends Edovia’s Screens (Mac, $30 or part of the Setapp $9.99 per month subscription service; iOS, $20) for remotely accessing a Mac and other platforms. (That article also recommends a number of other alternatives worth examining.)
Apple offers Apple Remote Desktop ($80), but its reviews are quite poor, and the company doesn’t seem to have kept up with the level of development required to make it shine and be reliable in the latest versions of macOS. It’s possible dumping Back to My Mac from macOS could spur improvement, but I don’t recommend Apple Remote Desktop for most people.
For remote file access, nearly everyone I know has switched to a cloud-based service like Box, Dropbox, Google Drive, iCloud Drive, or Microsoft OneDrive. Such a service provides access to files on linked desktops, through mobile software, and via a Web browser.
People who still need a Mac-to-Mac secure tunnel will have to look into more complicated solutions, like installing VPN server software on their Mac. That used to be an option with macOS Server, but Apple is removing the VPN server in future versions (see “Apple to Deprecate Many macOS Server Services,” 26 January 2018).
I felt a pang of regret when I read that Apple was putting an end to Back to My Mac, thinking of the utility it brought its users over the years. But—perhaps due to relatively low uptake by everyday Mac users—the company let it languish and never built it into a robust, consistent, and modern part of macOS. It’s a reasonable time to let it go.
We’re running a two-question survey to see what TidBITS readers think of Back to My Mac and what they have used it for.
How to Restore Files from Backblaze
The discontinuation of CrashPlan for Home on 22 October 2018 is coming soon (see “CrashPlan Discontinues Consumer Backups,” 22 August 2017), so I’ve been receiving questions about how best to restore files from the Internet backup service we now recommend, Backblaze (also a TidBITS sponsor).
With Backblaze, backups are largely automatic and work seamlessly in the background, but the process of restoring files requires more attention. It’s worth practicing these steps in advance so you can remain calm and work with assurance if you suffer a lost or corrupted file. And there’s no need to wait for Friday the 13th to do it (see “International Verify Your Backups Day,” 13 July 2018).
Get to the Starting Line
First, you need to log in to Backblaze and get to the point of selecting files:
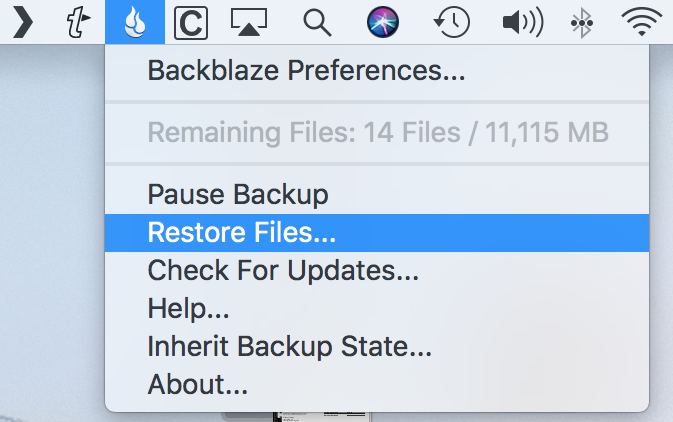
- Click the Backblaze button in the menu bar and choose Restore Files.

- Your default Web browser opens to a Backblaze login page. Enter your credentials and click Sign In. If you have two-factor authentication enabled, enter that code as well, either from your authenticator app or SMS message.
- You’re given three choices: Download Zip, USB Flash Drive, and USB Hard Drive. I cover only the first option here, and note that it’s a bit of a misnomer because you don’t need to download a Zip file if you want to restore only a few files. The other two options are essential if you need to restore so much data that the download would take days.
Select Download Zip.
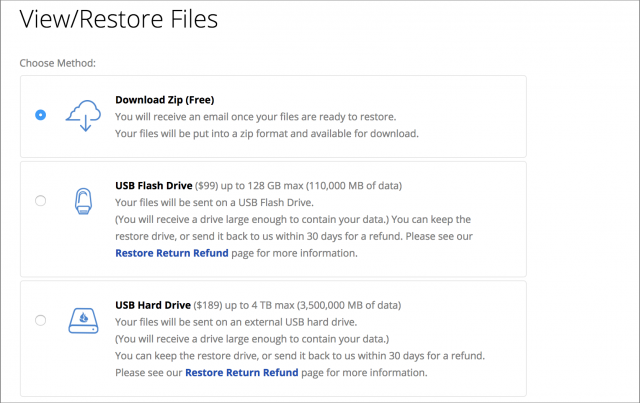
(As an aside, the USB Hard Drive option is limited to 4 TB per drive, so if you want to back up an 8 TB drive to Backblaze, consider partitioning it into two 4 TB volumes to simplify asking for a restore drive containing all your files.) - If you have a private encryption key, enter that in the field near the bottom of the page, scrolling if necessary to see it. Click Unlock.


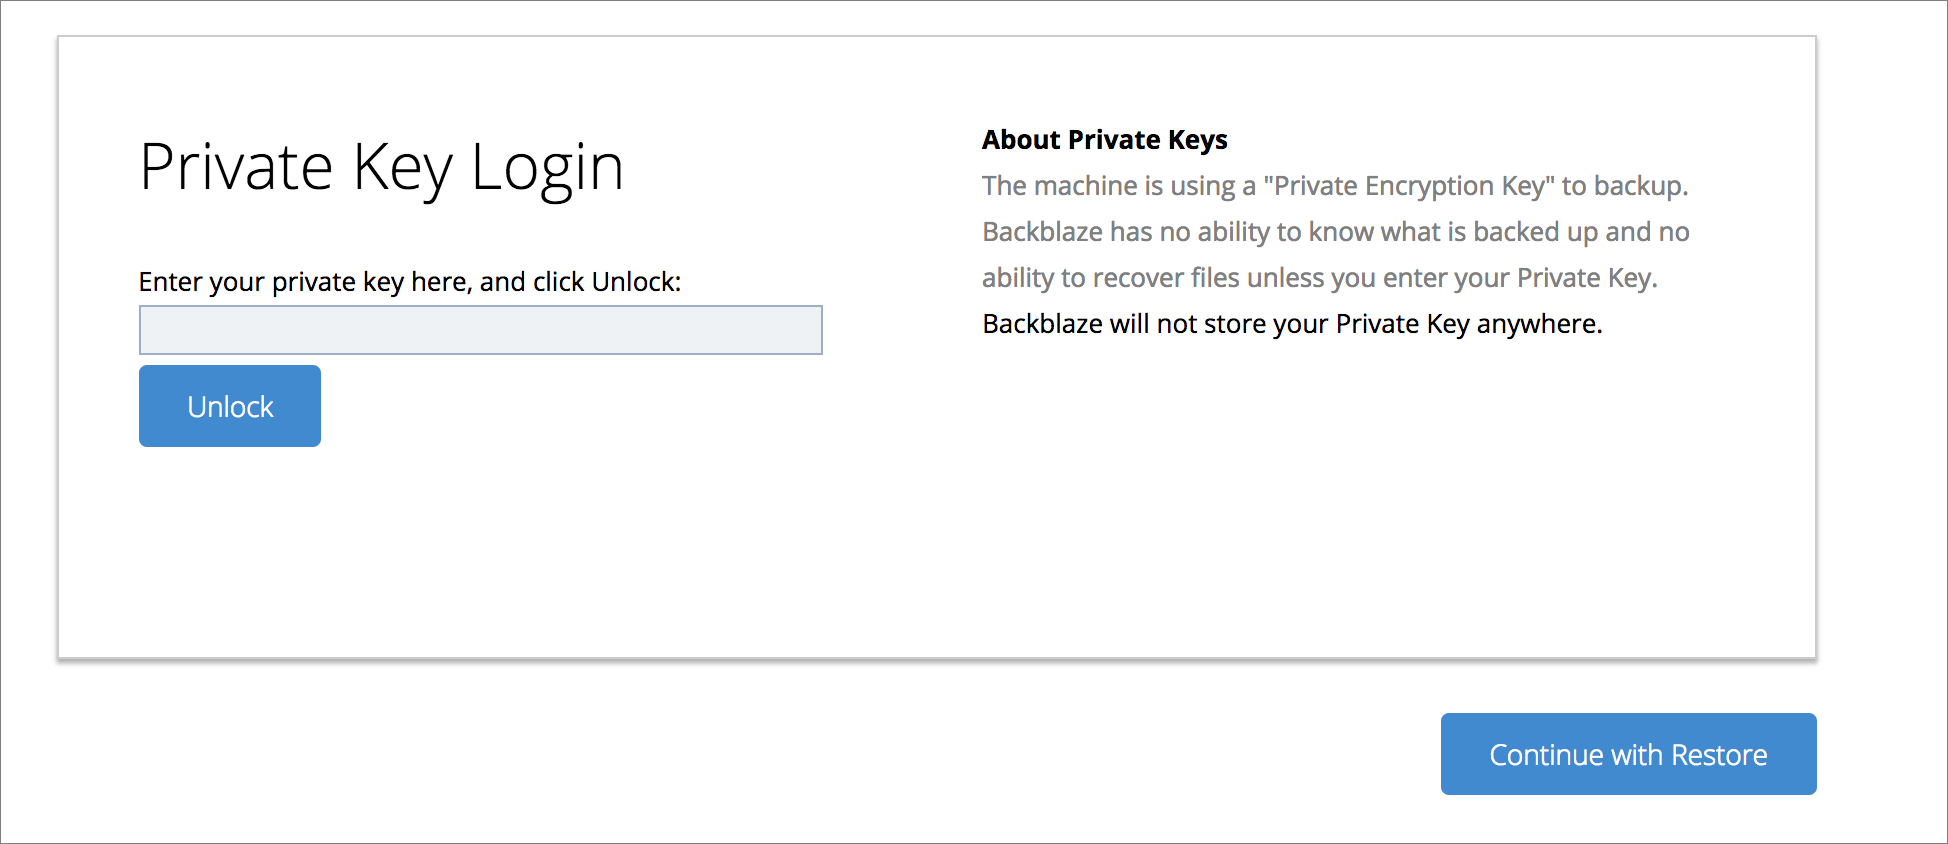
A file browser appears on the bottom of the page that lets you select files to restore. It will likely take a couple of minutes to load your files, so be patient.
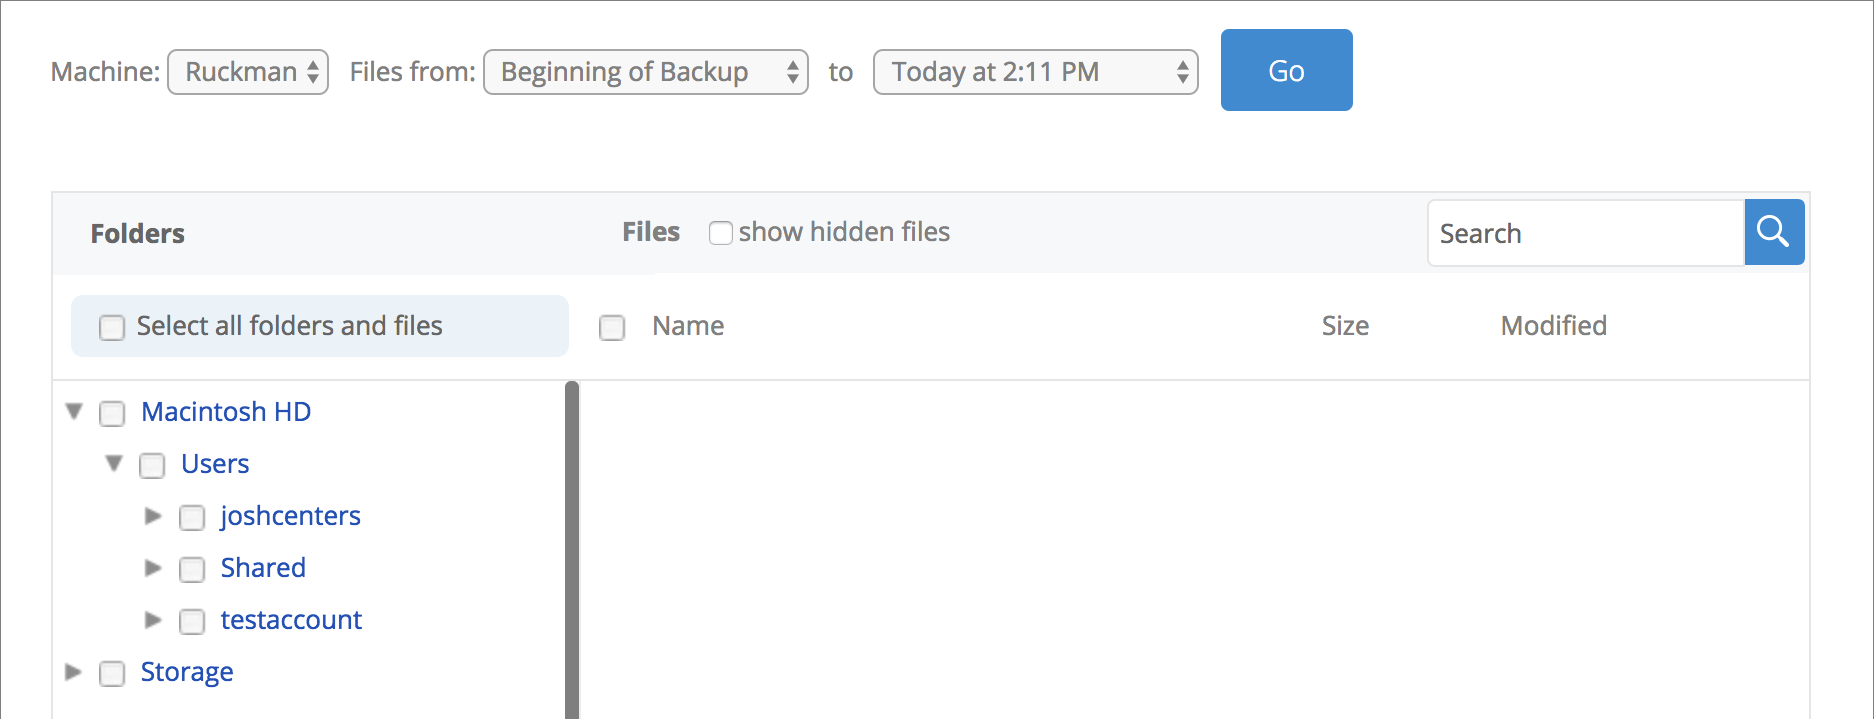
At the top of the interface, you can specify the computer and backup from which you wish to restore. Backblaze retains previous versions of files for up to 30 days, so if you need something other than the latest version of a file that hasn’t been touched in a while, leave Files From pop-up menu set to Beginning of Backup and set the To menu to the date from which you wish to restore. Click Go when you’re done.
In the file browser itself, you can check Select All Files and Folders if you wish, but unless you have an absurdly fast Internet connection, you’re probably better off having Backblaze send you a USB drive.
The file browser is largely self-explanatory. Click the expansion triangles to open folders and drill down to the files you wish to restore.
Restore a Single File
If you click a file’s name, you see options for downloading or sharing it immediately, assuming it’s smaller than 30 MB. Backblaze added this feature in 2017 in response to customer requests.
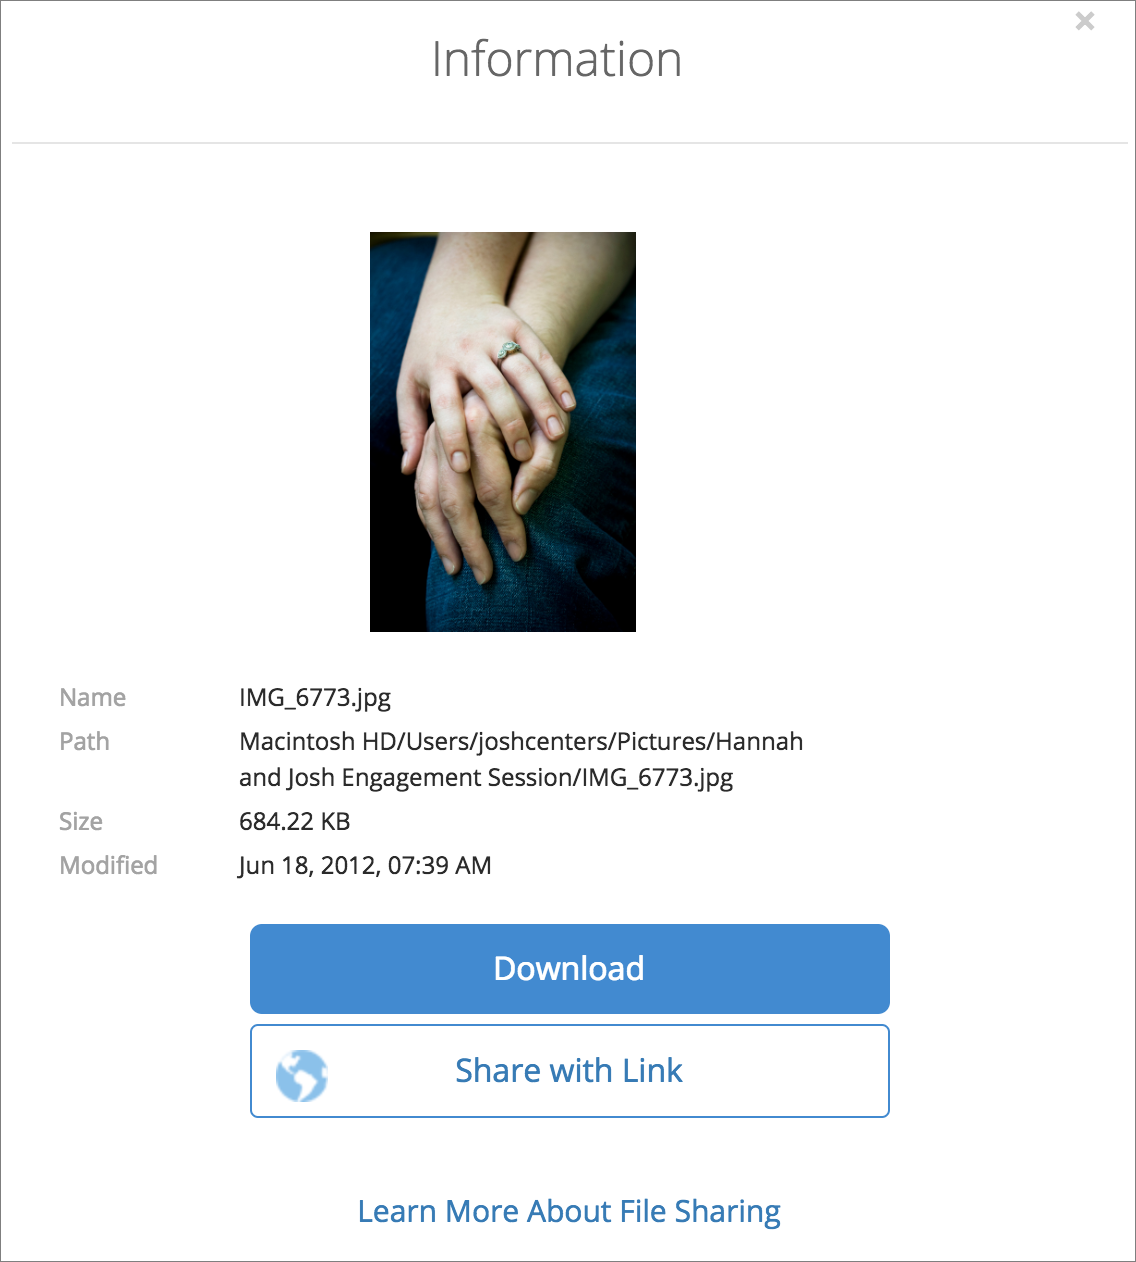
Click Download to download the file in your browser immediately. Clicking Share with Link instead exposes a text field containing a URL and a Copy button that copies the URL to your clipboard. Anyone with that link can download the file. See Backblaze’s documentation for some of the trickier details about sharing files in this way, which involves its B2 cloud storage service.
Restore Multiple Files
If you need to restore an entire folder or more than a handful of files, you’ll have to select the files in the browser and request a Zip file that takes time to prepare. But on the upside, you download all the files you need in one go.
In the file browser, indicate the files you want to restore by selecting their checkboxes. If you’re restoring from multiple folders, note how the folders and subfolders highlight in the sidebar, showing where you’ve marked files to download.

Once you’ve selected the files you wish to restore, click Continue with Restore.
Now it’s time to play the waiting game. Backblaze can take several minutes to assemble your backup archive, depending on how many files you’ve selected, the total size of those files, and the current server load. In my testing, it usually took ten minutes or less, even for a 24 GB restore.
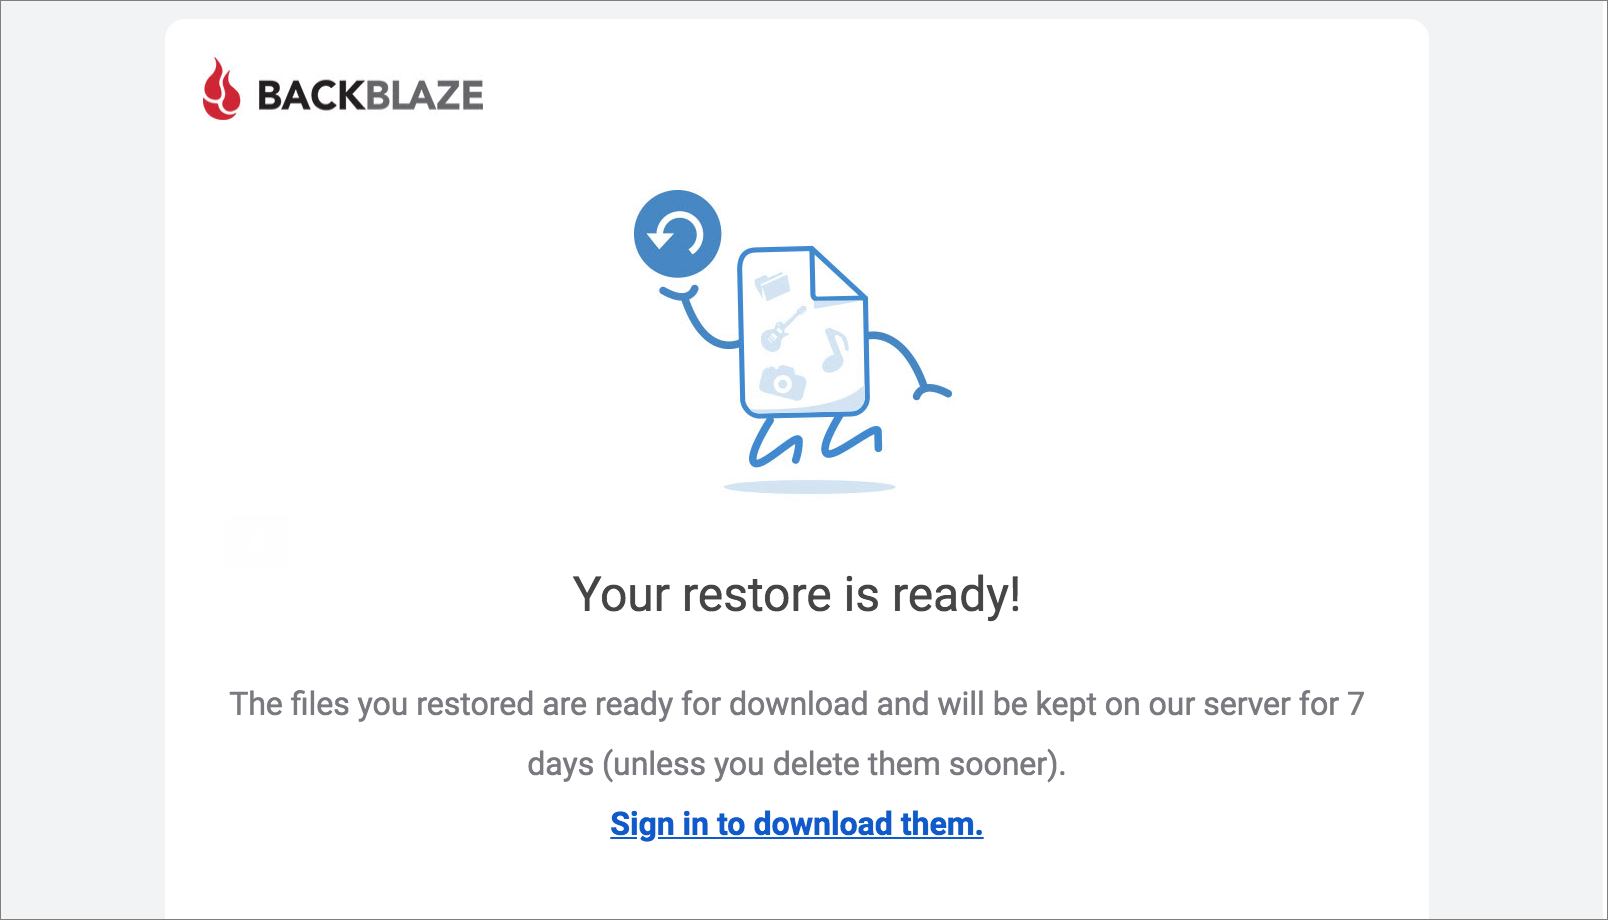
Eventually, you will receive email telling you that your restore is ready. Click “Sign in to download them” to go to the restore page. (Alternatively, you can access the restore page at any time by signing into your Backblaze account on the Web and clicking My Restores.)
Once you’re there, click the Download button to get a Zip archive of the files you selected.

In case you find this process of requesting and downloading a Zip file confusing, I’ve made a video that should clarify it.
Since you’re getting a Zip archive of the restored files, they won’t be restored to the Finder locations where they came from. Double-click the archive to expand it, and then move the files manually back to their proper locations.
To download a particularly large Zip archive, use the Backblaze Downloader app, as it is more efficient and reliable than a Web browser. When your restore is ready to download, launch the app, enter your Backblaze credentials, select a local folder to receive the download, click Sign In to Start, select a restore, and click Sign In to Start again. Note that you cannot initiate a restore from the Backblaze Downloader, just download one you’ve already created.
It’s All about Restoring
I’ve been a paying Backblaze customer for several years now, and although I’m happy with the service, it could use a better restore experience.
Ideally, Backblaze would provide a native Mac app for restoring that would eliminate the need for the browser interface, provide the download functionality of the Backblaze Downloader app, and offer the option of restoring files back to the locations from which they were backed up, much like Time Machine. That would eliminate the need to move files back to their original locations after restoring—not a big deal with a file or two, but a tedious task if you need to restore a large number of files and folders from all around your drive.
Thankfully, I don’t have to restore from Backblaze very often, and it’s usually just a file or two when I do. But that’s what an Internet backup service is ideal for most of the time—retrieving a small amount of data that has slipped through other levels of your backup strategy. Of course, it’s also essential as a last line of off-site defense should your data disappear due to fire, flood, or theft.
NAS: What You Need to Know before Buying
For many years, I’ve used an old Mac mini connected to a large external hard disk as a general-purpose network server. It was where all my music and movies were stored, but it also served as overflow storage and an occasional testbed for beta software. It has worked, mostly, but has always felt clumsily patched together. As my storage needs increased, and as I was preparing to write my book Take Control of Your Digital Storage, I realized I needed something more robust, like a NAS (network-attached storage) device.
When I asked a technical friend for his opinion on which kind of NAS to buy, his response mirrored mine (and perhaps yours, too). He had been thinking about getting one, but the sheer number of variables involved kept him from making a purchase.
A NAS itself typically looks like an unassuming largish box, sometimes containing just a single drive, but more often with two or more drive bays into which you insert bare hard drives or SSDs, making it possible to upgrade the overall storage over time by using higher-capacity drives. What makes it special is that it’s also a computer in its own right, with a processor, operating system, and RAM to handle all its tasks.
The NAS connects to your local network via Ethernet cable, making it available to everyone else on the same network. And in many cases, you can access the NAS when you’re outside the local network. If you arrive somewhere with your laptop and realize that an important file isn’t on your computer’s internal disk (or even if you’re on the couch downstairs and the file is on the NAS in your home office upstairs), it’s no problem; that file is available just as if its drive was directly connected to the computer.
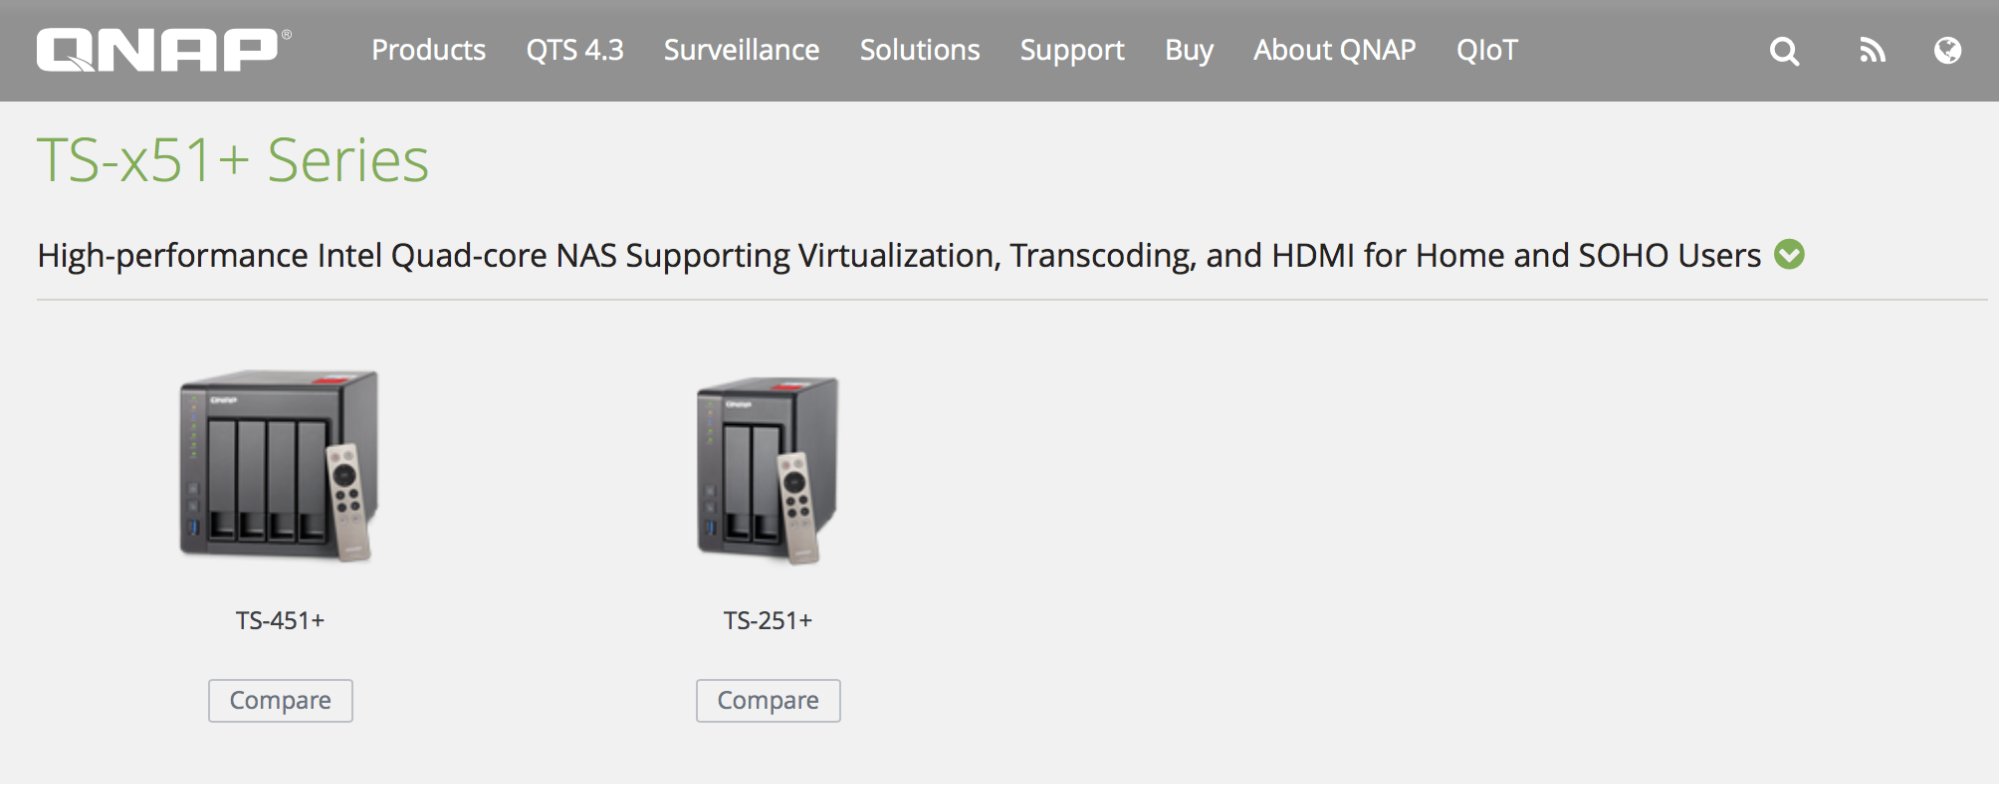
Several vendors sell NAS units, such as Synology, QNAP, Drobo, and WD. And among those, you’ll find models designed for personal use, for small offices, and for industrial applications.
If you think hard drive specs are eye-glazing, wait until you wade into the technicalities of NAS devices. Price is always a consideration, and some manufacturers mix and match components to hit price points—a unit might have four drive bays instead of two, for example, but use an older processor and offer less RAM. But that also means you can likely find something in your budget that performs the tasks you need.
NAS vs. External Drive
Before we step through the features themselves, let’s consider the reasons to use a NAS instead of a standard external hard drive. Some common reasons include:
- More storage: A NAS can offer more storage than a single external drive. I put off buying a NAS for a long time because hard drive capacities kept expanding to fit my needs (thanks, manufacturers!). Although I knew a NAS could provide more than what a single drive offered, it was easier to bump up the storage and go with what I was familiar with. That started to get expensive, though. When your storage needs outpace individual drive sizes, a NAS with several drive bays becomes more appealing.
- Expandable storage: A NAS is designed to grow with your data needs. When an internal hard drive in a NAS fills up, you can easily replace it with a higher-capacity one. I could go through my office and count the current and retired external hard drives, with their enclosures and cables and power supplies, but that would be too depressing.
- Protection against drive failure: Related to the above, it’s no fun when hard drives fail—and they do fail. Some NAS devices are built as RAID 1 or RAID 5 arrays, or as proprietary variations that incorporate the same technology, to mirror data such that if a disk crashes, you don’t lose data. And if that does happen, you can keep using the NAS volume while swapping out the bad drive.
- Remote access: If you primarily work on a desktop computer that doesn’t travel, having a high-capacity external hard drive plugged in all the time is no trouble—for that computer. Connecting to the data from a laptop, or another computer on the same network, is made easier with a NAS. It doesn’t rely on a desktop computer to share its contents, as is true of a traditional hard drive, because the NAS is the computer. This point is doubly important if you’re nowhere near your local network, such as while on a trip to another city, and need access to files.
- Streaming media: Many NAS devices include software for streaming video and audio stored on the drives. If you’ve built up a home library of movies, whether recorded yourself, ripped from DVDs, or downloaded, a NAS makes it easy to stream them on TVs, tablets, phones, and other devices.
- Business services: Although these uses are outside the scope of this article, many NAS devices can be set up as Web or email servers, cloud servers (like having a private version of Dropbox), and more. Some businesses and individuals prefer to have full control over these services instead of relying on Dropbox, Gmail, and others.
- Network backups: With a lot of storage and a constant presence on the network, a NAS can be a good on-site destination for backing up local computers. For example, my wife’s MacBook Pro is usually in our living room, and she doesn’t want a hard drive dangling from it for Time Machine backups. Instead, her data is backed up over the network.
NAS Features
I’ve arranged the following specs based roughly on their importance, although you may have different priorities, like hardware transcoding for streaming movies.
Number of Drive Bays
Packing more drives into a NAS gives you more storage, but there’s more to it than that. A two-bay NAS sounds like a good starter, and it’s certainly affordable. But remember that a typical NAS RAID configuration is set up with one drive for data and the other for redundancy—RAID 1 in a two-bay model.
If you populate it with two 4 TB drives, for example, you end up with 4 TB of usable storage space and 4 TB of mirrored protection. To increase the capacity, you could buy two 8 TB drives to replace the 4 TB drives, giving you 8 TB of usable storage and 8 TB of protection.
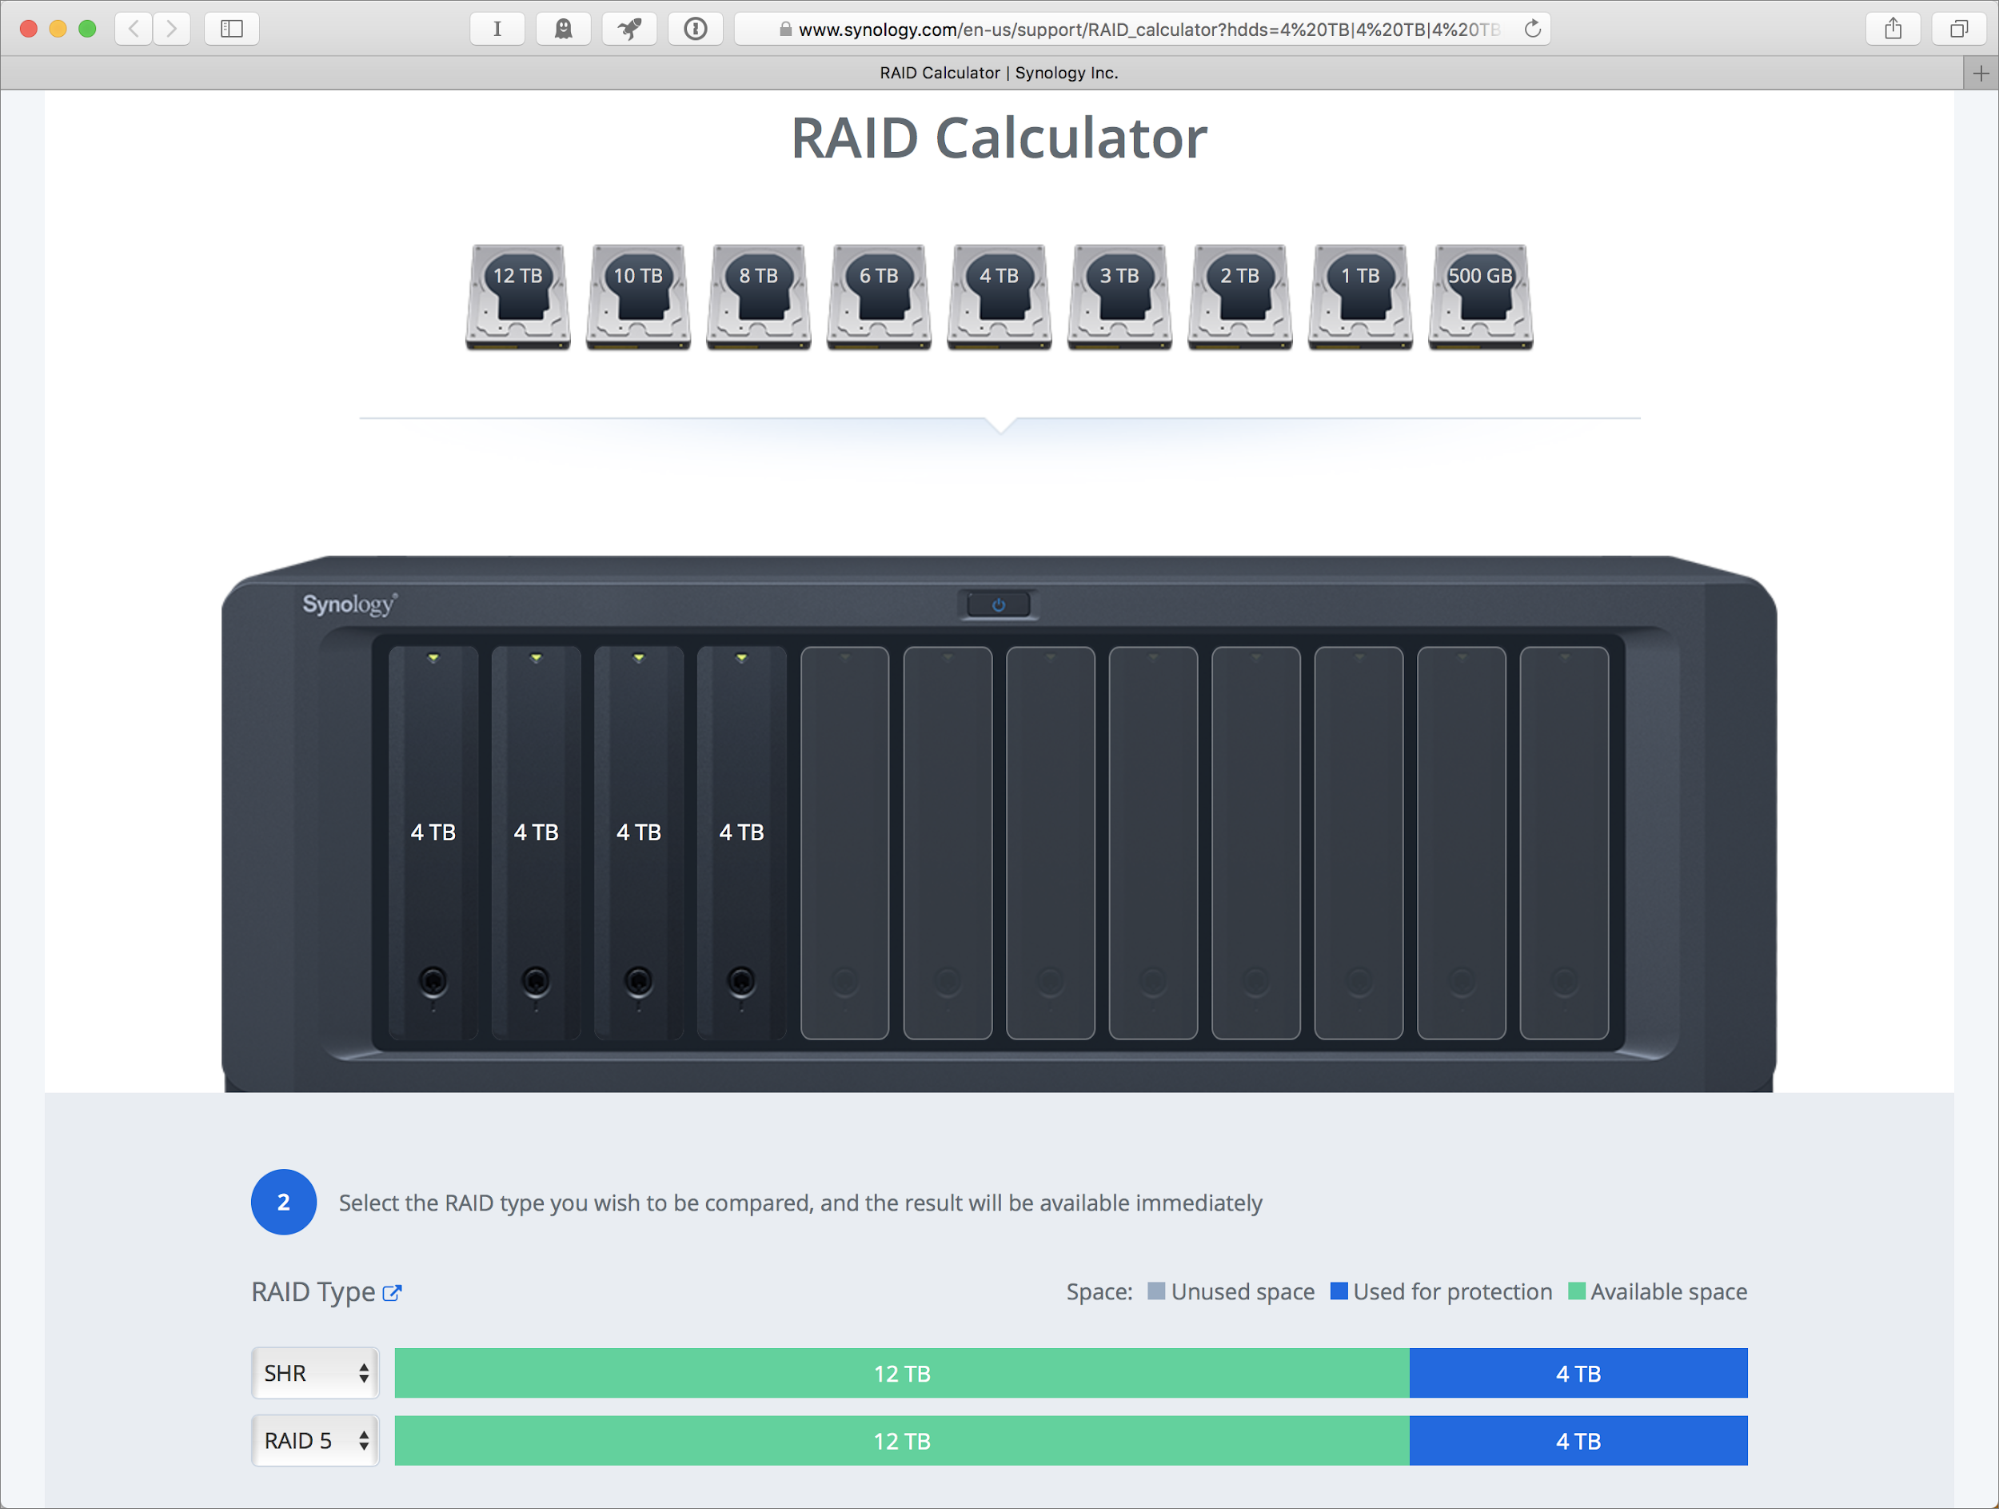
With a four-bay model, you could instead add two more 4 TB drives (which cost less per terabyte than 8 TB drives) to fill out the slots and end up with 12 TB of usable storage and 4 TB of protection in a RAID 5 configuration (or similar proprietary setup) for greater data redundancy and failure protection.
(In a four-drive RAID 5 configuration, redundancy comes not from mirroring, but from recording parity information—small bits of extra data that are added when copying files to ensure that the operations were successful—which is why you have more usable storage compared to redundant storage in this scenario.)
If you’re unfamiliar with how storage and RAID levels interact, check out Synology’s RAID Calculator. Even if you don’t end up buying a Synology NAS, it’s helpful to spec out how various drive capacities work under different RAID levels.
Ethernet
The “network” part of network-attached storage comes from connecting via Ethernet. In most models, that refers to Gigabit Ethernet (GbE), capable of theoretical transfer speeds of 1 Gbps (gigabits per second). Some more expensive models provide 10 Gigabit Ethernet (10 Gbps) connections. Faster is always better, but consider that the iMac Pro is currently the only Mac that supports 10 GbE directly; you can buy adapters to achieve those speeds with Thunderbolt 3-equipped Macs. Also, 10 GbE networks require Ethernet switches that can handle the speed. My recommendation is that if you think you’ll want 10 GbE in the future, buy a NAS that either has 10 GbE built in or available as an option; some NAS models include PCIe expansion card slots that accept such upgrades.
Another Ethernet-related consideration is how many ports are included. NAS models with two or more ports offer a feature called link aggregation. When connected to an Ethernet switch that supports LACP (Link Aggregation Control Protocol), the NAS can balance the data between Ethernet ports to avoid a bottleneck. If multiple computers on the network access the NAS frequently, link aggregation can improve network performance among them. It does not, unfortunately, double the amount of data that gets fed to a single computer, so you won’t see a speed benefit in that case.
CPU
Since a NAS is a full-fledged computer, not just a dumb hard drive, it requires a processor to run the software and manage storage. For most uses, the type and brand of CPU don’t matter, as they can all serve files well. The CPU specifics become relevant when encrypting data or transcoding video to watch on devices that don’t support that resolution.
Memory
As with any computer, the more RAM a NAS contains, the more capacity it has to accomplish its tasks. You’re not running Photoshop on it, but more RAM helps when the unit is handling multiple simultaneous connections, encrypting data, and other duties. Look for a model that you can expand with more RAM. Even if you don’t max out the memory when you buy it, you can upgrade it later.
Power Consumption
A NAS is designed to run continuously, so check how much energy it requires both under normal operation and when drives are in low-power or hibernation mode. For example, the Synology DiskStation DS418play (the model I purchased) supposedly uses 29.01 W during access and 10.59 W when in its disk hibernation mode. For a current Mac mini, by contrast, Apple specs its power usage as 85 W for “maximum continuous power” and an idle usage of 6 W, so it’s likely that it would average higher than the DiskStation DS418play based on what the Mac is doing.
Hardware Encryption
If it’s essential that your data remain encrypted while stored on the NAS, look for a model that offers hardware encryption. You can still encrypt data without this feature, but doing so requires more CPU power and is slower than dedicated encryption hardware. Reading and writing encrypted data involves a decrease in performance overall, but some hardware assistance is preferable to none. Also, check whether the NAS you’re considering encrypts data at the volume level or just at the folder level.
Hardware Transcoding
If you’re planning to host your audio and video libraries on the NAS and stream the content to computers and devices on the network, consider buying a model that supports hardware transcoding. This feature more quickly converts high-resolution video files to versions that are optimized for the destinations. For example, let’s say you capture a 4K movie file using an iPhone X: when viewed on a 1080p HD television, the NAS streams a transcoded version suitable for that device, discarding the overhead of the 4K resolution data.
Plex, a popular software system for streaming media, uses only the CPU in a NAS for processing, so hardware transcoding isn’t relevant for Plex users. Prioritize the CPU and RAM specs when looking at possible Plex servers.
RAID/File System Support
A NAS that includes more than a single drive uses a RAID scheme to make the disks appear as a single volume. Check to see which RAID levels are supported, in case you want to change them manually. It may also employ its own custom RAID configuration. Synology, for instance, uses Synology Hybrid RAID (SHR), which offers striping and redundancy while maximizing the amount of usable storage. Drobo’s BeyondRAID technology works similarly.
Depending on the model you’re researching, you’ll run into two file systems: the long-standing ext4 and the newer Btrfs, which adds support for snapshots and some low-level data integrity checks.
Normally, a file system isn’t a feature most people need to worry about; I bring it up here because some vendors use Btrfs as a marketing point. Ext4 tends to be a bit faster than Btrfs and has a longer history. Btrfs was designed as a modern alternative that’s more active about preserving data. Think of ext4 as being roughly analogous to the Mac OS Extended (HFS+) file system and Btrfs as the APFS (Apple File System) file system introduced in macOS High Sierra (see “What APFS Does for You, and What You Can Do with APFS,” 23 July 2018). I wouldn’t call Btrfs an essential feature, but you’re likely to be faced with the decision.
Other Considerations
There are plenty of other things to note, such as the amount of noise the NAS makes and the operating temperature if its location is in a warm environment. I’m also tempted to add performance throughput to this list—after all, faster performance is better, right? However, manufacturers don’t provide it for all models, and those numbers come from controlled tests designed to come up with the best results. So, by all means, take performance into account, but with a skeptical eye.
Why You Should Buy NAS-specific Hard Drives
Hard drive docks make for an excellent general-purpose storage solution. They connect to your computer and accept standard internal hard drives for backups without being burdened by an external drive’s case, cabling, and power supply.

As a result of using such a dock over the years, I have stacks of old drives lying around that were retired when I moved to higher capacities. Wouldn’t it be great to throw them into a NAS and make use of that storage?
It’s a tempting approach, but don’t do it, for three reasons:
- Combining drives of mismatched capacities can leave you with unusable disk space in many RAID configurations.
- Those drives have already seen a lot of use, so the probability that one will fail is higher.
- Most important, drives designed for NAS include features for minimizing data corruption, sensing and minimizing vibration, adjusting rotation speeds to last longer, and better enduring the rigors of always running.
Although there are many drive manufacturers out there, my research consistently turned up good reviews of WD’s Red line and Seagate’s Ironwolf line. Both companies also offer “pro” versions that are further hardened for NAS use but are more suited for large enterprise installations.
A NAS Primer
A NAS can be a versatile addition to your Mac’s storage, but the number of options and specifications when buying one can be paralyzing. Use this article as a reference when doing your own research.
After you’ve added a NAS to your setup, see my book Take Control of Your Digital Storage to learn more about working with files on the NAS, accessing it when you’re away from the network, and more. The book also covers other aspects of digital storage, such as using Disk Utility and First Aid, understanding the APFS file system in macOS High Sierra, and strategies for freeing up disk space.
We’re running a three-question survey to see what TidBITS readers think of NAS devices.


