#1488: iOS 13.2 and iPadOS 13.2, AirPods Pro, expired macOS installer certificates, screen mirroring tip, Continuity Sketch and Continuity Markup
Ready for more updates? iOS 13.2 and iPadOS 13.2 deliver promised features to Apple’s devices, including Deep Fusion, HomeKit Secure Video, and new Siri privacy options. Apple finally updated the HomePod to iOS 13 with this release, adding the capability to distinguish between family members. Apple also made a surprise announcement of the AirPods Pro, which boast swappable ear tips and active noise cancellation. Adam Engst shares tips for fixing macOS installers with expired certificates and mirroring selected screens in multi-monitor setups. Finally, for those who have updated to macOS 10.15 Catalina, we have a guide on using its new Continuity Sketch and Continuity Markup features. Notable Mac app releases this week include Default Folder X 5.4.1, BusyCal 3.7.2 and BusyContacts 1.4.2, Firefox 70.0, Transmit 5.6.1, and Bookends 13.2.7.
iOS 13.2 and iPadOS 13.2 Serve Up Deep Fusion, HomeKit Enhancements, and HomePod Features
Apple has released iOS 13.2 and iPadOS 13.2, which deliver promised features and fix a slew of bugs. You can install the updates, which weigh in at 597.3 MB on an iPhone X and 534.1 MB on a 10.5-inch iPad Pro, in Settings > General > Software Update, through the Finder in macOS 10.15 Catalina, or otherwise through iTunes.
If you’ve already updated to iOS 13 and iPadOS 13, keep installing these updates. If not, it’s probably worth holding off a bit longer, but we’re getting closer to the point where Apple should have found and fixed the most egregious bugs.

The marquee feature of iOS 13.2 is the promised Deep Fusion for the iPhone 11 models, which uses machine learning to combine multiple camera exposures into a single image with superior image quality and less noise (see “Apple Announces iPhone 11, iPhone 11 Pro, and iPhone 11 Pro Max,” 10 September 2019). Users of those new iPhones can now also change the video resolution directly from the Camera app.
Both iOS 13.2 and iPadOS 13.2 also add delayed HomeKit features, such as HomeKit Secure Video, which lets you securely store security camera footage in iCloud, and HomeKit-enabled routers, which let you quarantine HomeKit accessories from the rest of your network. When Apple first announced this feature earlier this year, the company specified support for routers from Eero, Linksys, and Spectrum, but there was no mention of any of those companies in the release notes (see “Apple Announces iOS 13 and Breaks Out iPadOS,” 3 June 2019). Stay tuned!
Meanwhile, on the Siri privacy front, these updates offer a new setting to control whether Apple stores recordings of your Siri queries and Dictation entries, and an option to delete Siri and Dictation data from Apple’s servers. This change comes in response to the controversy surrounding Apple’s use of contractors to monitor Siri recordings for quality control (see “Apple Announces Siri Privacy Reforms,” 29 August 2019).
Rounding out the new features, iOS 13.2 includes support for Apple’s just-announced AirPods Pro (see “Apple Releases AirPods Pro with Noise Cancellation,” 28 October 2019) and improved performance when using AssistiveTouch to activate the App Switcher. Finally, Apple added some new emojis—whee.
The update also squashes a number of bugs that:
- Prevented passwords from auto-filling in third-party apps
- Prevented the keyboard from appearing when using Spotlight search
- Caused swiping up to go to the Home screen to fail on iPhones without Home buttons
- Made Messages send only a single notification even when repeat alerts were enabled in Settings > Notifications > Messages > Repeat Alerts
- Caused Messages to show only a phone number and not a contact name
- Caused Contacts to launch to the last-opened contact instead of the contact list
- Prevented Markup annotations from being saved
- Temporarily hid saved notes in Notes
- Prevented manual iCloud backups from completing successfully
iOS 13.2 for HomePod
Apple has also, at long last, released iOS 13.2 for the HomePod. Although your HomePod should update itself soon, if it doesn’t, Apple provides manual installation instructions. That said, 9to5Mac is reporting that iOS 13.2 is bricking some HomePods, so don’t rush to update if it doesn’t happen automatically. (Adam Engst’s HomePods downloaded the update, but he’s holding off on tapping Update All until more is known about the bricking problem.)
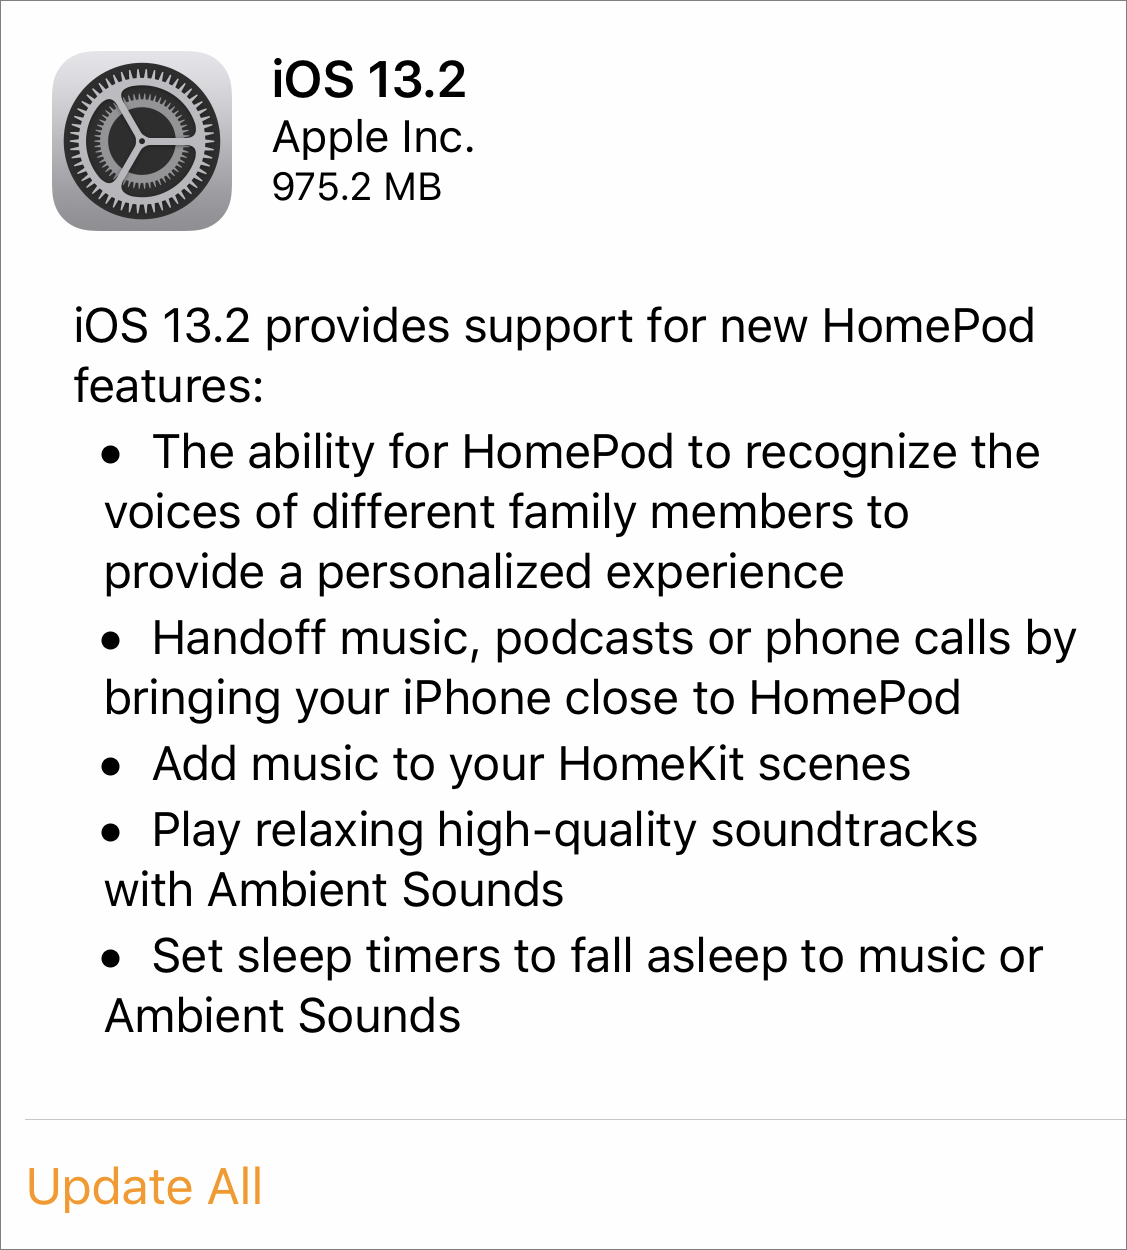
iOS 13.2 delivers the feature many HomePod-using families have been waiting for—the capability to distinguish between the voices of different family members. Until now, only one Apple ID could be associated with a HomePod, meaning that only one person could use Siri on the HomePod to set reminders, make calendar events, and perform other actions that relied on the Enable Personal Requests switch. In theory, this should also allow different people to get personalized Apple Music suggestions.
Here’s what else is new for the HomePod:
- The option to Handoff music, podcasts, and phone calls from an iPhone to a HomePod
- The option to add HomePod music to a HomeKit scene
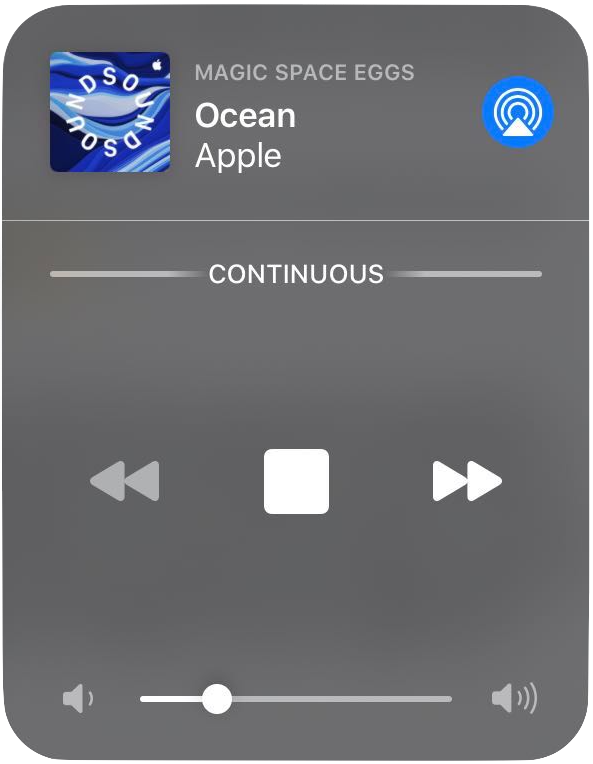
- Ambient Sounds, which are relaxing sounds you can play in the background
- Sleep timers, which work with both music and Ambient Sounds
Michael Cohen, whose HomePod updated with no problem, tells us that the trick for playing Ambient Sounds is to say something like “Hey Siri, play soundType sounds,” where soundType includes “fireplace,” “forest,” “night,” “ocean,” “rain,” “stream,” and “white noise.” If you discover other types, let us know in the comments.
Apple has yet to publish online release notes or security notes for these updates. According to Apple’s security updates page, Apple also released tvOS 13.2, but no release notes are yet available. We also anticipate the release of macOS 10.15.1 Catalina and watchOS 6.1 soon, since they’re both required for the AirPods Pro.
Apple Releases AirPods Pro with Noise Cancellation
The AirPods have been one of Apple’s most popular products of the last few years, so it wasn’t surprising when Apple introduced the second-generation AirPods (“Second-Generation AirPods Gain “Hey Siri” and Optional Wireless Charging,” 20 March 2019). More surprising is today’s release of the AirPods Pro, which build on those features to address some of the criticisms of Apple’s wireless earbuds. The new capabilities come with a price hike to $249, which includes a Wireless Charging Case. The AirPods Pro require at least the just-released iOS 13.2, iPadOS 13.2, and the upcoming watchOS 6.1, tvOS 13.2, and macOS Catalina 10.15.1.
(Warning—the scrolljacking on the AirPods Pro product page is slow, clumsy, and annoying; you’re better off reading Apple’s press release if you don’t have all day to scroll.)

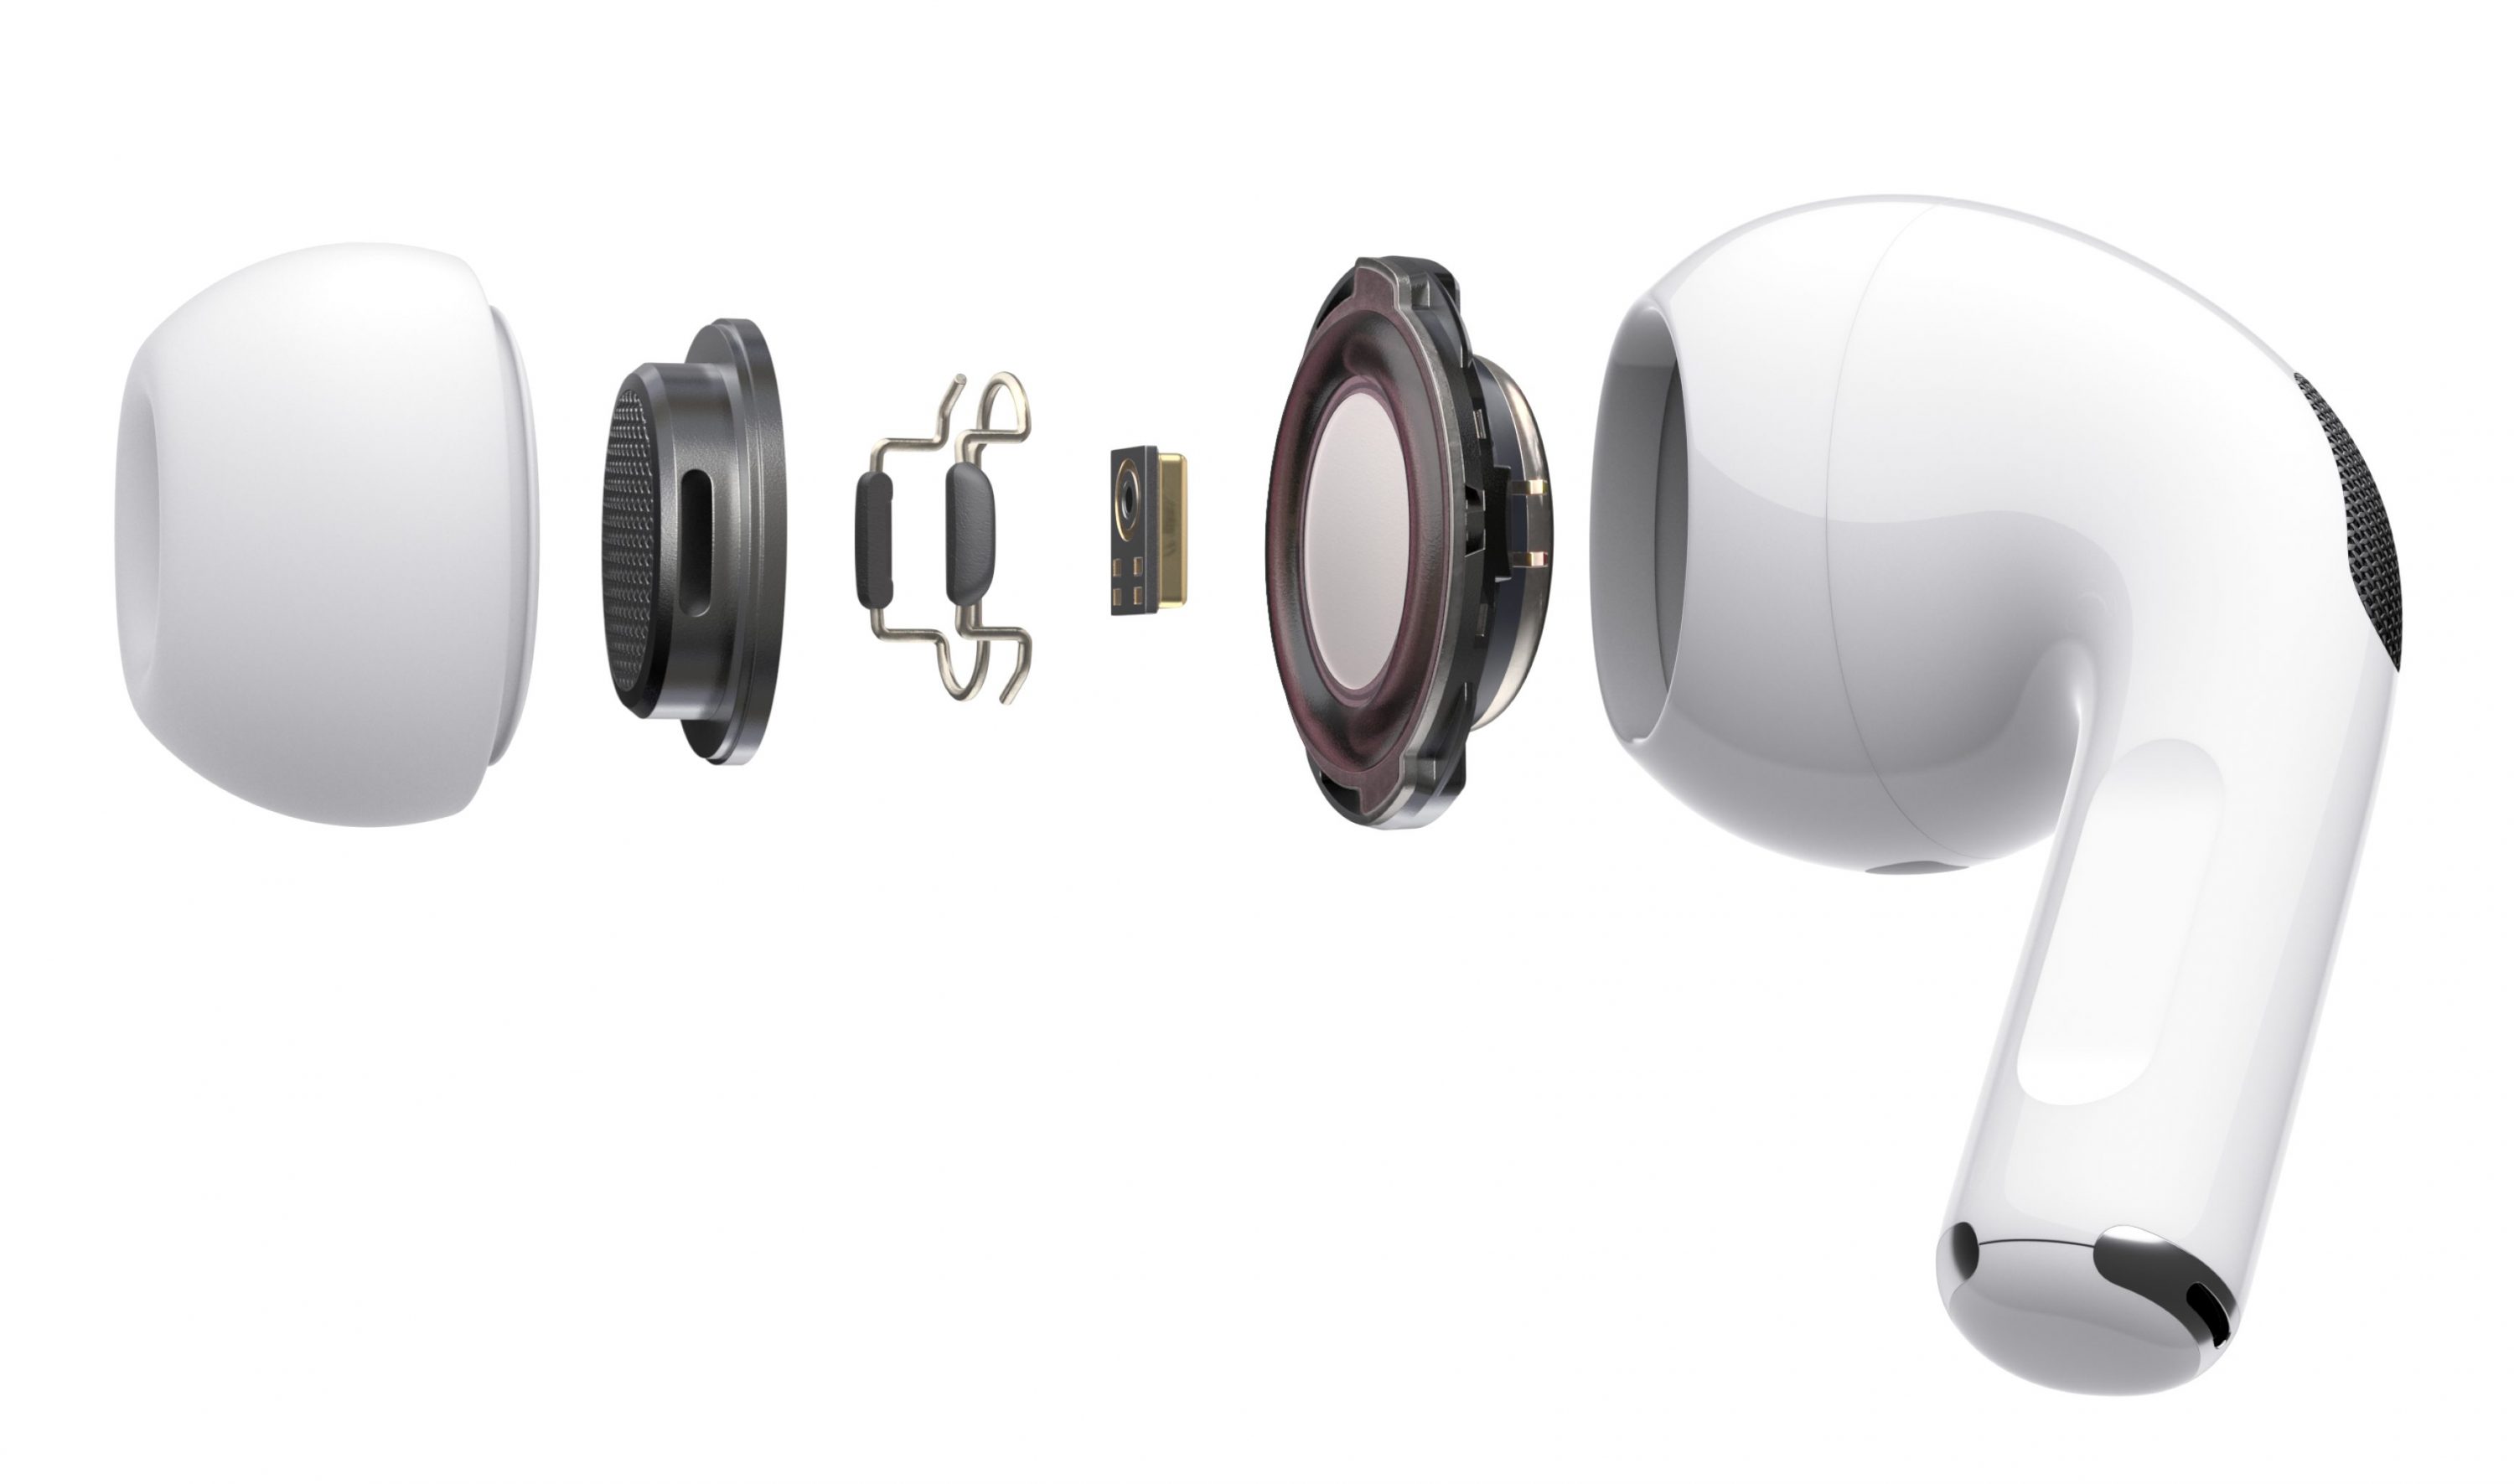
Most notably, Apple redesigned the AirPods Pro for improved comfort and fit. Although the original AirPods were lauded by many who found the wired EarPods uncomfortable, plenty of people still had trouble wearing the AirPods. Each of the AirPods Pro earbuds comes with three sizes of soft, flexible, silicone ear tips. Apple says the ear tips use a vent system to equalize pressure and reduce discomfort. By sealing the ear canal, the ear tips block more outside noise.
The AirPods Pro also offer an Ear Tip Fit Test, presumably accessed in iOS 13.2 or iPadOS 13.2, which somehow tests the quality of the seal and identifies the best ear tip size for you. The test’s algorithms measure the sound level in each ear and compare it to what’s coming from the speaker driver, then suggest if you need a different ear tip or should adjust the seal.
Although the ear tips should provide some level of passive noise cancellation, the real win will come from the new Active Noise Cancellation mode. It uses a pair of microphones—one facing out to sample the external environment and the other facing inward—and advanced algorithms that adapt the sound signal 200 times per second to cancel background noise. For frequent flyers, the AirPods Pro may be well worth the money for the active noise cancellation alone. Perhaps traveling business professionals are the audience that supports the “Pro” moniker.
However, there’s a problem with noise cancellation—passive or active—which is that sometimes you want to be able to listen to your music or podcast or audiobook without being entirely isolated from your environment. Runners need to be able to hear cars, bikes, and other runners—once, in a single-track trail race, I seriously startled an earbuds-wearing woman when I brushed past her too closely because she hadn’t been able to hear my shouted warnings as I overtook her. (Luckily, she couldn’t hear my subsequent imprecations either.) And anyone who commutes by bus, train, or plane needs to be able to hear important announcements.
To enable that, Apple has created Transparency mode, which adjusts the noise cancellation levels to ensure that your own voice sounds natural to you. Presumably, that’s a stand-in for being able to hear important sounds around you. You can switch between Active Noise Cancellation and Transparency modes using a new “force sensor” on the stem of the AirPods—is that Apple’s new term for a pressure-sensitive button? Alternatively, the volume slider in Control Center or the AirPlay icon on an Apple Watch both let you adjust modes. The AirPods Pro force sensor also enables you to play, pause, or skip tracks, and answer or hang up phone calls—for anything more, you can use Siri.
Active Noise Cancellation mode does consume more battery power, dropping the standard 5 hours of listening time to 4.5 hours. But the AirPods Pro boast 3.5 hours of talk time, which is up to 30 minutes more talk time than the second-generation AirPods. As with previous AirPods models, the Wireless Charging Case provides additional charges for up to 24 hours of listening time or 18 hours of talk time.
Apple makes much of the immersive sound quality of the AirPods Pro, using lots of breathless adjectives. The AirPods Pro probably sound better than the AirPods, but we’ll have to wait for the audiophiles to weigh in on whether such purple prose is warranted:
AirPods Pro deliver superior sound quality with Adaptive EQ, which automatically tunes the low- and mid-frequencies of the music to the shape of an individual’s ear—resulting in a rich, immersive listening experience. A custom high dynamic range amplifier produces pure, incredibly clear sound while also extending battery life, and powers a custom high-excursion, low-distortion speaker driver designed to optimize audio quality and remove background noise. The driver provides consistent, rich bass down to 20Hz and detailed mid- and high-frequency audio.
The AirPods Pro with Wireless Charging Case are available to order now for $249 and will start arriving on 30 October 2019. The second-generation AirPods remain available for $159 with the wired charging case or $199 with a Wireless Charging Case. The Wireless Charging Case itself remains priced at $79.
We’ll see if Apple can produce sufficient quantities of the AirPods Pro to meet demand, a challenge that took the company quite some time to meet for the original AirPods.
Redownload Archived macOS Installers to Address Expired Certificates
Apple digitally signs the installers used by its software updates to ensure that they haven’t been tampered with. That’s sensible, but there’s a gotcha: the certificates Apple uses to sign these installers have expiration dates. On his Der Flounder blog, Rich Trouton explains what happens when these certificates expire—Apple reissues the installers with new certificates. That has happened again, since many, if not all of Apple’s recent installers had an expiration date of 24 October 2019, which came and went last week.
For most Mac users, this kerfuffle is largely irrelevant—if you need an installer for an older version of macOS, you’ll get one that will work when you download it. The people who are being impacted are Apple consultants and IT admins who have built troubleshooting toolkits that contain a selection of macOS installers for rebuilding Macs with whatever version of macOS is required.

The Finder may report that those installers can’t be verified and may have been corrupted or tampered with during download.

Getting New Installers
Apple has now re-signed and re-released older installers, giving them a new expiration date of 14 April 2029—nearly 10 years in the future. If you want to rebuild your archive, you can download new installers from links on these pages:
- macOS 10.15 Catalina
- macOS 10.14 Mojave
- macOS 10.13 High Sierra
- macOS 10.12 Sierra
- OS X 10.11 El Capitan
- OS X 10.10 Yosemite
Apple says that earlier versions are not available for download, and as far as I can tell, that’s true. Historically, they appeared in the App Store app, in your list of purchased items, but the only operating systems still showing up there for me are the developer beta of Sierra and the GM candidate for El Capitan (and I doubt they’d work anyway).
However, if you have installers for 10.9 Mavericks, 10.8 Mountain Lion, and 10.7 Lion, TidBITS Talk reader gastropod suggested a workaround for their expired certificates. Before you install, set the clock on the Mac to a date when the certificate was valid, perform the install, and then reset the date back after installation. To change the date from Terminal (which is likely all that will be accessible), follow these steps, which set it to 1 February 2016:
- In the installer, choose Utilities > Terminal.
- Enter
sudo date 0201010116, press Return, and enter your password. - Quit Terminal and continue the install.
Catalina Enhances softwareupdate Command-Line Tool
Speaking of Terminal, Armin Briegel has written on his Scripting OS X blog that the softwareupdate command has a new option in Catalina that lets you download the full installer for a specific version of macOS. This seems to work with versions of 10.14 Mojave and 10.13 High Sierra, but nothing older.
This command downloads the latest Install macOS application to your Applications folder.
softwareupdate --fetch-full-installer
And this one downloads 10.13.6 specifically.
softwareupdate --fetch-full-installer --full-installer-version 10.13.6
In the Year 2525
This isn’t the first time we’ve needed to rebuild our collections of macOS installers—see “Previously Downloaded OS X Installers No Longer Work” (2 March 2016)—and it won’t be the last. Although it’s mostly just an annoyance to redownload everything now, the situation is more troubling over the long term. Silicon Valley always wants to look to the future, but academics and researchers of that future will also want to look back. Expiring certificates could make it difficult or even impossible to bring older Macs back to life for historical or reference purposes. Apple is unlikely to exist forever, but will the final employee re-sign all the old installers with a certificate that expires on the last possible date of 31 December 9999? And then what happens in the year 10,000?
TipBITS: How to Mirror Selected Screens in a Multiple Monitor Setup
I just got back from MacTech Conference, where the inimitable Sal Soghoian gave a talk in which he revealed a tremendously cool technology hidden deep inside macOS. I’ll write about that once he finishes the video explaining the setup.
For now, however, I want to share a tip that I’d never heard before that lets you mirror two (or more) of three (or more) screens attached to a Mac. It’s not something everyone will need, to be sure, but if you ever end up in a similar situation, you’ll appreciate knowing it. The trick works in at least macOS 10.14 Mojave and 10.15 Catalina, and I wouldn’t be surprised if it goes quite a bit further back.
Sal’s demonstration involved his MacBook Pro, an iPad connected by Luna Display, and a pair of projectors. One projector showed the iPad’s screen via a camera, so the audience could see Sal’s taps and swipes, but the other projector was connected to the MacBook Pro. As such, Settings > Displays > Arrangement showed three screens: the MacBook Pro, the Luna Display-connected iPad, and the projector.

The problem was that Sal could only see the MacBook Pro and the iPad on the podium. For anything that happened on the projector, he had to peer into the distance to work from the projected screen. That proved difficult, but he soldiered through the presentation.
Afterward, Ed Marczak, a speaker and advisor to MacTech Conference who wasn’t in the room during the setup time, shared a little-known tip that would have made things easier on Sal. It turns out that if you have three (or more) screens connected to a Mac, you can mirror two of the three by Option-clicking one and dragging it on top of another. This does exactly what you’d expect. The Mac acts as though it has only two screens instead of three, and the same image appears on the two that are mirrored, with the third being separate.
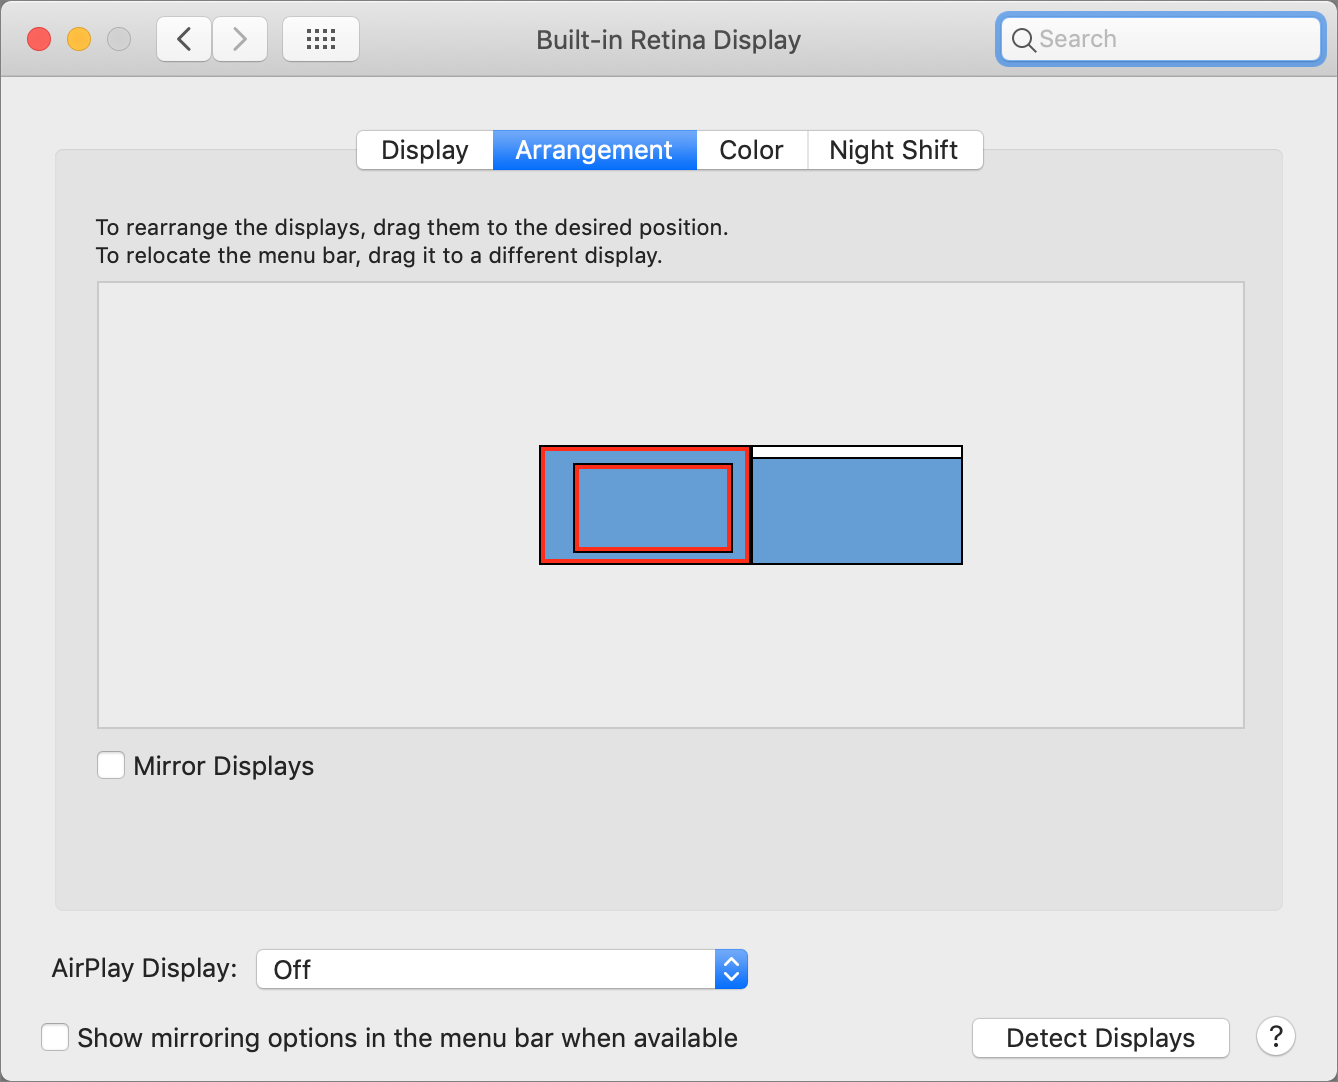
I verified this at home on my 27-inch iMac with Retina display, my standard 27-inch Thunderbolt Display, and an old 21-inch iMac I connected with Target Display Mode. Option-dragging the iMac monitor on top of my Thunderbolt Display’s icon in Settings > Display > Arrangement worked like a charm.
(What, you didn’t know about Target Display Mode? It’s a clever but short-lived technology that enables you to connect a non-Retina iMac made between 2009 and mid-2014 to another Mac via MiniDisplayPort or Thunderbolt and then use it as a secondary display. The trick, once you make the connection, is to press Command-F2 while the target iMac is at the login screen. It works pretty well, but it can be fussy to use regularly in my experience driving the 21.5-inch iMac as a secondary screen for my MacBook Air. In general, Target Display Mode is a great hack, but I wouldn’t recommend relying on it.)
Again, this tip is likely to be useful only in unusual situations, but as evidenced by Sal’s Rube Goldbergian presentation setup at MacTech, those situations do crop up from time to time.
How to Use Catalina’s Continuity Sketch and Continuity Markup
After pushing out a quick update to Take Control of Notes to address major changes in iOS 13, iPadOS 13, and macOS 10.15 Catalina, I realized that there were a few little things I’d missed in my haste, including a couple of little-publicized Continuity additions to macOS 10.15 Catalina. Another free update to Take Control of Notes will be out soon, but in the meantime, I’d like to tell you how you can take advantage of these new Continuity features, which aren’t limited to Notes.
Continuity is Apple’s umbrella term for a wide variety of technologies that let you integrate or switch between your Apple devices without missing a beat. They include features like AirDrop, Apple Pay, Auto Unlock, Handoff, Instant Hotspot, and Sidecar (see “Catalina’s Sidecar Turns an iPad into a Second Mac Monitor,” 21 October 2019). Catalina adds a couple of new members to the Continuity family: Continuity Sketch and Continuity Markup, which let you draw sketches and mark up files on a device running iOS 13 and sync that data back to a Mac running Catalina.
Continuity Sketch
If you’re familiar with the Continuity Camera features introduced in macOS 10.14 Mojave (see “How to Take Photos and Scan Documents with Continuity Camera in Mojave,” 27 September 2018), Continuity Sketch works much the same way. However, instead of letting you take a picture or scan a document with an iOS device, it lets you use your iOS device as a sketchpad for your Mac.
The same apps that support Continuity Camera also support Continuity Sketch, such as the Finder, Mail, Messages, Notes, Pages, and TextEdit. Here’s how to use Continuity Sketch:
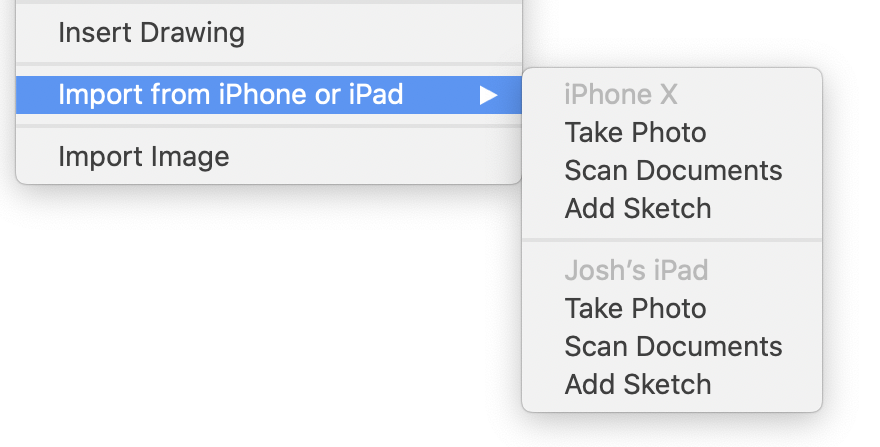
- Click File in the menu bar or Control-click. In Mail, you can Control-click in a compose window. In Messages, you can Control-click in the message field. In Finder, Control-click any blank area of the Desktop.
- Choose Import from iPhone or iPad > Add Sketch. If you have multiple devices available, the submenu will display multiple entries.
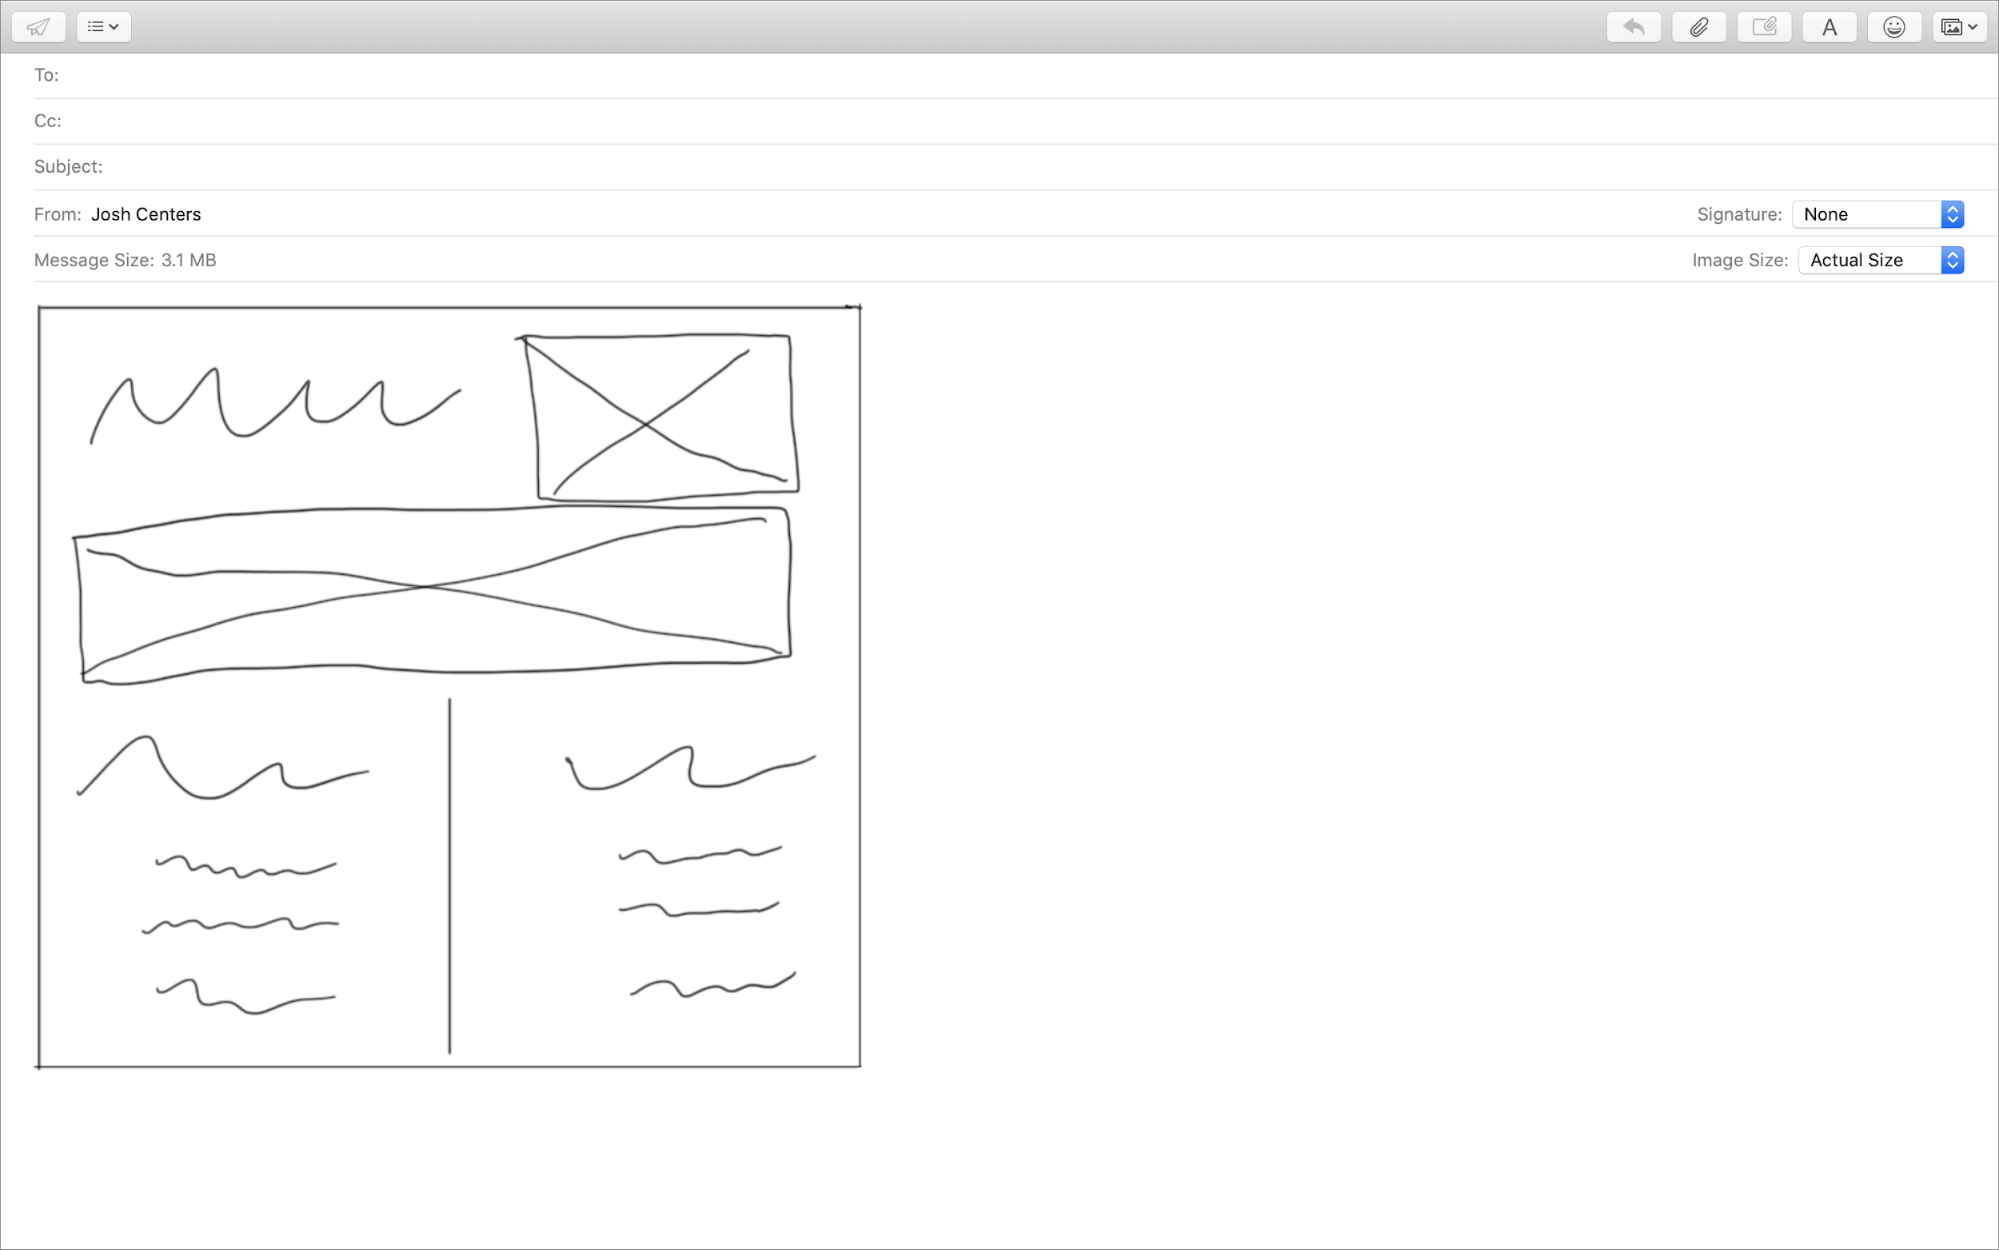
- Your iPhone or iPad should wake up to a sketch canvas. Draw your sketch using the onscreen tools (which I explain below).
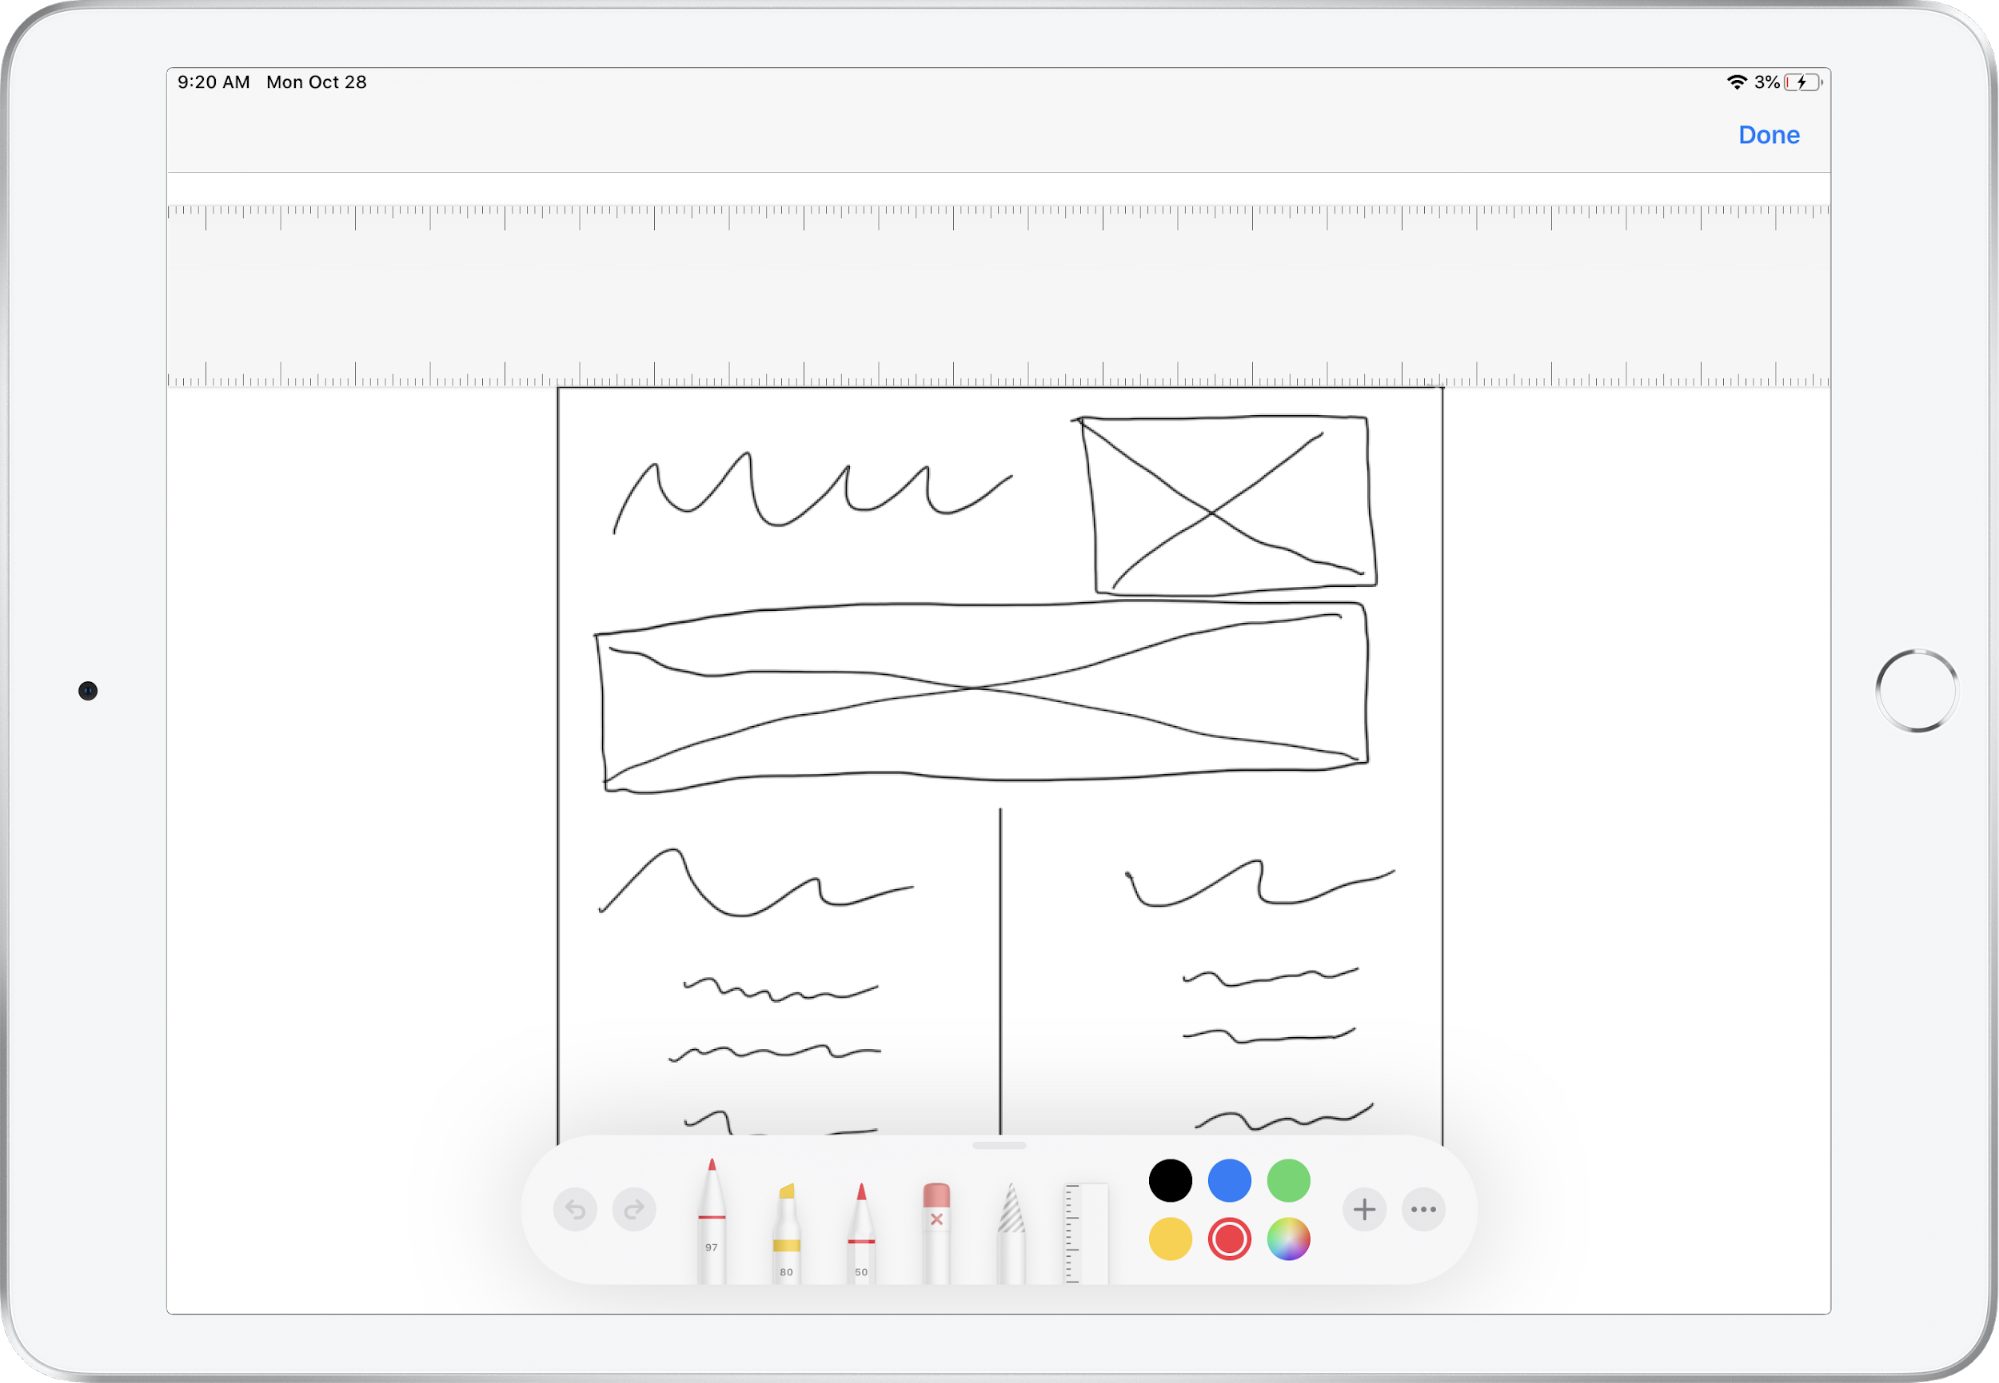
- When you’re finished, tap Done to send the sketch to your Mac and insert it in the app from which you called it.
Continuity Markup
Continuity Markup provides the same tools as Continuity Sketch, but it works differently. For one, it’s accessible only through Quick Look on the Mac. Also, unlike Continuity Sketch, where the sketch doesn’t appear until you tap Done on the iOS device, your scribbles on your iOS device show up in real-time on your Mac’s screen. Here’s how you use it:
- To activate Continuity Markup, first pull up an image or PDF document in Quick Look by selecting it in the Finder and pressing the Space bar.
- Click the Markup button in the Quick Look toolbar.

- In the markup toolbar, click the icon on the far right that looks like an iPad and Apple Pencil and choose your device from the pop-up menu.

- The chosen device will wake up, with the document or image in markup mode. Mark it up using the onscreen tools.
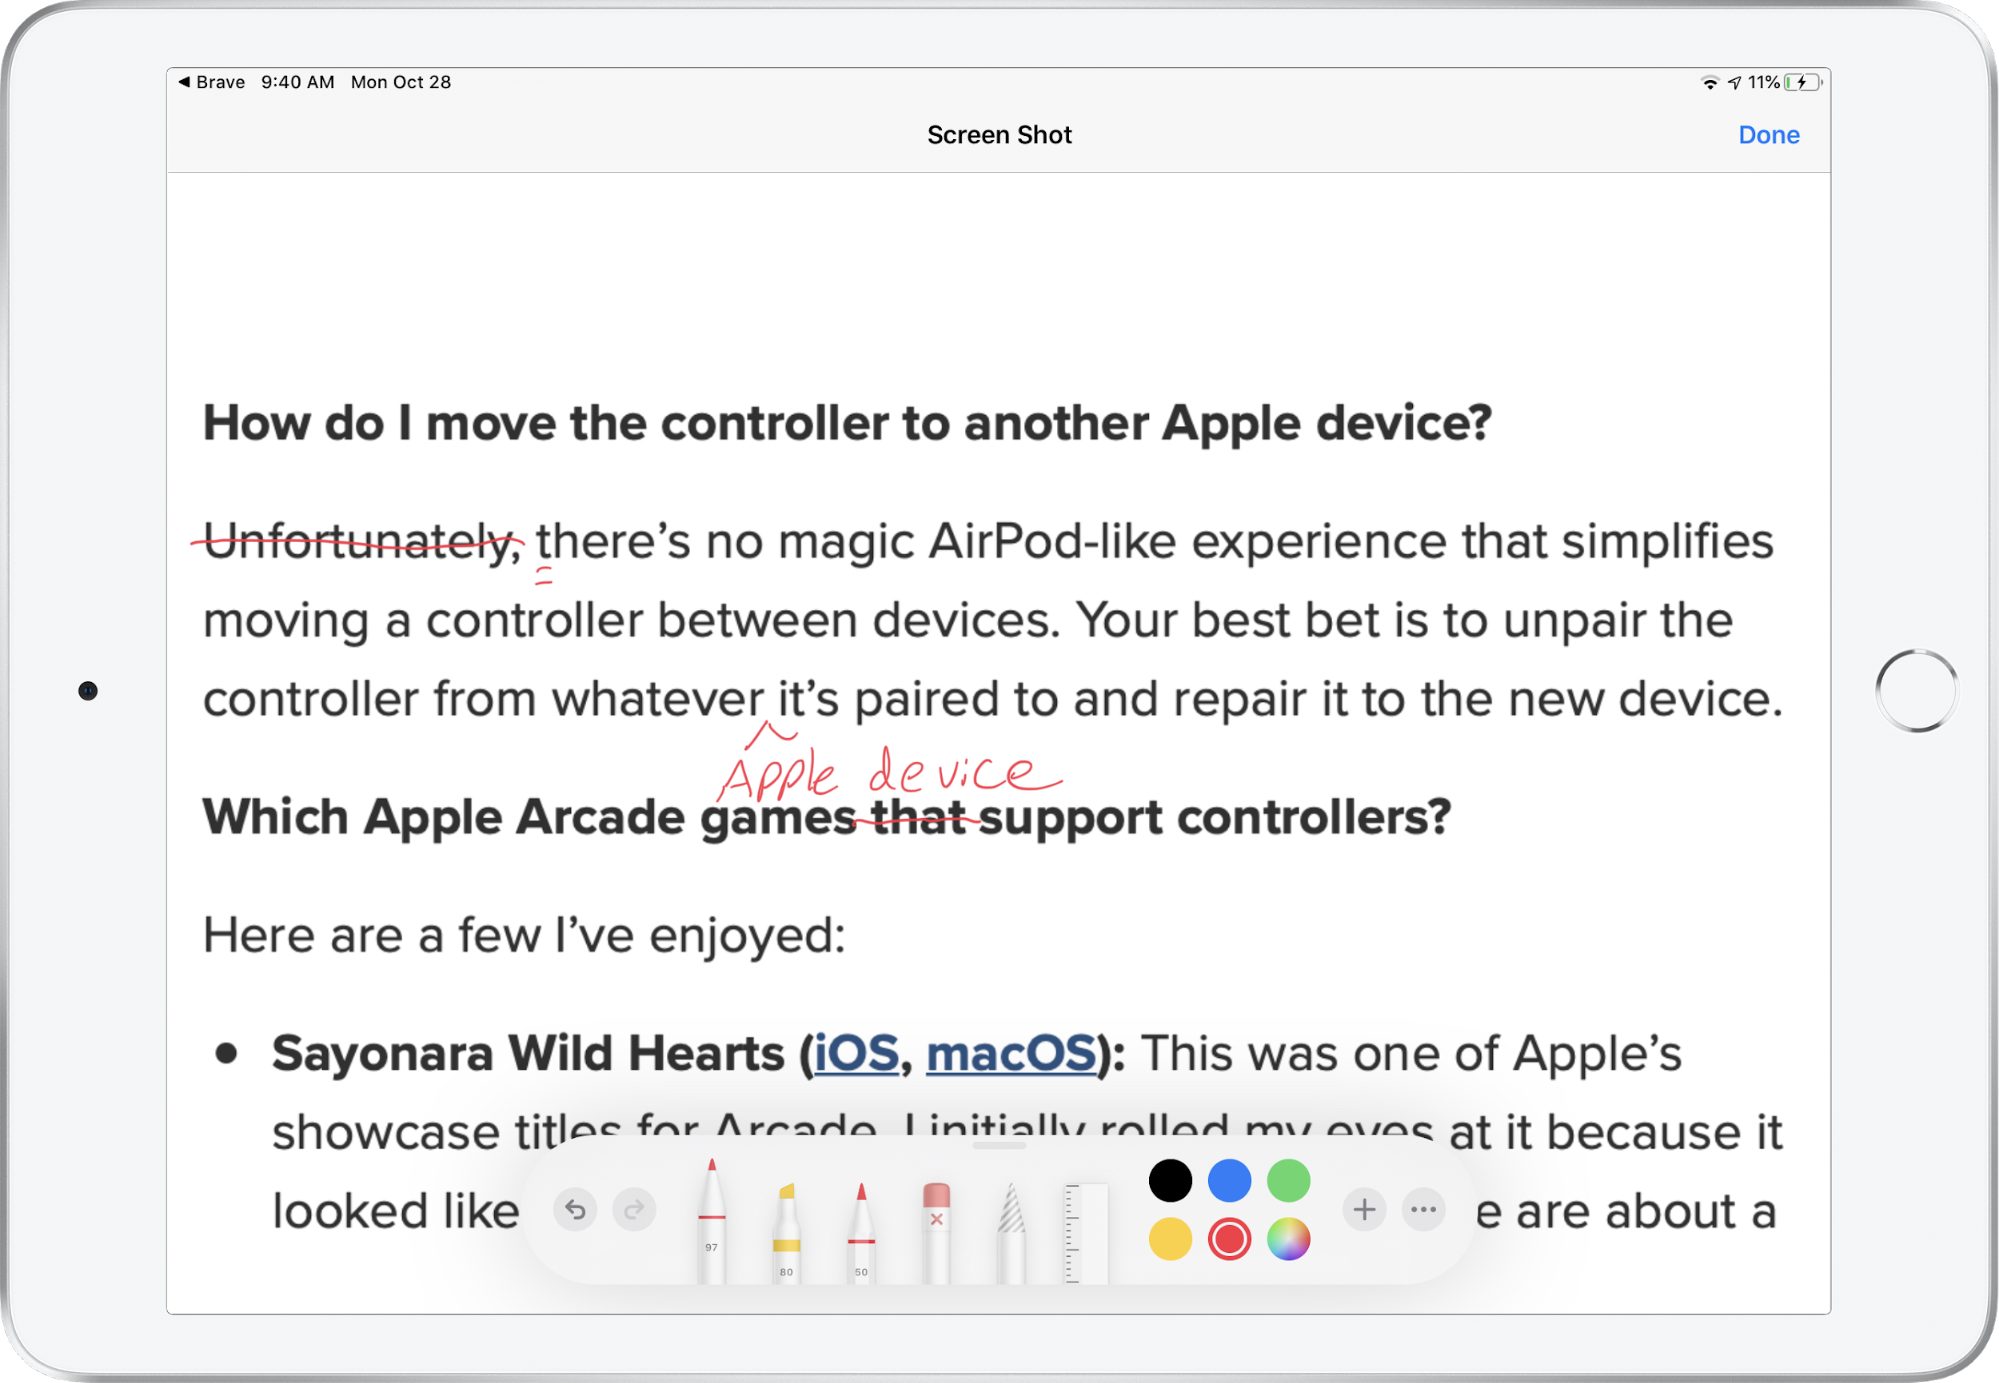
- When you’re finished marking up the image, tap Done to dismiss it from your iOS device.
- Back on the Mac, click Done in Quick Look to save your changes, or click Revert to undo them all.
Markup Tools
As noted, Continuity Sketch and Continuity Markup share the same set of tools on the iOS side. They appear in a palette at the bottom of the screen, and on an iPad, you can drag the palette to any of the four sides of the screen. And of course, if your iPad supports it, you can draw with an Apple Pencil.

Here are the tools, from left to right:
- Pen, Marker, Pencil: These three are the main tools you’ll use to draw on the screen, each with different thicknesses. Tap one of the tools while it’s selected to change its line style and weight or adjust its transparency.
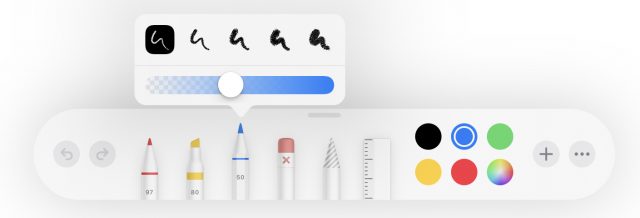
- Eraser: With this tool selected, tapping a drawing will erase it, which is called the Object Eraser. In iOS 13, you can switch to a pixel eraser, which works like a real eraser and lets you remove portions of the image, by tapping the Eraser tool again and then Pixel Eraser.
- Lasso: The lasso tool lets you draw around an object to select it. Once you’ve selected an object, you can drag it around the screen or tap it to see options to copy or delete it.
- Ruler: Tapping this tool displays a ruler, which you can move and rotate and then use to help draw straight lines at any angle by drawing along one side of the ruler. The line will snap to the edge of the ruler. Drag with one finger to move the ruler, and twist with two fingers to rotate it—it displays the angle while you’re rotating the ruler.
- More Tools: Sometimes you’ll see a plus icon in the palette. Tapping it reveals additional tools, which are extremely similar to Preview’s editing tools on the Mac:
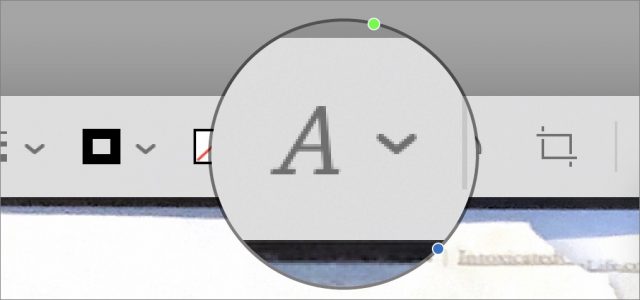
- Text box: Tap this tool to insert a text box, which says Text by default. Tap the box and tap Edit to change the text inside the box. You can also use the Aa button in the palette to change the text style.
- Signature: If you’ve created a signature in Preview for signing digital documents, you can insert it here. Otherwise, you’re prompted to draw a new signature that will be inserted on the screen.
- Magnifier: This tool adds a circular loupe that magnifies whatever is under it. Drag the blue dot to adjust the size of the loupe and the green dot to change the level of magnification.
- Shapes: Tap these icons to insert the associated shape: rectangle, circle, speech balloon, or arrow.


I cover these tools and much, much more in Take Control of iOS 13 and iPadOS 13, Take Control of Notes, and Take Control of Preview, which I co-authored with Adam Engst.